Halloween Lantern
Zoom Watch Video View Larger
View Project Instructions
Halloween Lantern Embroidery Project
PROJECT DETAILS
Description
Use thread in the colours of your choice and 1 or 2 layers of water soluble lining and a number 70 needle. Remember to use the same top and bottom thread to perfect finish
Materials Use thread in the colours of your choice
1 or 2 layers of water soluble lining
Number 70 needle
Remember to use the same top and bottom thread to perfect finish
Designs used in this project
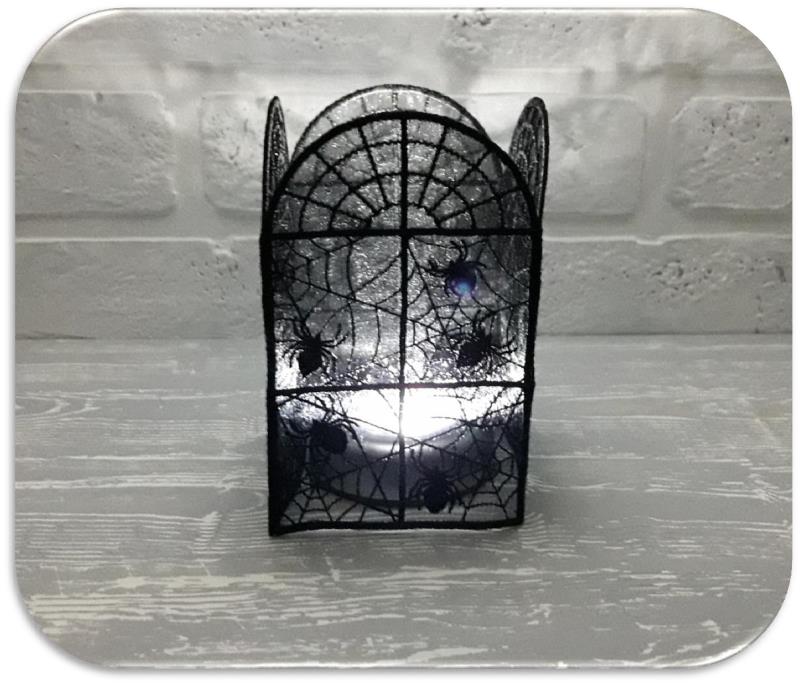
Final Product: What You Will Create
Preface: This is a collaboration between FSL Boutique and Ekaterina. The copyrights to digitizing belongs to Ekaterina
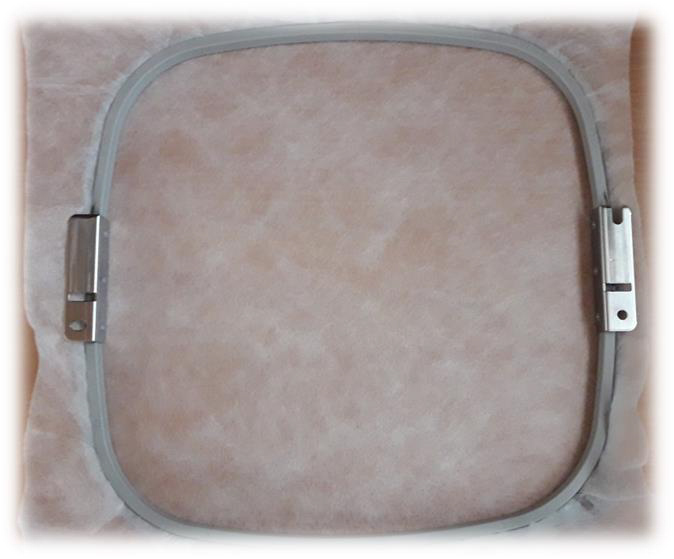
Step 1: Put the water soluble stabilizer in the hoop.
(Click Image to Enlarge)
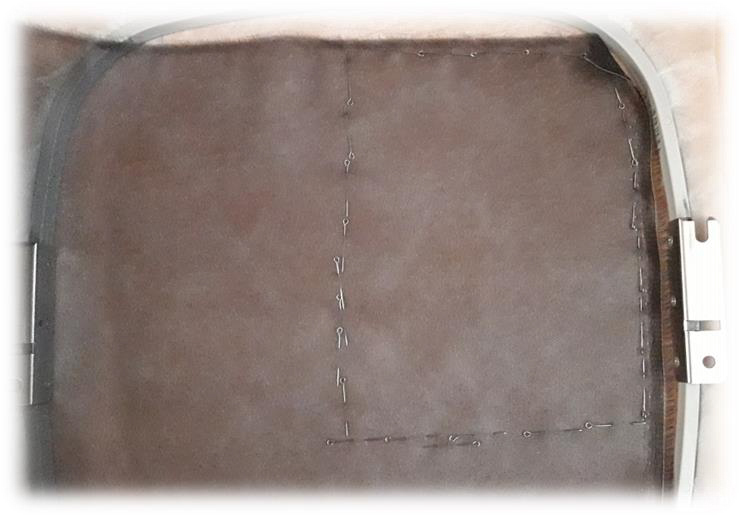
Step 2: Put a fabric on top and pin it. Organza or other transparent but dense fabric is good.
(Click Image to Enlarge)
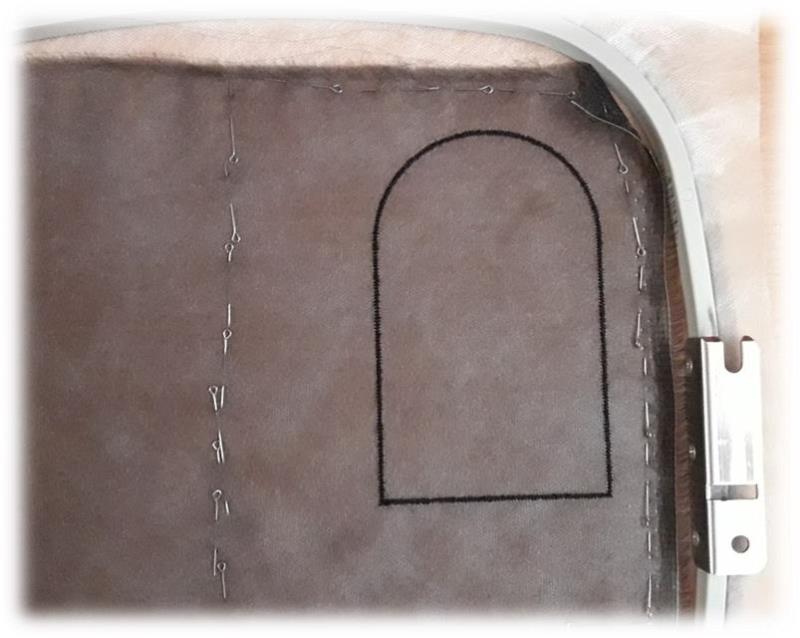
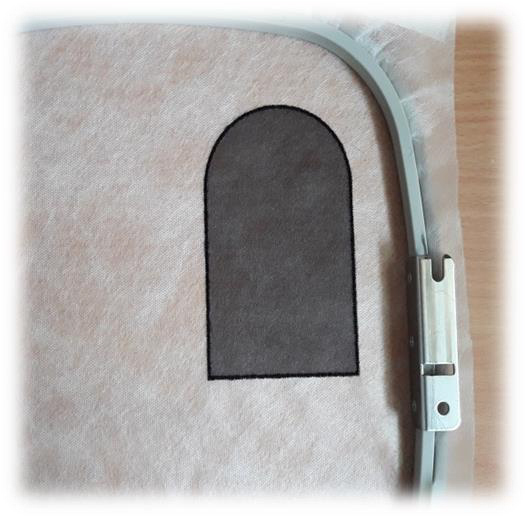
Step 3: Embroider the first color.
(Click Image to Enlarge)
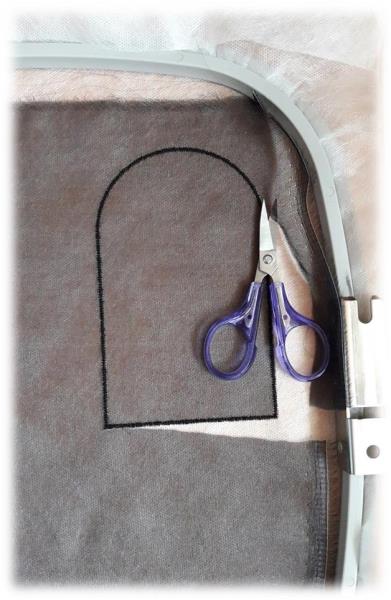
Step 4: (Click Image to Enlarge)
Gently trim excess fabric with scissors.
Step 5: Then embroider a second color.
(Click Image to Enlarge)
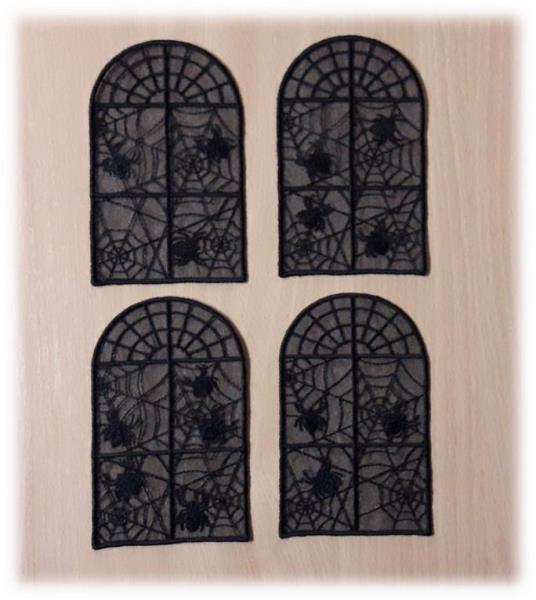
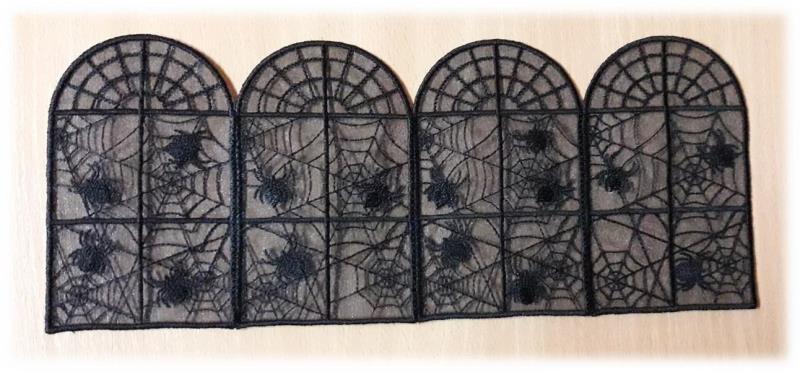
Step 6: Embroider all 4 parts as well. After embroidery, rinse in warm water until the stabilizer dissolves. Lay flat on a towel. Iron when dry.
(Click Image to Enlarge)
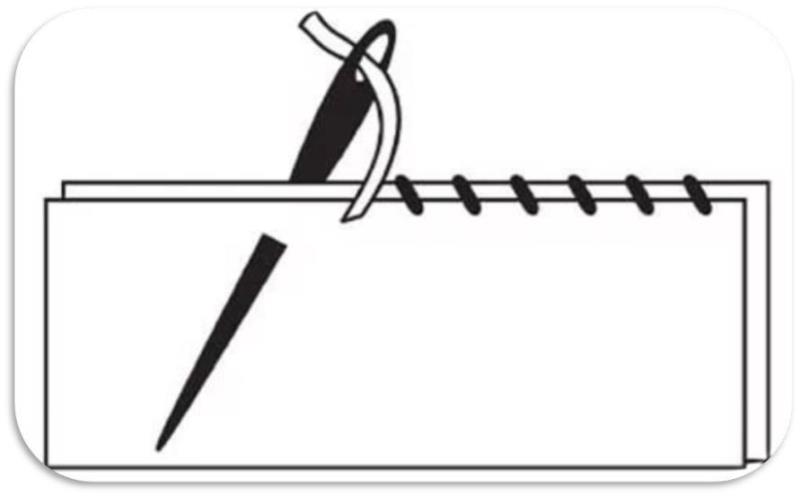
Step 7: Next, you need to sew all the parts. This can be done by hand or on a sewing machine. If you will sew with your hands, you can use such a seam:
(Click Image to Enlarge)
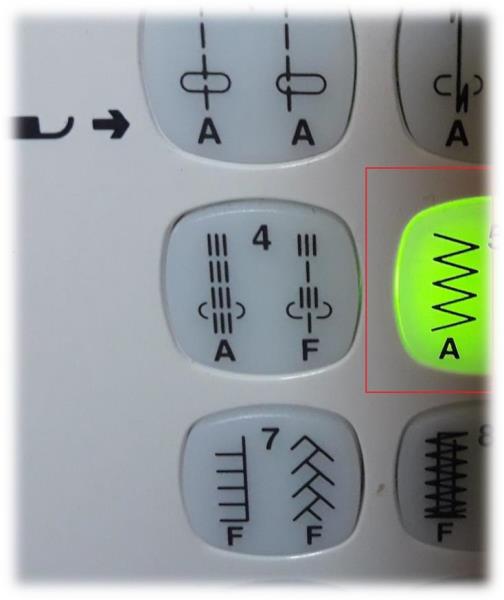
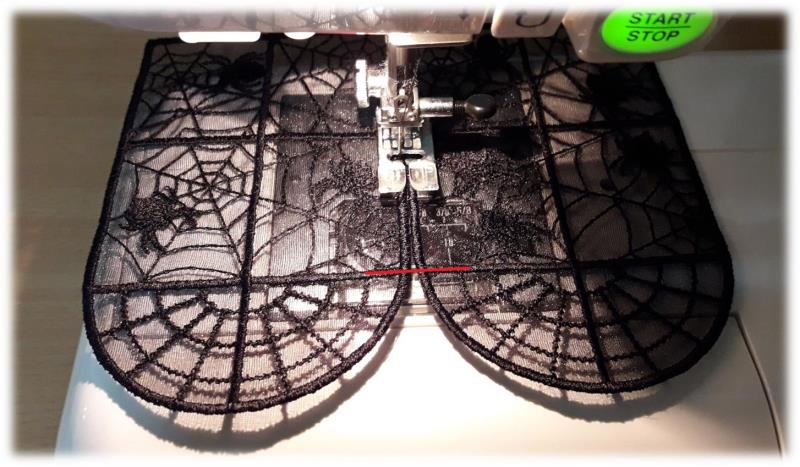
Step 8: If you will sew on a sewing machine, you need to choose a zig-zag seam width 3.5 mm density 1.5 mm.
(Click Image to Enlarge)
Step 9: Sew all the parts in turn. Sew to the place indicated by the red line.
(Click Image to Enlarge)
Step 10: (Click Image to Enlarge)
Step 11: (Click Image to Enlarge)
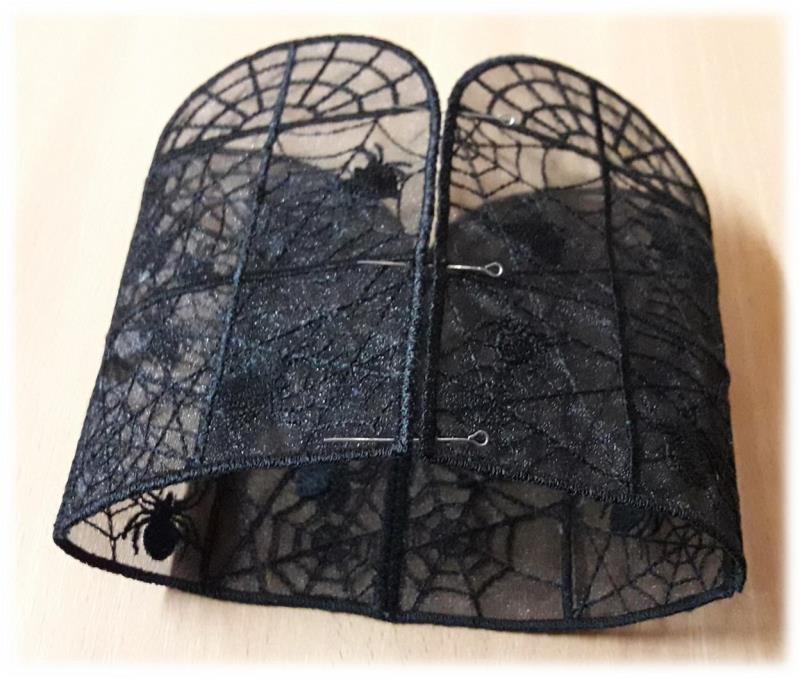
Step 12: Join the beginning and end of the structure and sew.
(Click Image to Enlarge)
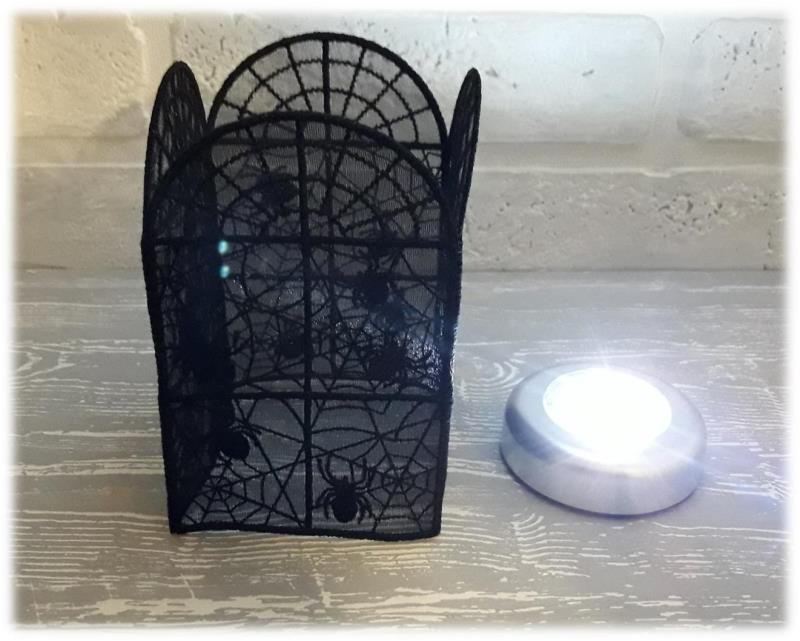
Step 13: Done! It remains to insert an electric torch and turn it on.
Never use a candle! This is dangerous! (Click Image to Enlarge)
Step 14: Enjoy the result of your work!
(Click Image to Enlarge)
Feedback
Please Login to Submit a Feedback
Invalid Characters, Please enter a valid Comment
Please enter a valid Comment
LOG IN
Submit
Link is Broken, Please check the URL