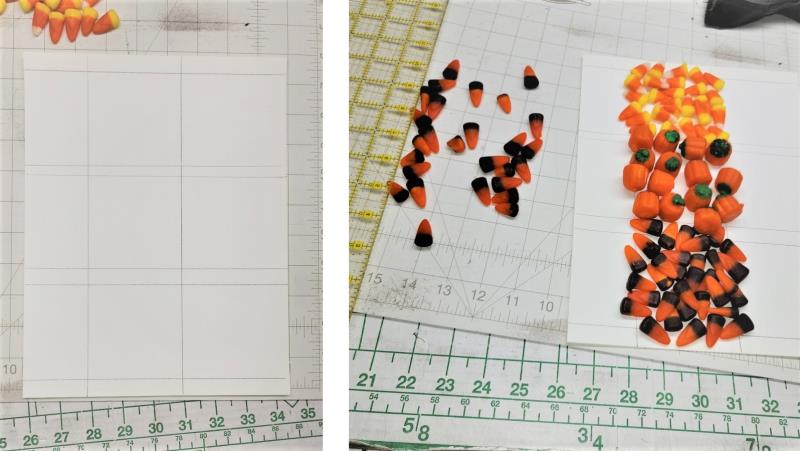
Read through the instructions thoroughly before beginning and assemble all the materials needed to complete the project. Cut out the fabric and vinyl squares. If you don’t have scraps of Halloween themed candy scraps, purchase a bag of mixed Halloween candy, sort it, and lay it out on a sheet of white paper. The lines were marked so that the photo prints would fit within the area of the jars. Print a paper template of the design.
(Click Image to Enlarge)
Step 2:
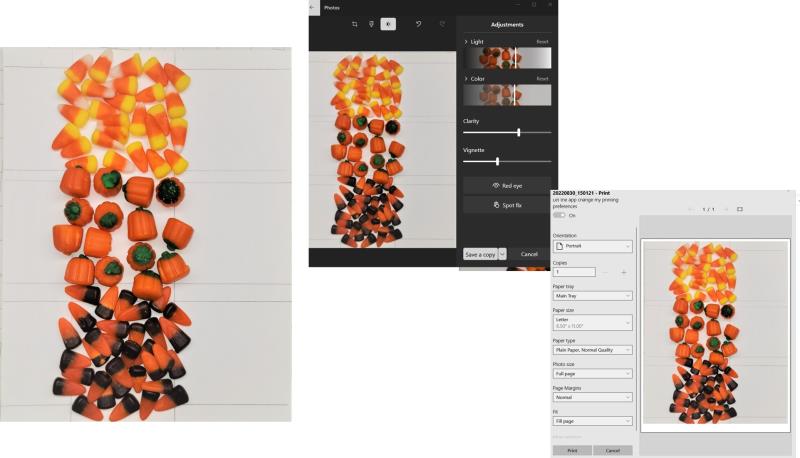
Take a photo of the candy and import it into photo software and adjust the colors and lighting. Print the photo on the printer fabric following the manufacturers’ instructions.
(Click Image to Enlarge)
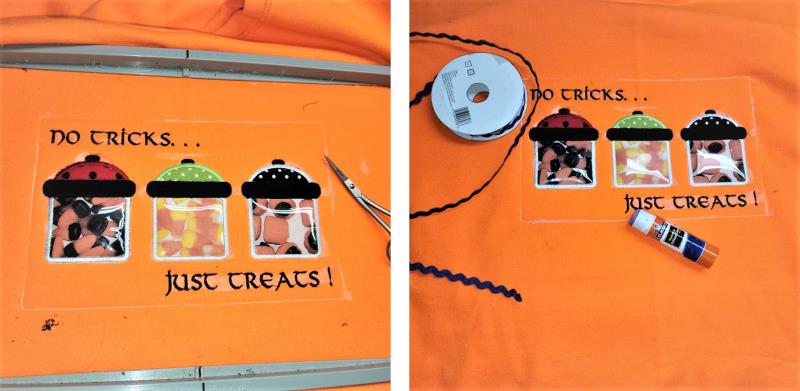
Step 3:
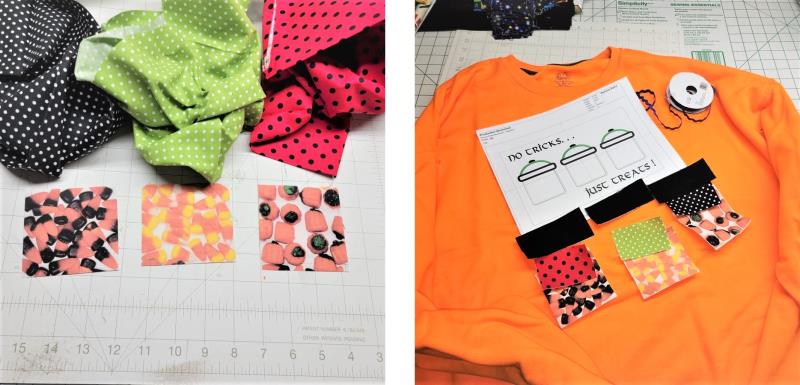
Trim the printer fabric into the squares. Decide which fabric scraps will go with which candy print.
(Click Image to Enlarge)
Step 4:
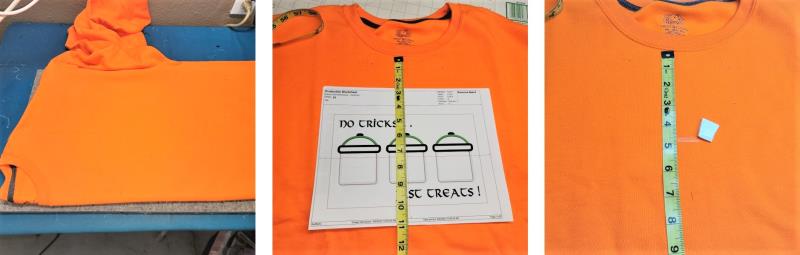
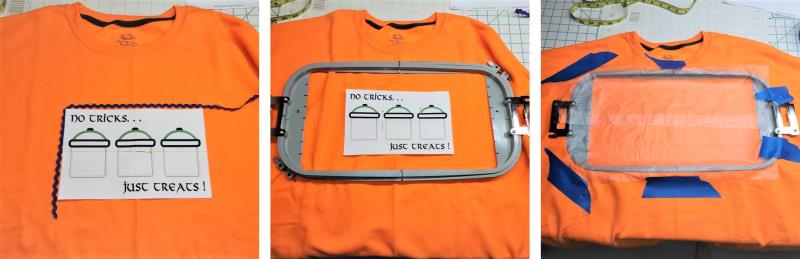
Fold the sweatshirt in half lengthwise along the center front, matching shoulder and side seams. Lightly press in a crease. Open up the sweatshirt and lay the paper template to determine the placement. Mark the center for the design.
(Click Image to Enlarge)
Step 5:
Place the rick rac around part of the design to make sure you’ll like the placement. Choose a hoop large enough for the design. Hoop the sweatshirt with a layer of poly mesh. Place the water-soluble topper in place and secure with painter’s tape.
(Click Image to Enlarge)
Step 6:
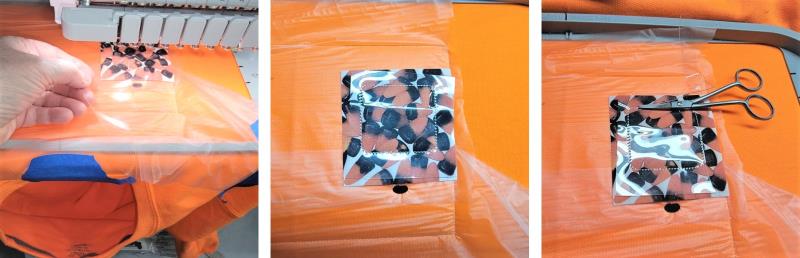
Load the design on the machine and rotate it if necessary. Place the hoop on the machine and make sure that none of the sweatshirt is caught underneath the hoop; center the design to the mark on the shirt. Stitch Color 1 which is the outline for sewing on the ric-rac and it also tacks down the topper. Stitch Color 2, the placement line for the first jar. Place the first candy theme square over the placement line.
(Click Image to Enlarge)
Step 7:
Place one piece of vinyl over the candy fabric. Stitch Color 3 to tack the layers together. Remove the hoop from the machine but do not remove the fabric. Lay the hoop on a flat surface. Trim the vinyl close to the stitching line, and then trim the candy fabric close to the candy fabric.
(Click Image to Enlarge)
Step 8:
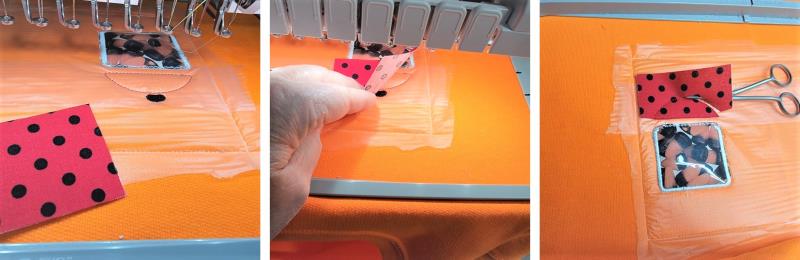
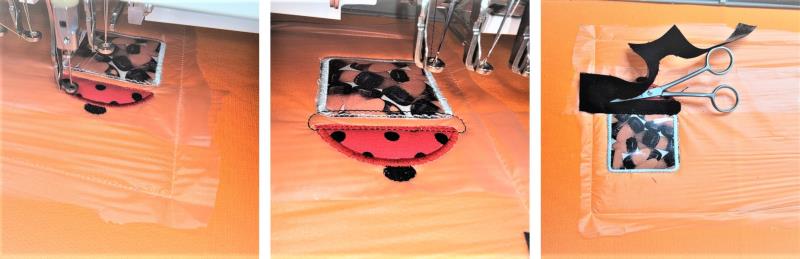
Stitch Color 4, the satin stitch around the candy jar. Stitch Color 5, the knob of the candy jar and outline for the jar top. Place down the fabric for the jar top. Stitch Color 6 to tack down the fabric. Remove the hoop from the machine and trim the fabric close to the stitching line.
(Click Image to Enlarge)
Step 9:
Stitch the satin outline around the top. Stitch the next color for the rim placement line. Lay down the black fabric, stitch the next color to tack it down. Trim the fabric and then stitch the satin outline.
(Click Image to Enlarge)
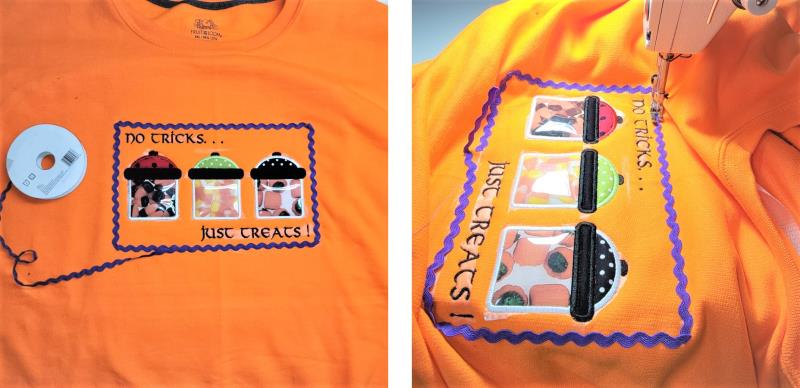
Step 10:
Repeat the same steps that were done for jar one, for the remaining two jars. After those are completed, stitch the text. Remove the water-soluble topper and then remove the piece from the hoop. Trim the excess stabilizer on the back of the sweatshirt.
(Click Image to Enlarge)
Step 11:
Using the fabric glue stick, position the ric rac along the stitching line on the outside of the design. Stitch the ric rac in place using the matching thread.
(Click Image to Enlarge)
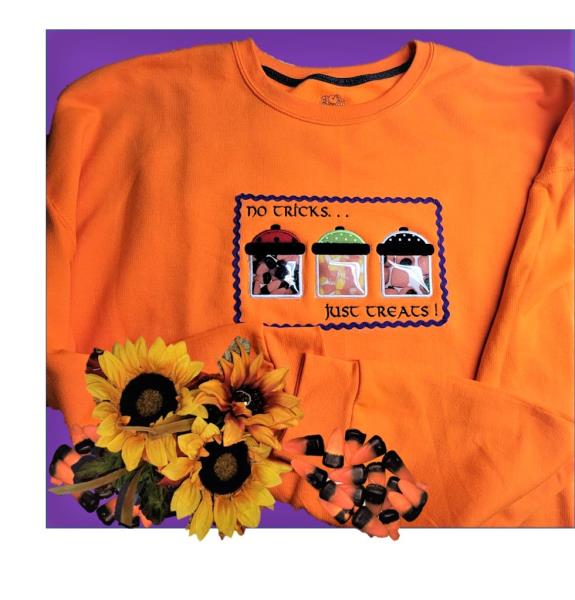
Step 12:
Thank you for purchasing the design. You’ll have a lot of fun stitching up a new sweatshirt for yourself, friends, and children. To wash the sweatshirt, turn it inside out, cool water, and lay flat to dry to preserve the color of the printed sheets and vinyl.
Ramona Baird has been in the embroidery industry for over 23 years. She and her husband owned a commercial and retail embroidery store in Arizona for many years. She is an experienced digitizer having been mentored by award-winners Pat Williams and Lindee Goodall. Ramona is a contributor to “Creative Machine Embroidery” magazine having 5 covers to her credit. Ramona has worked for Wilcom America and served many years as Education Director for the American Sewing Guild. With a degree in fashion design, she is able to design and execute patterns which Pat Williams says are “out of the box” in creativity and application. Ramona likes to challenge the boundaries of embroidery and bring new and exciting designs, ideas, and projects to EmbroideryDesigns.com. She wants embroiderers of all levels to increase their skills and enjoyment in using their embroidery machine for gift-making and personal pleasure.