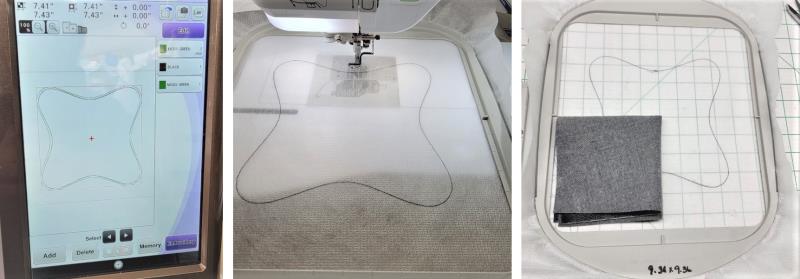
There are several fill patterns listed that may be used with the frame. Choose the design you’d like based upon the project you will be creating.
Step 1:
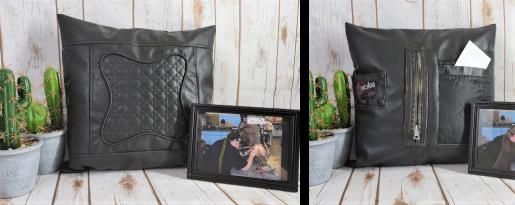
Read through the instructions thoroughly before beginning and assemble all the materials needed to complete the project. Our son had a leather jacket he no longer wore any more. He gave it to me for a project, and I decided to use the good parts of the leather, and other pieces of the jacket, to create a pillow. You may wish to create a purse or tote bag, a wallet, or some other project out of the leather. For me, this was a project that was created as I went along. The materials list is minimal because the jacket you use really determines the project and dimensions. I’ll tell you in these instructions what I did, and then you can adjust the instructions for what you are doing and how much fabric you have to work with. The designs I used for this project are 220816FIL01 and 220816FIL07.
(Click Image to Enlarge)
Step 2:
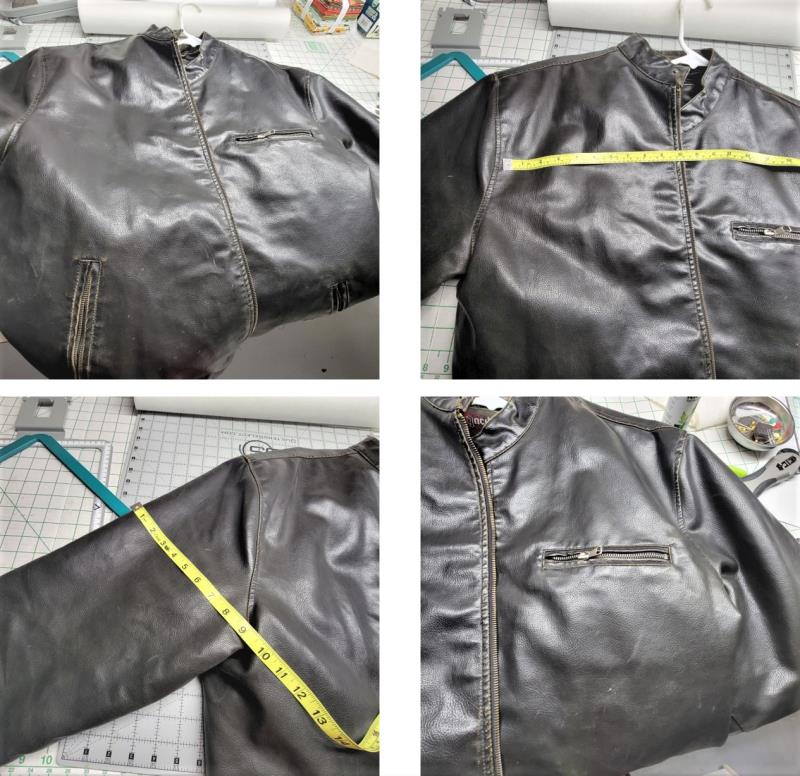
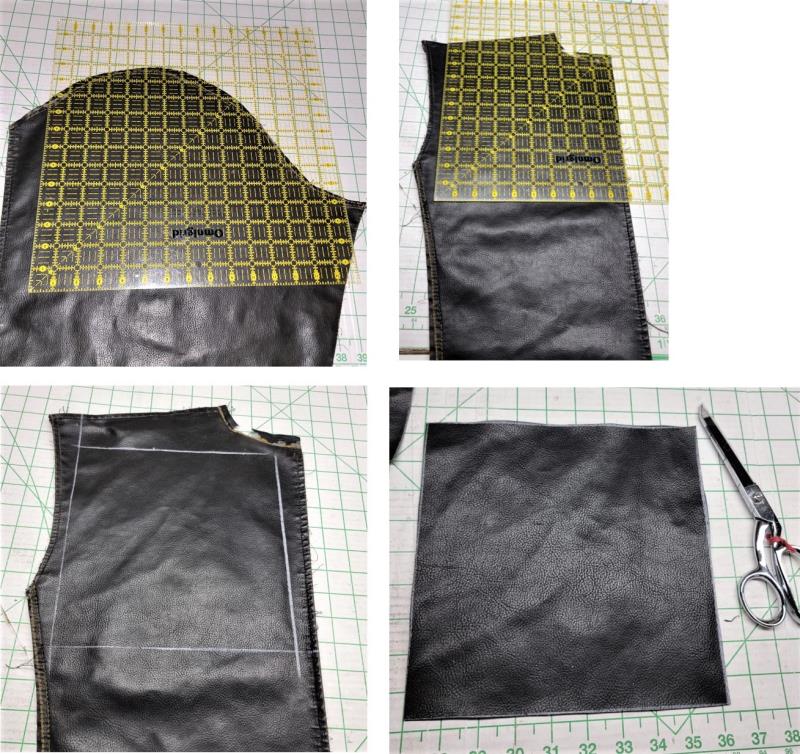
The jacket was a size 3XL. How much leather is available depends upon the size of the jacket and the condition of useable areas. Assess the jacket, look for any areas that are unusable and mark them with painter’s tape. Measure areas that are useable and make note of other items of the jacket like pockets and zippers that might be able to be incorporated in the project.
(Click Image to Enlarge)
Step 3:
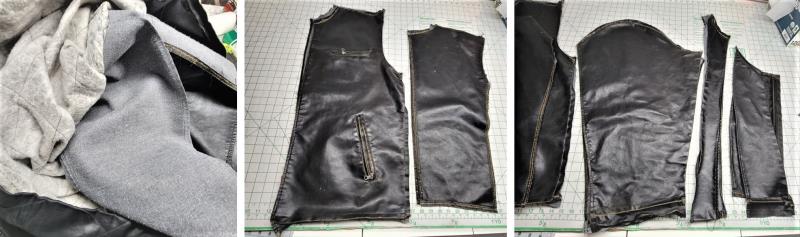
Grab a nice beverage, turn on a movie or some music, and take apart the jacket. I chose to use a seam ripper to cut the seams open. Depending upon the construction, you may wish to just cut along the seam line to save time. Sort through everything, assess areas one last time, and figure out what pieces of the garment will be used to cut which parts for the project.
(Click Image to Enlarge)
Step 4:
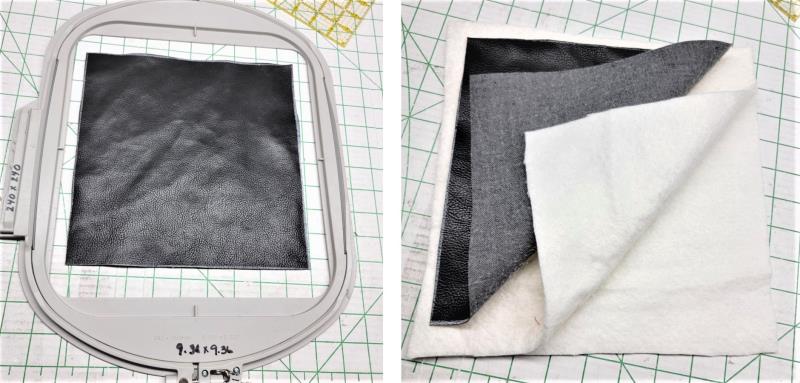
The sleeve head and one side of the jacket back, which had a center back seam, were used for the frame and the inside fill pattern stitching. I cut the fabric 9” square for the frame and the fill pattern stitching. Use sharp shears when cutting leather.
(Click Image to Enlarge)
Step 5:
Be sure you have a frame large enough for the designs being stitched. In addition to the leather, for the fill pattern stitching also cut two pieces of cotton batting.
(Click Image to Enlarge)
Step 6:
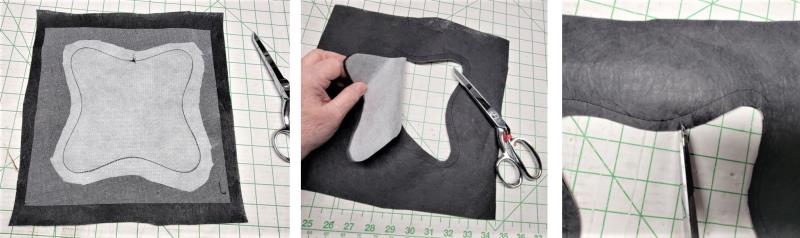
Begin with the frame pattern. Hoop a layer of poly mesh stabilizer. Stitch Color 1, the placement line. Remove the hoop from the machine and place it on a gridded surface so that the tick marks align on the grid lines. Quarter fold one piece of leather, center it on the grid as shown.
(Click Image to Enlarge)
Step 7:
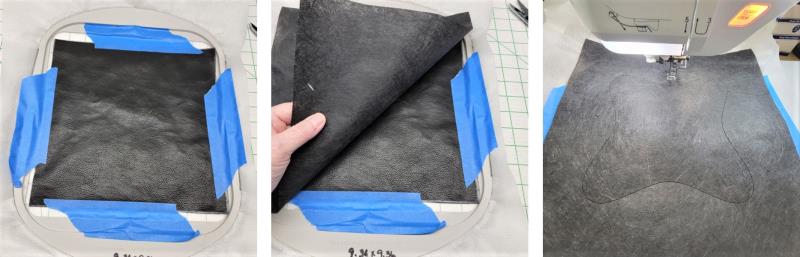
Open up the leather. Use painter’s tape to hold it in position within the hoop. On top of the leather place a piece of sturdy black fabric or black cutaway stabilizer which was used for this project. Stitch Color 2, the outline for the frame.
(Click Image to Enlarge)
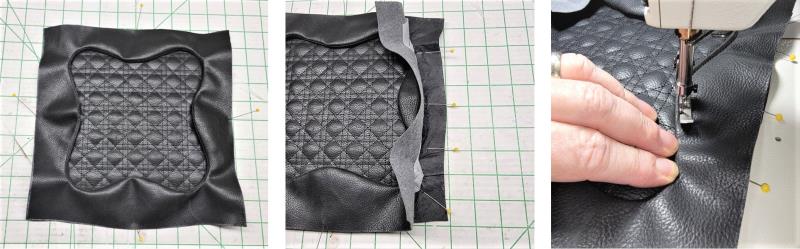
Step 8:
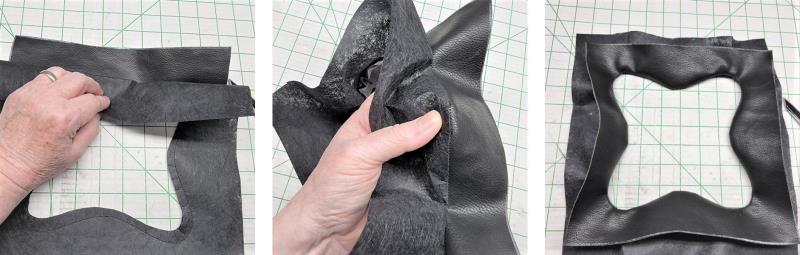
Remove the piece from the hoop. Trim the poly mesh stabilizer about an inch away from the outline. Now trim out the center of the frame, leaving about a ½” seam allowance. Make clips all the way around the seam allowance.
(Click Image to Enlarge)
Step 9:
Turn the fabric or stabilizer to the inside. Use your fingers to form all the areas of the frame, pushing the seam allowance toward the black stabilizer or fabric. Depending upon the leather, you may see ripples around the frame edges. For this leather, it was soft and well-worn so there were areas of the leather that were stretched out of shape a bit. When the pillow is inserted, it fills out the leather.
(Click Image to Enlarge)
Step 10:
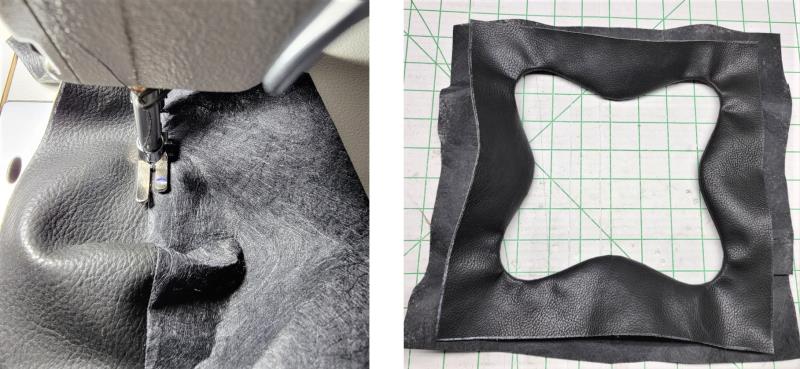
To help keep the seam allowance in place, understitch the seam. Set the frame aside until the fill pattern is done.
(Click Image to Enlarge)
Step 11:
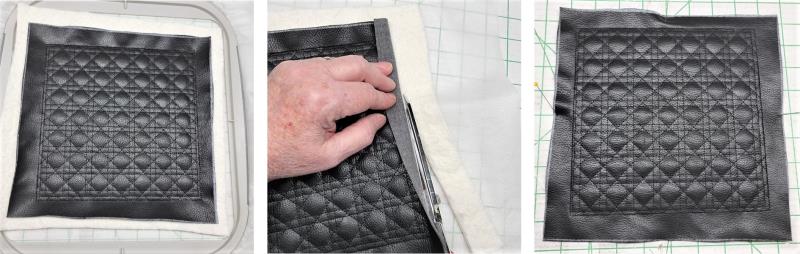
Load the chosen fill pattern on the machine. Hoop a layer of poly mesh. Stitch Color 1, the placement line. Center and lay the two layers of cotton batting down, and then place the second place of leather on top. Stitch Color 2, the tack down line.
(Click Image to Enlarge)
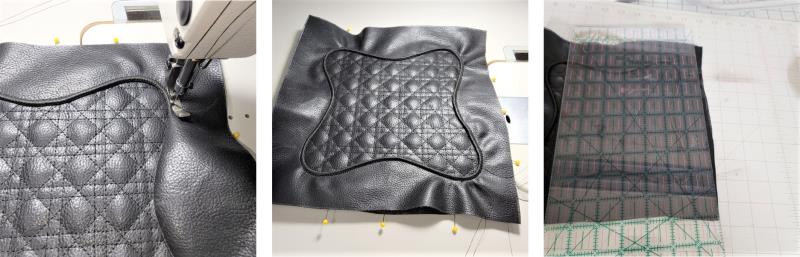
Step 12:
Stitch Color 3, the fill pattern. Remove the piece from the hoop. Turn back the edges of the leather and trim the batting and stabilizer close to the stitching line.
(Click Image to Enlarge)
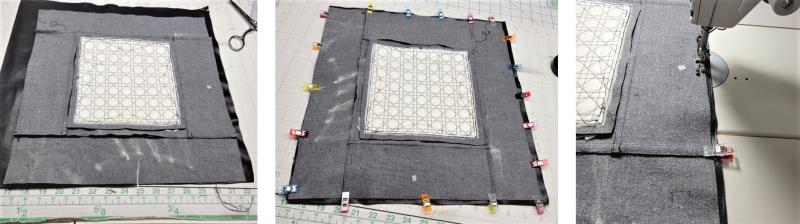
Step 13:
Place the fill on the grided mat and then center the frame the on top. Pull back the leather portion of the frame and pin it to the fill. Using a zipper foot, stitch about 1/8” away from the edge of the frame around the frame.
(Click Image to Enlarge)
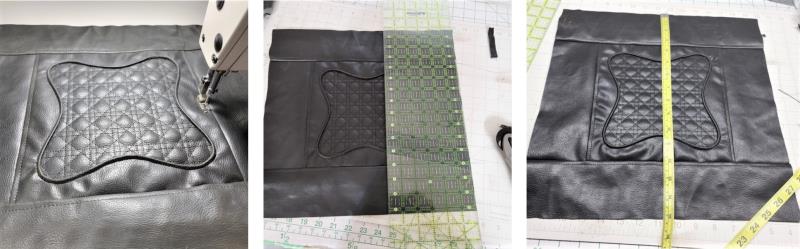
Step 14:
When stitching, you’ll find the edge almost looks like piping. Square up the piece and then measure it again.
(Click Image to Enlarge)
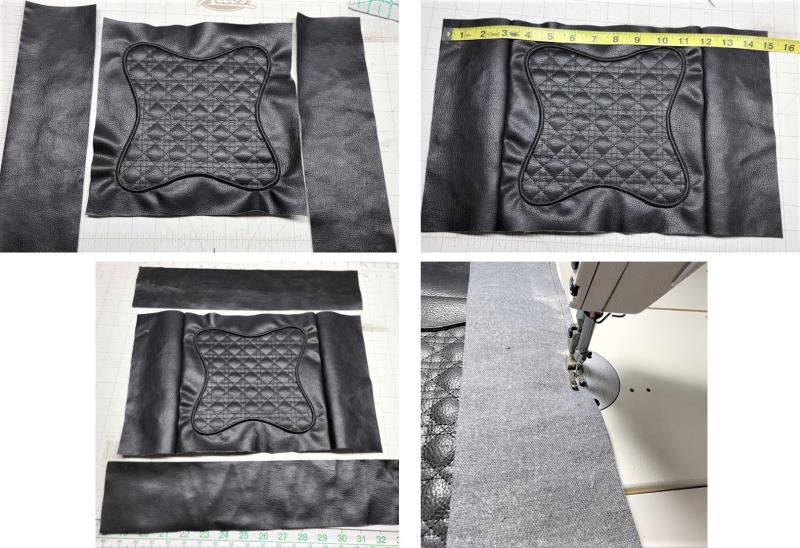
Step 15:
I was able to cut leather pieces 3 ½” wide by the side width of the embroidered piece. Those were sewn on using ¼” seam allowances. The piece was then measured across and strips cut 3 ½” by the length, plus a little bit more. The top and bottom pieces were sewn on using ¼” seam allowance.
(Click Image to Enlarge)
Step 16:
The seams were finger pressed toward the borders and then top stitched in place. The borders were squared up. In the end, the pillow front measured 15” square.
(Click Image to Enlarge)
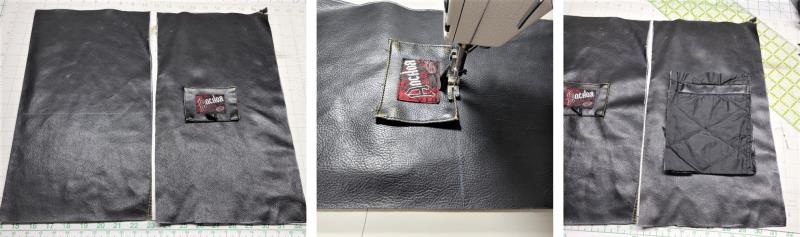
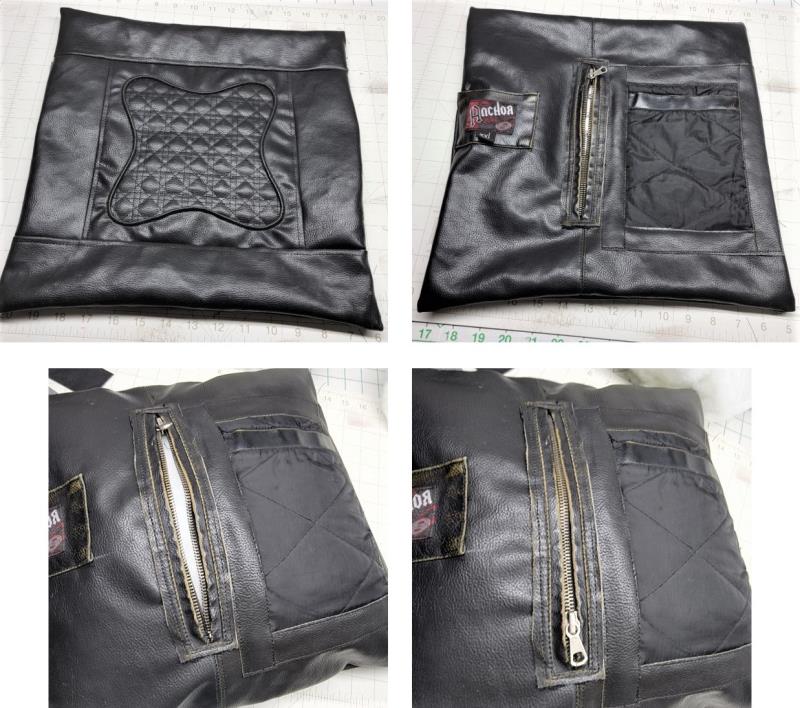
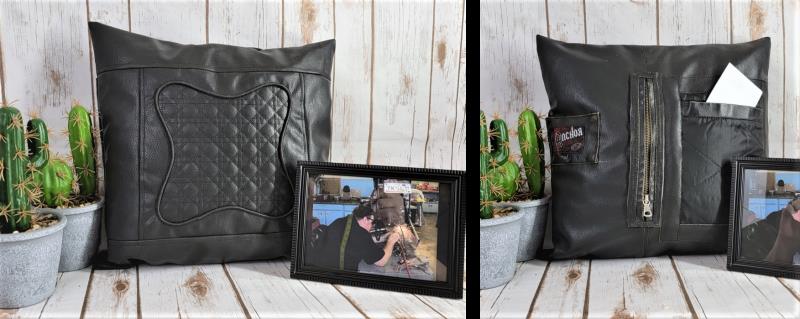
Step 17:
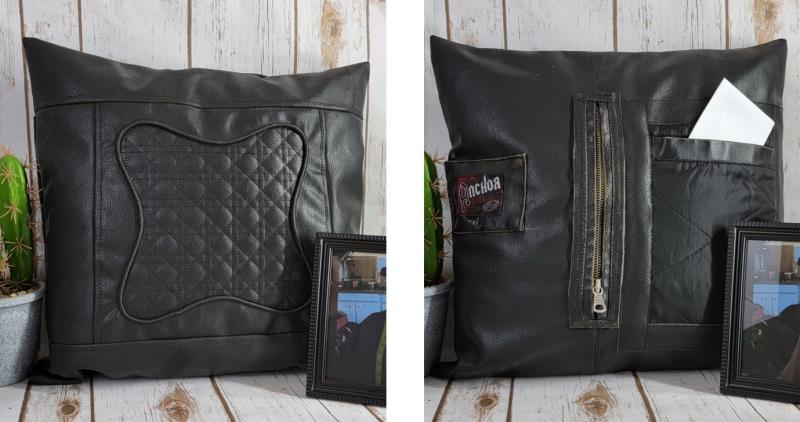
To add the back, I had to cut 2 pieces of leather 16” x 9”. Here is where it was rather fun to get a bit creative. I sewed the label of the jacket to one back piece, and used the inside pocket of the lining for the other half of the pillow back.
(Click Image to Enlarge)
Step 18:
To sew on the pocket, I cut 1” wide strips of leather to frame the pocket and stitched on as shown.
(Click Image to Enlarge)
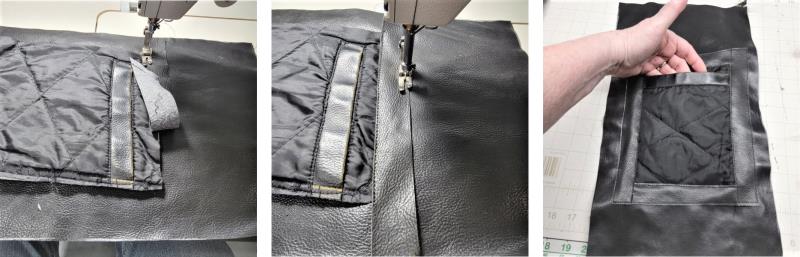
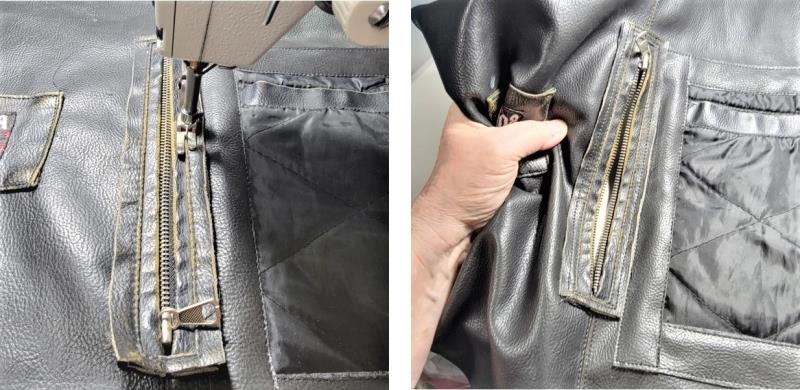
Step 19:
There needed to be a center back seam and an opening for inserting the pillow form. I decided to use one of the front pocket zippers over the opening instead of trying to hand sew the seam closed. Place the back pieces right sides together. Center the zipper in the middle of the seam. Mark the top and bottom. Sew the seam leaving the marked area open. Finger press the seam open and then edge stitch the seams down.
(Click Image to Enlarge)
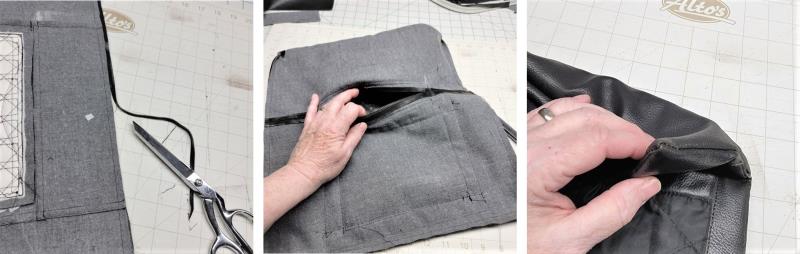
Step 20:
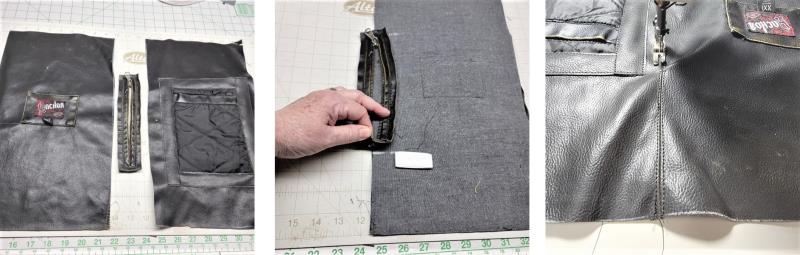
Turn back the seam allowances and edge stitch along the open edges.
(Click Image to Enlarge)
Step 21:
Center the zipper over the opening and stitch it down using the original stitching lines as a guide. Open up the zipper.
(Click Image to Enlarge)
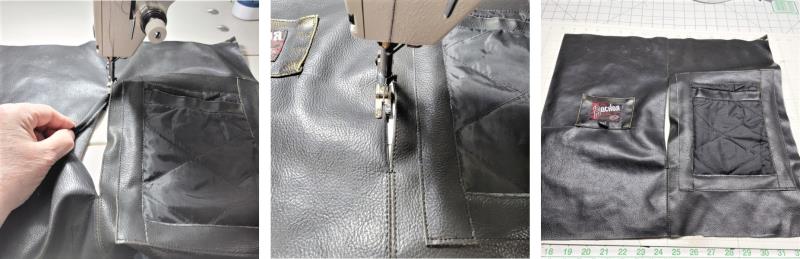
Step 22:
Place the front right side together over the back and clip the edges together. Sew around all edges using a ¼” seam.
(Click Image to Enlarge)
Step 23:
Trim the edges to even the up. Reach in through the open zipper and turn the pillow right side out, forming the corners well.
(Click Image to Enlarge)
Step 24:
Insert the pillow and close the zipper.
(Click Image to Enlarge)
Step 25:
Thank you for purchasing the designs. This project is a wonderful way to create a useful item from a beloved garment. Create it as a gift, along with a photo. The recipient can write down some memories of special times wearing the jacket and add the paper to the pocket as a nice keepsake. And don’t forget to add your information in the pocket, too, so everyone knows who made the pillow and for whom.
Ramona Baird has been in the embroidery industry for over 23 years. She and her husband owned a commercial and retail embroidery store in Arizona for many years. She is an experienced digitizer having been mentored by award-winners Pat Williams and Lindee Goodall. Ramona is a contributor to “Creative Machine Embroidery” magazine having 5 covers to her credit. Ramona has worked for Wilcom America and served many years as Education Director for the American Sewing Guild. With a degree in fashion design, she is able to design and execute patterns which Pat Williams says are “out of the box” in creativity and application. Ramona likes to challenge the boundaries of embroidery and bring new and exciting designs, ideas, and projects to EmbroideryDesigns.com. She wants embroiderers of all levels to increase their skills and enjoyment in using their embroidery machine for gift-making and personal pleasure.