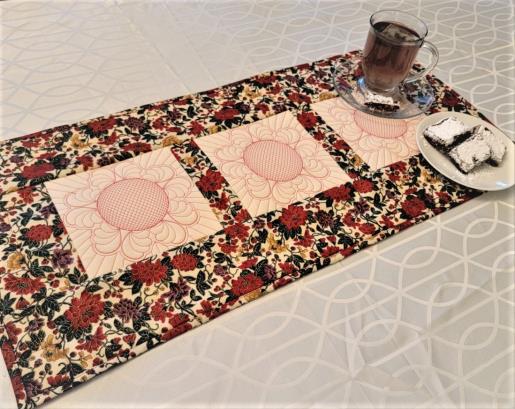
Read through the instructions thoroughly before beginning and assemble all the materials needed to complete the project. Choose embroidery thread to embroider the quilting design that picks up a color in the floral fabric. All seams are ½”, except for the binding seam. All fabric pieces are cut a little larger than needed and trimmed to size as the assembly is done.
(Click Image to Enlarge)
Step 2:
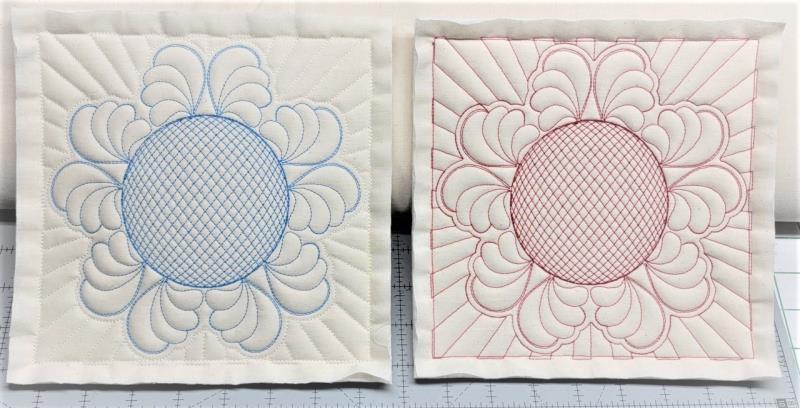
There are three designs that can be stitched. The first is a two-color quilting design where the main feather quilting is one color and the starburst is a second color. The second is where the feathers and starburst are all one color. The third is the feather design without the starburst background. Choose the design you’d like.
(Click Image to Enlarge)
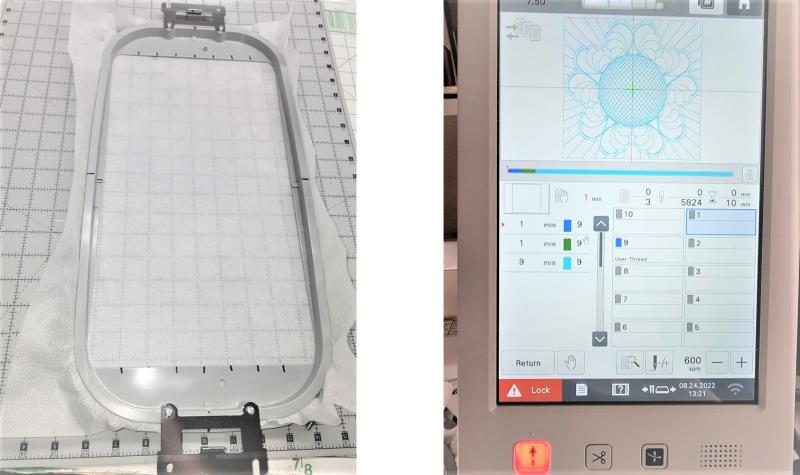
Step 3:
I found it easier to use a larger hoop for stitching. Hoop a layer of poly mesh stabilizer. Load the chosen design on the machine.
(Click Image to Enlarge)
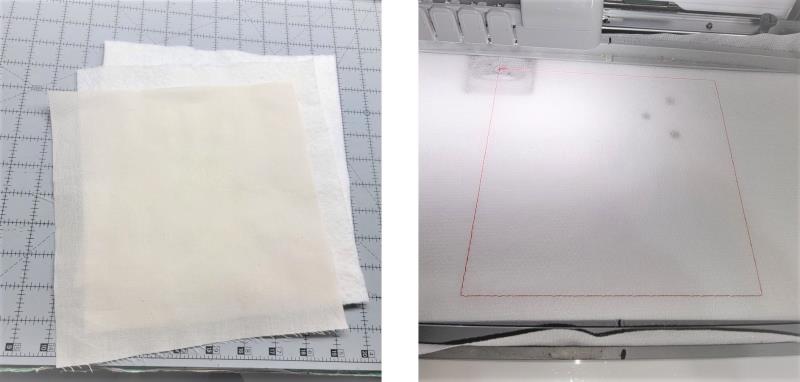
Step 4:
Cut the two layers of batting and the piece of plain cotton for each embroidered square. Place the hoop on the machine and stitch Color 1, the placement line.
(Click Image to Enlarge)
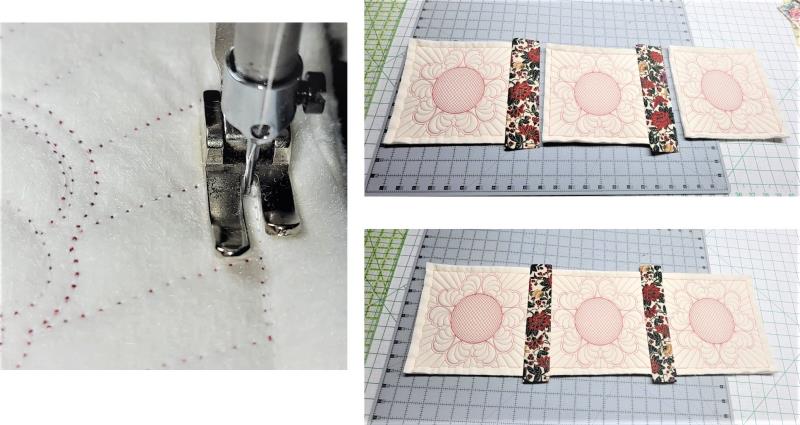
Step 5:
Center the two layers of batting over the placement line, and then place down the plain fabric. Stitch Color 2 to tack all the layers together (slow down the machine for this step to make sure the fabric and batting stay smooth in the hoop.) Continue stitching the chosen design. When the design has finished stitching, remove it from the hoop. Trim ½” beyond the tack down line on all sides.
(Click Image to Enlarge)
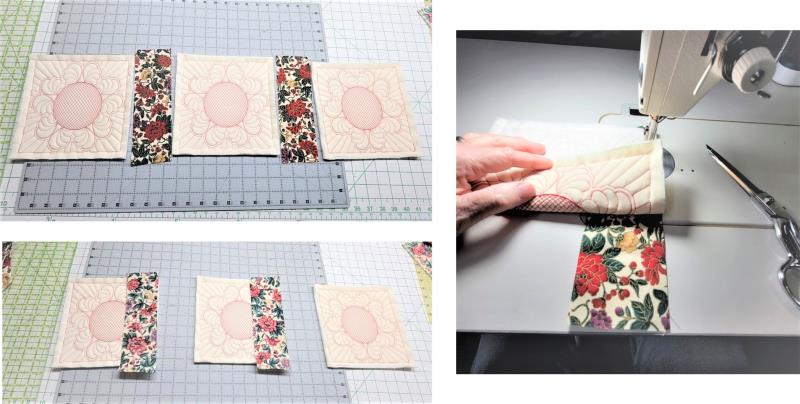
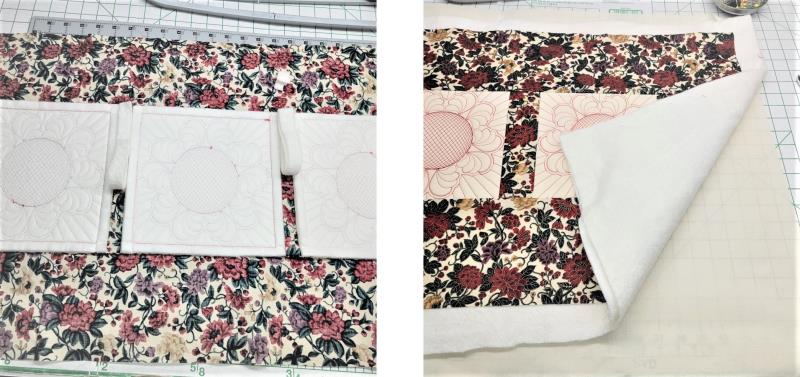
Step 6:
Repeat stitching the chosen design two more times. For assembly, cut 2 sashing strips 3” x 9”. Place them between the blocks as shown. Place the sashing, right sides together, to the right of the left and middle square. The pieces are cut a little longer than needed and will be trimmed in a future step.
(Click Image to Enlarge)
Step 7:
Stitch the seam using the tack down line as a stitching guide. Press the seams toward the sashing. Now stitch the other seams and press to complete the center portion of the table runner. Be sure to keep the tops and bottoms of the quilt blocks even at the top and bottom when sewing on the sashing.
(Click Image to Enlarge)
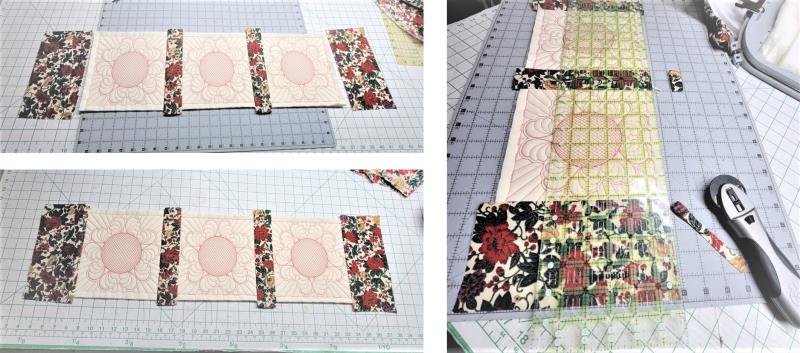
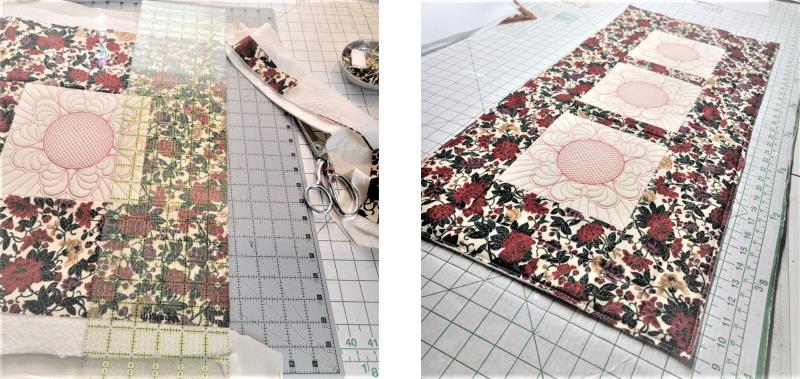
Step 8:
Cut the left and right border pieces 5” x 9”. Stitch them on and press the seams toward the border. Trim the sashing and border edges even with the quilted blocks.
(Click Image to Enlarge)
Step 9:
The center portion should look like the top photo. Now cut the top and bottom border pieces.
(Click Image to Enlarge)
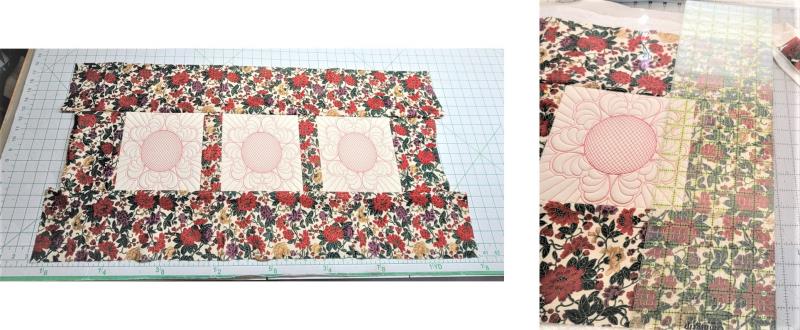
Step 10:
Stitch the top and bottom border pieces to the center portion. Trim the borders to 4 ½” wide all around, being sure the table runner is squared up.
(Click Image to Enlarge)
Step 11:
Flip the table runner wrong side up. Cut ¾” x 8” batting pieces to fill in the area under the sashing strips, two batting pieces under each strip. Place the backing on the cutting board, then the two large batting pieces on top, and then center the table runner on top.
(Click Image to Enlarge)
Step 12:
Pin all the layers together and then baste them at the machine. Trim the backing and batting even with the top. Quilt the sashing and borders as desired. It doesn’t show up, but red thread was used to stitch in the middle of each sashing piece, and in each border. Apply the binding using your favorite method.
(Click Image to Enlarge)
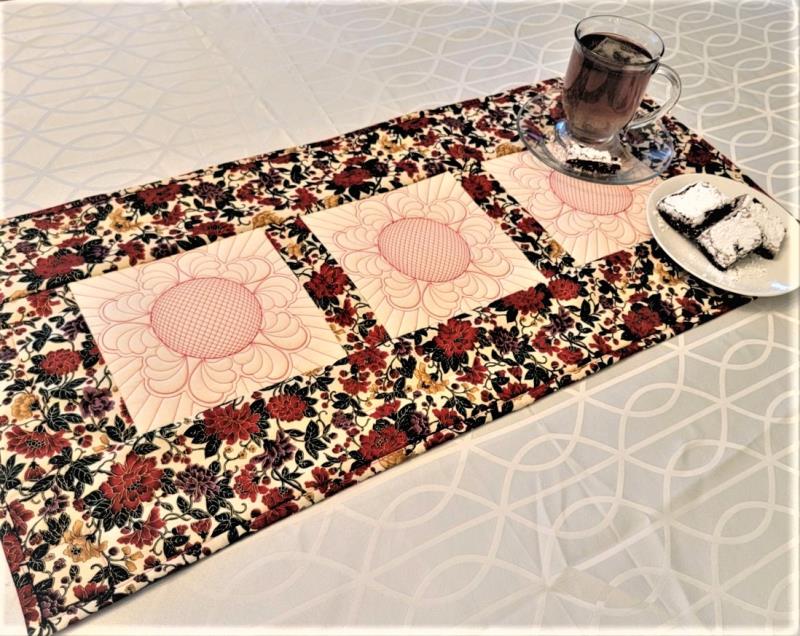
Step 13:
Thank you for purchasing the Starburst Feather designs! I know you’ll find many other uses for these designs such as for pillows, hot pads, counter mats, and bags.
Ramona Baird has been in the embroidery industry for over 23 years. She and her husband owned a commercial and retail embroidery store in Arizona for many years. She is an experienced digitizer having been mentored by award-winners Pat Williams and Lindee Goodall. Ramona is a contributor to “Creative Machine Embroidery” magazine having 5 covers to her credit. Ramona has worked for Wilcom America and served many years as Education Director for the American Sewing Guild. With a degree in fashion design, she is able to design and execute patterns which Pat Williams says are “out of the box” in creativity and application. Ramona likes to challenge the boundaries of embroidery and bring new and exciting designs, ideas, and projects to EmbroideryDesigns.com. She wants embroiderers of all levels to increase their skills and enjoyment in using their embroidery machine for gift-making and personal pleasure.