{{superHeaderAds.title}}
Live Chat
Embroidery Designs
Welcome, Embroiderer
Login
Mylar Tea Light Wraps
{{mainImageAlt || (productInfo._source && productInfo._source.name) || ''}}

Mylar Tea Light Wraps Embroidery Project

By   Sew Chic   on   May 07, 2024

PROJECT DETAILS

SKILL LEVEL
Beginner
TIME REQUIRED
00:30
Description

The designs digitizing rights and photos used in the project are copyrighted to Holly

Project Preview Video

Materials
  • Water-soluble stabilizer (not the thin topper type)
  • Embroidery thread with same thread wound on your bobbin
  • Mylar film
  • LED tea light
  • Fabric glue

  • Designs used in this project
  • https://www.embroiderydesigns.com/productdetails/artsy-knots/packs/1/akdp1121
  • https://www.embroiderydesigns.com/productdetails/artsy-knots/designs/1/akh1331
  • https://www.embroiderydesigns.com/productdetails/artsy-knots/designs/1/akh1332
  • https://www.embroiderydesigns.com/productdetails/artsy-knots/designs/1/akh1333
  • https://www.embroiderydesigns.com/productdetails/artsy-knots/designs/1/akh1334
  • https://www.embroiderydesigns.com/productdetails/artsy-knots/designs/1/akh1335
  • https://www.embroiderydesigns.com/productdetails/artsy-knots/designs/1/akh1336
  • https://www.embroiderydesigns.com/productdetails/artsy-knots/designs/1/akh1337
  • https://www.embroiderydesigns.com/productdetails/artsy-knots/designs/1/akh1338
  • https://www.embroiderydesigns.com/productdetails/artsy-knots/designs/1/akh1339
  • https://www.embroiderydesigns.com/productdetails/artsy-knots/designs/1/akh1340


  • Final Product: What You Will Create


    Preface:

    This is a collaboration between ITH Boutique and Holly Workshop. The copyrights to the digitizing and some images belongs to Holly
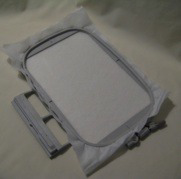

    Step 1:
    (Click Image to Enlarge)

    To begin making the tea light wrap, hoop your water soluble stabilizer.
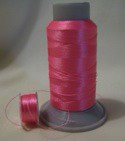


    Step 2:

    You will want to have a bobbin wound with the same thread you are using as the top thread.
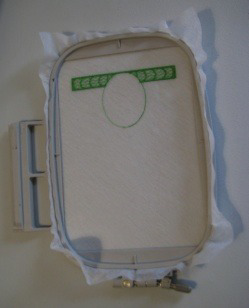


    Step 3:
    (Click Image to Enlarge)

    Stitch the first color (which will be the band for the bottom of the wrap) and the second color, which will give you placement for the mylar.
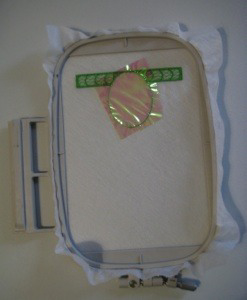


    Step 4:
    (Click Image to Enlarge)

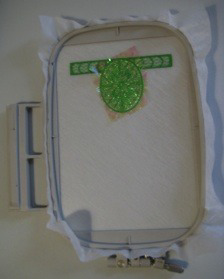
    Lay the mylar over the area that just stitched and stitch the third color. This will tack your mylar in place.


    Step 5:
    (Click Image to Enlarge)

    Continue to stitch the fourth color which will be the design over the mylar.
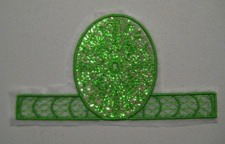
    Finished stitching.

    At this point the excess mylar around the design can be removed by gently pulling it off.


    Step 6:
    (Click Image to Enlarge)

    Remove the hoop from the machine, unhoop and cut away the excess stabilizer without cutting into the actual design.

    Soak the design in water. After soaking, blot the excess moisture and lay flat to dry.
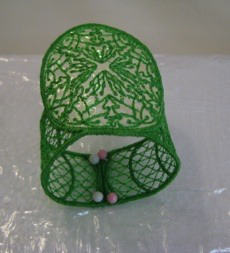


    Step 7:
    (Click Image to Enlarge)

    When completely dry, apply the glue to one end of the wrap. Bring the two ends together and hold them in place until glue is dry.

    I tried using clips to hold the ends together and also pinning the holders down for this process.

    The easiest for me was to use a piece of thick styrofoam wrapped with plastic wrap and pinning the design down with ball topped straight pins. (Wrapping the foam with the plastic wrap will prevent the glue sticking to the foam.)
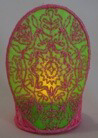
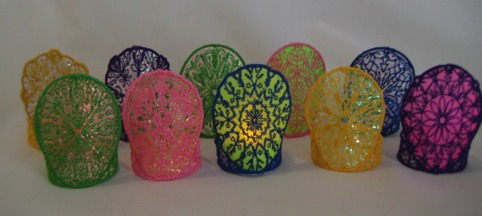


    Step 8:

    Let the wrap sit until glue is completely dry. Finished!


    Step 9:

    Mylar Tea Light Wraps

    Meet the Author: Sew Chic
    Sew Chic
    Embroidery Enthusiast
    More From This Author
    Link is Broken, Please check the URL
    Exclusive Embroidery Offers!
    Copyright © {{ currentDate | date:'yyyy'}} - EmbroideryDesigns.com
    GET 50% OFF! ×