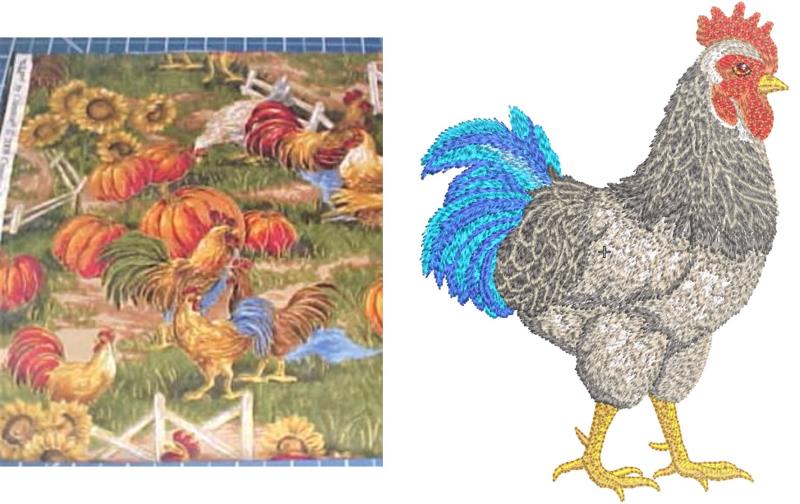
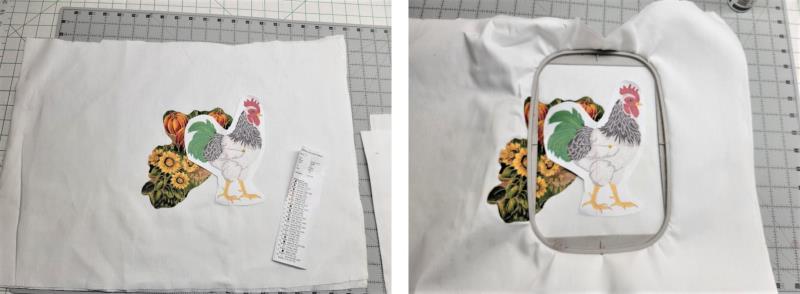
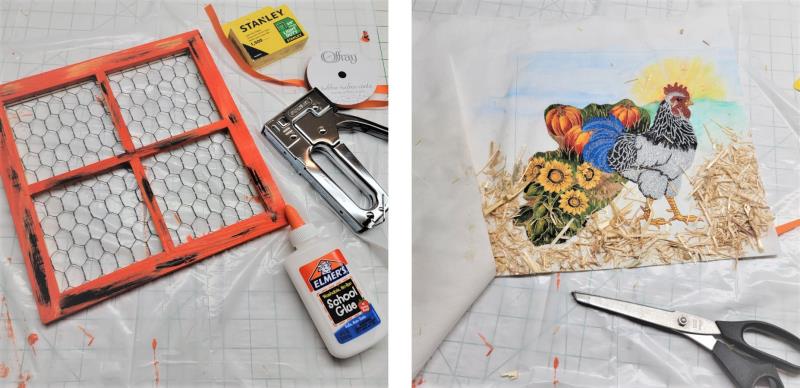
Read through the instructions thoroughly before beginning and assemble all the materials needed to complete the project. The fabric used in the project was in my stash and is from about 2009, so find something similar that can be fussy-cut for a background behind the embroidered rooster. The tails of the rooster were changed in the project to blues instead of greens. Print a template of the embroidery design.
(Click Image to Enlarge)
Step 2:
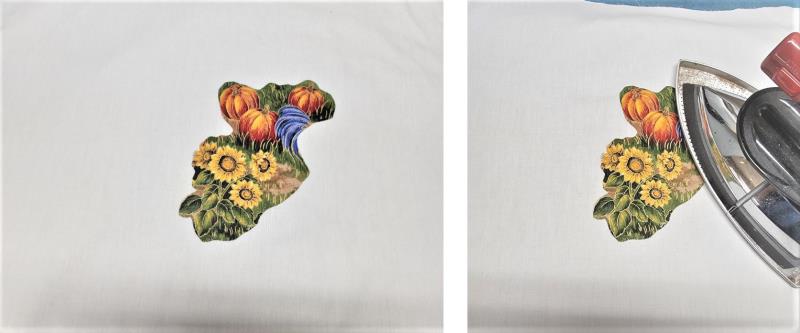
Back the fabric with the Heat ‘n Bond Lite following the instructions, and then fussy-cut an area of the fabric like shown. The piece will be fused to the white fabric.Back the fabric with the Heat ‘n Bond Lite following the instructions, and then fussy-cut an area of the fabric like shown. The piece will be fused to the white fabric.
(Click Image to Enlarge)
Step 3:
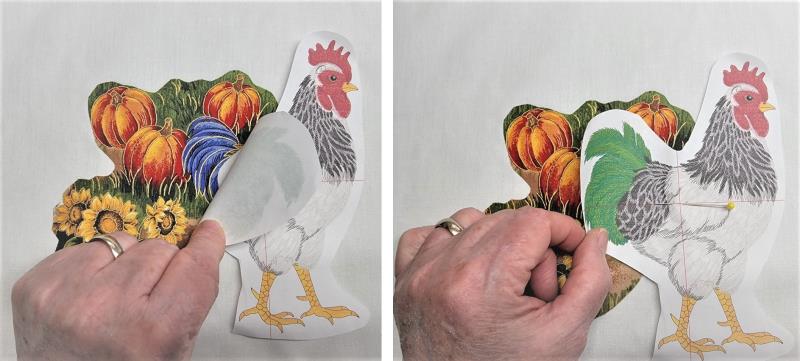
On the white fabric, figure out how the frame will be placed, and how the fabric and embroidery design will be placed. For this design and fabric, I wanted the tail of the embroidery to cover the tail on the fabric.
(Click Image to Enlarge)
Step 4:
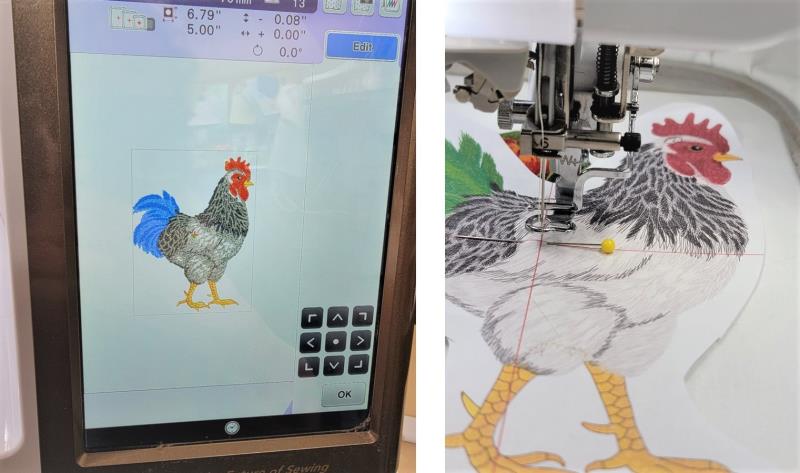
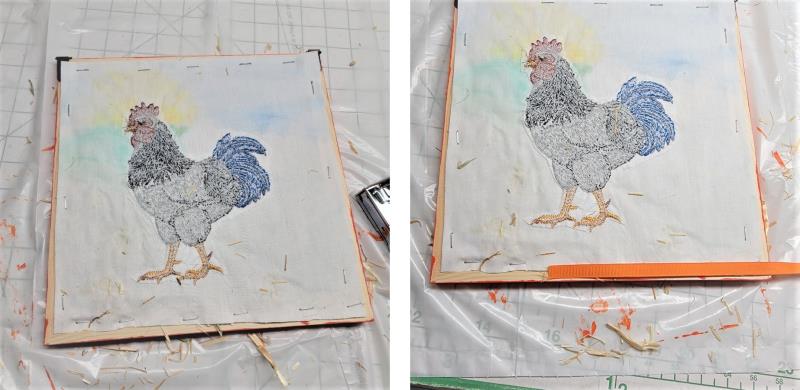
Once the placement is decided, fuse down the fabric and pin the embroidery template in place. Hoop the fabric with the stabilizer, centering the design in the hoop.
(Click Image to Enlarge)
Step 5:
Load the design on the machine. Center the needle over the crosshair on the template.
(Click Image to Enlarge)
Step 6:
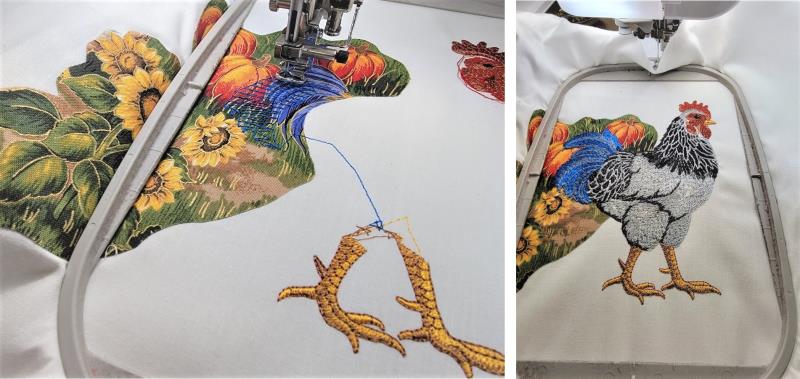
Remove the paper template and stitch the design following the color sequence. Here you see that by careful alignment, the tail feathers cover the tail feather area of the fabric.
(Click Image to Enlarge)
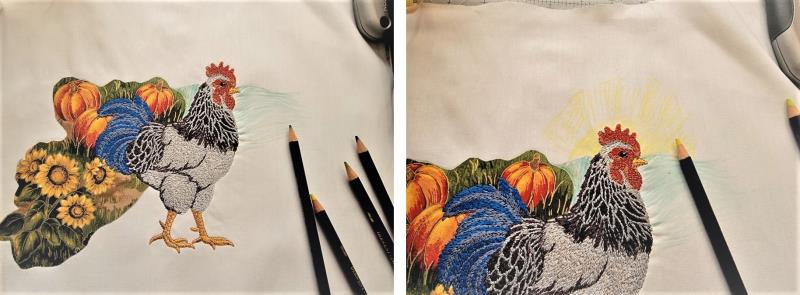
Step 7:
After the embroidery is finished, remove the piece from the hoop and press well—do not cut the stabilizer away. Now gather the remainder of the supplies. For painting the fabric, Inktense pencils were used and then water applied. Use whatever you have on hand that will work for fabric.
(Click Image to Enlarge)
Step 8:
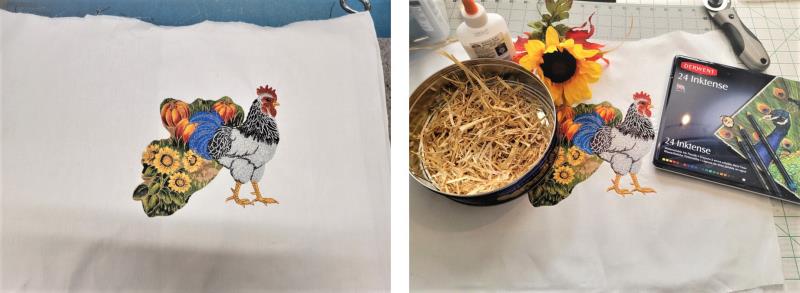
I am absolutely no artist. All I was trying to do was add some additional color in the background around the fabric and embroidery. Using the pencils, greens were applied to give an indication of grass, then yellow and orange was added like a sunrise.
(Click Image to Enlarge)
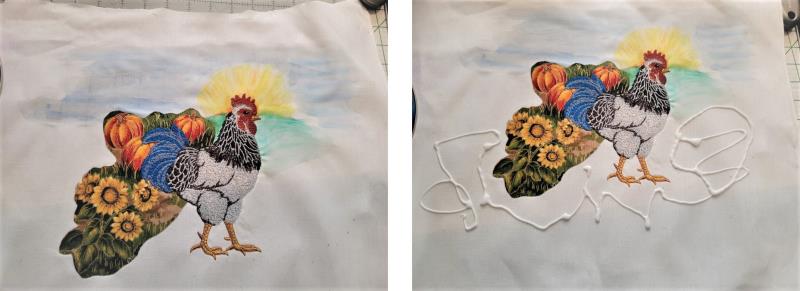
Step 9:
After that was dried, a little bit of blue was added to indicate the sky. Water was applied between each color and left to dry before the next colors were added. Once the inks were dry, glue was drizzled as shown.
(Click Image to Enlarge)
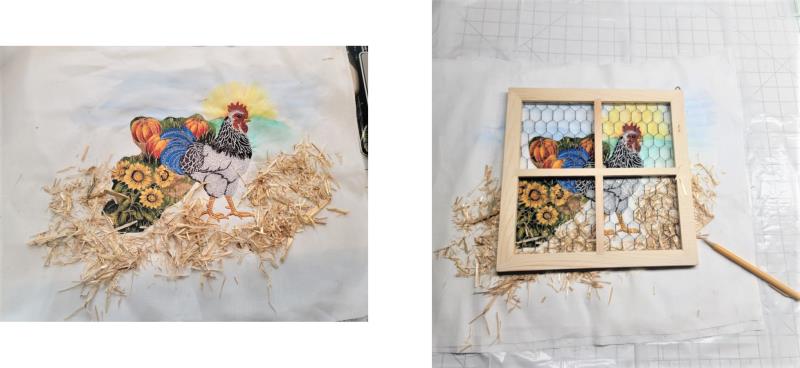
Step 10:
An old brush was used to smear the glue and then a layer of straw was patted into the glue. Lift the piece to shake off any loose straw, and reapply as you’d like.
(Click Image to Enlarge)
Step 11:
Let the glue dry. Lay the frame over the piece positioning as planned. Use a pencil to draw around the frame on the fabric.
(Click Image to Enlarge)
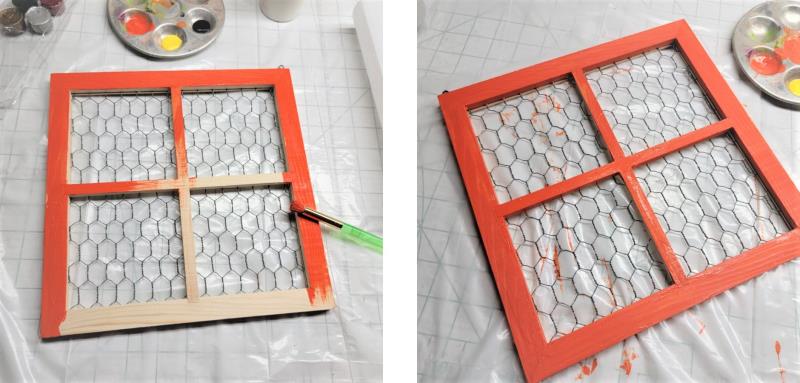
Step 12:
Place the plastic to protect the work surface. Paint the edges of the frame and let dry.
(Click Image to Enlarge)
Step 13:
Add other colors to make the frame look weathered. Using the old scissors, cut about ¼” inside the outline made around the frame.
(Click Image to Enlarge)
Step 14:
Turn the frame over and staple the piece in place. Optional: cover the staples with ribbon to finish.
(Click Image to Enlarge)
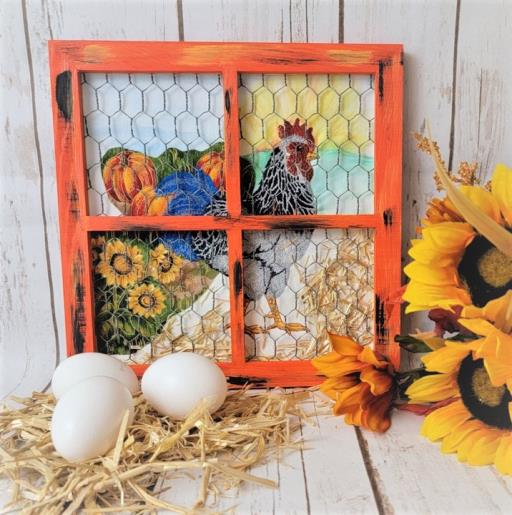
Step 15:
Congratulations on creating a clever piece of artwork for a kitchen.
Ramona Baird has been in the embroidery industry for over 23 years. She and her husband owned a commercial and retail embroidery store in Arizona for many years. She is an experienced digitizer having been mentored by award-winners Pat Williams and Lindee Goodall. Ramona is a contributor to “Creative Machine Embroidery” magazine having 5 covers to her credit. Ramona has worked for Wilcom America and served many years as Education Director for the American Sewing Guild. With a degree in fashion design, she is able to design and execute patterns which Pat Williams says are “out of the box” in creativity and application. Ramona likes to challenge the boundaries of embroidery and bring new and exciting designs, ideas, and projects to EmbroideryDesigns.com. She wants embroiderers of all levels to increase their skills and enjoyment in using their embroidery machine for gift-making and personal pleasure.