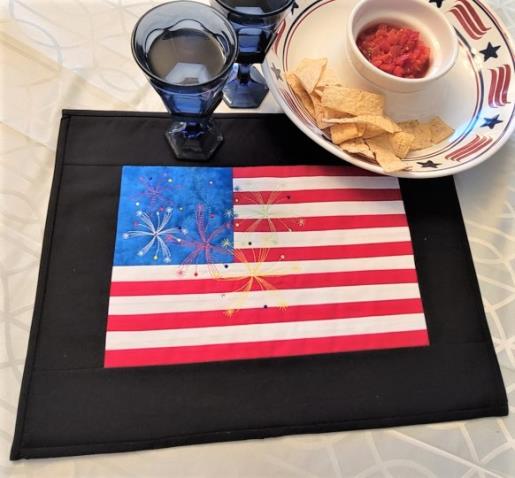
Step 1: | Read through the instructions thoroughly before beginning and assemble all the materials needed to complete the project. There are four hoopings to this project, those sections are assembled, and then the borders, backing, and binding are added as the last steps at the sewing machine. |  (Click Image to Enlarge) |
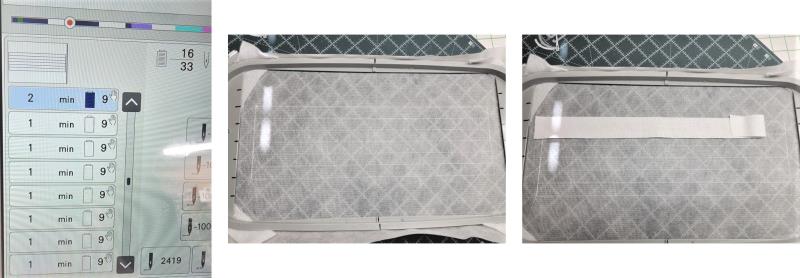
Step 2: | The design will look like this when it is loaded on the machine. Instead of four separate files to be loaded on the machine, there is just one. | 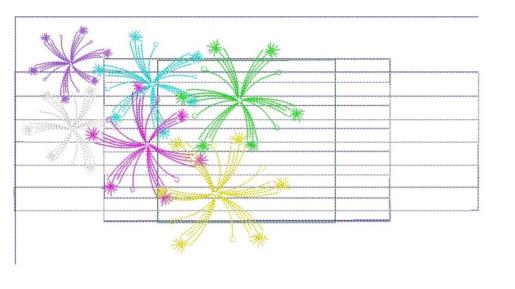 (Click Image to Enlarge) |
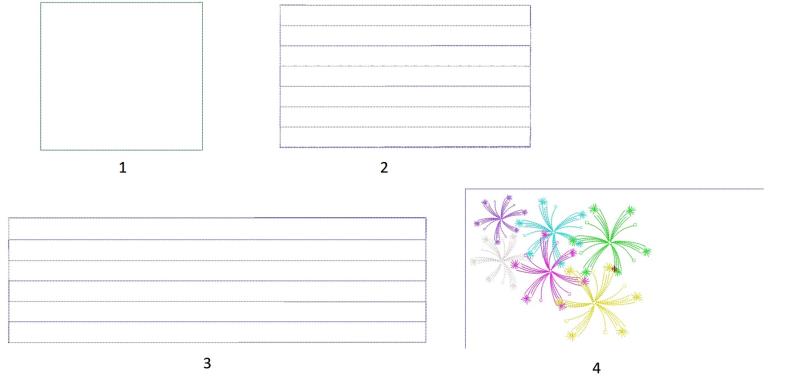
Step 3: | Here is what will be sewn in each of the four hoopings: 1. The blue field, 2. The upper right side of the flag, 3. The lower flag section, and 4. The fireworks. There is a stop in the color chart between each of the sections to be sewn. Do not sew this color; it is there to allow for rehooping. |  (Click Image to Enlarge) |
Step 4: | Starch, press, and cut all the fabric pieces. For the red and white stripes, stack them in the order they are to be stitched. The blue field is hoop one. The upper stripe sections are the smaller ones, beginning and ending with red are for the second hooping. The third hooping is the longer red and white strips beginning with white and ending with red. Load the design on the machine. Each color in the sequence is a stop as you will see. | 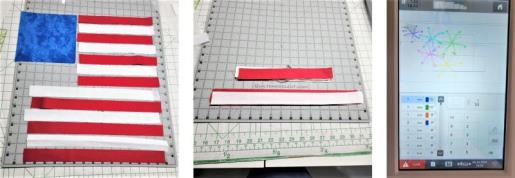 (Click Image to Enlarge) |
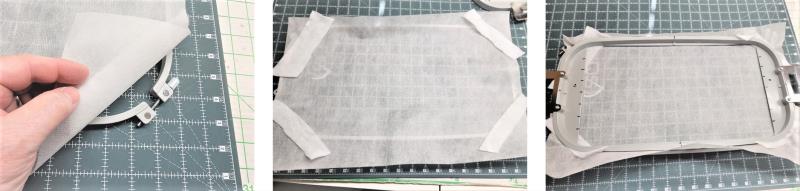
Step 5: | Here is a little tip. Some of the larger hoops for machines have the screws at the rounded corners of the hoop frame—this can present problems when just hooping a layer of poly mesh stabilizer; you’ll notice it pulls or gets sloppy in the corners instead of having even tension in those areas. To help alleviate this, place the stabilizer over the lower hoop and then lay pieces of batting in the corners. Place the inner hoop down. You’ll notice the batting takes up the slack and you’ll have even tension in all areas of the hoop! |  (Click Image to Enlarge) |
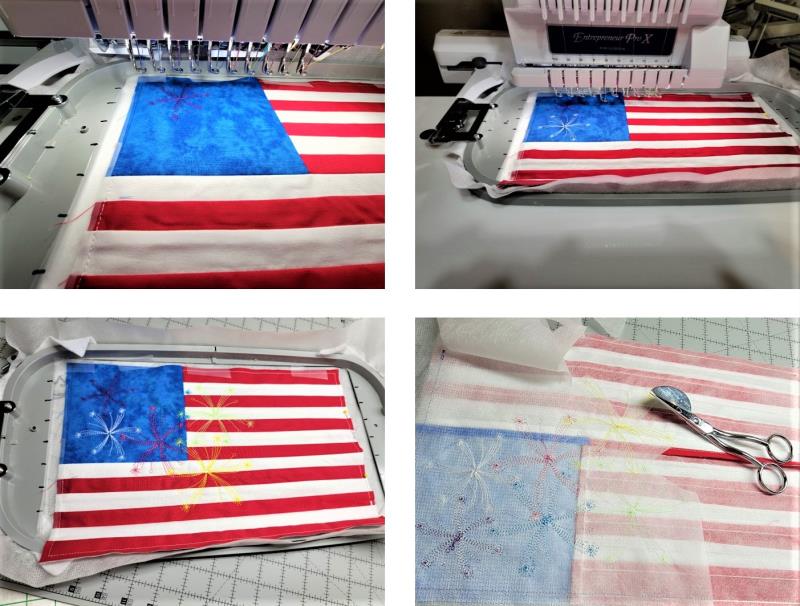
Step 6: | Hooping 1. Hoop a layer of stabilizer. Stitch Color 1, the placement line. Center the blue square of fabric over the placement line. Stitch Color 2, to tack the fabric to the stabilizer. |  (Click Image to Enlarge) |
Step 7: | Color 3 is a stop to allow re-hooping—do not sew this color. Advance to Color 4. Remove the blue fabric from the hoop. Hoop a new piece of stabilizer. | 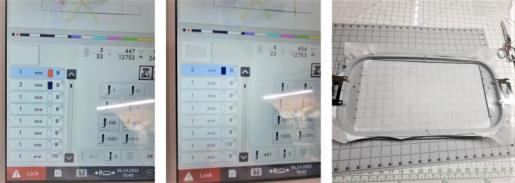 (Click Image to Enlarge) |
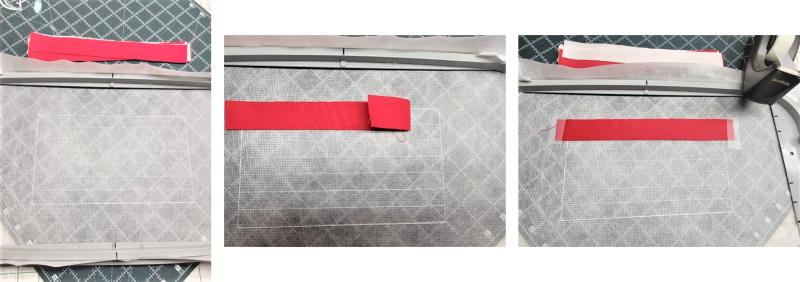
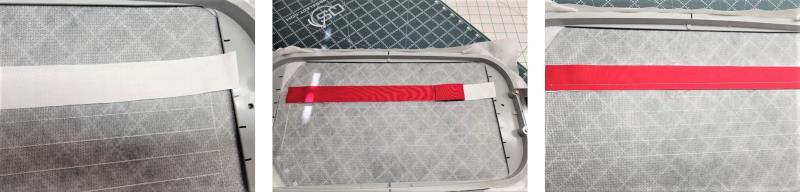
Step 8: | Place the hoop on the machine and stitch Color 5, which is the outline for the smaller strips of red and white fabric. Remove the hoop from the machine and center the first red strip of fabric over the top placement line; tape down the left and right ends. | 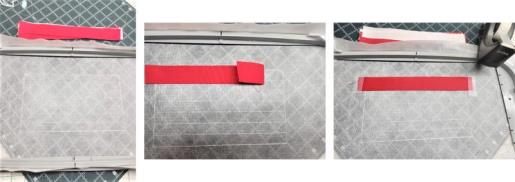 (Click Image to Enlarge) |
Step 9: | Place the hoop on the machine and stitch Color 6, a tack down line at the top of the strip. Remove the hoop from the machine and place a strip of white fabric over the red. Place the hoop back on the machine and stitch Color 7, the seam line to tack those two strips together. |  (Click Image to Enlarge) |
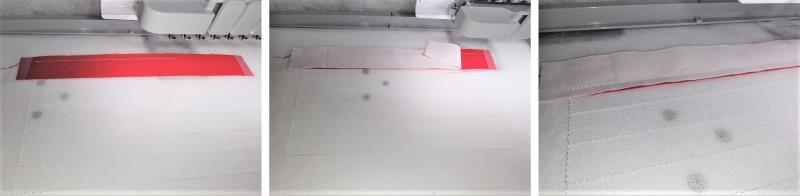
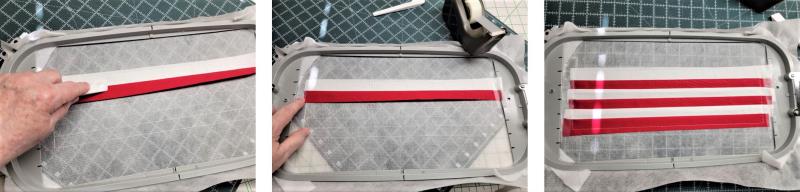
Step 10: | Remove the hoop from the machine. Flip the white strip down and use a pressing tool or your finger to crease along the seamline; tape down the left and right ends of the white strip. Place the next red strip down on top of the white. |  (Click Image to Enlarge) |
Step 11: | Place the hoop back on the machine and stitch Color 8, to seam that strip in place. Remove the hoop from the machine, flip the red strip down, finger press the seam, and tape the ends in place. Place down the next white strip over the last strip. |  (Click Image to Enlarge) |
Step 12: | Continue with the next Colors 9-11 until all the short strips have been sewn down. Color 12 will sew the last strip at the bottom Color 13 will stitch down the left side of the strip set, and Color 14 will stitch down the right side of the strip set. |  (Click Image to Enlarge) |
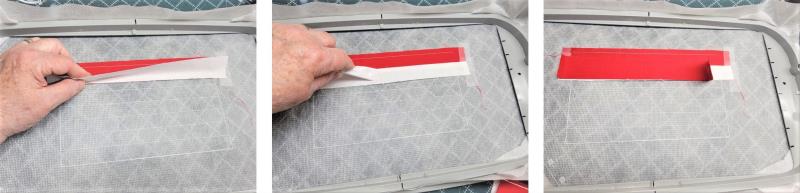
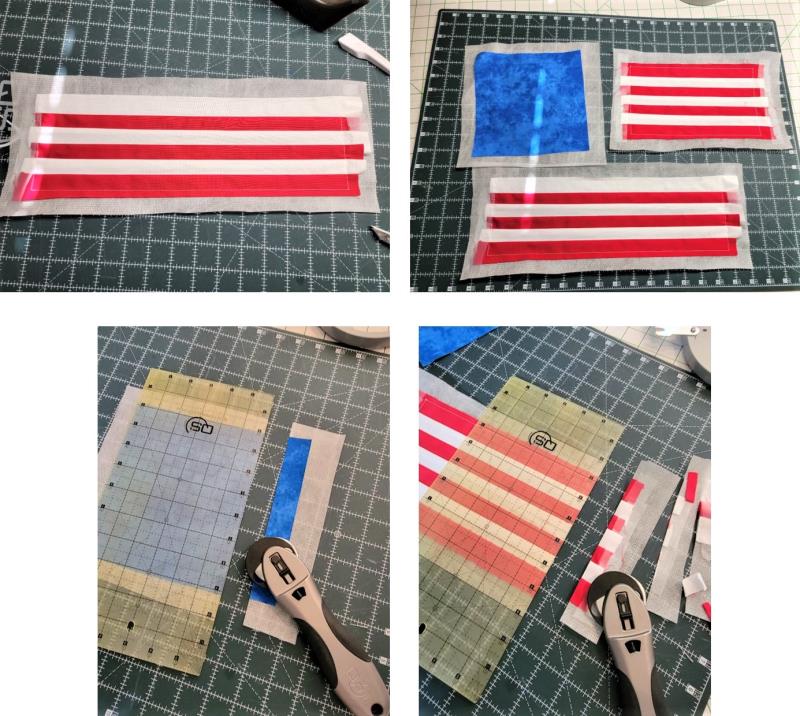
Step 13: | This completes the upper right strip set. Color 15 is a stop for re-hooping; do not sew this color. Remove the piece from the hoop and generally cut around it. Set this strip set aside until needed. | 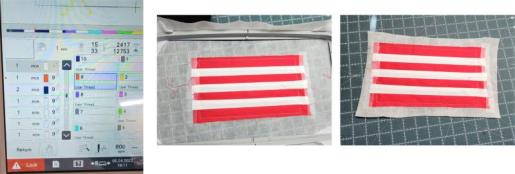 (Click Image to Enlarge) |
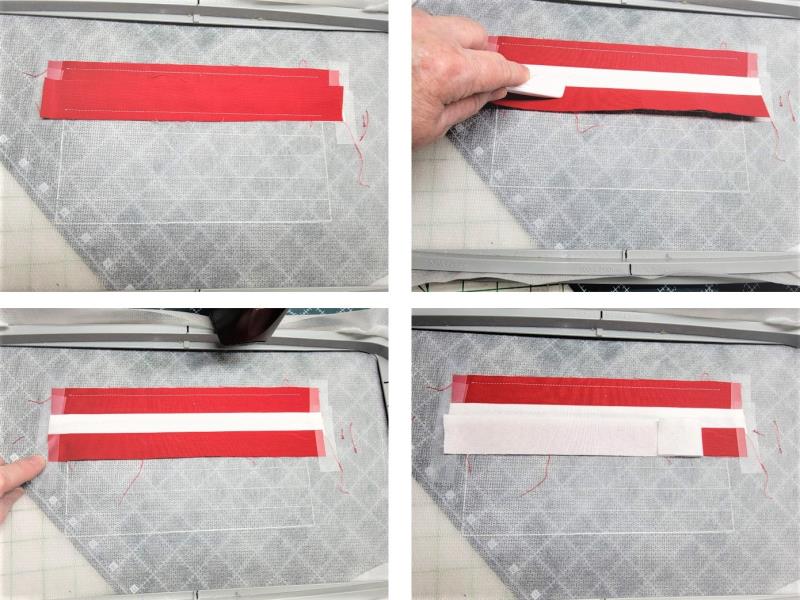
Step 14: | Advance to Color 16. The bottom row strip set is done in the same manner as the previous one. Place the hoop on the machine. Stitch Color 16, the placement line for the lower strip set. Remove the hoop from the machine and center the first white strip over the top placement line. | 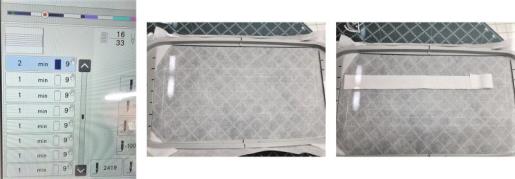 (Click Image to Enlarge) |
Step 15: | Place the hoop back on the machine and Stitch Color 17 to tack the top of the white strip to the stabilizer. Remove the hoop from the machine and tape down the left and right sides of the strip. Place a red strip over the white. Place the hoop back on the machine and stitch Color 18 to tack this strip to the previous. | 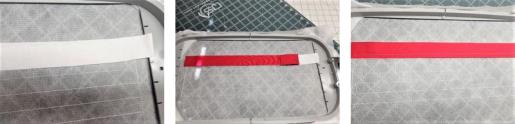 (Click Image to Enlarge) |
Step 16: | Remove the hoop from the machine, flip the red strip down, press the seam, and tape the ends down. Continue placing the strips, sewing the seam, flipping the strip down, and pressing for the remaining strips (Colors 19-22). Color 23 will stitch the lower edge of the last strip in place. Color 24 stitches down the left side of the strip set, and Color 25 stitches down the right side of the strip set. Color 26 is a stop for re-hooping; do not stitch this color. |  (Click Image to Enlarge) |
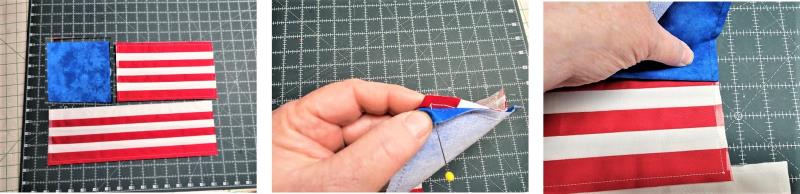
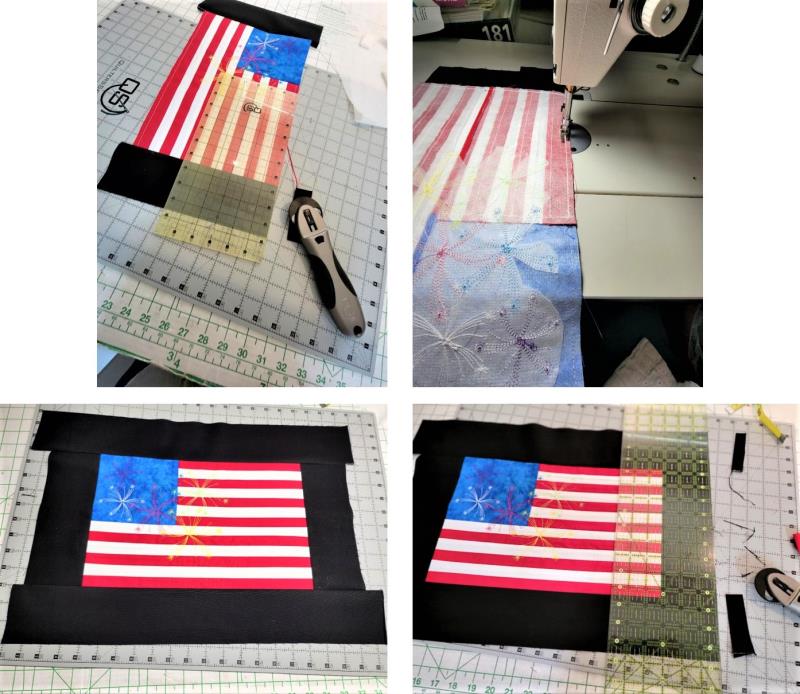
Step 17: | Remove the second strip set from the hoop and generally cut away the excess stabilizer. Using the outer stitching line of each section as a guide, trim all the way around all pieces, leaving a ¼” seam allowance. | 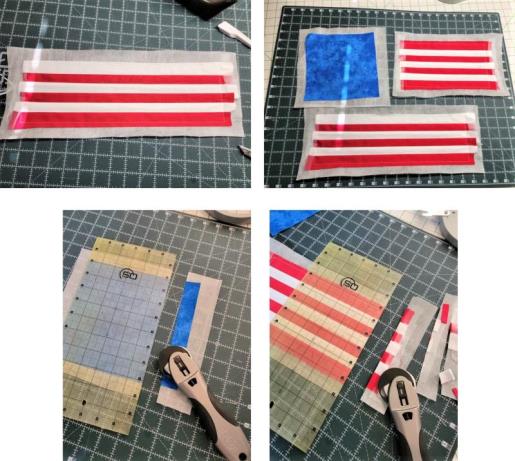 (Click Image to Enlarge) |
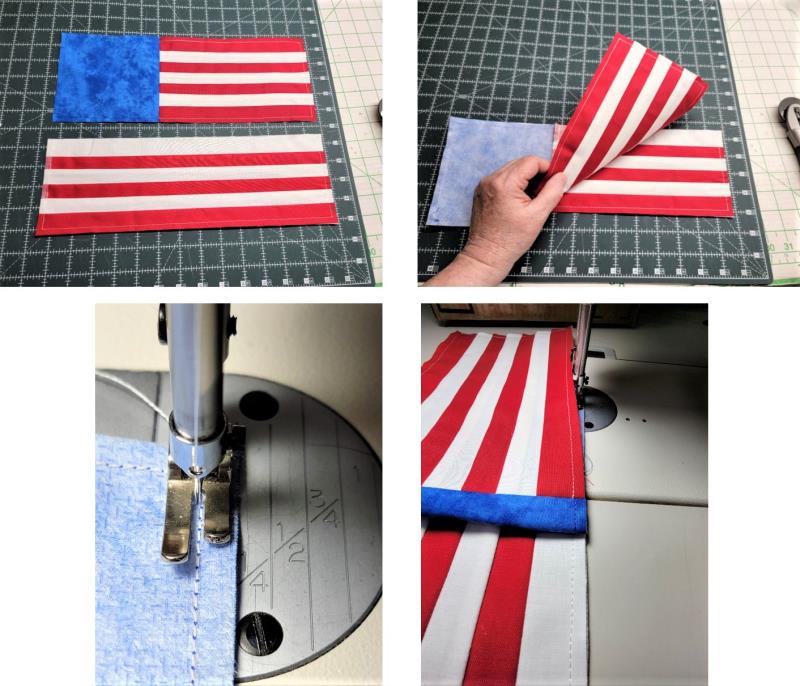
Step 18: | Align the pieces as shown. Be sure to turn the blue piece in the correct direction—the shorter side should go next to the short strip set. Beginning with the blue field and short strip set, pin the right side of the blue field to the left side of the short strip set. Meet the corners and the stitching lines. | 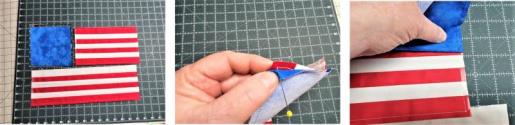 (Click Image to Enlarge) |
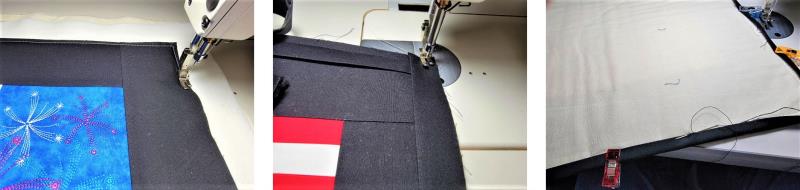
Step 19: | Using a 2.5mm stitch length sew the sections together as pinned. The needle should be just to the left of the embroidered stitching line. Press the seam toward the blue field. |  (Click Image to Enlarge) |
Step 20: | With right sides together, place the lower edge of the sections just sewn to the top of the long strip set. Again, match the corners and embroidered stitching lines. |  (Click Image to Enlarge) |
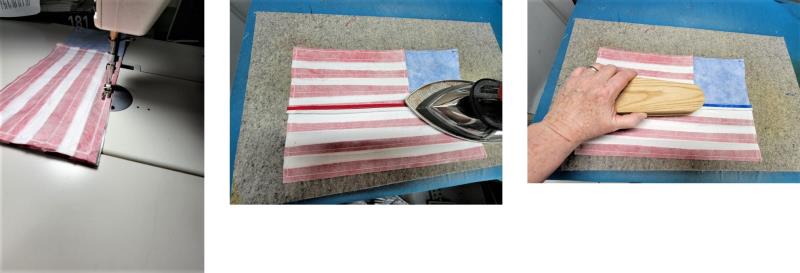
Step 21: | Stitch the seam. Press the seam open using a clapper to help flatten it. |  (Click Image to Enlarge) |
Step 22: | This completes the flag. Next will be to stitch the fireworks colors. | 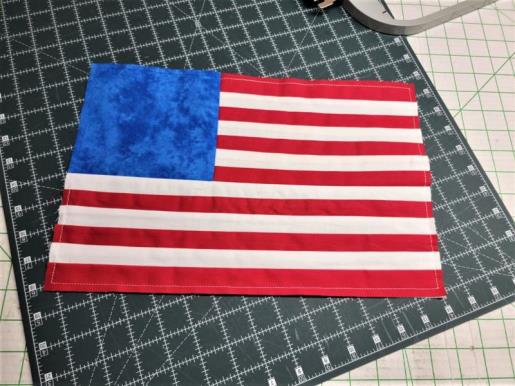 (Click Image to Enlarge) |
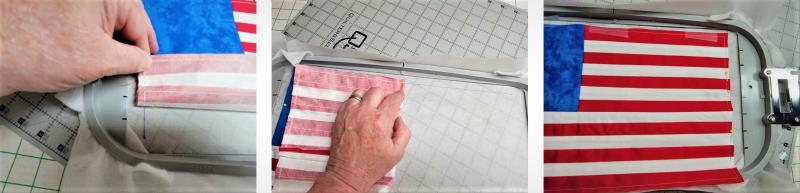
Step 23: | Advance to Color 27. Hoop a piece of stabilizer and stitch Color 27, the placement line to align the left and top of the flag to the hoop. Remove the hoop from the machine. | 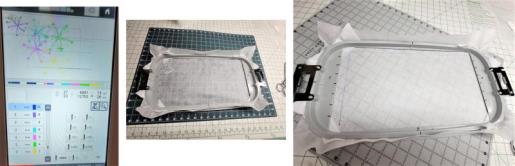 (Click Image to Enlarge) |
Step 24: | Carefully align the upper left hand corner point stitching line on the flag to the upper left corner of the placement line. Then align the left and top edges of the embroidered stitching lines of the flag to the left and top placement lines. Be sure you are aligning stitching lines and not the cut edges of the fabric to the placement line. Tape the flag in place. |  (Click Image to Enlarge) |
Step 25: | Place the hoop back on the machine and stitch the remaining Colors 28-33 for the fireworks. Remove the hoop from the machine. Cutaway the excess stabilizer from around the fireworks designs. |  (Click Image to Enlarge) |
Step 26: | Center the shorter black borders to the left and right of the flag. Place right sides together and stitch the borders on, pressing the seam toward the border. When sewing on the borders, have the flag on the top so the seam can be sewn following the embroidered line of stitching like before. |  (Click Image to Enlarge) |
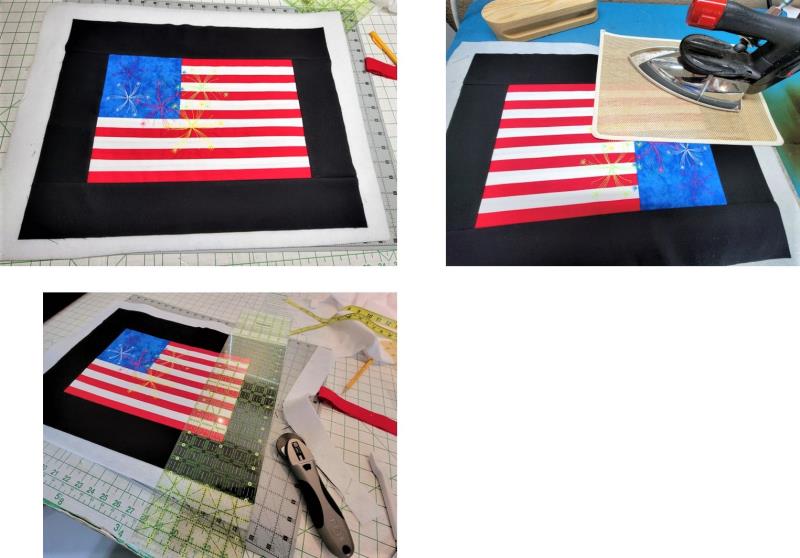
Step 27: | Trim the borders even with the top and bottom of the flag. Now center and sew on the top and bottom borders, pressing the seams toward the border and then trimming and squaring up the piece. Note: to make the project a different size, say for placemats, just alter the size of the borders. | 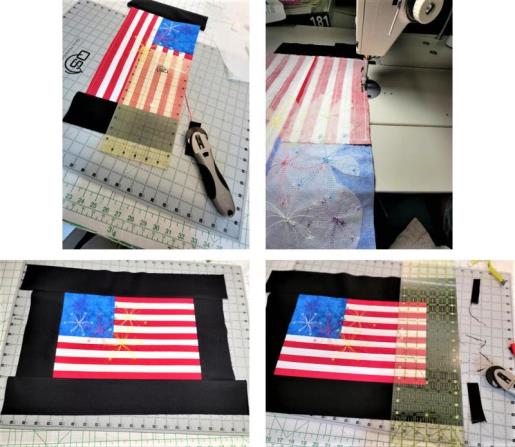 (Click Image to Enlarge) |
Step 28: | Center the piece over the fusible batting, with the fusible side up. Using a pressing cloth or mat, fuse the piece to the batting; trim the batting even with the piece. |  (Click Image to Enlarge) |
Step 29: | Fuse the remaining piece of batting to the backing. No additional quilting was done (that is an option if you wish), so pieces of Heat ‘n Bond Lite were place between the backing and top, and the pieces fused together. | 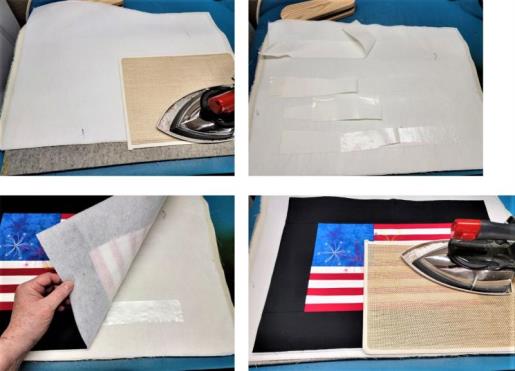 (Click Image to Enlarge) |
Step 30: | Baste the back and top together along all edges. Apply the binding with your preferred method. |  (Click Image to Enlarge) |
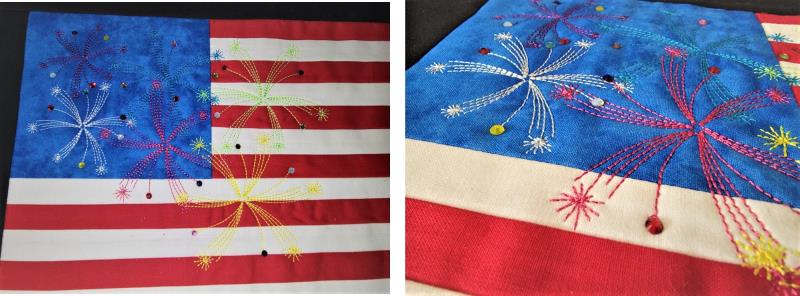
Step 31: | Each of the firework’s designs has four circles at the end of a stitching line as a guide for applying the crystals. | 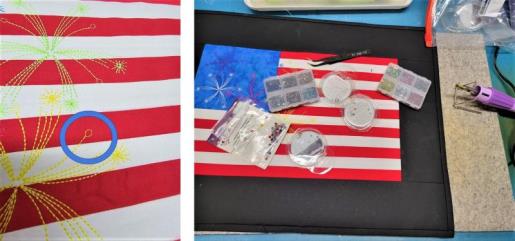 (Click Image to Enlarge) |
Step 32: | Heat the wand and choose what crystals will be placed where. | 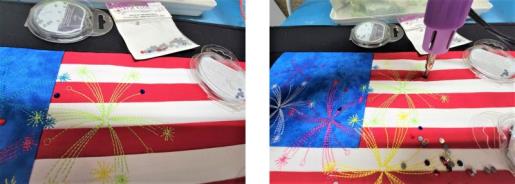 (Click Image to Enlarge) |
Step 33: | Let the crystals cool. You’ll love the way the crystals add a special sparkle to the table mat. | 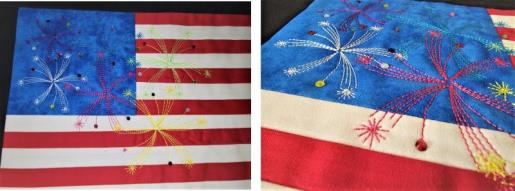 (Click Image to Enlarge) |
Step 34: | Thank you for purchasing the ITH Table Mat design and enjoy your July 4th celebrations! | 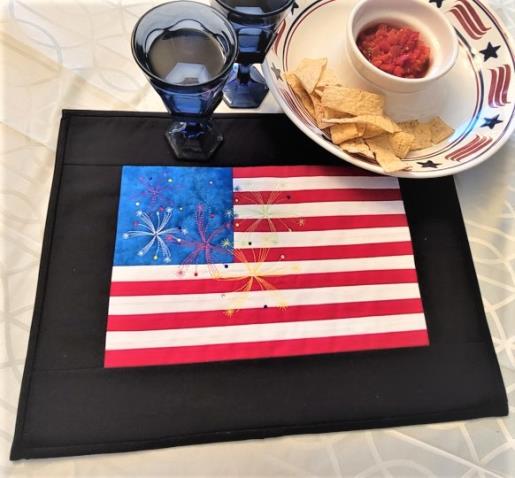 (Click Image to Enlarge) |
|