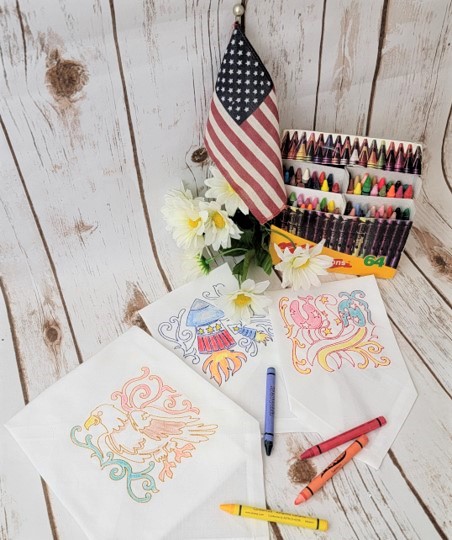
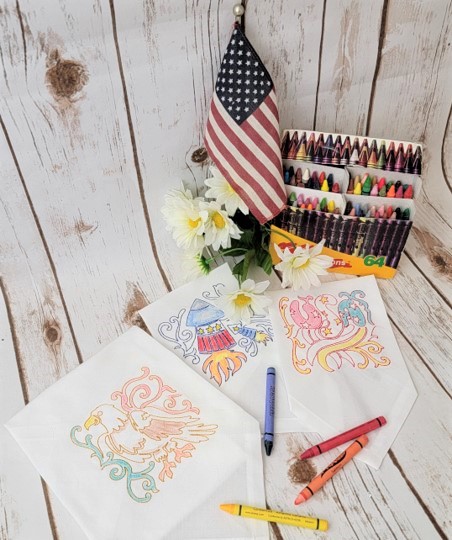
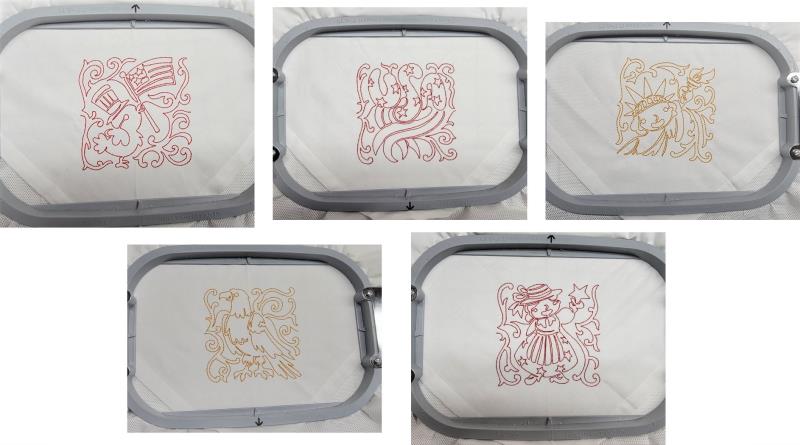
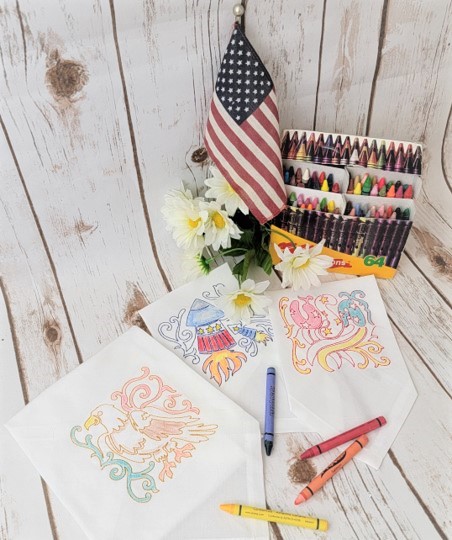
Read through the instructions thoroughly before beginning and assemble all the materials needed to complete the project. This is a fun summertime, rainy day project for any age—children especially love creating these. An adult should do the embroidery, and let the children color in the design. Choose a cotton napkin, and pre-wash. Read the instructions on the art coloring material so you know how to treat/pre-wash the fabric so the color remains through laundering.
(Click Image to Enlarge)
Step 2:
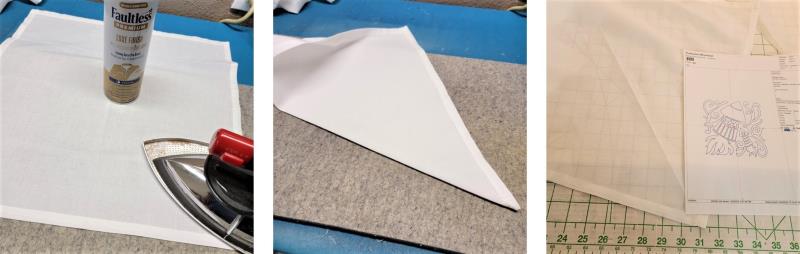
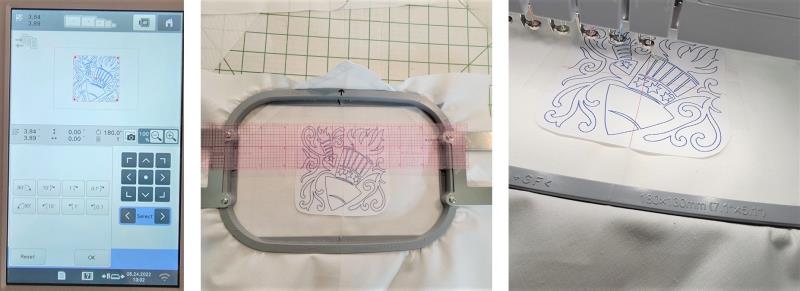
Press the napkin and then fold it in half on the diagonal. Keep any starch out of the area where the design is to be stitched and colored—starch may interfere with color retention of the product used. Print out the paper template of the design; cut out the design.
(Click Image to Enlarge)
Step 3:
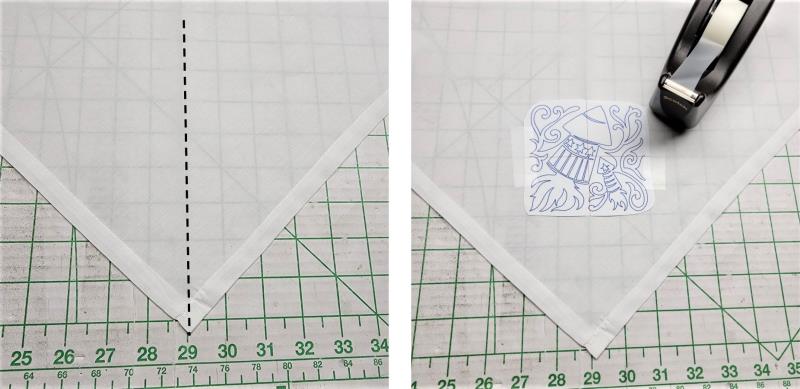
To aid in design alignment, lay the corner/fold of the napkin along a straight line. Measure up 6” from the point of the napkin and place the center of the design template at this point. Tape down the template.
(Click Image to Enlarge)
Step 4:
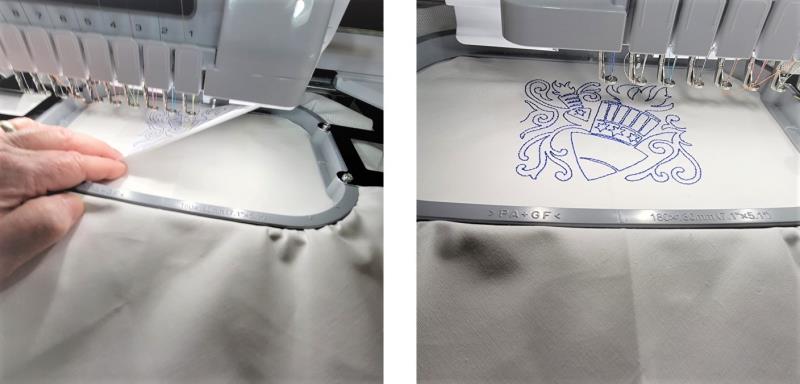
Load the design on the machine. Rotate the design 180 degrees so it is upside down. Hoop the design, upside down, with the tearaway stabilizer. Load the hoop on the machine, and load the embroidery thread.
(Click Image to Enlarge)
Step 5:
Remove the paper template and stitch the design.
(Click Image to Enlarge)
Step 6:
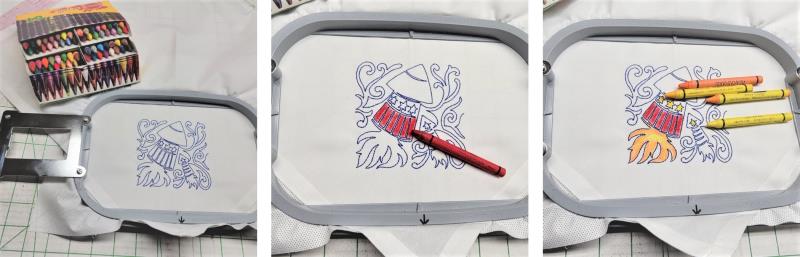
There are a couple of ways to do the coloring. If using fabric crayons, the fabric may be left taught in the hoop to make coloring easier. If using Intense inks or acrylic paint, remove the piece from the hoop and remove the excess stabilizer. Back the fabric with pressed on freezer paper (wax side of the freezer paper to the back side of the design), and follow the manufacturers’ directions for product use.
(Click Image to Enlarge)
Step 7:
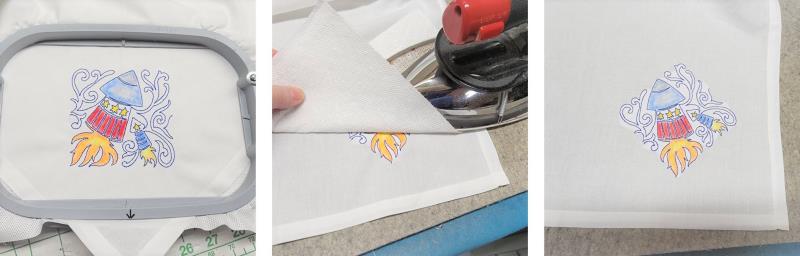
Have fun coloring in the design as little or as much as you’d like. Remove the fabric from the hoop, and remove the excess stabilizer. For fabric crayons, use several paper towels over the top of the design and press over the paper towels, blending the wax into the fabric. Change out the paper towels as needed until no more color is released.
(Click Image to Enlarge)
Step 8:
Repeat Steps 2-7 for all the remaining designs.
(Click Image to Enlarge)
Step 9:
Thank you for purchasing the designs! Have fun creating napkins for summer time picnic and pool side celebrations.
Ramona Baird has been in the embroidery industry for over 23 years. She and her husband owned a commercial and retail embroidery store in Arizona for many years. She is an experienced digitizer having been mentored by award-winners Pat Williams and Lindee Goodall. Ramona is a contributor to “Creative Machine Embroidery” magazine having 5 covers to her credit. Ramona has worked for Wilcom America and served many years as Education Director for the American Sewing Guild. With a degree in fashion design, she is able to design and execute patterns which Pat Williams says are “out of the box” in creativity and application. Ramona likes to challenge the boundaries of embroidery and bring new and exciting designs, ideas, and projects to EmbroideryDesigns.com. She wants embroiderers of all levels to increase their skills and enjoyment in using their embroidery machine for gift-making and personal pleasure.