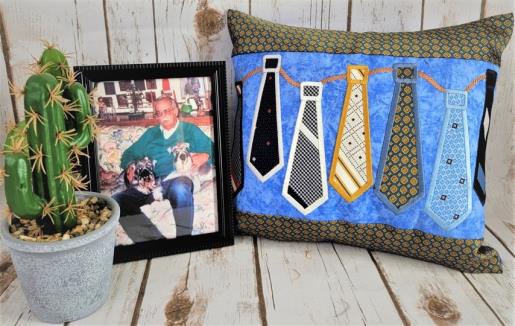
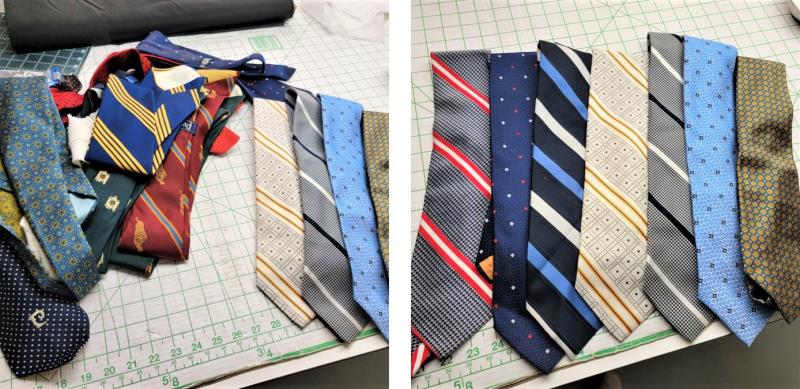
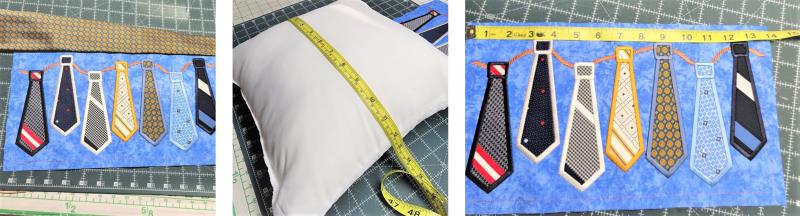
Read through the instructions thoroughly before beginning and assemble all the materials needed to complete the project. Adjust the measurements as needed for the project you are creating. Shown will be a 12” pillow with top and bottom borders, and a pillow back. Choose the ties you’d like to use for your project. Determine how they will be laid out in sequence as the project is sewn.
(Click Image to Enlarge)
Step 2:
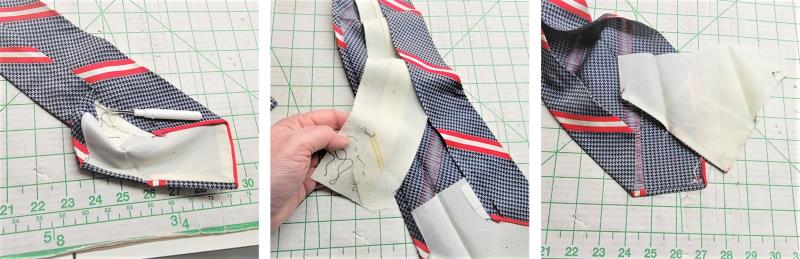
The ties need to be taken apart. Use a seam ripper to undo the stitches on the back of the tie. Remove the interfacing (save it for use as header fabric when sewing jackets) and remove the lining at the tip of the tie.
(Click Image to Enlarge)
Step 3:
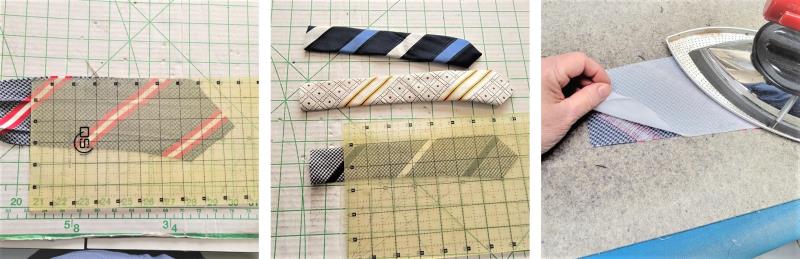
Determine how to cut the fabric. Each tie section should be cut 3” x 5”. If the smaller end of the tie is wide enough, you may be able to open up and just use that portion, saving the other parts of the tie for future projects. Press the tie in the direction of the grainline of the fabric so it doesn’t stretch. Interface the back with a fusible knit interfacing.
(Click Image to Enlarge)
Step 4:
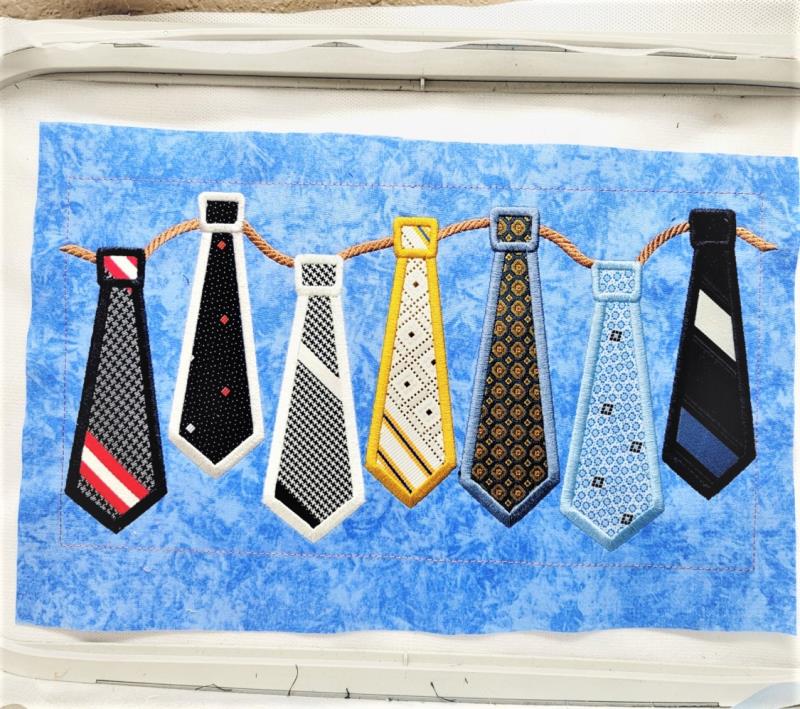
Determine the general layout order of the ties for stitching—this may change as you stitch. Audition fabric on which the ties are to be stitched. There is a rope or twine that “holds up” the ties, like on a clothes line, so keep that in mind. For the project, a light blue batik was used to be rather like a skyline. Press the background fabric well.
(Click Image to Enlarge)
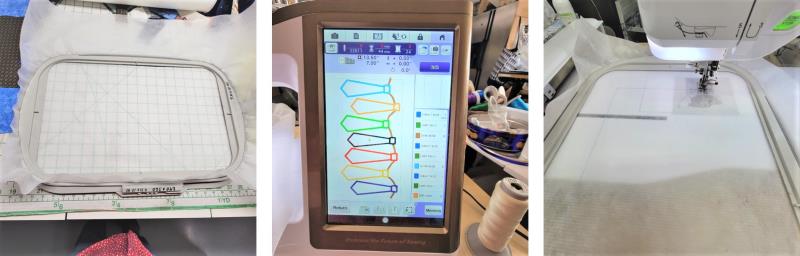
Step 5:
Hoop a layer of poly mesh stabilizer and load the tie design on the machine, rotating if necessary; set the colors and stops on the machine if need be. Place the hoop on the machine and stitch Color 1, the placement line.
(Click Image to Enlarge)
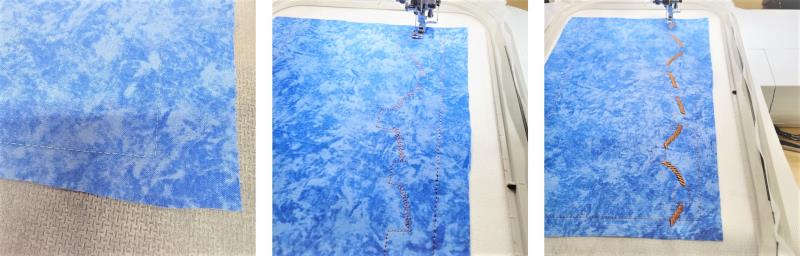
Step 6:
Center the background fabric over the placement line. Stitch Color 2, to tack down the fabric. Stitch color 3, the rope.
(Click Image to Enlarge)
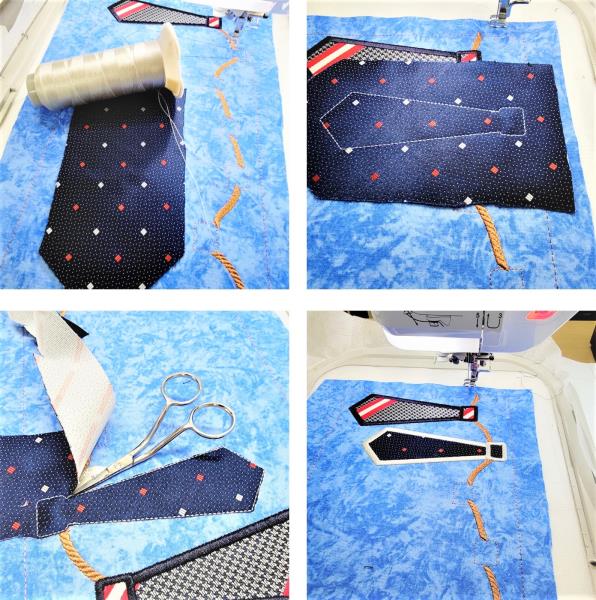
Step 7:
To sew the ties, there are three steps: placement line, tackdown (after which the tie fabric is trimmed), and the satin border. Use the same color for each of these three steps, changing the thread color as needed for each tie. Color 4 is the first placement line. Place down the fabric keeping in mind how any prints or stripes will end up in the final stitching. Stitch Color 5 to tack down the tie fabric.
(Click Image to Enlarge)
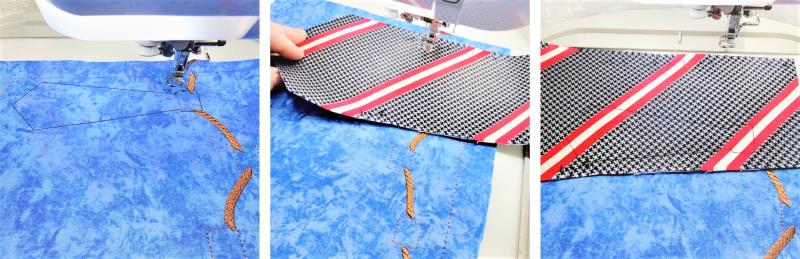
Step 8:
Remove the hoop from the machine and carefully cut the fabric up to the stitching line. Place the hoop back on the machine and stitch Color 6, the satin stitching.
(Click Image to Enlarge)
Step 9:
Choose the thread color for the second tie and load it on the machine. Continue stitching the placement line, placing down the fabric, stitching the tack down, trimming, and then stitching the satin outline.
(Click Image to Enlarge)
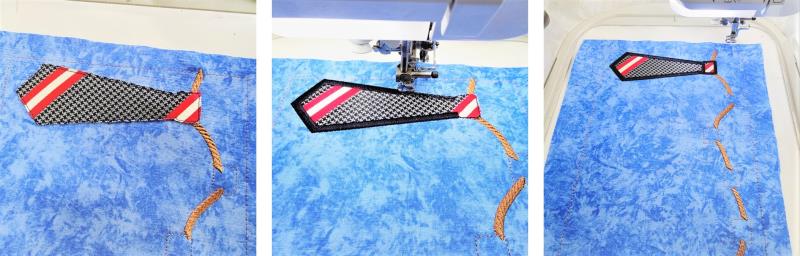
Step 10:
Continue stitching the remaining five ties, choosing thread colors and following the color sequence.
(Click Image to Enlarge)
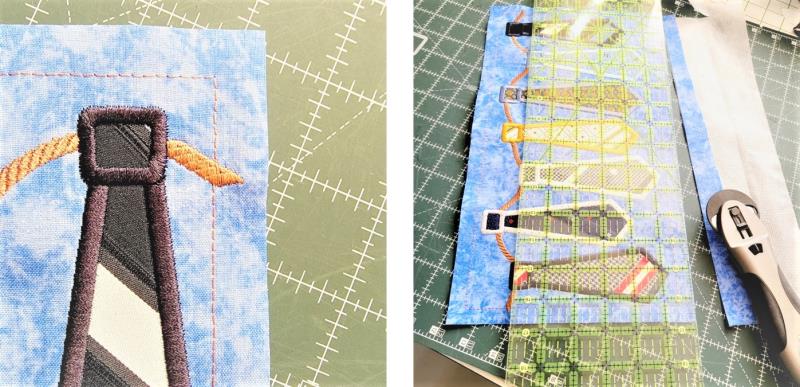
Step 11:
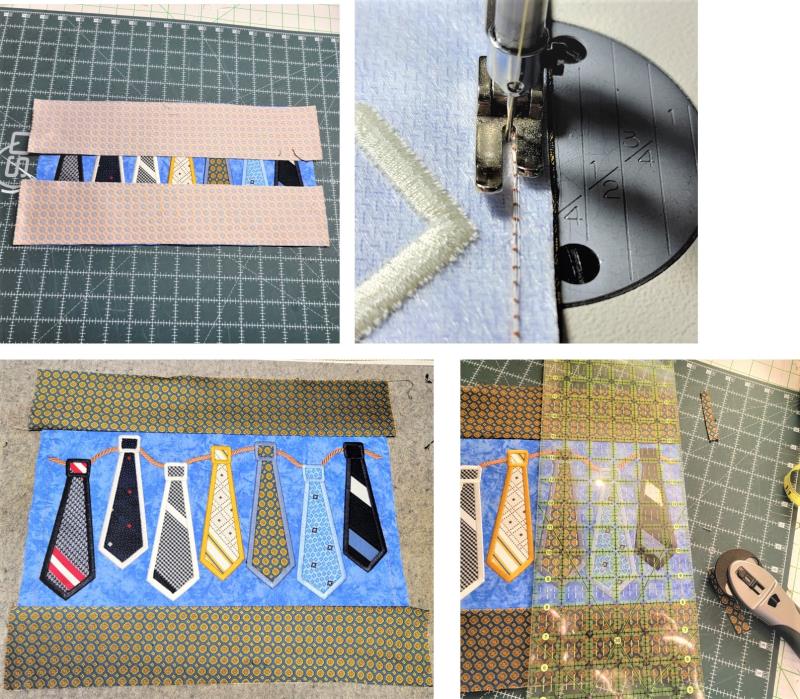
After all the embroidery is done, trim the excess fabric to ¼” seam allowances using the outer most stitching outline as a guide.
(Click Image to Enlarge)
Step 12:
Now here is where you can vary the size for the pillow. Audition fabrics you think would look good as borders
(Click Image to Enlarge)
Step 13:
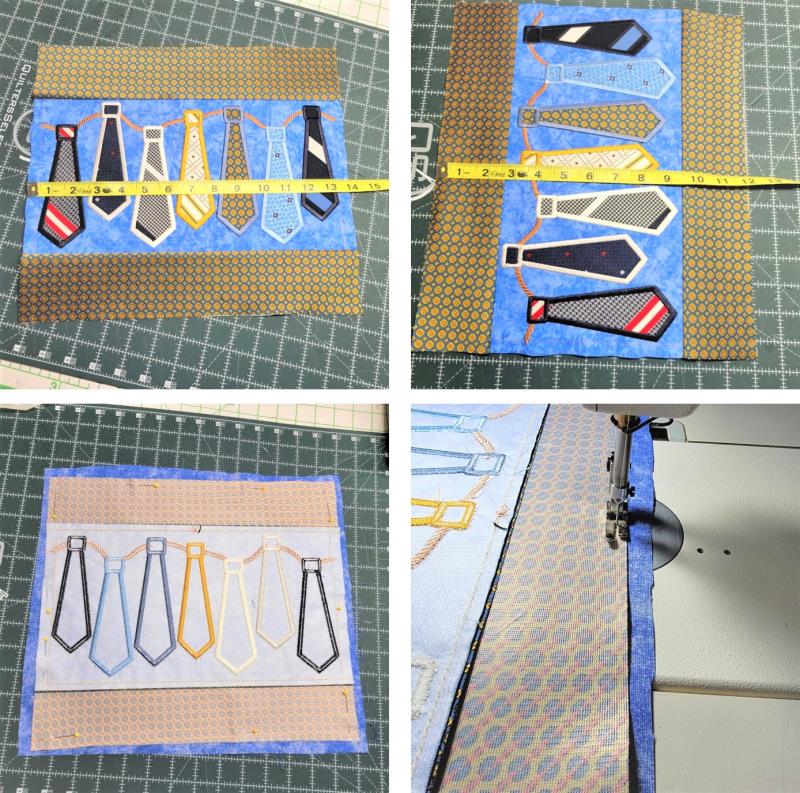
or use tie fabric if you don’t have fabric scraps you think look good. Measure the pillow, or determine the finished size for the pillow. Measure the height and width of the embroidered piece width wise (minus seam allowances).
(Click Image to Enlarge)
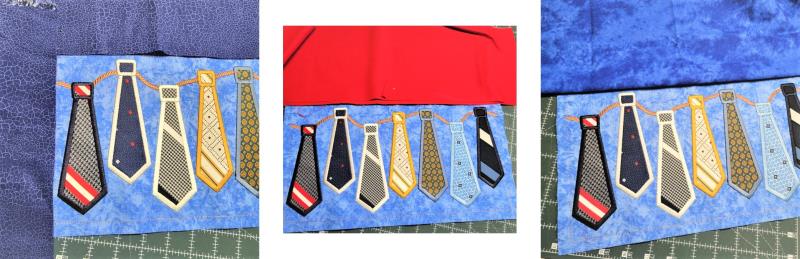
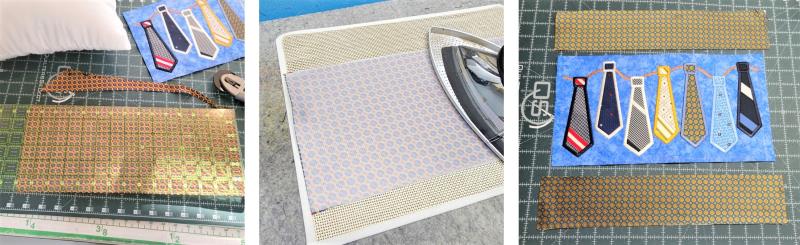
Step 14:
Cut the border pieces the desired size, PLUS SEAM ALLOWANCES, making them a bit longer than needed. Press knit interfacing on the back of the pieces. These two border pieces were made from the rest of one of the ties used in the embroidery, 3” x 15”.
(Click Image to Enlarge)
Step 15:
Place the top and bottom borders right side over the top and bottom edges of the embroidered piece and pin them together. Using the back side of the embroidery as a guide, stitch just to the left of the outer stitching line; press the seams toward the border. Trim the border edges even with the embroidered piece. If adding side borders, do that now.
(Click Image to Enlarge)
Step 16:
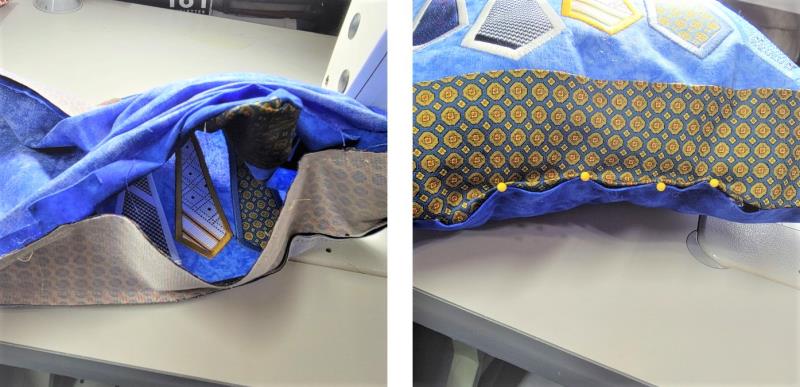
Measure the length and width of the front pillow and cut the backing piece about ½” larger all the way around. Place right sides together and pin. Stitch all the way around with a ¼” seam allowance, leaving an opening at the bottom for turning.
(Click Image to Enlarge)
Step 17:
Trim the excess backing fabric even with the front fabric. Turn the pillow right side out through the opening, forming the corners well. Insert the pillow form or stuff the pillow with fiber-fil; turn in the seam allowances at the lower edge, and hand stitch the opening closed.
(Click Image to Enlarge)
Step 18:
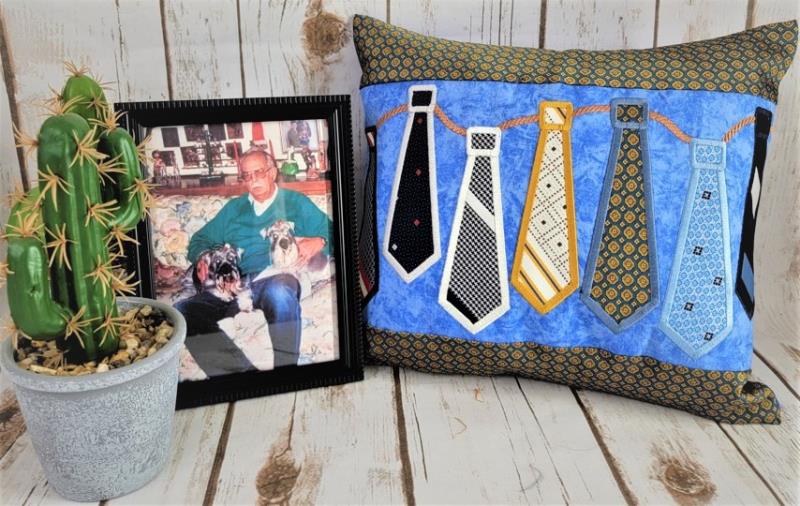
Thank you for purchasing the Father’s Day Tie embroidery design. This would make a great gift any time for children, grandchildren, siblings, or any other relative. Be sure to give a photo of the gentleman to whom the ties belonged to complete the gift. This will be a treasured gift for years to come.
Ramona Baird has been in the embroidery industry for over 23 years. She and her husband owned a commercial and retail embroidery store in Arizona for many years. She is an experienced digitizer having been mentored by award-winners Pat Williams and Lindee Goodall. Ramona is a contributor to “Creative Machine Embroidery” magazine having 5 covers to her credit. Ramona has worked for Wilcom America and served many years as Education Director for the American Sewing Guild. With a degree in fashion design, she is able to design and execute patterns which Pat Williams says are “out of the box” in creativity and application. Ramona likes to challenge the boundaries of embroidery and bring new and exciting designs, ideas, and projects to EmbroideryDesigns.com. She wants embroiderers of all levels to increase their skills and enjoyment in using their embroidery machine for gift-making and personal pleasure.