Read through the instructions thoroughly before beginning and assemble all the materials needed to complete the project. The photo shows the pieces that are needed.
(Click Image to Enlarge)
Step 2:
The embroidery file is set up like this; it includes all three sections with a color stop between each section to allow re-hooping. Instead of loading three files, one for each section, it is easier to have all the sections in one file.
(Click Image to Enlarge)
Step 3:
The file includes hooping 1, the stars/1776. The second hooping will stitch the seam lines for sewing the stripes and stitching the 2nd Amendment text. Hooping three will again seam the stripes and then stitch the quoted text. Do not color sort and do not change the order.
(Click Image to Enlarge)
Step 4:
After all the embroidery stitching is done then the blue field is sewn to the top right, and then that set is sewn to the lower section.
(Click Image to Enlarge)
Step 5:
1st Hooping: hoop a layer of poly mesh. Take the blue fabric and smallest piece of Battilizer to the machine. Load the embroidery file.
(Click Image to Enlarge)
Step 6:
Color 1 will stitch a placement line. Center the Battilizer and blue fabric on top of the placement line. Stitch Color 2 to tack all layers together. Stitch Color 3 the stars and 1776. Do not stitch Color 4—it is a stop to allow rehooping. Remove the piece from the hoop and set aside until the assembly steps.
(Click Image to Enlarge)
Step 7:
2nd Hooping: hoop a layer of poly mesh stabilizer. Take one larger piece of Battilizer to the machine, along with the smaller red and white strips. Advance to Color 5 to stitch the placement line. Center the batting over the placement line. Stitch Color 6 to tack the Battilizer to the stabilizer. Next will be to sew the strips.
(Click Image to Enlarge)
Step 8:
Beginning with a short red strip, lay the top of the strip about 3/8” over the top edge of the placement line Stitch Color 7 to tack the top of the red strip in place. Place a white strip on top of the red, matching all the cut edges.
(Click Image to Enlarge)
Step 9:
Stitch Color 8 to sew the seam line. Note: the strips are actually cut wider than needed so that they are easier to handle and align at the machine. If need be, trim the seam line after it is stitched for each section leaving about a ¼” seam allowance. Now flip the white strip down and using your finger nail or a tool, “press” the seam. Use the Scotch tape along the edges as you go to hold the pieces down as they are being stitched, keeping the tape out of the sewing area. Now place a red strip over the white, matching the cut edges.
(Click Image to Enlarge)
Step 10:
Stitch Color 9, the seam. Trim the seam, if necessary, flip the red piece down and finger press it; tape the ends down. Place a white strip over the last red strip. Continue sewing the strips (Color stops 10-14), trimming, and finger pressing the seams until the section is done. Stitch Color 15, the left side tack down. Stitch Color 16, the right-side tack down.
(Click Image to Enlarge)
Step 11:
Stitch Color 17, the 2nd Amendment text. Color 18 is a color stop for rehooping; do not sew this color. Remove the tape and remove the piece from the hoop and set aside until assembly.
(Click Image to Enlarge)
Step 12:
3rd Hooping: hoop a piece of poly mesh stabilizer. Sew Color 19, the placement line. Center the remaining piece of Battilizer over the placement line. Sew Color 20 to tack it down. This section is basically a repeat of the last, using the longer red and white strips, beginning with a white strip. Lay one white strip about 3/8” above the top of the placement line, sew Color 21 to tack the strip down at the top. Lay a red strip over the white, matching all cut edges.
(Click Image to Enlarge)
Step 13:
Continue sewing, trimming, pressing, and taping down the ends of the strips Colors 22-29. Stitch Color 30, which will sew the quoted text. Remove the piece from the hoop and remove all the tape. Next will be assembly and finishing.
(Click Image to Enlarge)
Step 14:
On all three pieces, trim all the edges, leaving a ¼” seam allowance. Beginning with the blue field and upper right section lay them as shown.
(Click Image to Enlarge)
Step 15:
Place the blue field right side down over the top right section. Align the right line of the blue field over the left side of the top flag section; these stitching lines need to match exactly. Pin and sew the seam following along the embroidered seamline and staying just to the left of the stitching line.
(Click Image to Enlarge)
Step 16:
Press the seam toward the blue field and use a clapper to flatten the seam. Now will be to sew the lower section to the sections just sewn. Lay the pieces as shown.
(Click Image to Enlarge)
Step 17:
Again, placing right sides together, aligning the bottom stitching line of the top sections to the top stitching line of the bottom section. Pin the sections together and stitch. Press the seam open and use a clapper to flatten it.
(Click Image to Enlarge)
Step 18:
Cut the Heat ‘n Bond Lite the same size as the finished flag. Following the instructions, press the Heat ‘n Bond Lite to the back of the piece, let cool, and then remove the paper. Center the piece over the backing. Trim the backing 1” away from the flag, all the way around. Double fold the edges over the edges of the flag; press and stitch the edges down.
(Click Image to Enlarge)
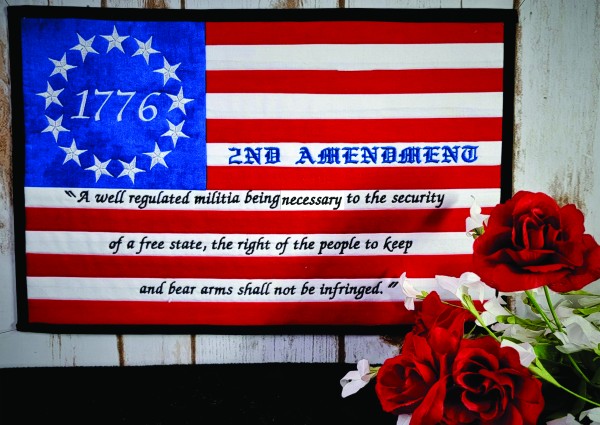
Step 19:
Thank you for purchasing the 2nd Amendment Wallhanging design and congratulations on completing the beautiful wallhanging. To use the flag in another way, just stitch the 1776 and stars in the blue field, but omit stitching the other text sections.
Ramona Baird has been in the embroidery industry for over 23 years. She and her husband owned a commercial and retail embroidery store in Arizona for many years. She is an experienced digitizer having been mentored by award-winners Pat Williams and Lindee Goodall. Ramona is a contributor to “Creative Machine Embroidery” magazine having 5 covers to her credit. Ramona has worked for Wilcom America and served many years as Education Director for the American Sewing Guild. With a degree in fashion design, she is able to design and execute patterns which Pat Williams says are “out of the box” in creativity and application. Ramona likes to challenge the boundaries of embroidery and bring new and exciting designs, ideas, and projects to EmbroideryDesigns.com. She wants embroiderers of all levels to increase their skills and enjoyment in using their embroidery machine for gift-making and personal pleasure.