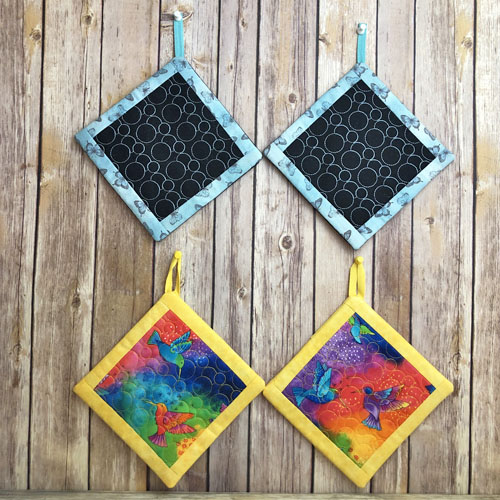
Everyone needs new practical potholders. These are quick to make and include Insul-Brite® and cotton batting to protect your fingers. These are completely made in the hoop. No hand stitching required.
Cut a piece of cotton batting to fit your hoop. This batting was cut 12” x 15” to fit an 8” x 8” hoop. Hoop it tautly in the hoop. This will serve as your stabilizer.
Step 2:
(Click Image to Enlarge)
Cut fabrics of your choice per the materials list above. Iron all fabrics with spray starch for a neat final project. Fold one of the 7 ½” x 9” back fabrics in half resulting in a 9” x 3 ¾” folded rectangle.
Step 3:
Run the 1st color stop (CS1) as an outline of the project and a placement line for the center fabric.
(Click Image to Enlarge)
Step 4:
Spray adhesive on the back of your center fabric. Align it very carefully within the center square placement line as the tack down stitch is only 1/8” inside this square.
(Click Image to Enlarge)
Step 5:
Run CS2 to tack down the center fabric.
(Click Image to Enlarge)
Step 6:
Run CS3 to quilt the center block.
Step 7:
Lay the first border strip face down over the center block. Align the left side of the strip with the center square fabric. The ends of the strip should extend ¾” beyond the top and bottom outside placement lines. Run CS 4 to stitch it down.
Step 8:
Fold the border out and finger crease across the seam. Tape the edges of the border down over the outside placement lines.
Step 9:
Add the top, right side and bottom borders as in Steps 7 and 8 using CS, 5, 6 and 7, taping down each border as you go.
Step 10:
Remove the hoop from the machine, do not unhoop. Lay the hoop face down on a flat surface. Place the Insul-Brite® square over the back of the embroidery. It does not matter which side of the Insul-Brite® is facing up. Tape down all sides.
Step 11:
(Click Image to Enlarge)
Return the hoop to the machine and run CS8 to tack down the Insul-Brite®.
Step 12:
(Click Image to Enlarge)
Remove the hoop from the machine. Do not unhoop. Trim the Insul-Brite® right next to the tack down stitches on all sides.
Step 13:
You have a choice to place the hanging loop wherever you would like it. In the samples the 6” twill tape was folded in a triangle and taped into the left corner. On the picture of the aqua and black potholder the twill tape was simply folded in half and taped to the corner. I liked the way the corner turned better with it being simply folded in half in the second picture. Place the raw ends of the tape about even with border strips with the fold into the center of the potholder. These are held in place with cellophane tape as it is easier to remove if it is stitched through.
(Click Image to Enlarge)
Step 14:
(Click Image to Enlarge)
Align the raw edges across the top border strip with the folded edge towards the inside of the potholder.
Step 15:
Place the 7 ½” x 9” remaining back fabric across the potholder. The 9” width goes across the pot holder. Align the bottom edge of the fabric with the bottom edge of the bottom border.
(Click Image to Enlarge)
Step 16:
Tape around the edges of the fabric. The top tape in this photo should have been placed at the top fabric. Placed as it is the final seam stitched through the tape and I don’t like having to remove embroidery tape that has stitched through. Run the last CS for the final seam.
(Click Image to Enlarge)
Step 17:
Alternately you can tape just both sides of the back pieces. You can add a little cellophane tape to the outside edges for the final back piece of fabric so the presser foot doesn’t get caught where the back fabric over laps the folded fabric. This is done to prevent the presser foot from lifting that final piece of fabric. There should be a small amount of space between the final seam and the final fabric so that the fabric can be used to turn the project right side out.
(Click Image to Enlarge)
Step 18:
(Click Image to Enlarge)
Lay the ¼” mark on the final seam stitches and trim around the block with a ¼” seam allowance.
Step 19:
Trim off the corners at a 45° angle.
(Click Image to Enlarge)
Step 20:
(Click Image to Enlarge)
Turn the project right side out by pulling the bottom of the potholder through the long back lining. Use a tube turner stick to assist in poking out the corners. The flip the folded lining strip over the top of the potholder. Press the potholder.
Step 21:
Cut a strip of fusible webbing the width of the inside of the folded strip. Slip it under the edge of the fold so that none of the webbing is exposed. Following the manufacturer’s instructions fuse the strip into place.
(Click Image to Enlarge)
Step 22:
(Click Image to Enlarge)
Allow the potholder to cool completely then remove the paper from the fusible web.
Step 23:
(Click Image to Enlarge)
Iron the potholder again with steam to fuse the flap to the back of the potholder.
Step 24:
Congratulations the ITH Potholder is complete. Make many from all your scraps of materials to have on hand for last minute gifts.
Award winning Digitizer, Embroidery Educator, Author and a Consultant to the Industry, Pat Williams has 30 years of experience in the embroidery industry. Pat has won multiple awards for her digitizing expertise including the 2007 Impressions Awards Grand Championship, Best of Show as well as the 1st and 2nd Place Awards. Pat’s love of digitizing has afforded her the opportunity to write numerous articles for Impressions magazine in the United States and Images Magazine in Europe. In 2001 Pat was named “Embroidery Educator of the Year.” For many years Pat taught digitizing seminars at the ISS Shows in Long Beach, CA and for Compucon software. She now resides in Tucson, AZ.