Gather all supplies and review instructions before beginning
(Click Image to Enlarge)
Step 2:
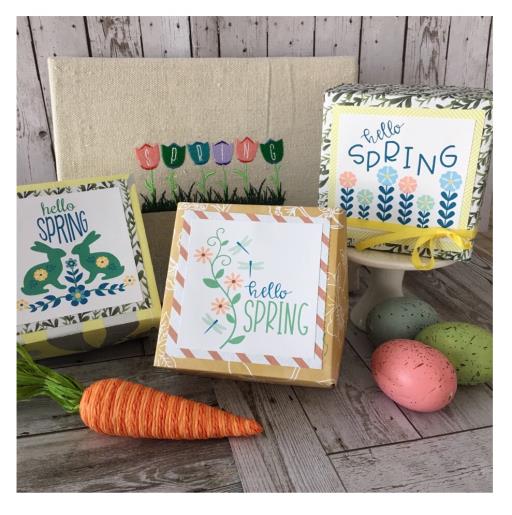
Bring into your Word Program by inserting one of the design linked for this tutorial. I have chosen the Hello Spring tulips . Resize to approx 3.” X 3.”. Keep in mind the treat box lid will measure 4.5” x 4.5” when construction is complete and you will be placing this printed design after trimming onto a cut piece of cardstock measuring 3 3/4" x 3 3/4". Print out design onto the solid cardstock. Set aside.
(Click Image to Enlarge)
Step 3:
Decide which two patterned cardstock sheets you want to use for the box lid and box bottom. Trim the box bottom cardstock to 11 3/8” x 11 3/8”. Do not trim cardstock for box lid.
The next steps will show you how to fold your cardstock to construct box. Make your fold lines as crisp as possible as this will help when constructing the box top and bottom. The folding pattern is used for both. The folding may get a little confusing but once you get it, it should be pretty easy going forward.
(Click Image to Enlarge)
Step 4:
Place your bottom cardstock sheet pattern down as this is the side you will want showing for the outside of the box. Fold in half diagonally into a triangle. Open it back up and fold the other side diagonally so that your creases will form a folded “X”.
(Click Image to Enlarge)
Step 5:
Keeping pattern side down. Fold each corner into the center of the creased “X”. Fold in two opposite sides to form a rectangle. Open back up and repeat for the two other sides.
(Click Image to Enlarge)
Step 6:
Now here’s the tricky part. Undo the top and bottom folds and flaps. Refer to picture. Fold in point A to B and point C to B. Pinch the corners so that the fold goes inward and the two edges of the box meet up (Refer to pic) fold over the flap. Repeat for the other side. Secure the flaps in place with a small piece of tape.
(Click Image to Enlarge)
Step 7:
Repeat construction steps for your coordinating cardstock for the lid. You do not need to trim down the lid cardstock as this will fit over the bottom. You now have a box lid and bottom.
(Click Image to Enlarge)
Step 8:
Using your third sheet of patterned coordinating cardstock cut a 3 ¾” x 3 ¾” square.
(Click Image to Enlarge)
Step 9:
Trim your printed Print Art cardstock to fit within that square. Center on top and glue in place. Next center on top of box lid and glue in place.
(Click Image to Enlarge)
Step 10:
Tie your ribbon around the box for the finishing touch. And you are done! Great job! Repeat steps for your additional boxes using the print art designs linked to this tutorial.