Step 1: | Read through the instructions thoroughly before beginning and assemble all the materials needed to complete the project. Work carefully and do not rush in doing this project—enjoy the process! Exquisite thread was used for the project, as was clean ‘n tear tearaway stabilizer. Press all the fabrics well. |  (Click Image to Enlarge) |
Step 2: | Load the three designs on the machine and stitch them in order. Hoop one layer of tearaway with one piece of white Kona cotton. Again, be sure the straight of grain of the fabric runs in the direction the design will stitch. Because the machine I have has the widest part of the hoop width-wise, the design has to be turned 90 degrees. Thus, the lengthwise grain of the fabric has to run in the same direction as indicated by the arrows. For me, that was for panels one and three. For panel 2, I was able to stitch the design without turning it, so the lengthwise grain of the fabric was run in the same direction. If you’ve had trouble with registration on some designs, this may be one of the causes—run the lengthwise grainline in the same direction as the design. | 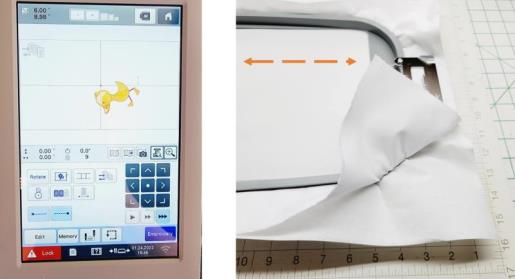 (Click Image to Enlarge) |
Step 3: | The first color to stitch will be an outline—this will be used for eventually trimming away some of the stabilizer and centering the batting and backing fabric after the design stitches. | 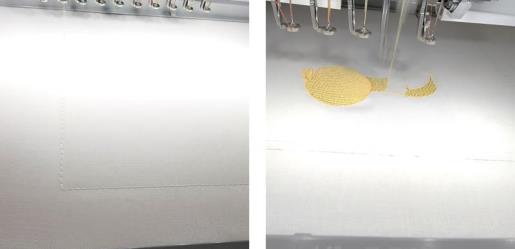 (Click Image to Enlarge) |
Step 4: | Continue stitching all the colors, stopping the machine before the last color to allow trimming of the stabilizer and placing on the batting and backing. | 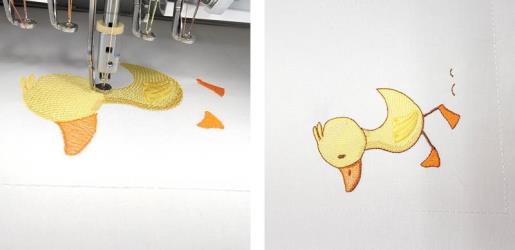 (Click Image to Enlarge) |
Step 5: | Remove the hoop from the machine. Now the stabilizer will be trimmed inside the first stitching line and around the embroidery. Flip the hoop over. | 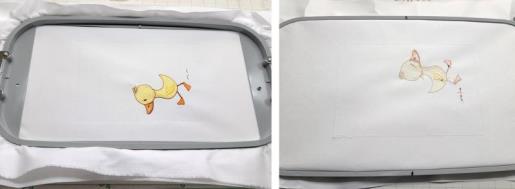 (Click Image to Enlarge) |
Step 6: | Using the small applique scissors, very carefully trim inside the stitching line. The outer stabilizer needs to remain intact to keep the rest of the fabric stabilized in the hoop. Begin at one corner. | 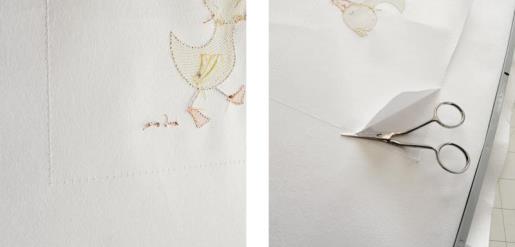 (Click Image to Enlarge) |
Step 7: | Trim close to the stitching line, cutting all the way around to release the center portion of the stabilizer. Now use the scissors to trim close to the embroidery. DO NOT TEAR THE STABILIZER—CUT IT! If the stabilizer was torn, there is a chance the quilting stitches would not register properly because the fabric was moved while ripping the stabilizer. | 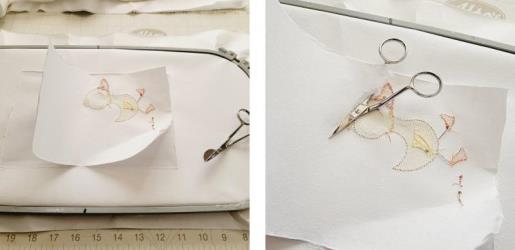 (Click Image to Enlarge) |
Step 8: | The back of the piece should look like this. Now center and layer the batting and backing over the back of the embroidery. | 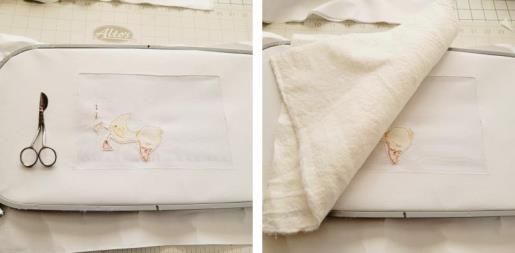 (Click Image to Enlarge) |
Step 9: | Temporary spray adhesive may be used or pieces of embroidery tape to temporarily hold the pieces in place. | 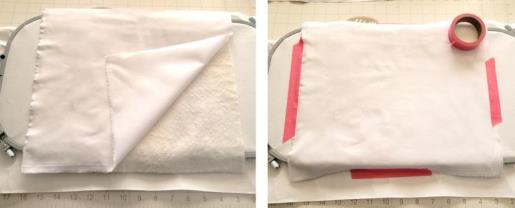 (Click Image to Enlarge) |
Step 10: | Very carefully place the hoop back on the machine. Next there will be stitches to tack all the layers together and then the stipple quilting will stitch. | 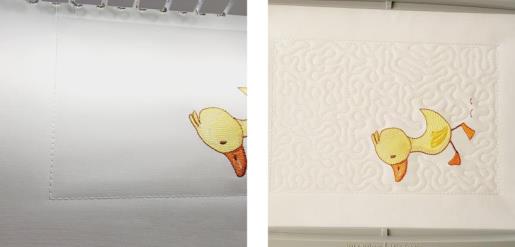 (Click Image to Enlarge) |
Step 11: | Remove the piece from the hoop. Fold back the top fabric and then fold back the stabilizer along the outer stitching line. Use your finger nail to crease the stabilizer and then carefully tear it away, working in small sections. Do this all the way around the piece. | 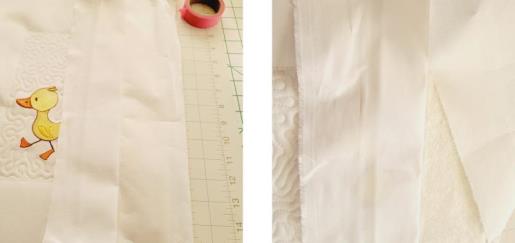 (Click Image to Enlarge) |
Step 12: | Piece one is done. Feel how soft the embroidery is on the duck because of the light density and notice how the Florentine fill adds dimension and movement to the embroidery. | 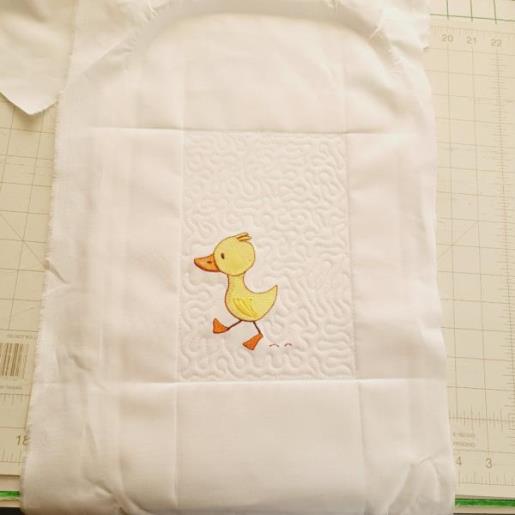 (Click Image to Enlarge) |
Step 13: | Repeat the same steps of hooping and stitching for the second (middle) panel. After the banner outline stitches, stop the machine. The organza fabric will be used as the applique fabric for the banner. An option is to use a light pink cotton or linen fabric if you don’t have organza. I liked the organza because it made the area look more like banner fabric. | 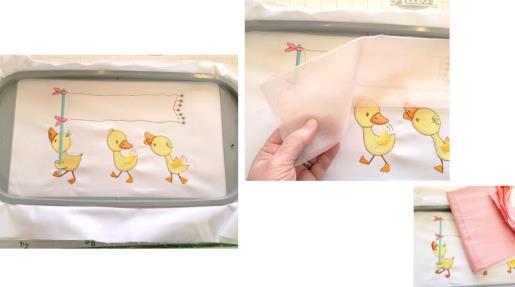 (Click Image to Enlarge) |
Step 14: | Fold the fabric in thirds—this intensifies the color. | 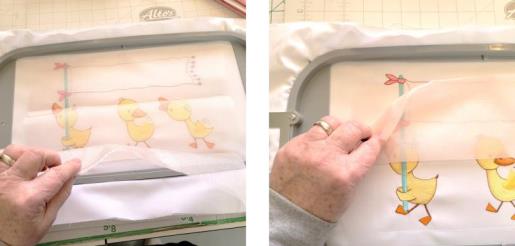 (Click Image to Enlarge) |
Step 15: | Use pieces of embroidery tape to hold the organza in place. Stitch the organza in place and then stop the machine before the outer tackdown and border stitching. Remove the hoop from the machine, and trim away the excess organza. | 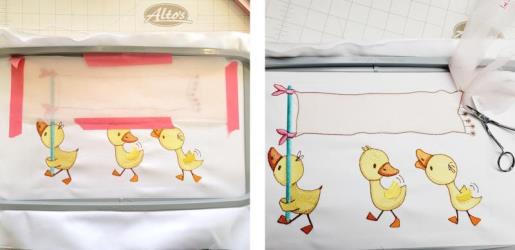 (Click Image to Enlarge) |
Step 16: | Place the hoop back on the machine and stitch the tack down and satin border on the banner. Remove the hoop from the machine again. | 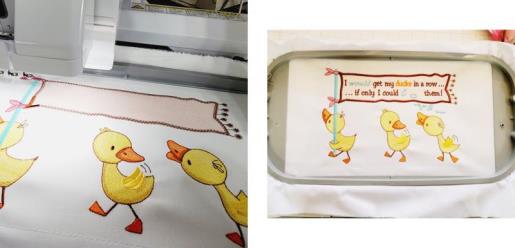 (Click Image to Enlarge) |
Step 17: | As was done with panel one, trim away the stabilizer from inside the first (outer) stitching line. Layer the batting and backing, and securing it with embroidery tape. Place the hoop back on the machine. | 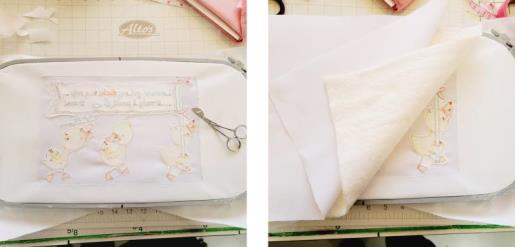 (Click Image to Enlarge) |
Step 18: | Stitch the last color to tack the layers together and do the stipple quilting. Remove the piece from the hoop and remove the excess stabilizer from around the edges like before. | 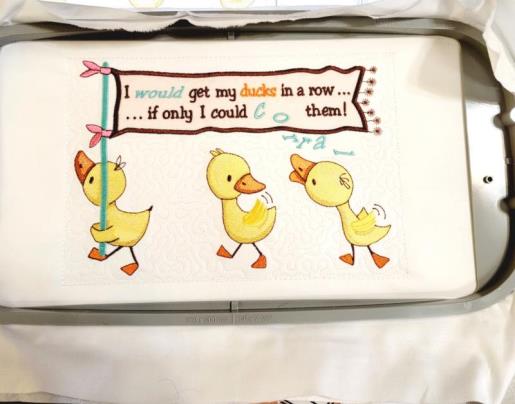 (Click Image to Enlarge) |
Step 19: | Panel three is done just like the first panel. Load the fabric and stabilizer in the hoop. Stitch the colors and stop the machine before the last color stitches. Remove the hoop from the machine and remove the stabilizer inside the first stitched line. | 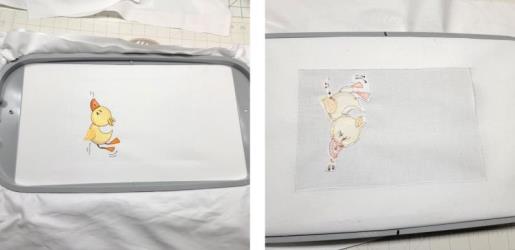 (Click Image to Enlarge) |
Step 20: | Layer the batting and back fabric, securing it. Place the hoop back on the machine and stitch the last color tacking all the layers together and stitching the stipple quilting. | 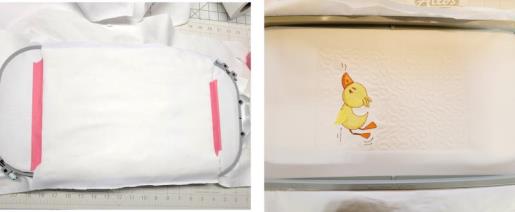 (Click Image to Enlarge) |
Step 21: | At this point if you do not have a frame, the pieces can be sewn together, matching up the lines, trimming and binding. This would be a cute wall hanging if done in this manner. | 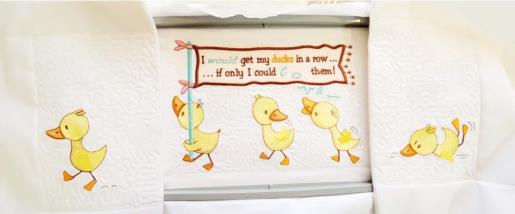 (Click Image to Enlarge) |
Step 22: | I have found that all frames vary in size slightly, so you’ll have to do a little measuring and marking for the frame you have. I just folded along the outer stitching line to test the fit and see what I needed to do from this point. I ordered this frame several years ago. It is still sold on AckfeldWire.com as of the time of this project writing. I cannot guarantee the dimensions will be exactly what this frame are, so be sure to measure and figure out what you need to cut and do for binding. | 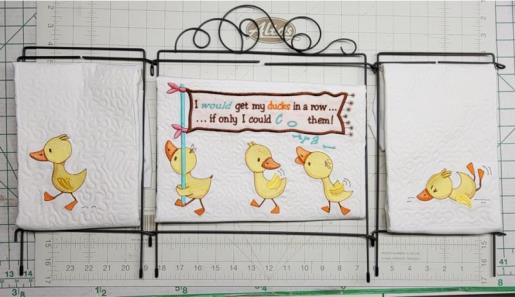 (Click Image to Enlarge) |
Step 23: | There are a lot of options for binding. Use a plaid, or pick up a color that is in the embroidery—the choice is yours. I wanted something a little more subtle, so I opted to use the same white Kona cotton and use the aqua embroidery thread to do a decorative machine stitch to secure it in place. | 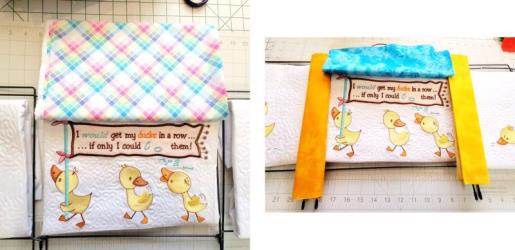 (Click Image to Enlarge) |
Step 24: | Using the measurement of the frame, trim the embroidery to the dimensions needed. For panels one and three, I cut ¼” beyond the outer stitching line on all sides. This left a little room around each side because I knew when the binding was added, it would add a little dimension and fill the frame. | 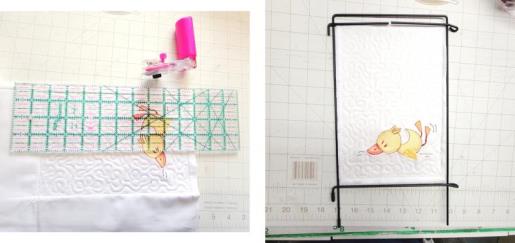 (Click Image to Enlarge) |
Step 25: | Repeat for the remaining panels. Because the middle panel was digitized to fit not only the frame but also the hoop size, I had to find the middle of each panel on the sides, align them, and then determine how much to cut off the top and bottom of this middle panel. | 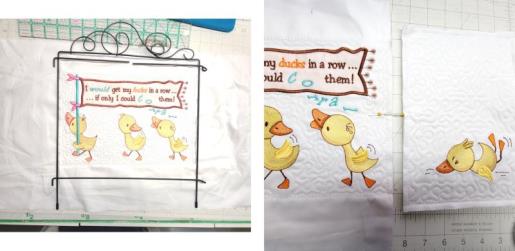 (Click Image to Enlarge) |
Step 26: | To do this, fold the pieces in half, matching the outer stitch line; place a pin in the middle. | 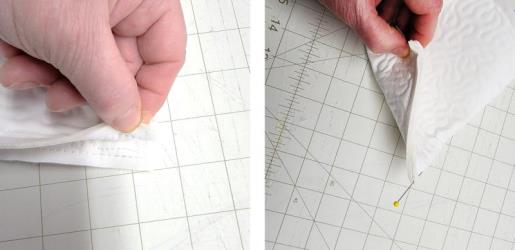 (Click Image to Enlarge) |
Step 27: | |  (Click Image to Enlarge) |
Step 28: | Carefully keeping the pins aligned, I used a ruler to determine how much I was going to need to cut. I used a herra marker and ran it along the top edge of panel 2 to make a crease mark, and repeated for the bottom. After double checking the measurements, then the middle panel fabric was cut to size. | 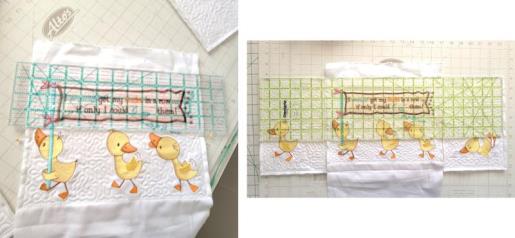 (Click Image to Enlarge) |
Step 29: | Binding strips were cut 2 ¼” wide and sewn together, pressed lengthwise and then stitched to the front of each piece, mitering the corners. The binding was then pressed to the back. | 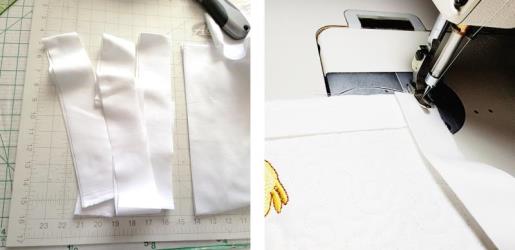 (Click Image to Enlarge) |
Step 30: | Using the aqua thread, this decorative stitch was chosen to stitch down the binding from the front. | 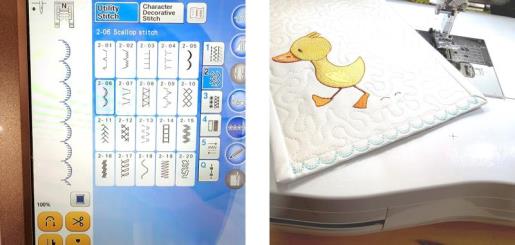 (Click Image to Enlarge) |
Step 31: | After all the binding is stitched down, then remove any placement/tackdown stitches that show—this really should just be at the top and bottom of the middle panel. | 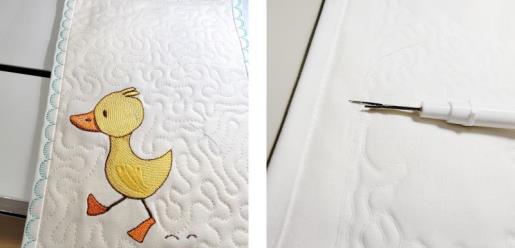 (Click Image to Enlarge) |
Step 32: | Now all that is left is to add ribbon hangers. |  (Click Image to Enlarge) |
Step 33: | Lay the pieces wrong side up and place the frames over the pieces to determine the ribbon hanger placement. | 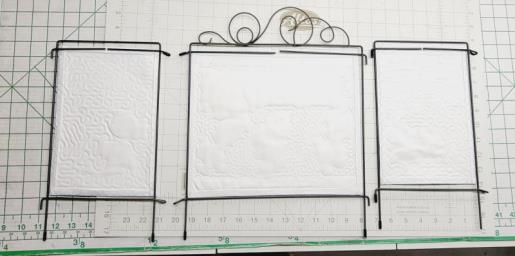 (Click Image to Enlarge) |
Step 34: | Cut the ribbon in 6” lengths, fold in half and pin in place as determined. I was able to place the ribbon inside each top corner with the folded edge of the ribbon just ever so slightly below the top edge of the piece. Pin the ribbons in place. Repeat for all panels. From the right side, stitch in the ditch to secure the ribbons in place. | 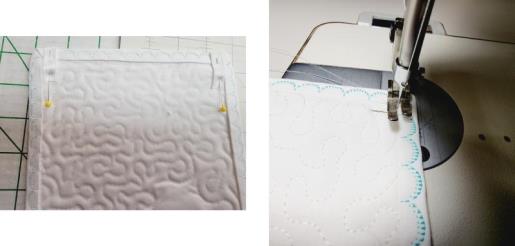 (Click Image to Enlarge) |
Step 35: | Slide the ribbons onto the wire frame. Insert the end of one wire panel into the loop of the other, replacing the little black rubber nubs to hold them in place. | 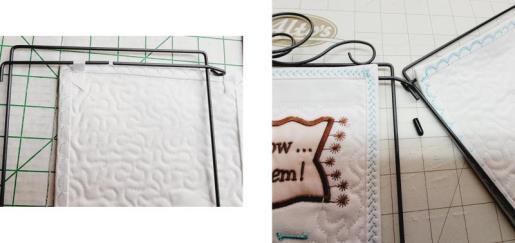 (Click Image to Enlarge) |
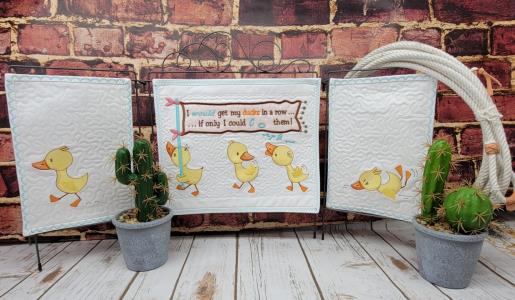
Step 36: | Is this too cute or what! You can have a lot of fun with this and no matter in your office or home, it is sure to get some fun comments. It is also a reminder not to take things too seriously and none of us always has our ducks in a row, no matter how hard we try. | 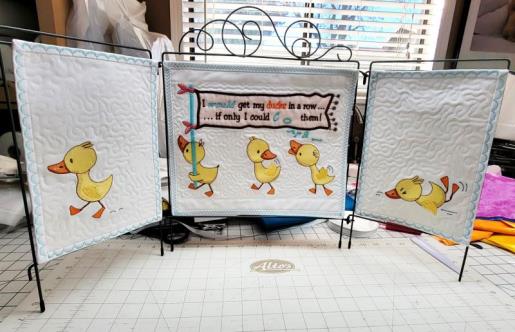 (Click Image to Enlarge) |
Step 37: | Congratulations! You’ll be able to use this frame for other projects, too. Change out the panels seasonally and maybe order others to gift with embroidery to family and friends. |  (Click Image to Enlarge) |
|