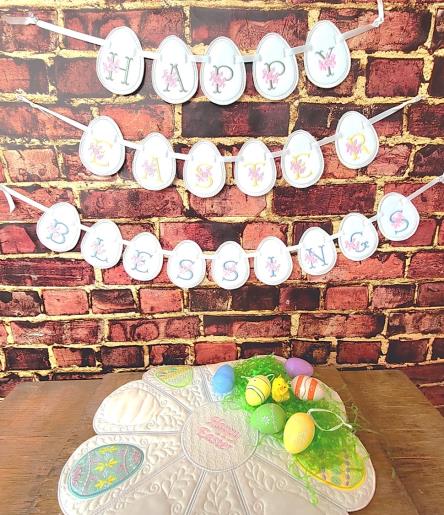
Read through the instructions thoroughly before beginning and assemble all the materials needed to complete the project. Determine the colors for the project. The letters can be done in soft pastels or bright embroidery colors—the choice is yours. I chose to do all the flower colors the same, but did the letters for each word in three different colors: Happy was stitched in soft green, Easter was stitched in yellow, and Blessings was done in pale blue.
(Click Image to Enlarge)
Step 2:
For each letter, hoop a piece of clean tear stabilizer. Cut the felt front and back pieces. Load the first letter on the machine.
(Click Image to Enlarge)
Step 3:
Place the hoop on the machine and stitch color 1, the placement line for the front felt.
(Click Image to Enlarge)
Step 4:
Be sure the felt is centered over the placement line. Stitch color 2, to tack down the felt. Stitch colors 3 and 4—the letter and flower.
(Click Image to Enlarge)
Step 5:
Remove the hoop from the machine but do not remove the fabric from the hoop. Flip the hoop over. Center the stiff felt on the back (use spray adhesive or embroidery tape to hold it in place. Place the hoop back on the machine. Stitch the last color.
(Click Image to Enlarge)
Step 6:
The last color tacks the layers together, sews the satin stitch, and buttonholes. Carefully tear away the visible stabilizer.
(Click Image to Enlarge)
Step 7:
Trim the back stiff felt about 1/8” away from the outer stitching line. Trim the front felt about ¼’ away from the outer stitching.
(Click Image to Enlarge)
Step 8:
Use the seam ripper to open the buttonholes. Begin at one end and cut toward the center; turn the piece around and insert the seam ripper at the other end of the buttonhole and cut toward the center.
(Click Image to Enlarge)
Step 9:
Stitch all the eggs, trimming each as the next one stitches.
(Click Image to Enlarge)
Step 10:
Align the eggs in letter order to form the word. Cut a length of ribbon about 10” longer than needed.
(Click Image to Enlarge)
Step 11:
Beginning at one end, use tweezers to insert the end of the buttonhole, pull the ribbon through to the back, and up through the other buttonhole to the front.
(Click Image to Enlarge)
Step 12:
Continue weaving the ribbon through the buttonholes until all the eggs for the letter are assembled. Repeat for the other words. Knot the ends of the ribbons.
Ramona Baird has been in the embroidery industry for over 23 years. She and her husband owned a commercial and retail embroidery store in Arizona for many years. She is an experienced digitizer having been mentored by award-winners Pat Williams and Lindee Goodall. Ramona is a contributor to “Creative Machine Embroidery” magazine having 5 covers to her credit. Ramona has worked for Wilcom America and served many years as Education Director for the American Sewing Guild. With a degree in fashion design, she is able to design and execute patterns which Pat Williams says are “out of the box” in creativity and application. Ramona likes to challenge the boundaries of embroidery and bring new and exciting designs, ideas, and projects to EmbroideryDesigns.com. She wants embroiderers of all levels to increase their skills and enjoyment in using their embroidery machine for gift-making and personal pleasure.