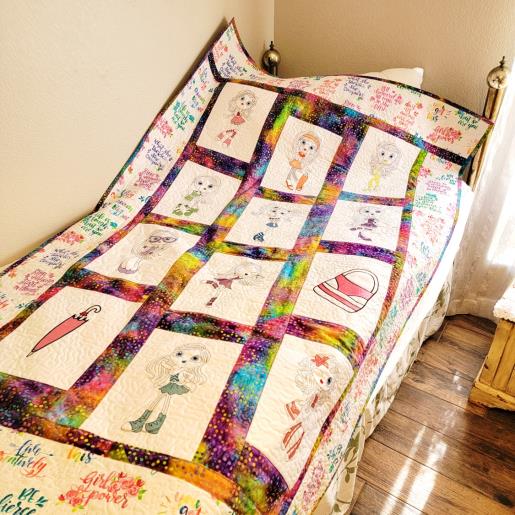
Step 1: | Read through the instructions thoroughly before beginning and assemble all the materials needed to complete the project. All seams are ¼”. Use the large sheet of Mylar judiciously; it is added in small sections to the embroidery. Here is the quilt from the front and back—step 3 has an overview of where the strips of fabric are used. Use this as a guide for assembly. You’ll notice the quilt back is all dot fabric except for the print fabric which was placed as the backing for the embroidered blocks. The embroidery is done first with quilting in the hoop, then assembled with sashing/batting into three rows. The rows are then joined together with sashing/batting between. More sashing/batting/borders are added to each side, top, and bottom. Once the quilt is completed, it is squared up and binding is added. | 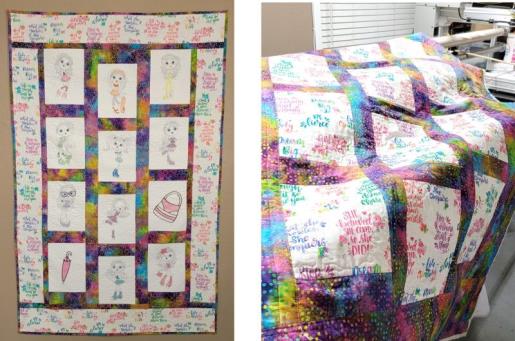 (Click Image to Enlarge) |
Step 2: | The designs are large so make sure you have a hoop large enough to stitch them. The two fabrics listed in the materials section worked well together; chose the fabrics you’d like to use to coordinate with the designs. | 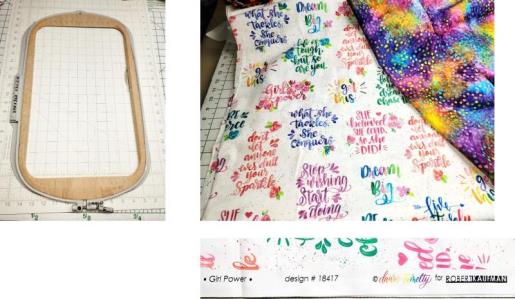 (Click Image to Enlarge) |
Step 3: | Here is where all the pieces will go on the quilt front and back. Every effort was made to ensure accuracy in all the measurements, but please double check—as is always the rule, measure twice, cut once. | 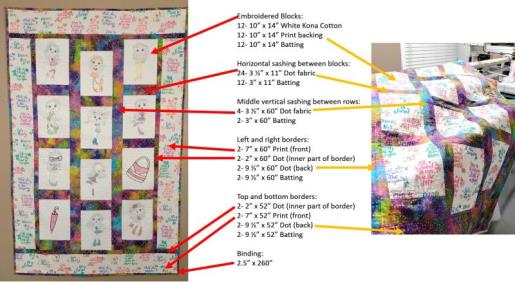 (Click Image to Enlarge) |
Step 4: | Load the embroidery designs on the machine. Each design takes approximately an hour to complete. The first couple of steps in each design are the same as are the last two steps. The rest of the steps vary in each design. Begin by hooping a piece of poly mesh stabilizer. Stitch Color 1, the placement line. Place down one piece of white Kona Cotton over the placement line. Stitch Color 2 which will tack down the fabric. | 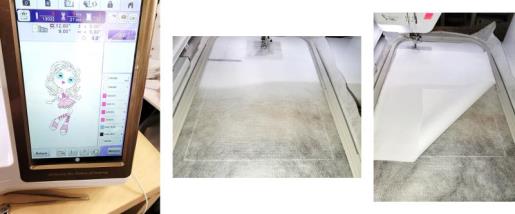 (Click Image to Enlarge) |
Step 5: | From there, follow the color sequence placing down the small pieces of Mylar as indicated. For the sections with Mylar, there will be a placement line, the Mylar is placed down, then the next color will tack it in place. | 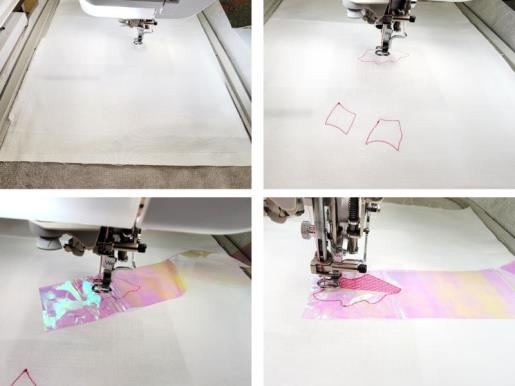 (Click Image to Enlarge) |
Step 6: | From there a light density fill will stitch. The excess Mylar needs to be removed when indicated in the color sequence. If your machine doesn’t trim the small jump stitches in small areas, stop the machine and trim them before continuing on. | 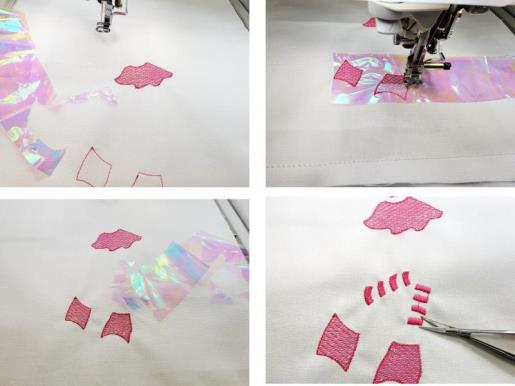 (Click Image to Enlarge) |
Step 7: | After all the details of each girl are stitched, the machine will stop. Remove the hoop from the machine but do not remove the fabric from the hoop. Flip the hoop over and spray one side of the batting with temporary spray adhesive. Place the sprayed side down over the back of the embroidery. Spray the back side of the print fabric and place it right side up over the batting. Load a bobbin with the same white thread used on the top. Return the hoop to the machine (make sure the batting and back fabric stay flat) and stitch the color to tack all the layers together. The final color to stich does the quilting around the embroidery design. | 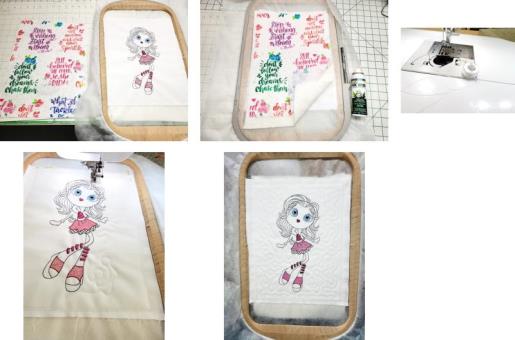 (Click Image to Enlarge) |
Step 8: | Note: for the embroidery design of the girl with glasses, the eyes will stitch and then a placement line is stitched for the glasses, at which point the vinyl is added. | 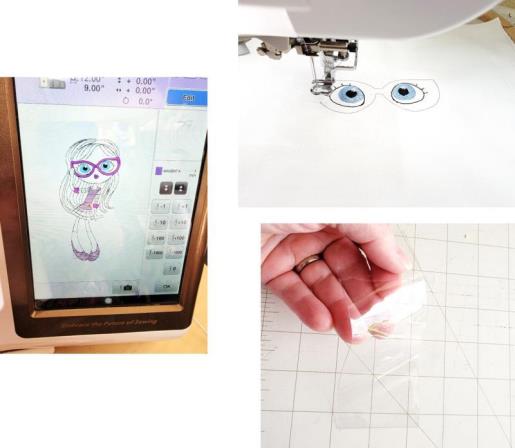 (Click Image to Enlarge) |
Step 9: | Place down the vinyl and stitch the tack down line; trim the vinyl when indicated and then follow the rest of the color sequence to finish the design. | 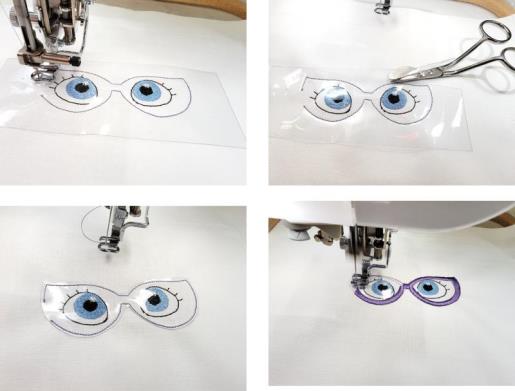 (Click Image to Enlarge) |
Step 10: | After all the designs have stitched, use the outer most stitching line to square up and trim the fabric, leaving a ¼” seam allowance. | 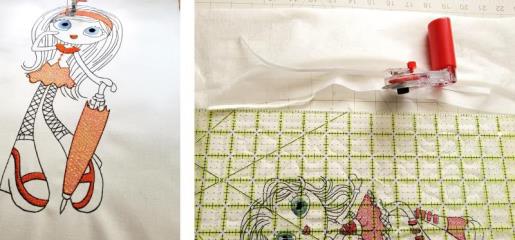 (Click Image to Enlarge) |
Step 11: | You’ll have fun stitching all the designs—the Mylar really makes the details sparkle. Next will be to add the sashing with the dot fabric. |  (Click Image to Enlarge) |
Step 12: | Decide on the placement of the embroidered blocks. Follow the outline shown, or decide how you would like them placed. | 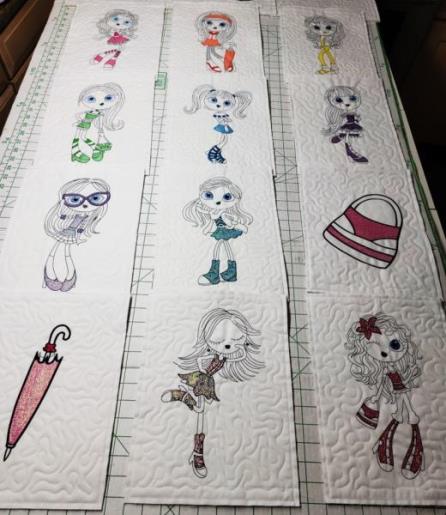 (Click Image to Enlarge) |
Step 13: | Measure and cut the sashing pieces to go in-between the embroidered blocks—they are longer than needed but makes it easier for stitching and squaring up the blocks. |  (Click Image to Enlarge) |
Step 14: | Begin by stitching the sashing fabric to the bottom of the upper left most block. Place the right side of one sashing to the bottom of the block, and a second sashing piece right side to the bottom back of the block. Basically, you are sandwiching the bottom of the block between the two sashing pieces which are right sides together. Sew the seam. | 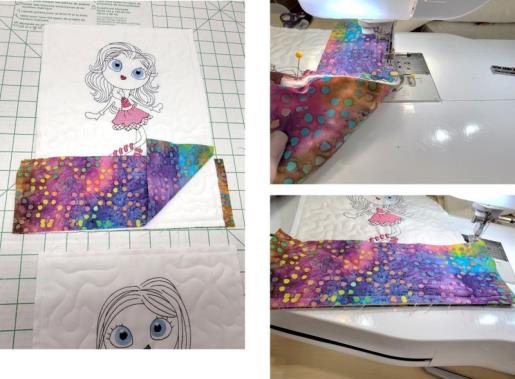 (Click Image to Enlarge) |
Step 15: | Open up the sashing back as shown. To help keep the blocks aligned, place a ruler at the long edge of the block to the bottom of the bottom sashing. Draw a chalk line. Repeat for the other side. This gives lines to center the top of the next block. Now grab the top of the second block in the row and align the upper corners to the chalk line. | 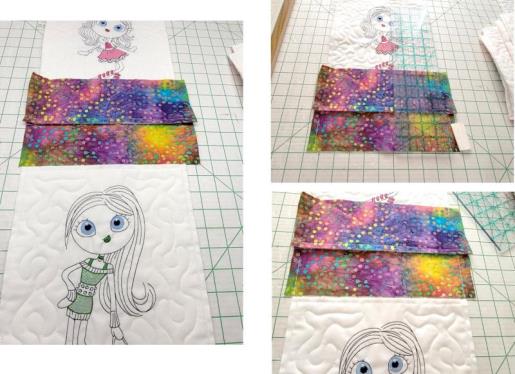 (Click Image to Enlarge) |
Step 16: | Pin the back side of the top of the second block to the right side of the bottom of the first back sashing between the chalked line. Sew the seam and press the back sashing piece. | 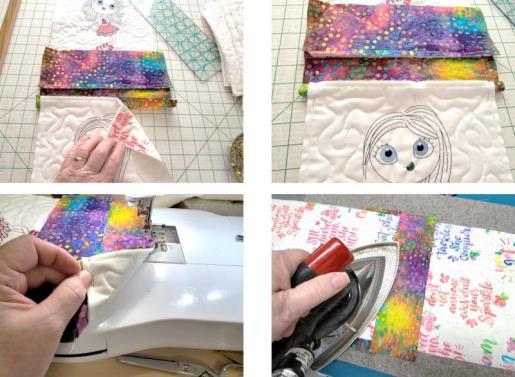 (Click Image to Enlarge) |
Step 17: | Fold under ¼” on the bottom front sashing piece—the folded edge should just cover the front of the stitching line just sewn. Cut the batting piece. The edges should just kiss and meet the cut edge of the seam allowances. Press the top sashing piece in place. | 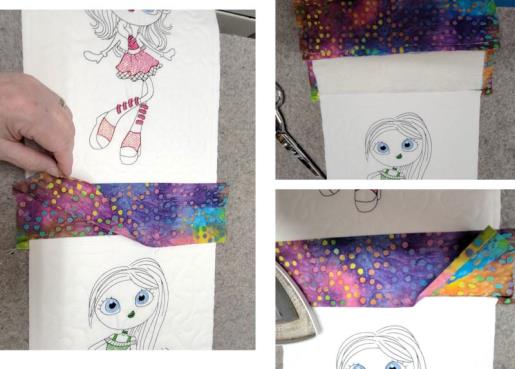 (Click Image to Enlarge) |
Step 18: | I find it helpful to add dots of glue within the seam allowance (indicated by the yellow dotted line) and then press the top sashing seam allowance down with a dry iron; no pinning needed and the glue washes away in the first washing. | 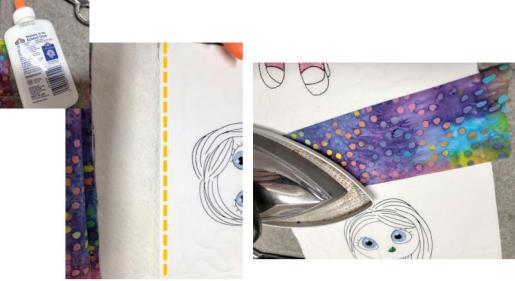 (Click Image to Enlarge) |
Step 19: | Trim the sashing even with the blocks. Use a stitch-in-the-ditch foot if you have one for this next step. The blade of the foot glides right at the seam line. | 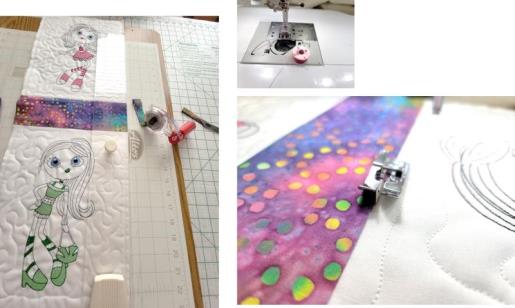 (Click Image to Enlarge) |
Step 20: | Adjust the needle to the left a couple of clicks so that the needle is about 1/8” inside of the seam. Place a thread on the machine that coordinates with the dot fabric (bright pink was used in the project in both top and bobbin). Edge stitch both sides of the sashing in place. | 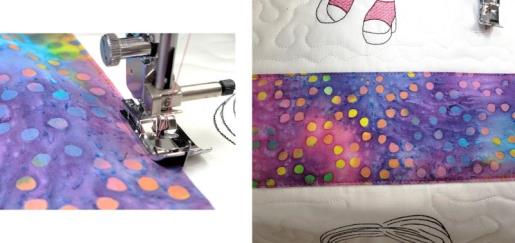 (Click Image to Enlarge) |
Step 21: | Continue on adding sashing between the blocks for the first row, adding batting, and edge stitching. | 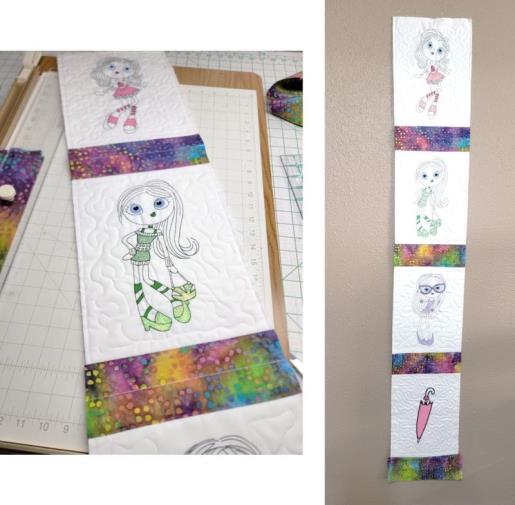 (Click Image to Enlarge) |
Step 22: | 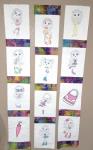 (Click Image to Enlarge) Add the sashing for the second and third rows. Notice on the middle row that the sashing is at the top of the first block and there is none at the bottom of the fourth block. |
Step 23: | Each block finished length is 12”. Cut the dot fabric in the widths needed across the grain; piece the long sashing pieces together. Cut the short sashing pieces to length. | 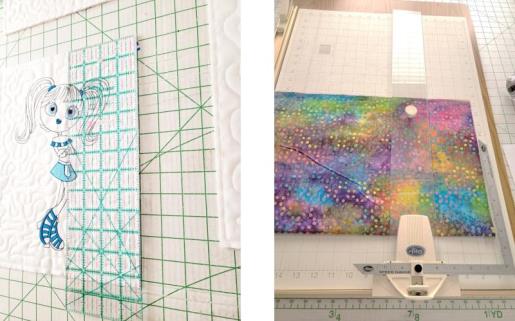 (Click Image to Enlarge) |
Step 24: | Now the three rows are joined with long sashing strips. Join the cut pieces together with mitered seams to get the length needed. | 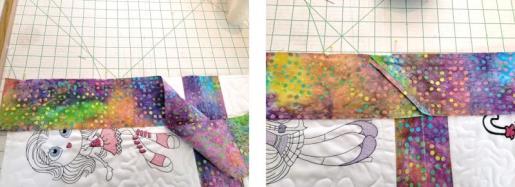 (Click Image to Enlarge) |
Step 25: | Measure the length of the rows and add about 2” extra. Cut the middle sashing strips. Just like was done with the horizontal sashing strips, sandwich the rows between the strips, stitch, and cut and insert the batting. | 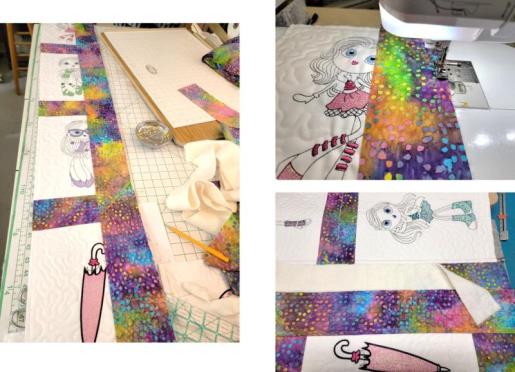 (Click Image to Enlarge) |
Step 26: | Edge stitch the strips in place. Next will be to add outer strips and borders around the outside. | 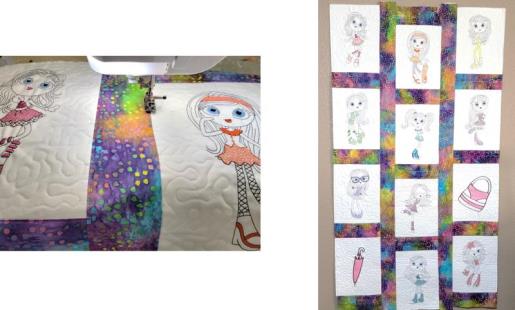 (Click Image to Enlarge) |
Step 27: | Begin with the side borders. Cut the print fabric. To the right side of the left border, add the narrow dot fabric strip and sew it to the border. Sew the remaining long edge of the strip to the left side of the quilt top, right sides together. Repeat for the right border. | 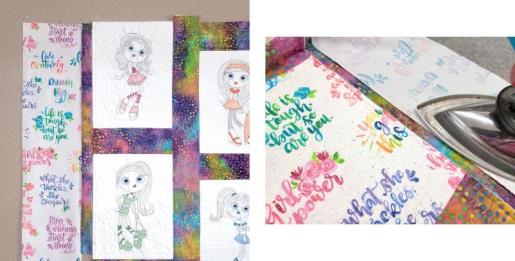 (Click Image to Enlarge) |
Step 28: | Since I am going to put this on the longarm to quilt the borders, I cut the side border back pieces wider and stitched them on. I then cut a piece of batting the same length and width, butting it against the seam allowance. | 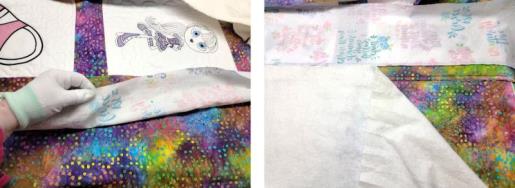 (Click Image to Enlarge) |
Step 29: | To help hold the batting in place, a light spray of temporary spray adhesive was used on the batting and then smoothed into place, butting it against the seam allowance. | 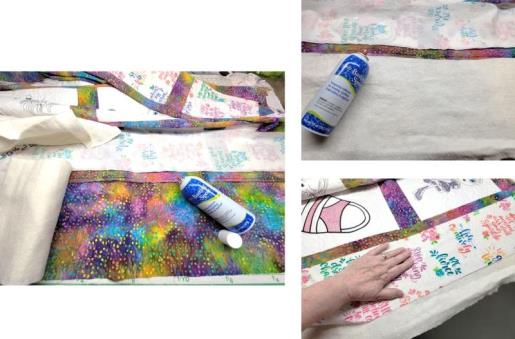 (Click Image to Enlarge) |
Step 30: | Pins were placed at the edge of the border and then all the layers were basted together. Edge stitching was done along the inner dot strip. | 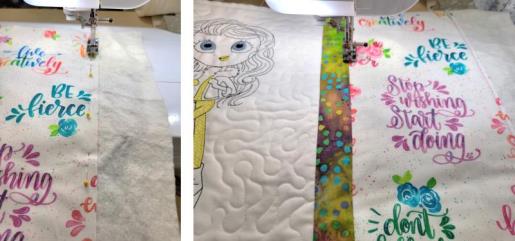 (Click Image to Enlarge) |
Step 31: | The same steps were repeated for the other side border and then the sides were squared up with the top and bottom of the quilt. | 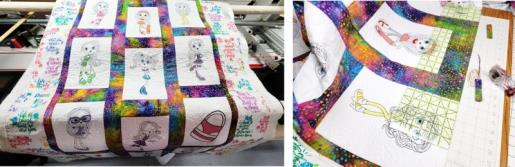 (Click Image to Enlarge) |
Step 32: | Repeat cutting fabric and stitching the top and bottom border pieces together, adding batting, basting and edge stitching along the dot fabric. Here is the front and back of the quilt. | 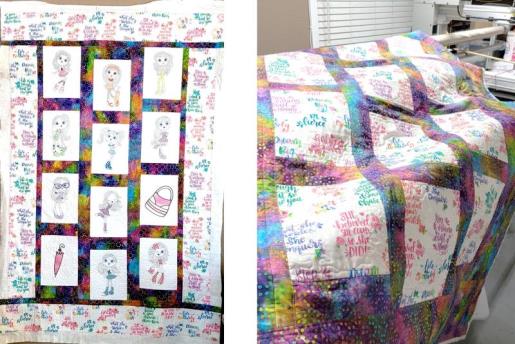 (Click Image to Enlarge) |
Step 33: | Quilt the outer border sections as you’d like. I placed the quilt on the frame to quilt the top | 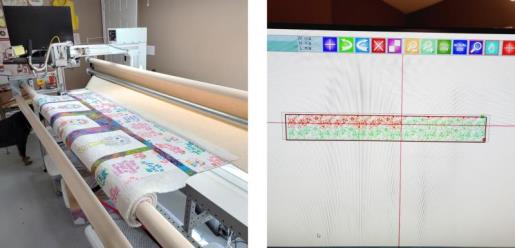 (Click Image to Enlarge) |
Step 34: | and bottom borders first. | 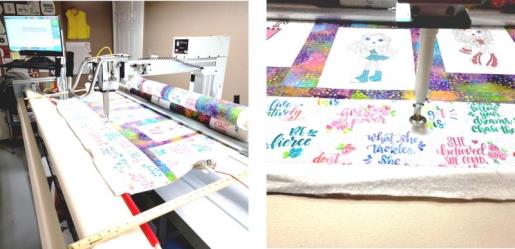 (Click Image to Enlarge) |
Step 35: | The quilt was removed from the frame, turned, and the right and left borders were quilted. The top and bottom borders were quilted with the diamond design and the left and right borders with the lipstick design. Choose what you would like. | 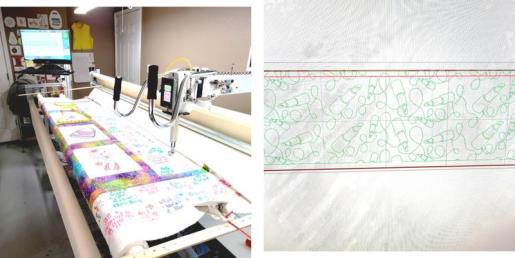 (Click Image to Enlarge) |
Step 36: | The quilt is now ready to square up and bind. | 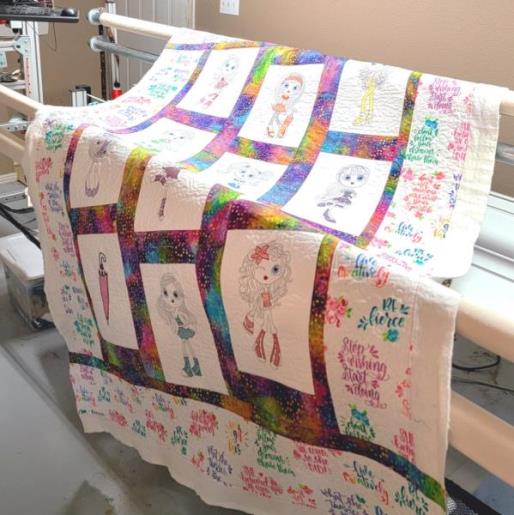 (Click Image to Enlarge) |
Step 37: | Square up the quilt. The dot edge of the border was used as a guide. | 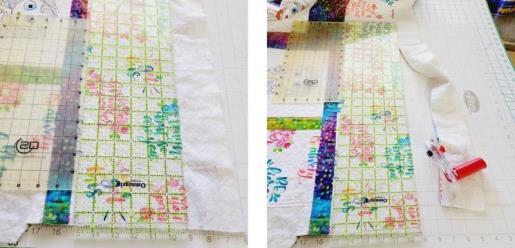 (Click Image to Enlarge) |
Step 38: | Cut the binding strips, stitch them together, press in half. Sew the binding to the back side of the quilt, mitering the corners, and finishing the end. Press the binding back seam. | 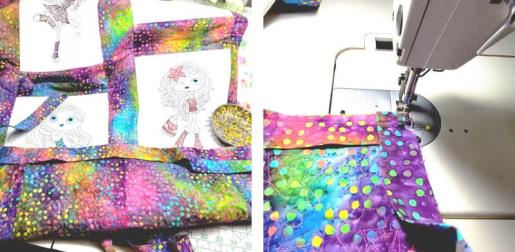 (Click Image to Enlarge) |
Step 39: | Roll the binding to the front, press, and then place a bead of glue in the seam allowance and press in place with a dry iron. This technique I learned by viewing a Sharon Schamber video (https://www.youtube.com/watch?v=a2hWQ5-ZccE) and it works perfectly every time! | 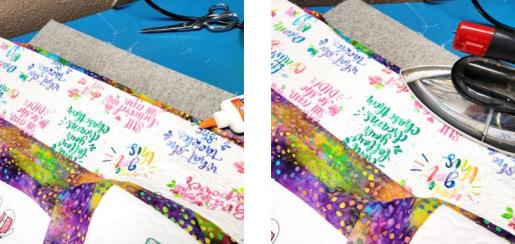 (Click Image to Enlarge) |
Step 40: | At the corners, form beautiful miters. Stitch the binding in place—no pins or clips needed! | 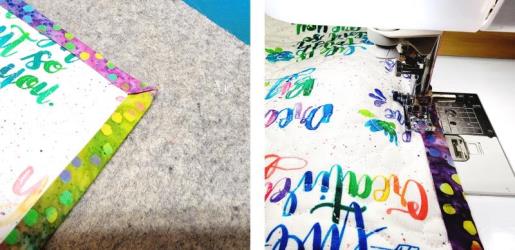 (Click Image to Enlarge) |
Step 41: | This ITH Mylar Diva Quilt does take some time to do but the end results are well worth the time spent. | 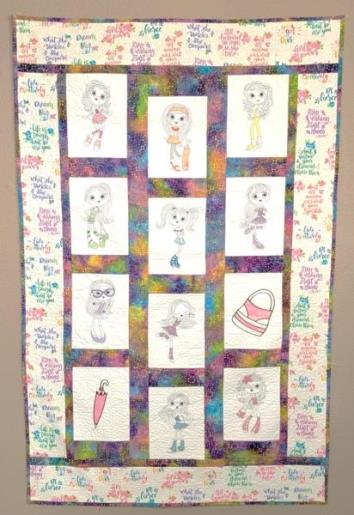 (Click Image to Enlarge) |
Step 42: | Congratulations! The quilt is completed. |  (Click Image to Enlarge) |
Step 43: | Doesn’t this make a wonderful set? The ITH Mylar Divas Quilt, ITH Mylar Sunglasses Pillow, and the Pillow for Savannah projects are all meant to go together as a coordinating set. Check out the pillow projects a make the complete set for a special youngster in your life. |  (Click Image to Enlarge) |
|