Gather all supplies and review instructions before beginning. Print out paper template of embroidery design. Thread colors used in this project tutorial are red, white, slate gray and black or refer to embroidery design thread color chart. Load design onto your machine per your machine’s instructions.
(Click Image to Enlarge)
Step 2:
Center place your paper design template approx. 5” up from bottom edge of table runner to center of design. Mark your axis points using your air erasable fabric pen.
(Click Image to Enlarge)
Step 3:
Hoop stabilizer. Mark axis points directly onto stabilizer to help center marked table runner. Lightly spray temporary adhesive spray directly onto stabilizer.
(Click Image to Enlarge)
Step 4:
Center place table runner onto hooped stabilizer matching your marked axis points to your hoop axis point markings. Finger press to secure onto stabilizer.
(Click Image to Enlarge)
Step 5:
Attach hoop to machine. Confirm center needle placement with design. Make any adjustments if needed. Begin the embroidering process. Stitch out of this design at 700 SPM ( stitches per minute) will take approximately 30 min.
(Click Image to Enlarge)
Step 6:
Embroidering stitch out complete. Detach hoop from machine. Cut and trim all jump stitches and loose thread ends. Carefully remove tear away stabilizer. Iron press if needed. Repeat steps to complete the opposite side end of table runner.
(Click Image to Enlarge)
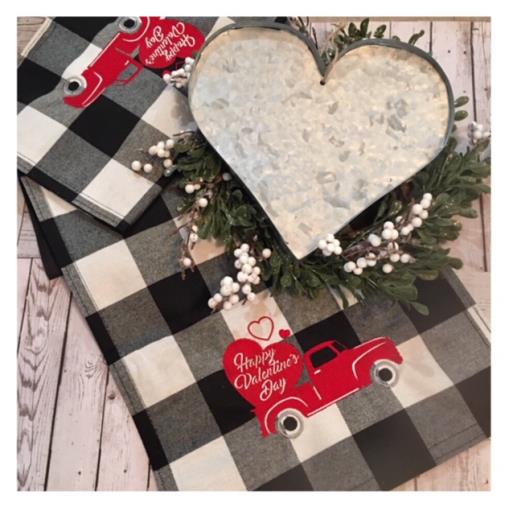
Step 7:
Your Valentine Table Runner is complete! Way to go! Happy Valentine’s Day!