{{superHeaderAds.title}}
Live Chat
Embroidery Designs
Welcome, Embroiderer
Login
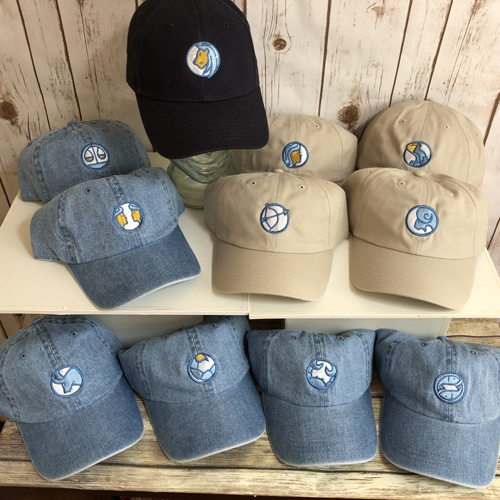
Zodiac Symbol Cap Fronts
{{mainImageAlt || (productInfo._source && productInfo._source.name) || ''}}

Zodiac Symbol Cap Fronts Embroidery Project

By   Pat Williams   on   August 25, 2021

PROJECT DETAILS

SKILL LEVEL
Intermediate
TIME REQUIRED
01:00
Description

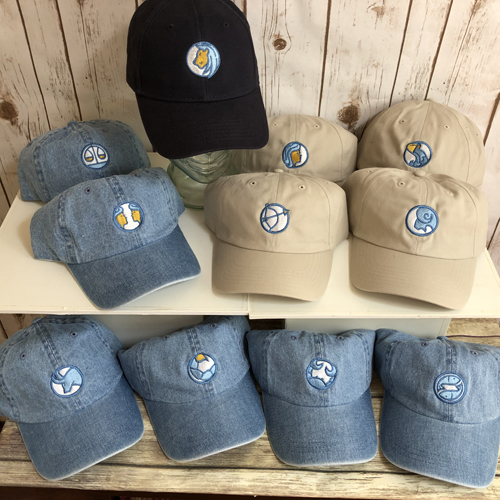
Not everyone follows astrology, but everyone seems to be proud of the Zodiac sign that they fall under. Stitch up these caps to make great unisex gifts for everyone on your gift list. You just need to know their birthday.

Project Preview Video

Materials
  • Wide or Front Caps Frames
  • Structured or unstructured mid or low-profile cotton twill caps
  • Tear away stabilizer

  • Designs used in this project
  • https://www.embroiderydesigns.com/productdetails/pat-williams/designs/1/aquariuscap
  • https://www.embroiderydesigns.com/productdetails/pat-williams/designs/1/virgocap
  • https://www.embroiderydesigns.com/productdetails/pat-williams/designs/1/scorpiocap
  • https://www.embroiderydesigns.com/productdetails/pat-williams/designs/1/libracap
  • https://www.embroiderydesigns.com/productdetails/pat-williams/designs/1/geminicap
  • https://www.embroiderydesigns.com/productdetails/pat-williams/designs/1/capricorncap
  • https://www.embroiderydesigns.com/productdetails/pat-williams/designs/1/cancercap
  • https://www.embroiderydesigns.com/productdetails/pat-williams/designs/1/ariescap
  • https://www.embroiderydesigns.com/productdetails/pat-williams/designs/1/sagittariuscap
  • https://www.embroiderydesigns.com/productdetails/pat-williams/designs/1/piscescap
  • https://www.embroiderydesigns.com/productdetails/pat-williams/designs/1/leocap
  • https://www.embroiderydesigns.com/productdetails/pat-williams/designs/1/tauruscap


  • Final Product: What You Will Create

    Preface:
    Follow your machines manual to properly set up your cap frame. All thumb screws must be tight. Correct hooping is important to the success of your design. 


    Step 1:
    (Click Image to Enlarge)
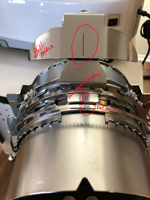
    The wide cap hoop has three red dots to help you keep your hat straight on the hoop. One is on the bill holder, one on sweatband holder and one on the wire band that holds the cap to the hoop. For now, flip the top bill holder to the back.


    Step 2:
    (Click Image to Enlarge)
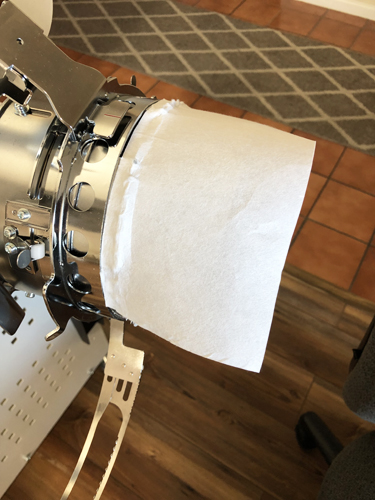
    As these designs are for the front of a cap cut tear away stabilizer 4” x 10” and lay it on the cap frame. If your cap frame has little prongs to help hold it in place, push the prongs through the stabilizer.


    Step 3:
    (Click Image to Enlarge)
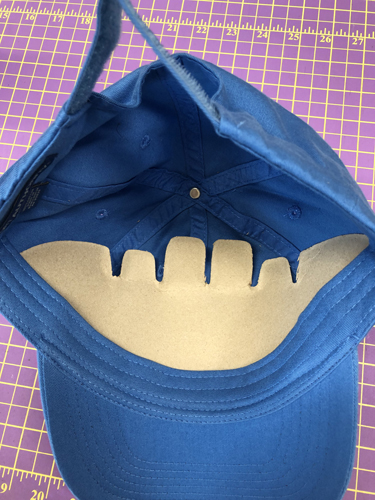
    Remove the cardboard shape keeper if one is inside the cap.


    Step 4:
    (Click Image to Enlarge)
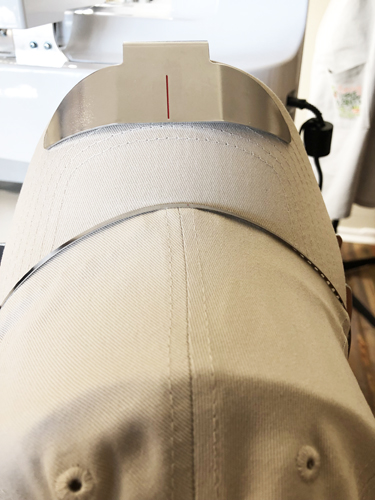
    Pull the sweatband out from inside the cap and open the straps on the back of the caps. Place the cap on the cap frame pulling the sweatband forward all the way into the hoop. Align the center of the cap with the line on the sweatband holder.


    Step 5:
    (Click Image to Enlarge)
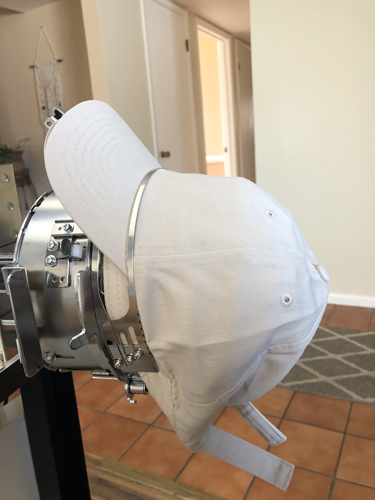
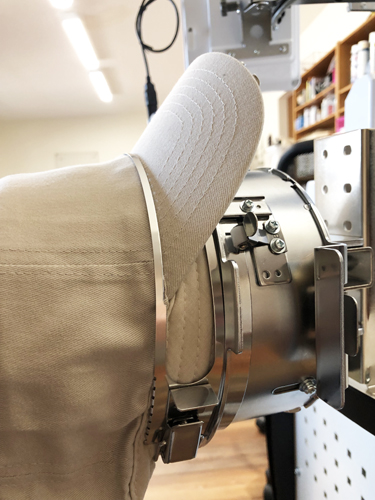
    Bring the wire band across the cap. The inside of the wire band goes on the inside of the bill, the notched outside band needs to sit on the side seams, where the sweatband is sewed to the cap; across the top seam where the bill is sewn to the crown; and across the side seam on the far side of the cap. That last section is the trickiest one as just before the latch you must fold the sweatband end out of the way so that you can close the clasp of the frame.


    Step 6:
    (Click Image to Enlarge)
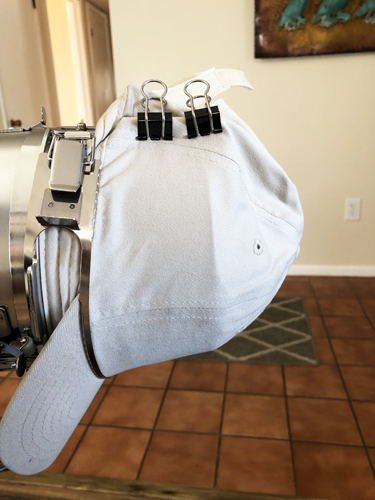
    When applying the bulldog clips make sure the sides are straight and that you are not pulling the cap crown down towards the frame. This not only wrinkles the sides of the cap, but also takes the ease out of the crown which will affect the stitching. Smooth the sides of the cap back to the bottom bars as straight as possible. Place two bulldog clips with the wire clamps facing to the inside of the frame. If the wire clips face the outside of the frame they can interfere with the turning of the cap when it is being stitched.


    Step 7:
    (Click Image to Enlarge)
    Rotate the cap hoop to its upright position. Pushing the bill of the cap slightly towards the bill holder, slide the bill holder over the bill of the cap and push it down to its final position.


    Step 8:
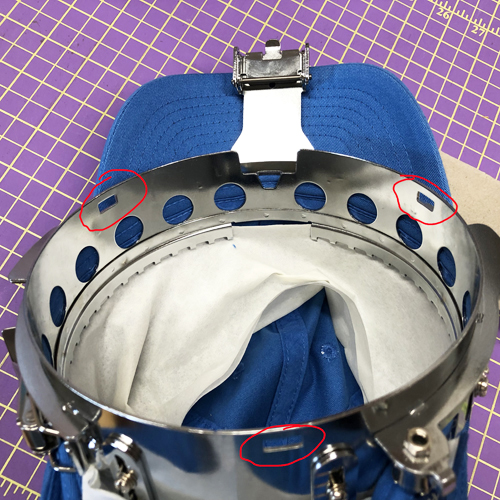
    There are three cut out rectangles in the metal of the hat hoop that must be pushed in securely to the hat frame driver. As I can’t photograph those on the machine I though it best to show them to you on the inside of the frame. Make sure you hear the two top and bottom center rectangles click into the white rollers of the cap frame driver.


    Step 9:
    (Click Image to Enlarge)
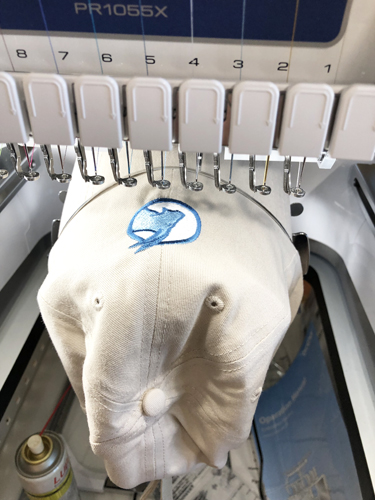
    Load the cap frame driver following your manufacturer’s directions. If there is an extra little riser to cover the needle opening be sure to use that too. Load the cap hoop onto the machine.


    Step 10:
    (Click Image to Enlarge)
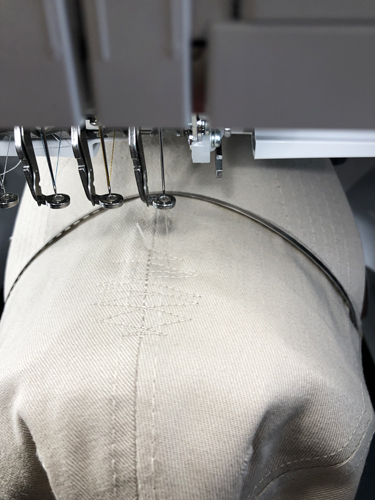
    Transfer the design into the machine. On this machine the software automatically turns the design upside down as it knows it has the cap frame on. If your machine doesn’t do this be sure to turn the design upside down. On the next software screen you have the ability to move the design slightly closer to the bill of the cap. I moved the design as low to the bill as it would go and then backed up just two little steps as I did not want to push the limits. Slow the machine down for the best results on caps. I ran this at 600 stitches a minute.  


    Step 11:
    (Click Image to Enlarge)
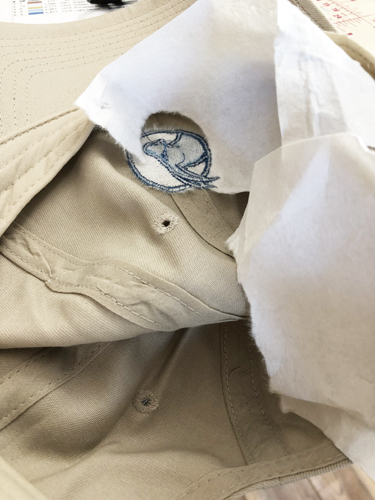
    Remove the cap from the hoop and tear away the excess stabilizer. Trim any long tails inside the cap.


    Step 12:
    Congratulations your first Zodiac Symbol Cap is complete! Stitch up a whole set for very personal Christmas and birthday gifts.

    For the love of embroidery…
    Pat Williams
    Meet the Author: Pat Williams
    Pat Williams
    Award winning Digitizer, Embroidery Educator, Author and a Consultant to the Industry, Pat Williams has 30 years of experience in the embroidery industry. Pat has won multiple awards for her digitizing expertise including the 2007 Impressions Awards Grand Championship, Best of Show as well as the 1st and 2nd Place Awards. Pat’s love of digitizing has afforded her the opportunity to write numerous articles for Impressions magazine in the United States and Images Magazine in Europe. In 2001 Pat was named “Embroidery Educator of the Year.” For many years Pat taught digitizing seminars at the ISS Shows in Long Beach, CA and for Compucon software. She now resides in Tucson, AZ.
    More From This Author
    Link is Broken, Please check the URL
    Exclusive Embroidery Offers!
    Copyright © {{ currentDate | date:'yyyy'}} - EmbroideryDesigns.com
    GET 50% OFF! ×