I purchased a 1x1.5mtr piece of printed polar fleece for this blanket and as it does not fray I did not finish the edges but you could overlock or blanket stitch around the edges if you desire. Make sure to print off the pattern piece for the flap from the attached files.
Step 1:
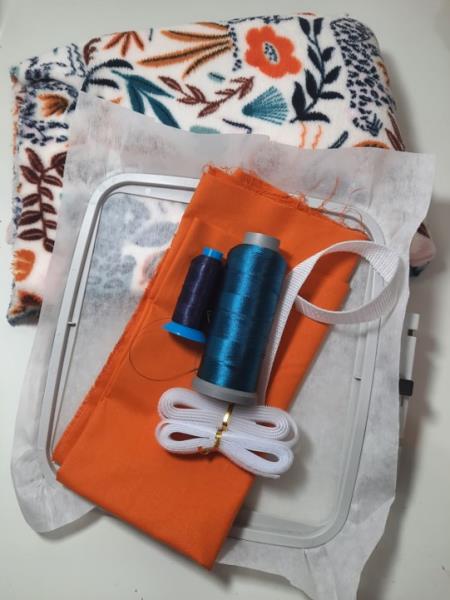
Gather all your materials and read through the instructions before you begin. Have a copy of the color sequence on hand for the embroidery stitch out.
(Click Image to Enlarge)
Step 2:
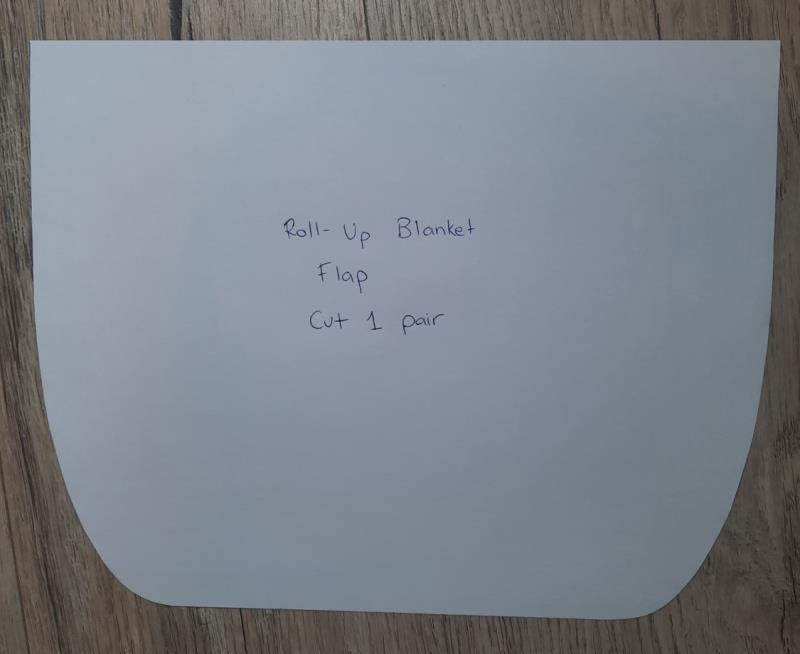
Print the pattern piece for the flap and cut out.
(Click Image to Enlarge)
Step 3:
Using that pattern piece, cut 2 pieces from the plain cotton. Mark up 3 ½” from the bottom raw edge and in 5” to indicate the center of the embroidery design. Hoop the stabilizer and fabric ensuring it is centered to your mark and stitch out the design.
(Click Image to Enlarge)
Step 4:
Unhoop your design and tearaway the excess stabilizer and trim loose threads. Then place the other flap piece over the top of the embroidered panel and clip around the curve edge only. Stitch using a 10mm seam, clip the corners to allow a nice curve when it is turned through.
(Click Image to Enlarge)
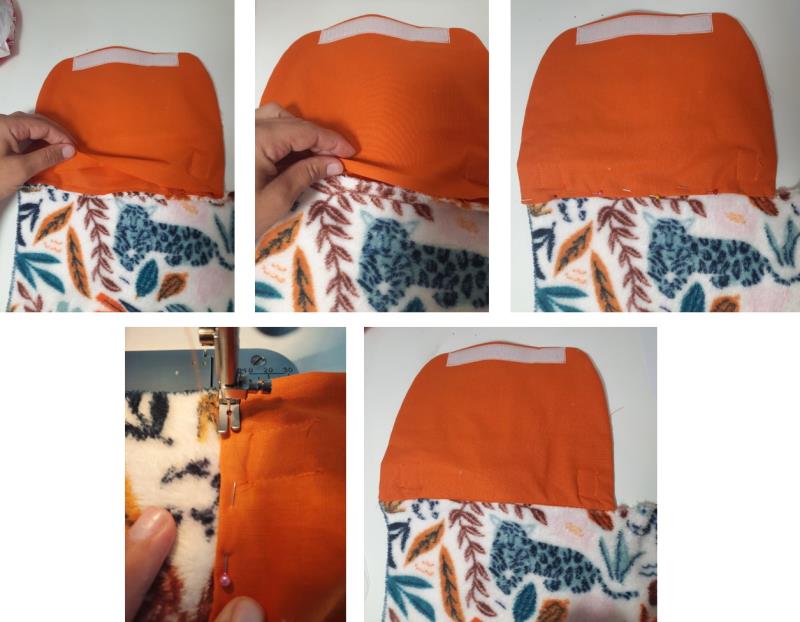
Step 5:
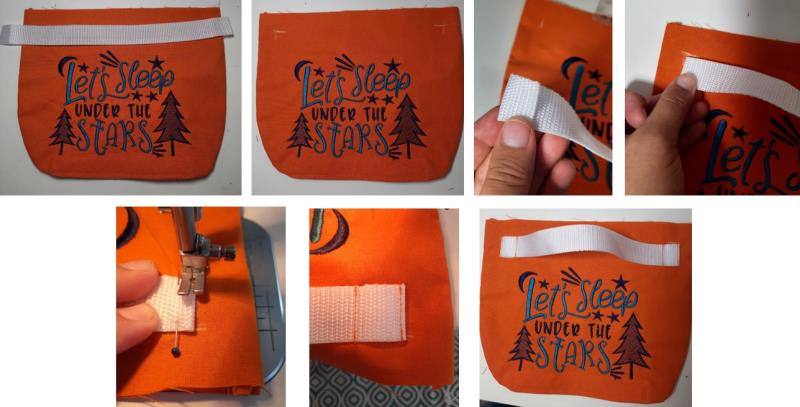
On the back of the flap, position the hook tape on the bottom edge and pin in place. Stitch down around all edges. You will see the stitching on the front of the panel and it should sit just under the embroidery design.
(Click Image to Enlarge)
Step 6:
Now on the front of the flap, from the top raw edge measure down 20mm then measure in from the side edge 30mm. This represents the top and side position of the webbing position. On each end of the webbing, turn under 20mm then position the webbing on the flap at your markings. Pin in place. Then stitch down the folded edge aswell as 20mm in the secure the webbing. This forms the handle.
(Click Image to Enlarge)
Step 7:
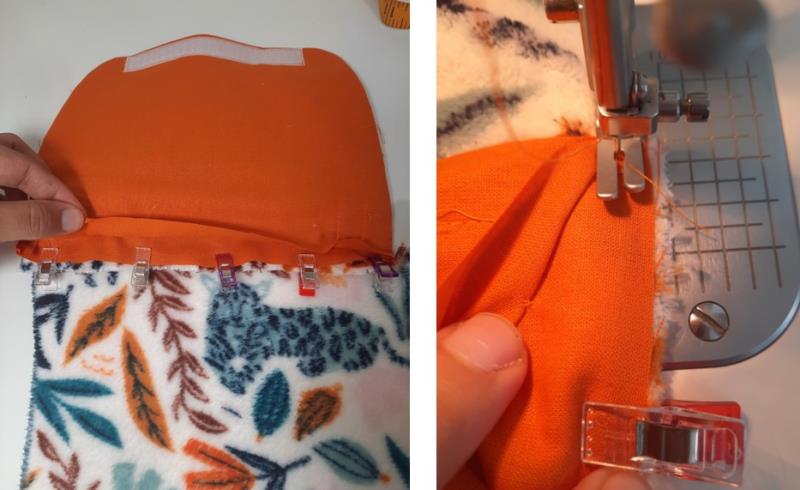
When looking at the wrong side of your blanket, find the top left corner of one of the long sides and place the raw edge of the flap against the top edge of the blanket with right sides facing. Then pin only the embroidered panel of the flap to the right side of the blanket and stitch using a ¼” seam
(Click Image to Enlarge)
Step 8:
Then with the back layer of the flap, turn under a 10mm seam and lay it over the seam you sewed in step 7, pin in place then stitch down.
(Click Image to Enlarge)
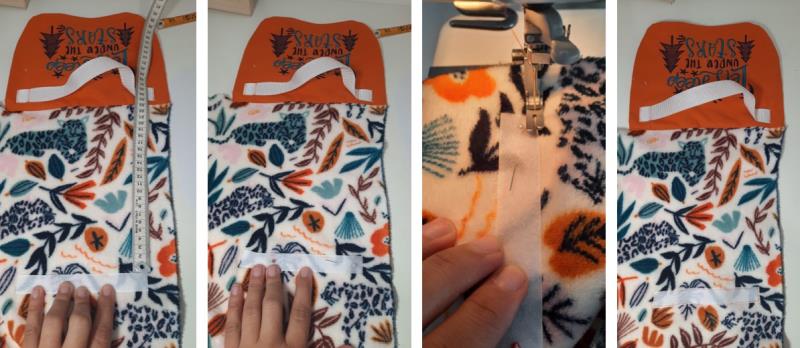
Step 9:
Turn the blanket to the right side, measure down from the seam of the flap/blanket 24cm and in from the blanket edge 3cm, this is the position for the loop tape. Pin it in place then stitch it down.
(Click Image to Enlarge)
Step 10:
Fold your blanket, then roll up and secure with the Velcro. To fold your blanket, find a long edge and the blanket in half widthwise, then fold again in thirds. Then roll your blanket up from the bottom to the flap and secure with Velcro.
(Click Image to Enlarge)
Step 11:
Now grab your blanket and enjoy sleeping under the stars.