


PROJECT INSTRUCTIONS


PROJECT INSTRUCTIONS

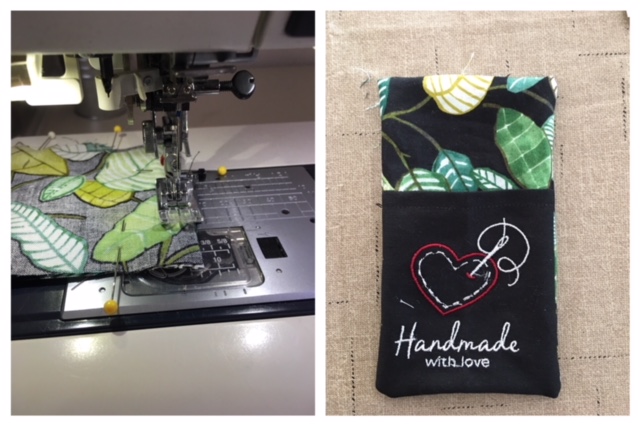
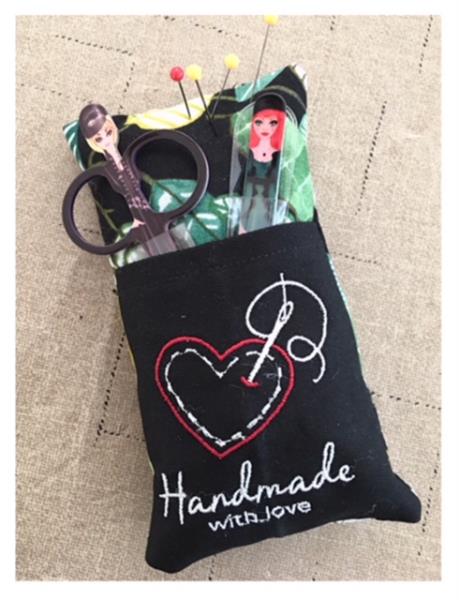
Pocket Pincushion Embroidery Project
By
Linda Mills
on
May 06, 2021
PROJECT DETAILS
SKILL LEVEL
Beginner
TIME REQUIRED
00:30
Description
Keep all your sewing essentials in place and at hand with a pocket pincushion.
Project Preview Video

QUICK VIEW
Tear Away Stabilizer
$7.98
Circle Price: $7.18

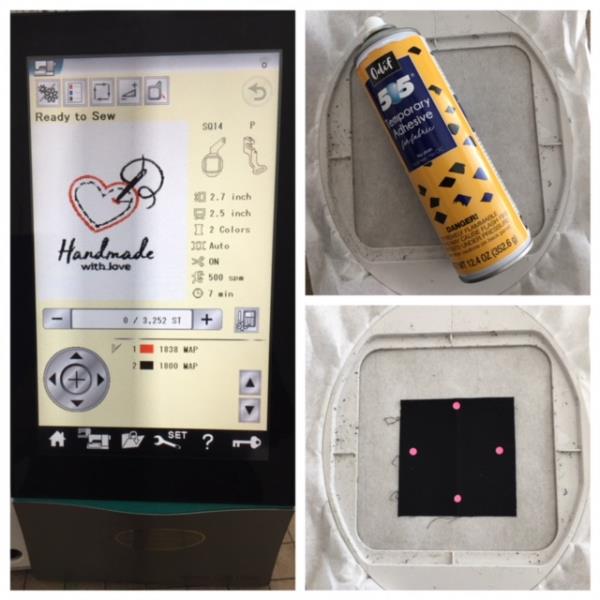
505 Spray Temporary Spray Adhesive
$15.99
Circle Price: $15.99

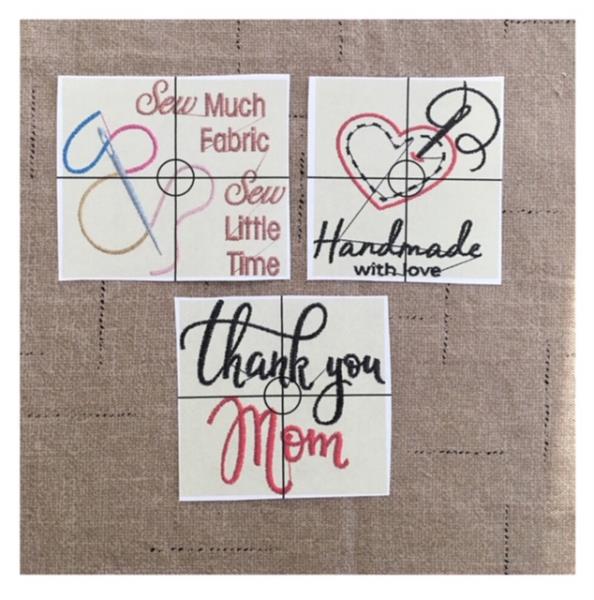
Thank You Mom
$4.99
$1.99
Circle Price: $1.99

Sew Much Fabric
$4.19
$2.10
Circle Price: $2.10

Handmade With Love Label
$3.89
Circle Price: $3.89


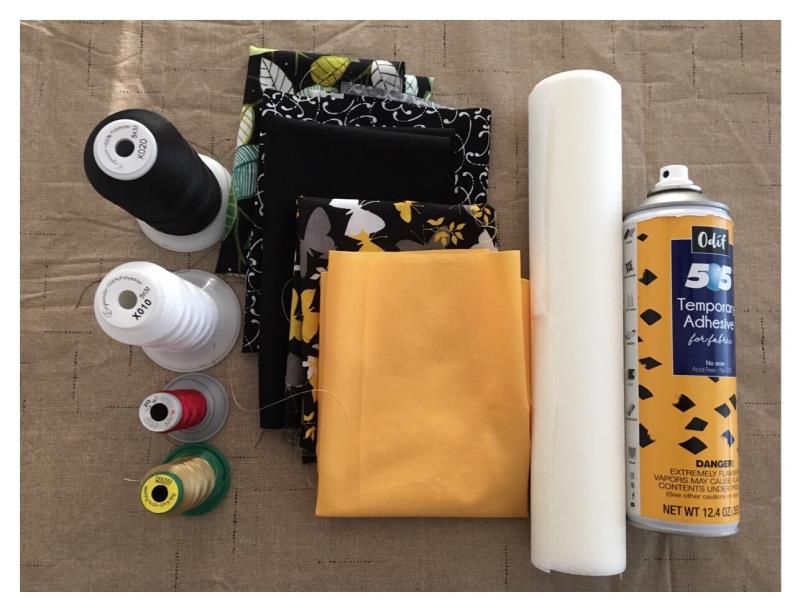
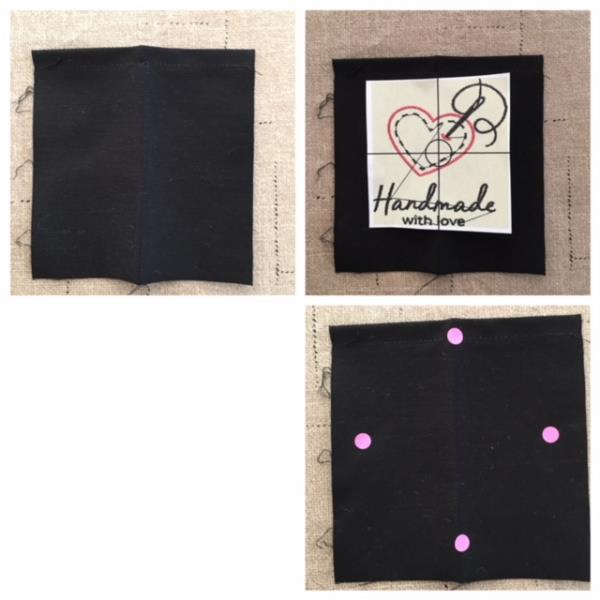
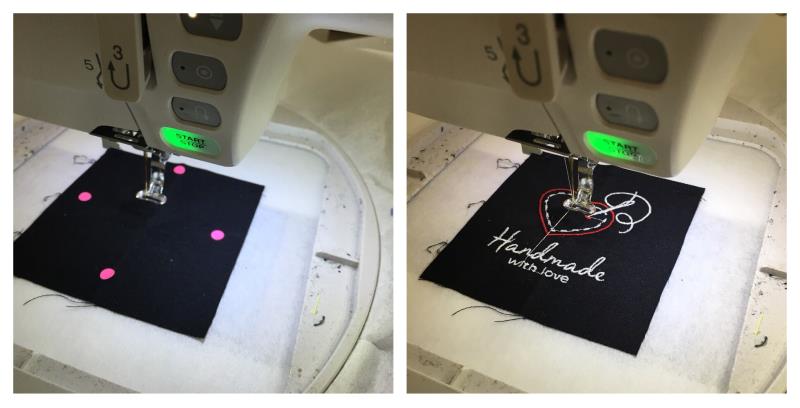
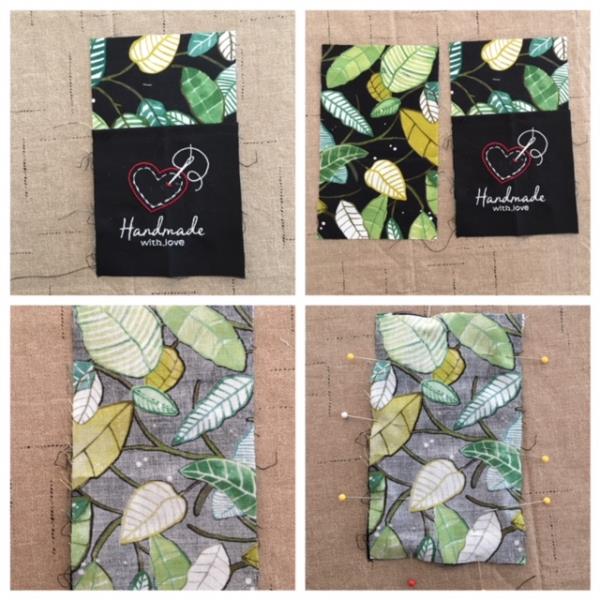
| Materials FAT QUARTER PRINT /COORDINATING COTTON SOLID REMNANT SEWING THREAD EMBROIDERY THREAD ( multiple colors/refer to embroidery designs thread color chart TEMPORARY ADHESIVE SPRAY TEAR AWAY STABILIZER POLYESTER FIBERFILL (HANDFUL FOR EACH PINCUSHION) FABRIC AIR ERASE or CHALK PEN STRAIGHT PINS OR CLIPS (1) HAND SEWING NEEDLE |
| Designs used in this project |
| Final Product: What You Will Create |
 |
|
Projects You May Like
Meet the Author:
Linda Mills

Linda loves to create by sharing her different sewing and machine embroidery techniques so others can utilize their machines to the fullest
Feedback
Characters Remaining
Please Login to Submit a Feedback
Invalid Characters, Please enter a valid Comment
Please enter a valid Comment
Reviewed On
Link is Broken, Please check the URL