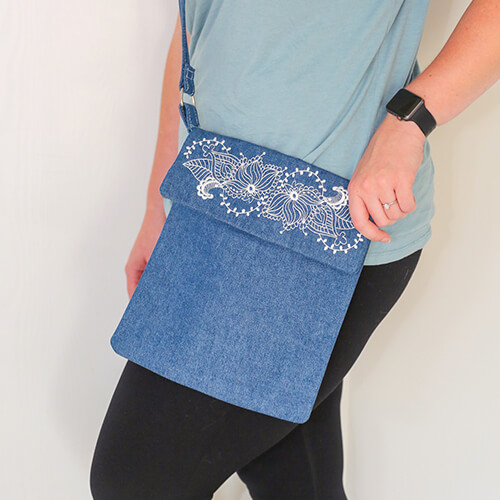
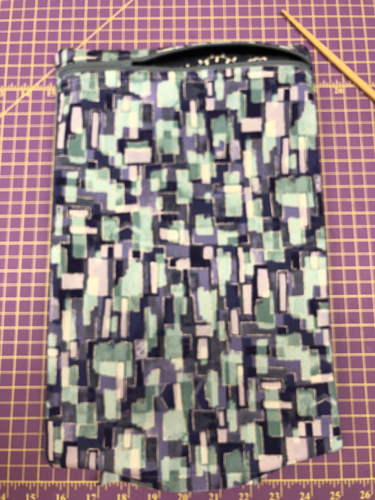
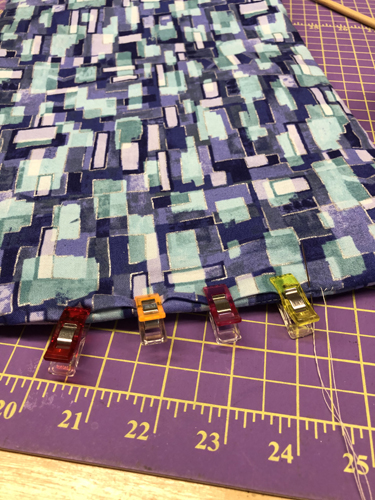
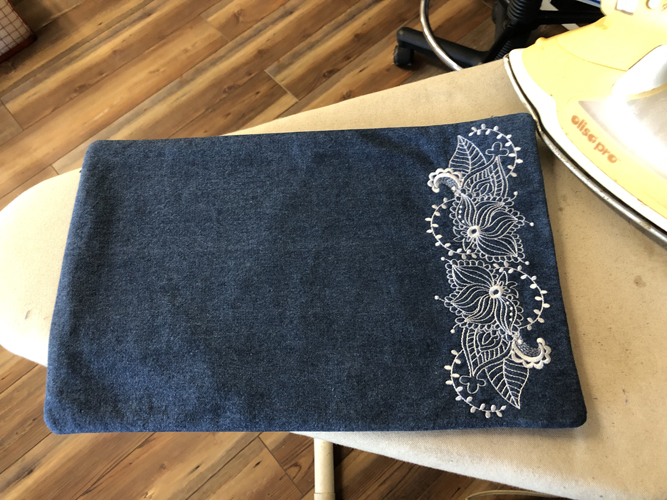
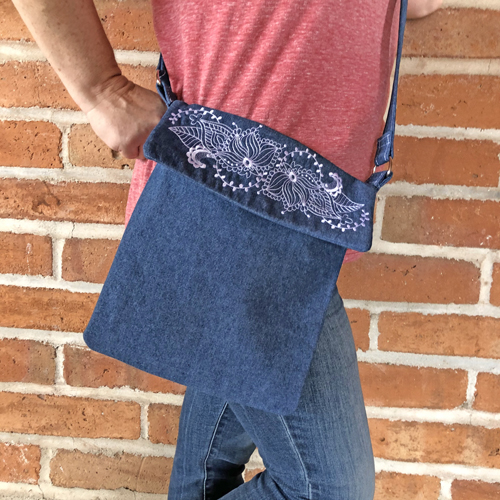
This ultimate sized crossbody fold over bag is made in Brother’s Luminaire 2 large16” x 10 5/8th” hoop. This bag, including the zipper under the flap, is made in two hoopings with only the straps and strap holders made at the sewing machine.
A regular size 11 needle is used in the embroidery machine for the stitching of the bag. A size 16 Jeans needle is needed when the D-ring straps are sewn to the bag. This project is made in two hoopings. Please read the instructions to know when to rehoop stabilizer in your hoop. White thread can be used for all the color-stops in this project except for the stops that call for water soluble thread.
Step 1:
(Click Image to Enlarge)
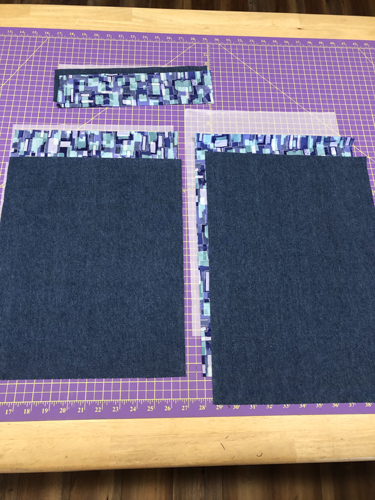
Cut from denim, lining and knit interfacing:
a. 1 17 ½” x 12” rectangle – bag back b. 1 15 ¼” x 12 rectangle – lower bag front c. 1 3 1/8” x 12” rectangle – upper bag front
Step 2:
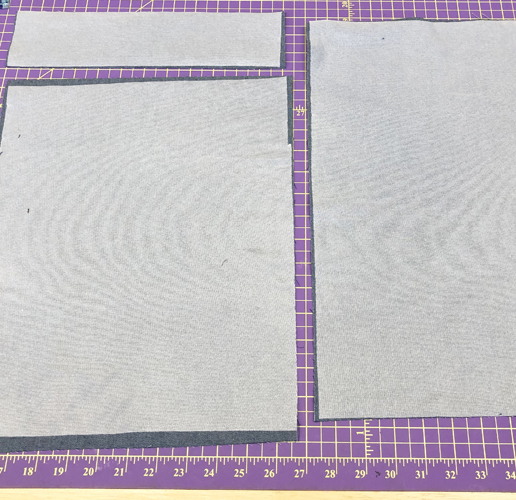
Following the manufacturer’s instructions fuse the knit interfacing to the corresponding denim pieces.
(Click Image to Enlarge)
Step 3:
(Click Image to Enlarge)
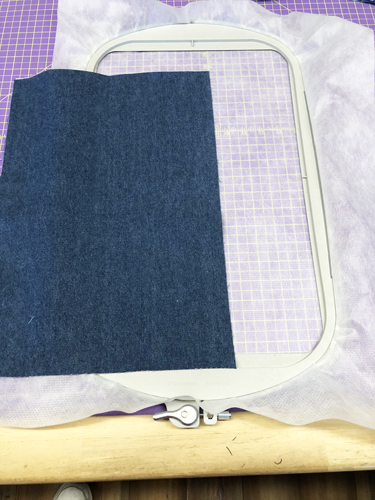
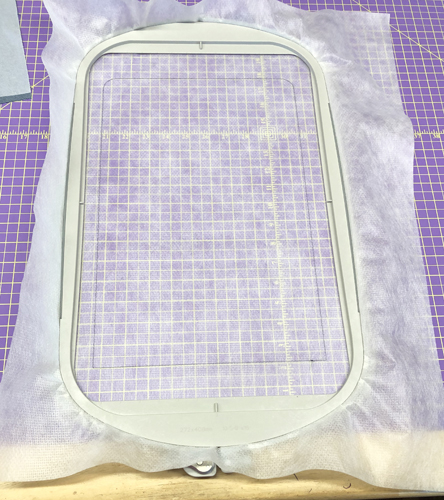
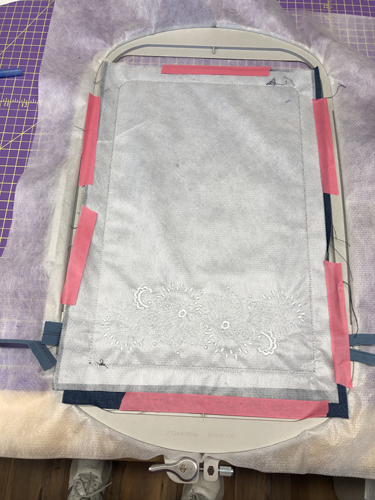
For the 1st hooping take the largest (17 ½” denim fabric) and your hoop with the tautly hooped no-show stabilizer inserted. Run the 1st color-stop (CS) as a placement line.
Step 4:
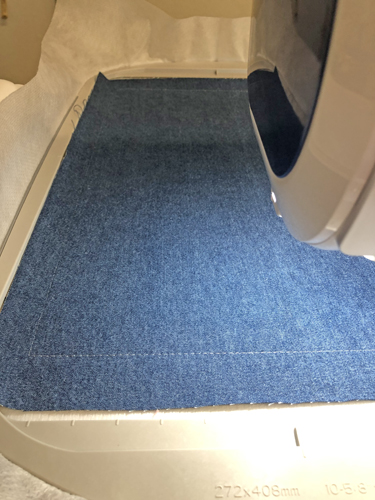
The placement line in this photo was run with a darker thread just to make it easier for you to see. For exact placement of the fabric it is best to remove the hoop from the machine, do not unhoop, and lay the hoop on your cutting mat aligning the bottom of the placement stitches with a straight line on your mat. Spray adhesive on the 17 ½” x 12” denim fabric and position over the placement line so that the fabric exceeds the placement lines by ½” on all sides.
Step 5:
(Click Image to Enlarge)
Run CS 2 in water soluble thread to tack down the fabric. We use water soluble thread for this step in the case any of these stitches show after the bag is assembled you can remove them with a damp sponge.
Step 6:
(Click Image to Enlarge)
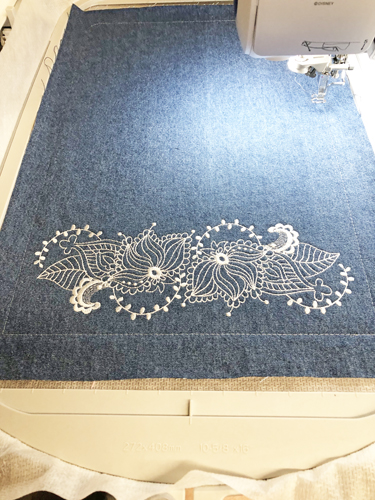
Run CS 3 in white to stitch the design.
Step 7:
(Click Image to Enlarge)
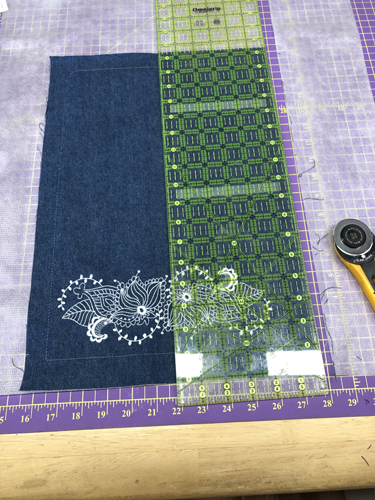
Remove the project from the hoop. Trim away the excess stabilizer around the fabric edges.
Step 8:
(Click Image to Enlarge)
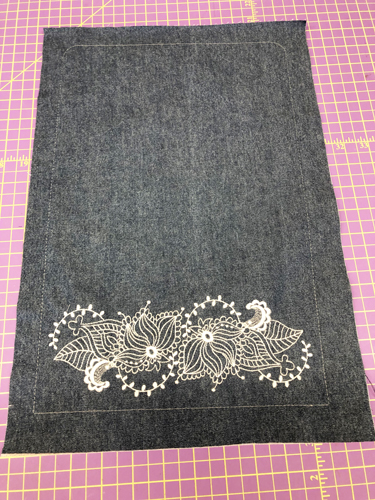
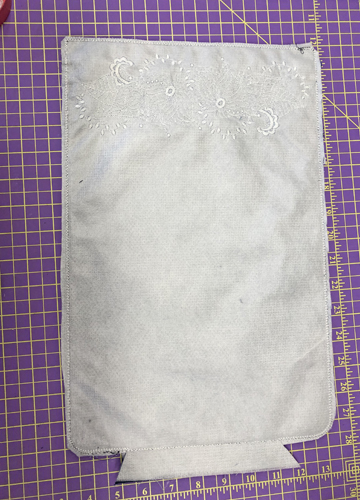
This piece will now be referred to as the bag back.
Step 9:
(Click Image to Enlarge)
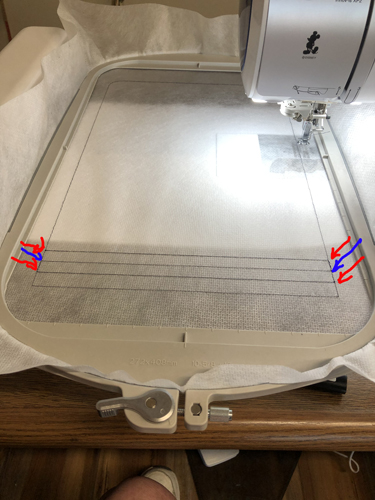
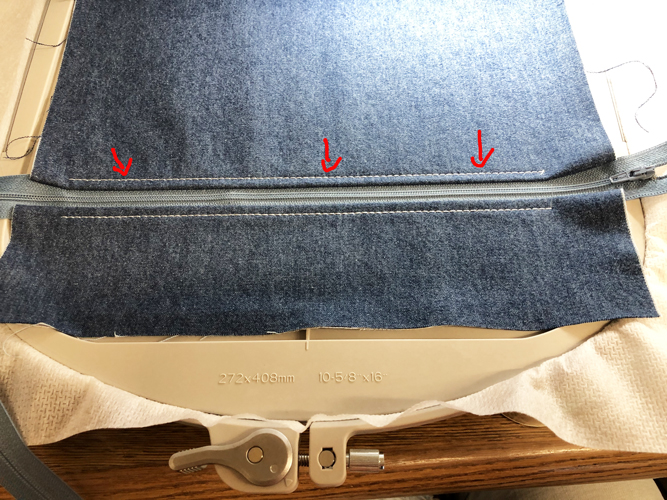
Tautly hoop a new piece of stabilizer. Run CS 4 as a placement line for the zipper and as an outline of the bag. The red arrows indicate the outside placement lines for the zipper. The blue arrows point to the center of zipper placement.
Step 10:
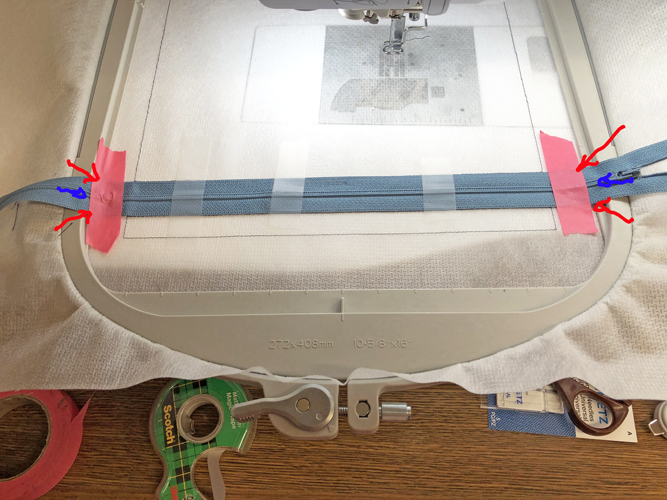
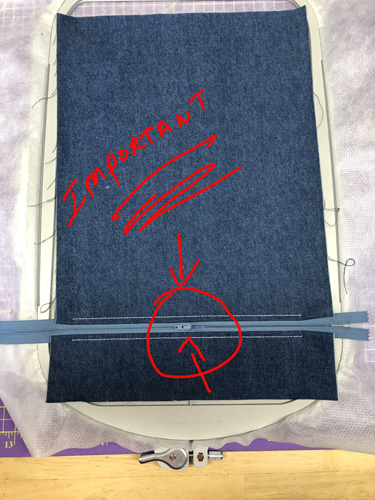
Tape the zipper face up aligning the center of the zipper across the center line and the outside edges of the zipper meeting the two lines indicated by the red arrows. Zippers are not always the same in width. It is important that the center of the zipper is in the correct place. Both ends of the zipper should extend well beyond the side placement lines. Because of the length of this zipper it is good to use cellophane tape in several locations across the zipper to hold it in place. Cellophane tape is preferred here as it is easier to remove after it is stitched through. Embroidery tape is place on the ends of the zipper that are outside of the placement lines as it is stronger.
(Click Image to Enlarge)
Step 11:
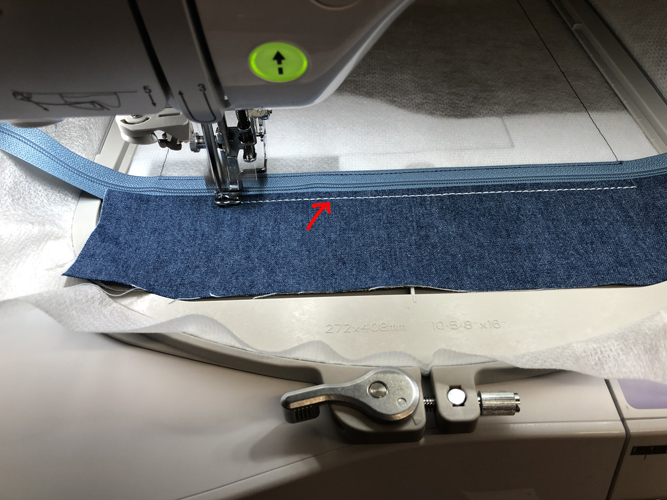
Run CS 5 to tack the zipper down. Remove the cellophane tape.
(Click Image to Enlarge)
Step 12:
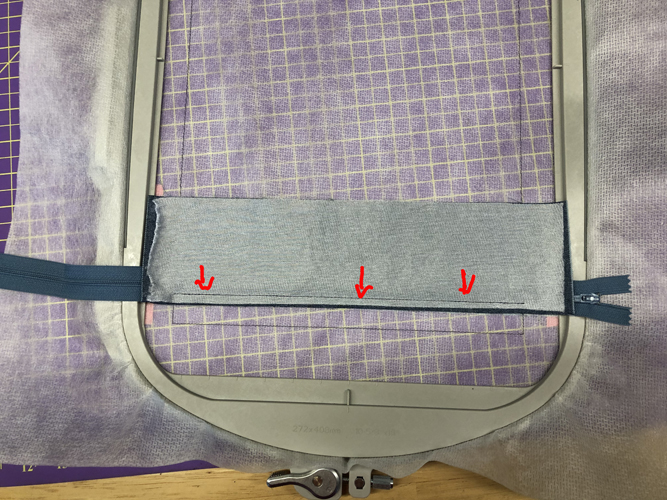
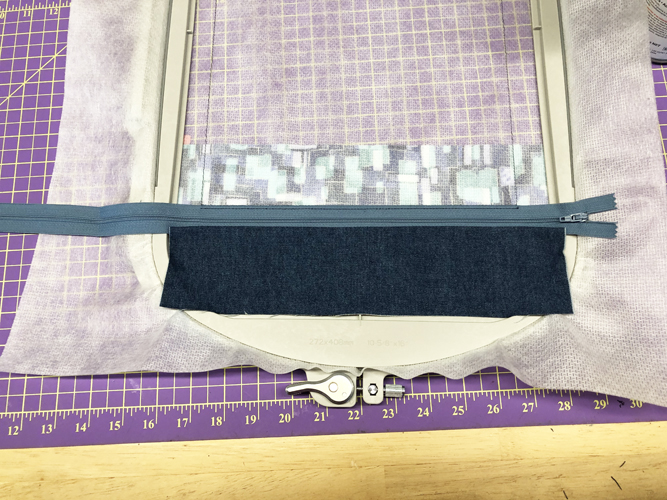
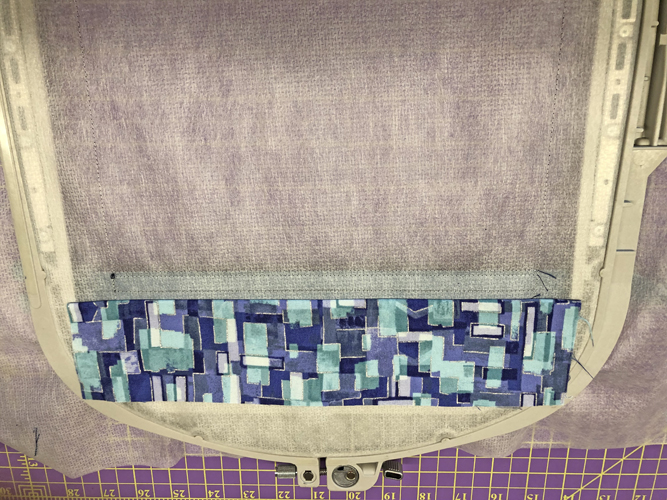
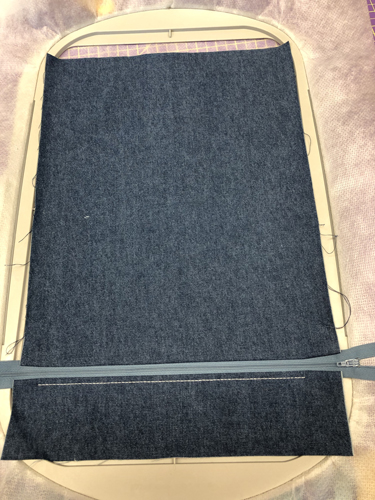
Remove the hoop from the machine, do not unhoop, align one edge of the 3 1/8th” x 12” piece of denim with the lower edge of the zipper having the fabric extend over the zipper; tape down the outer edges.
(Click Image to Enlarge)
Step 13:
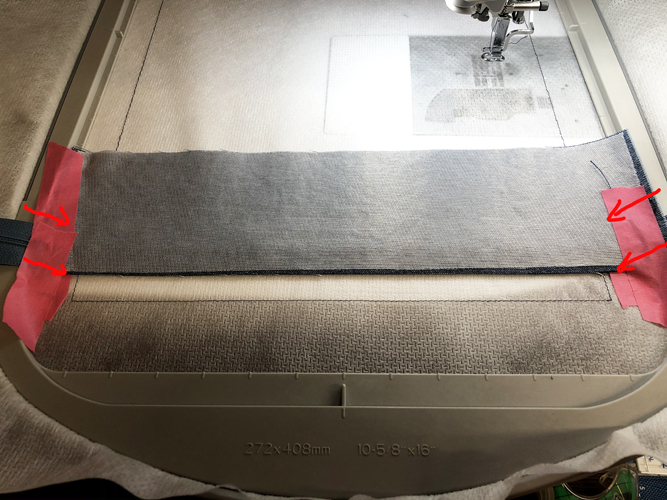
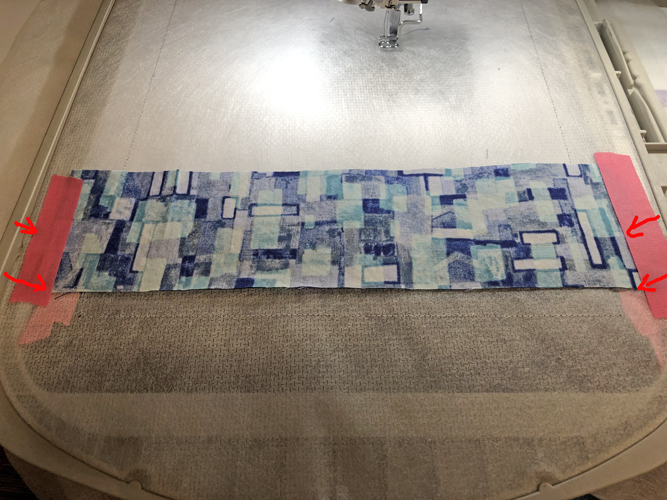
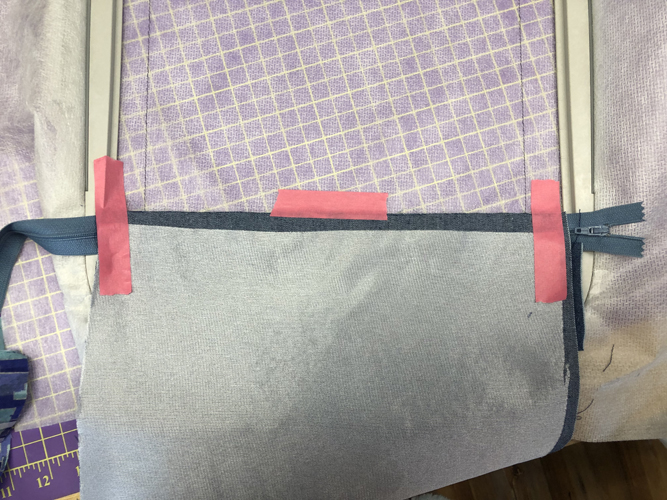
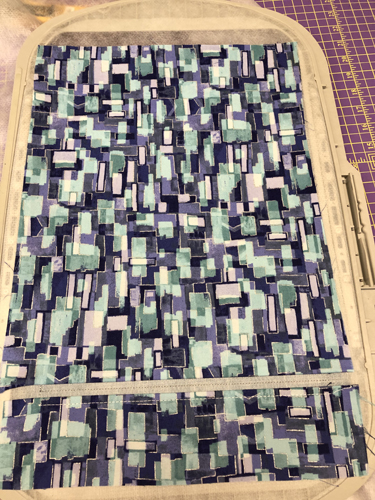
Turn the hoop face down. Tape a long edge of the lining face down to the lower edge of the zipper placement lines.
(Click Image to Enlarge)
Step 14:
Run CS 6 to seam the fabrics to the zipper. Remove the hoop from the machine, do not unhoop.
(Click Image to Enlarge)
Step 15:
Remove the hoop from the machine, do not unhoop. Remove the tape from the denim and spray adhesive on the back of the denim. Smooth the denim over the top placement line.
(Click Image to Enlarge)
Step 16:
Turn the hoop face down. Remove the tape from the lining fabric. Spray adhesive on the back of the lining and smooth the fabric towards the end of the hoop. Be sure not to press to hard on the fabric when smoothing the lining to the stabilizer as you do not want to loosen the stabilizer in the hoop.
(Click Image to Enlarge)
Step 17:
Return the hoop to the machine and run CS 7 to topstitch the top fabrics.
(Click Image to Enlarge)
Step 18:
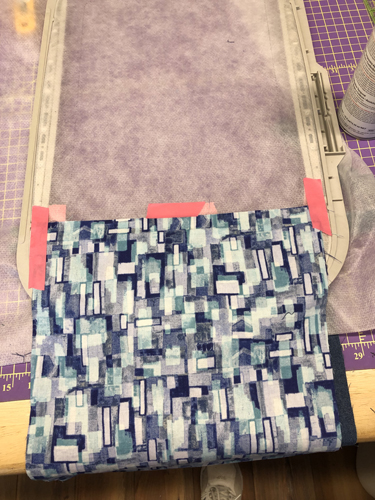
Remove the hoop from the machine, do not unhoop. Place the top edge of the 15 ¼” x 12” denim along the zipper placement line having the bottom of the fabric cover the zipper and top fabric. Tape the fabric into place.
(Click Image to Enlarge)
Step 19:
(Click Image to Enlarge)
Turn the hoop face down. Tape the lining face down aligning with the zipper placement line. Tape the edges into place. Due to the widths of these fabrics the center of the fabric was taped as well. If you choose to do this keep the tape outside of the ¼” seam allowance space so it will not be sewn though. Return the hoop to the machine and run CS 8 to seam the fabrics to the zipper.
Step 20:
(Click Image to Enlarge)
Remove the hoop from the machine, do not unhoop. Remove the tape. Spray adhesive on the back of the denim and smooth over the placement lines.
Step 21:
(Click Image to Enlarge)
Turn the hoop face down. Remove the tape. Spray adhesive on the back of the lining and smooth the lining over the bag placement lines.
Step 22:
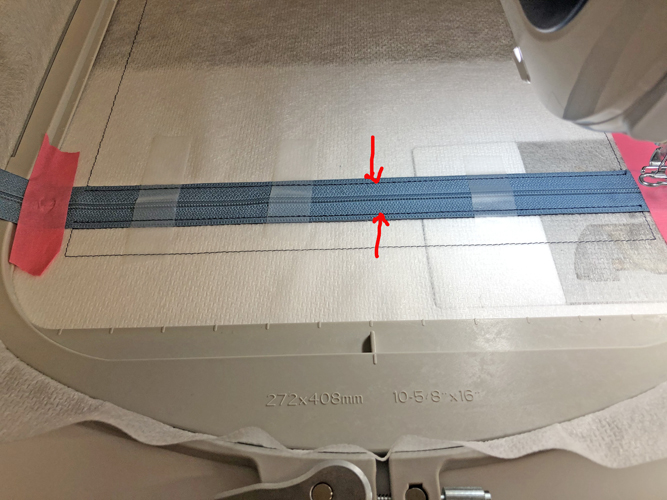
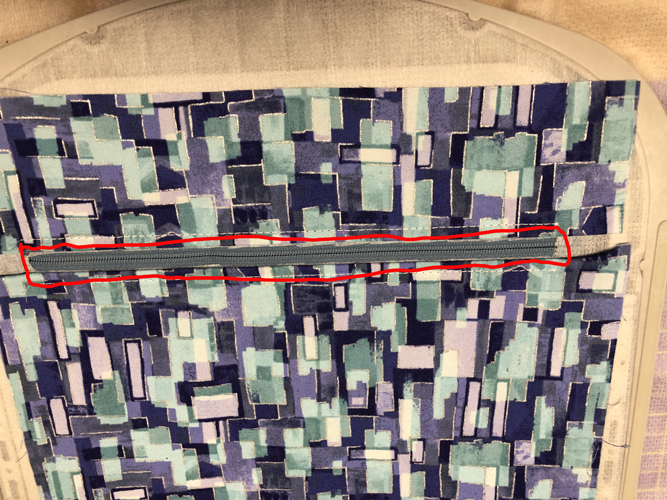
Return the hoop to the machine and run CS 9 to topstitch close to the zipper.
(Click Image to Enlarge)
Step 23:
Remove the hoop from the machine, do not unhoop. With small scissors or a seam ripper lift and remove the stabilizer from the lining side of the hoop. Be careful not to cut your zipper.
(Click Image to Enlarge)
Step 24:
(Click Image to Enlarge)
IMPORTANT – Open the zipper halfway across the bag.
Step 25:
(Click Image to Enlarge)
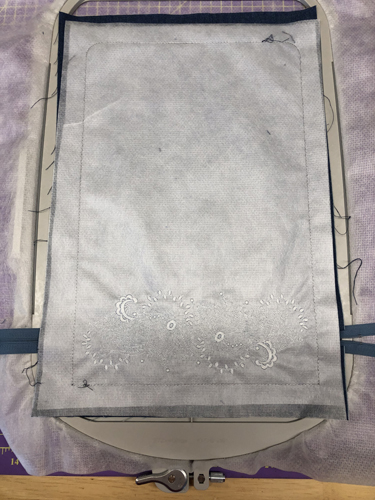
Place the embroidered back fabric face down over the hooped fabric. The embroidery design will be over the zipper.
Step 26:
(Click Image to Enlarge)
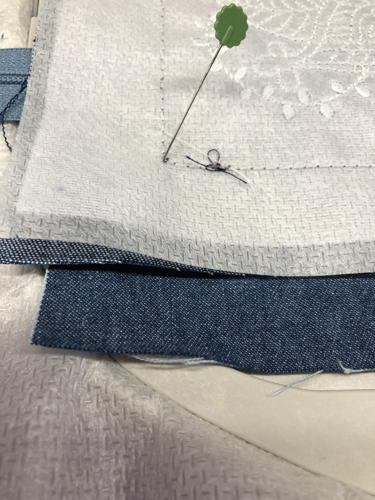
To align the front and back stick a pin through the corner stitching of both the front and back.
Step 27:
(Click Image to Enlarge)
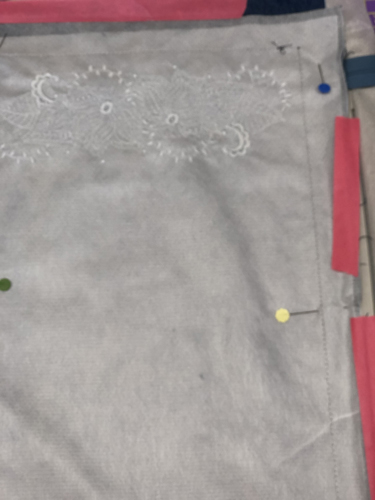
Place a vertical pin next to the vertical pin in the corners and along the side seams. Tape the edges of the top fabric to the under fabric and along edges of the hoop to keep it in place. Remove all pins before returning the hoop to the machine.
Step 28:
(Click Image to Enlarge)
Return the hoop to the machine and run CS 10 to stitch around the whole bag.
Step 29:
(Click Image to Enlarge)
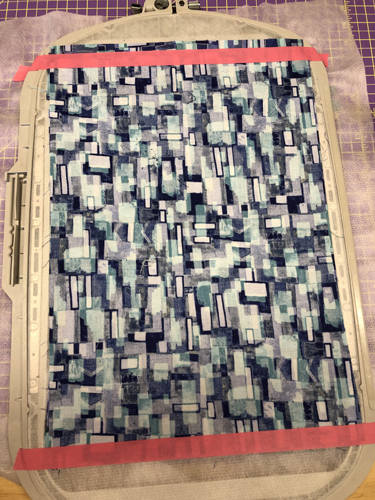
Remove the hoop from the machine, do not unhoop. Place the hoop face down on a flat surface. Place the lining face down over the project so that the fabric exceeds the placement lines by ½” on all sides. Return the hoop to the machine and run CS 10 as the final seam which will leave an opening on one side of the bag for turning.
Step 30:
(Click Image to Enlarge)
Cut two angled slits in at the area left for the turning. Trim around the rest of the bag with a ¼” seam allowance. Trim diagonally across the corners. Trim the fabric across the opening to a ½” seam allowance. Clip the curves.
Step 31:
(Click Image to Enlarge)
Place the project on a table and fold back to top to lining pieces over the opening. Trim the fabric and stabilizer under the lining to a ¼” seam allowance.
Step 32:
(Click Image to Enlarge)
Turn the bag lining side out through the opening. Use a tube turner or other object to poke out the corners.
Step 33:
(Click Image to Enlarge)
Turn the lining fabric seam allowance to the inside and slip stitch the opening closed.
Step 34:
Open the zipper and turn the bag right side out. Use a tube turner stick to poke out the corners. Press all around the bag with a steam iron.
(Click Image to Enlarge)
Step 35:
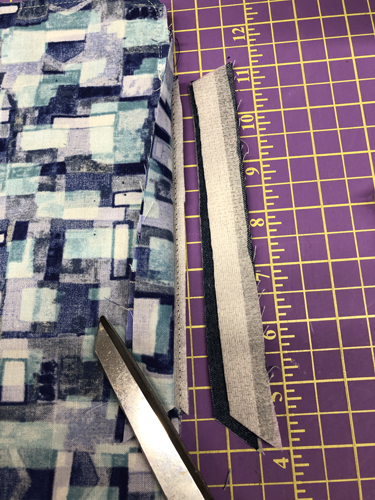
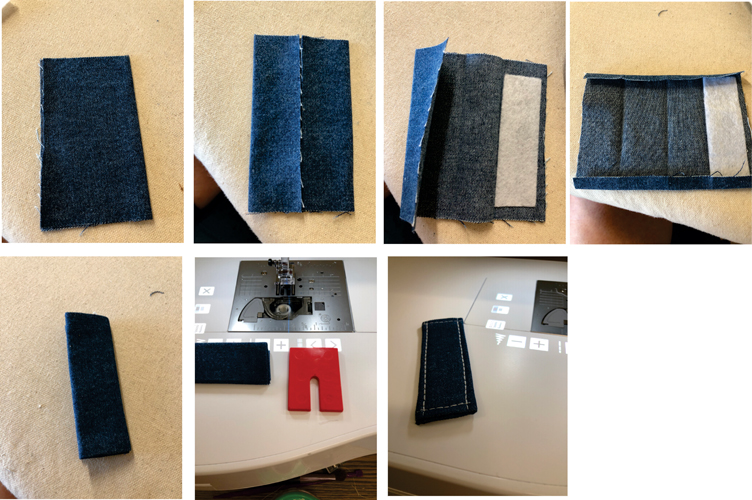
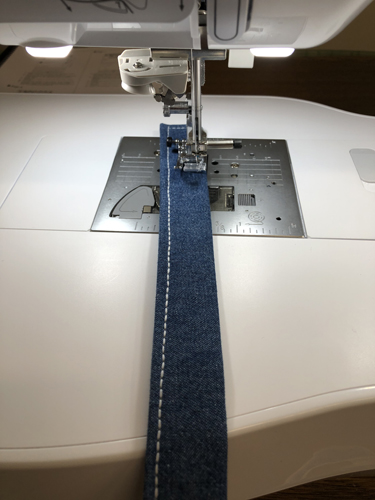
To make the straps for the D-rings cut two pieces of fabric 3 ¾” tall x 4” in width, and a 1” x 3 ¼” strip of fusible batting. Fold the 4” side in half and press so that it measurers 2” x 3 ¾”. Open the fabric and bring the two sides to the fold in the center and press. Open the fabric and fuse the batting centered on one edge. Fold and press ¼” in on the top and bottom edges of the fabric. Fold the two sides to the center again and then fold the strap in half and press. Insert the Jeans needle in your machine and top stitch around the strap. You may need a Jeans Jig to raise the presser foot to topstitch around all sides of the two straps.
(Click Image to Enlarge)
Step 36:
(Click Image to Enlarge)
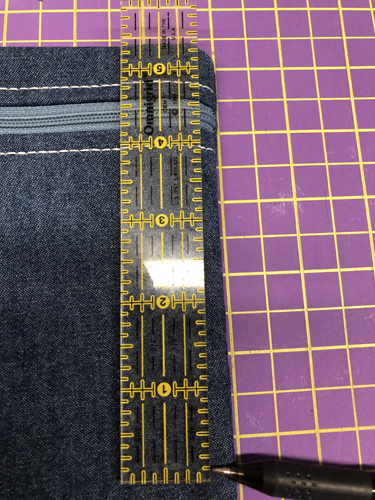
Measure down 5 ½” on both sides of the bag and make a mark as a placement line for the side straps.
Step 37:
(Click Image to Enlarge)
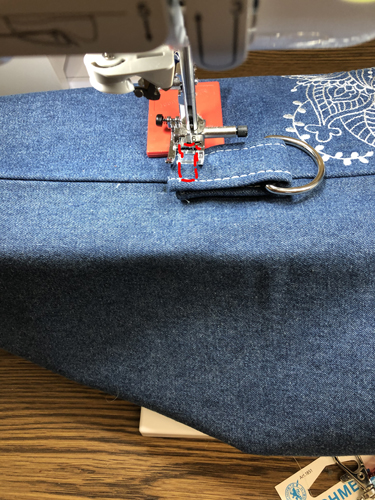
Slip the D-ring on the strap and fold in half. Remove the embroidery unit so that you can use the free arm on the machine. Slide the bag onto the free arm. Align the bottom of the strap with the mark you made. Stitch a rectangle through the end of the folded straps to attach it to the purse. Repeat on the other side of the bag.
Step 38:
(Click Image to Enlarge)
Cut a 4” x 50” strip of denim for the crossbody strap and a 1” x 49 ½” of fusible batting. Fold. Press and assemble the strap as you did in Step 35. Adjust the length of the strap for shorter or taller people, but 50” is the standard for most body heights.
Step 39:
(Click Image to Enlarge)
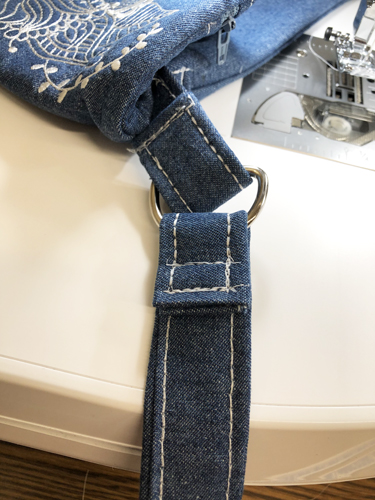
Slip the ends of the strap though the D-ring about 1” fold over and stitch down as in Step 37.
Step 40:
Congratulations your Crossbody Fold Over Bag is complete!
Award winning Digitizer, Embroidery Educator, Author and a Consultant to the Industry, Pat Williams has 30 years of experience in the embroidery industry. Pat has won multiple awards for her digitizing expertise including the 2007 Impressions Awards Grand Championship, Best of Show as well as the 1st and 2nd Place Awards. Pat’s love of digitizing has afforded her the opportunity to write numerous articles for Impressions magazine in the United States and Images Magazine in Europe. In 2001 Pat was named “Embroidery Educator of the Year.” For many years Pat taught digitizing seminars at the ISS Shows in Long Beach, CA and for Compucon software. She now resides in Tucson, AZ.