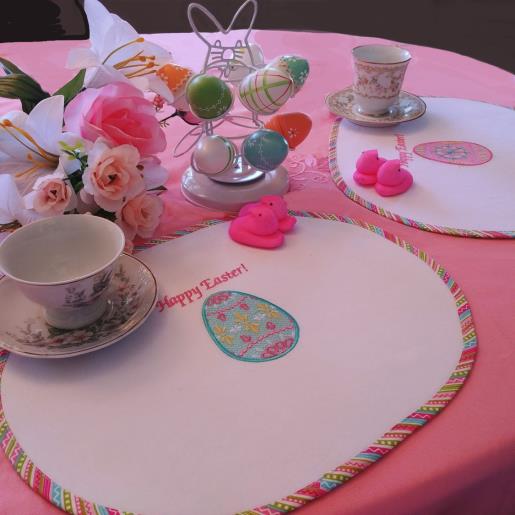
These placemats are easy to do and each one takes only about 20 minutes to stitch. After that it is a matter of fusing fabrics to each side of the placemat, add binding, and the placemat is ready for use. The iridescent Mylar adds a touch of sparkle to the beautiful stitching.
Step 1:
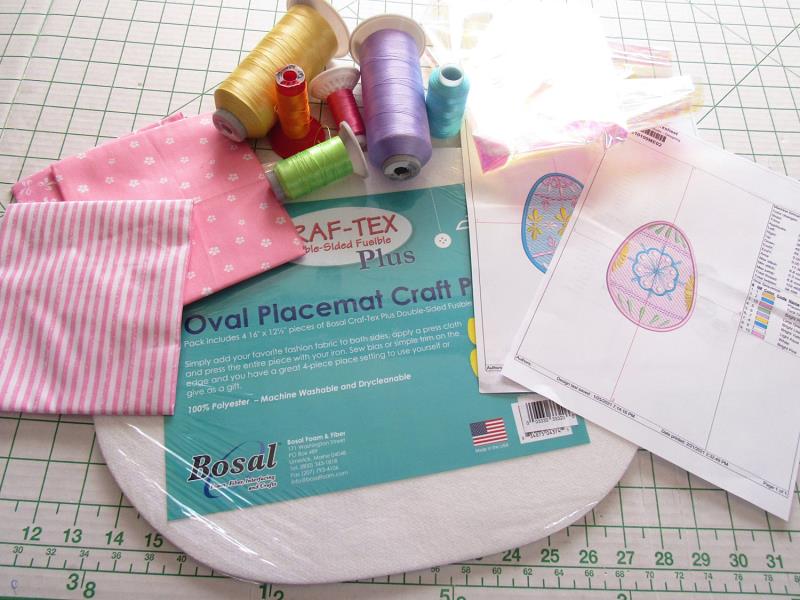
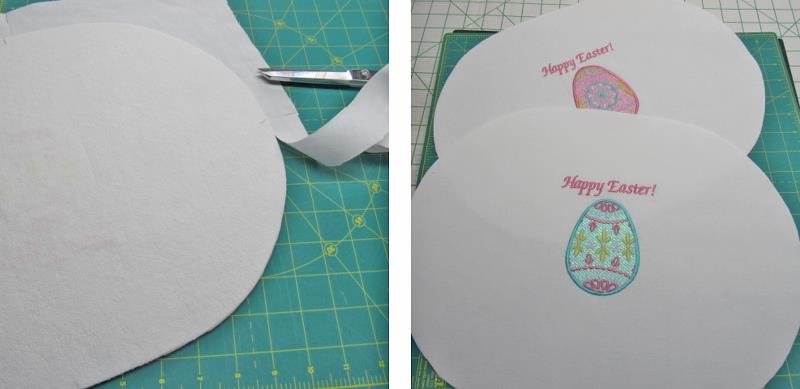
Read through the instructions thoroughly before beginning and assemble all the materials needed to complete the project. Print out the paper templates. Each placemat takes two fat quarters: one for the front, and one for the back.
(Click Image to Enlarge)
Step 2:
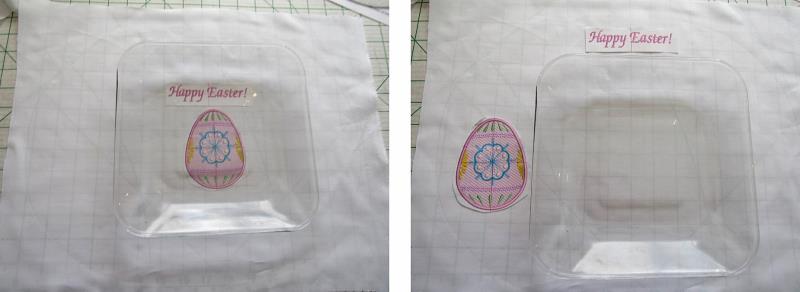
Cut out the paper templates and decide on the design. For these placemats, a clear glass luncheon plate will be used, I decided to center the design underneath the plate. The designs may be placed wherever you’d like—another layout would be to have the egg on the left and the text at the top of the plate.
(Click Image to Enlarge)
Step 3:
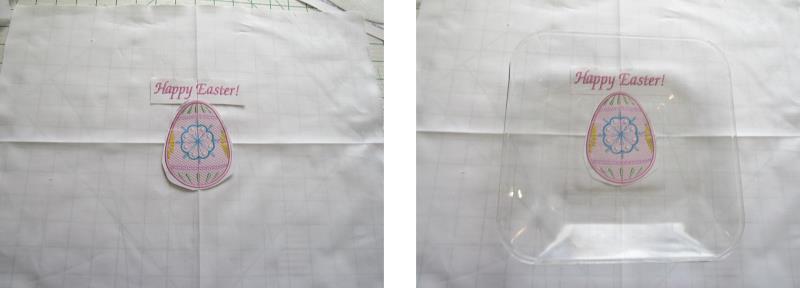
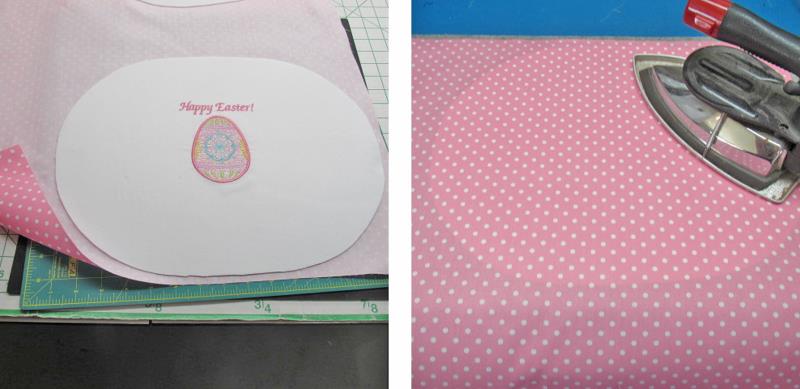
Press the fabric well with spray starch and then quarter fold the fabric and lightly creates. Place the egg at the center of the crosshair, and the text on top; double check the placement with the plate.
(Click Image to Enlarge)
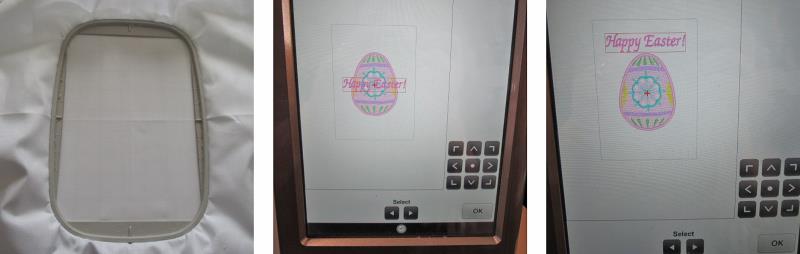
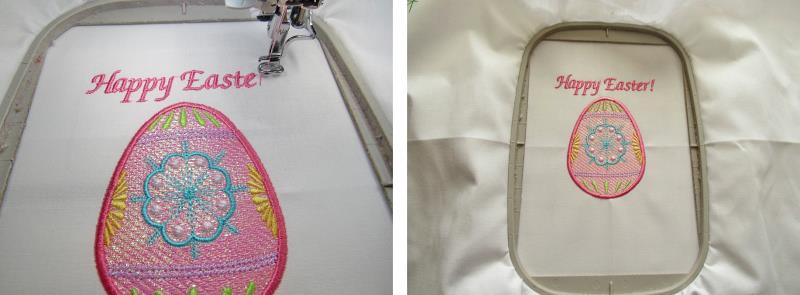
Step 4:
Hoop the fabric with a layer of tearaway stabilizer. Load the designs on the machine. Bring in the egg in first because it will center on the screen. Add the text. Use the arrow keys to move the text above the egg.
(Click Image to Enlarge)
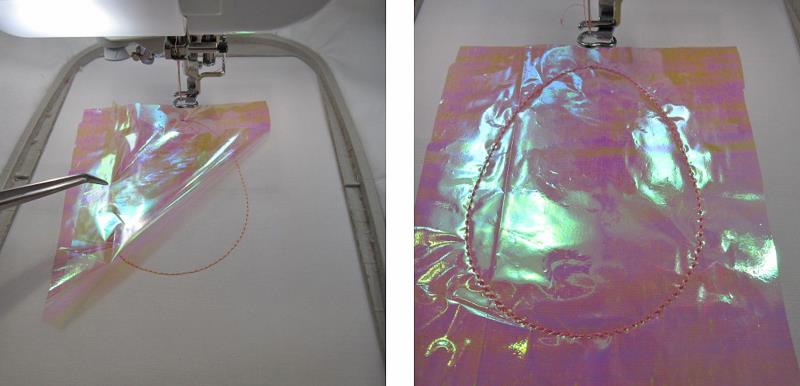
Step 5:
Stitch color 1, the placement line. Place the piece of Mylar over the placement line. Stitch color 2 which tacks down the Mylar.
(Click Image to Enlarge)
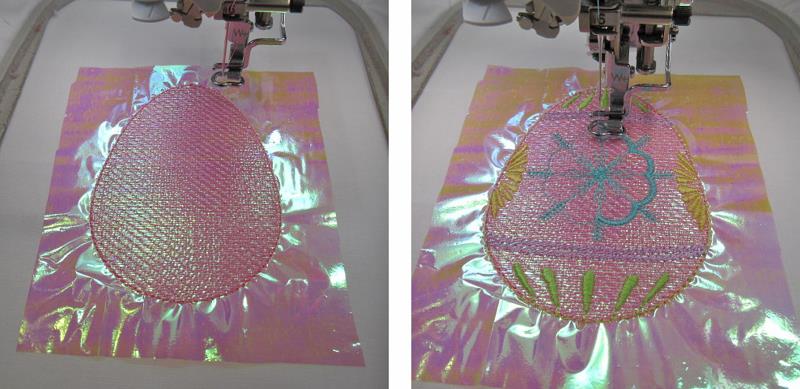
Step 6:
Stitch color 3, the open density over the mylar. Continue stitching through the sequence of colors.
(Click Image to Enlarge)
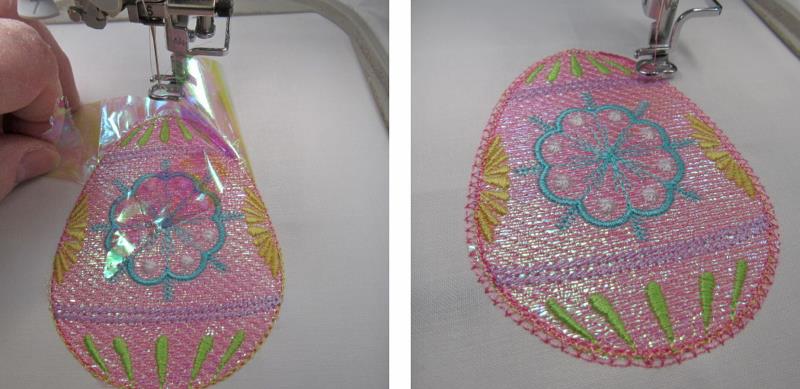
Step 7:
Before the satin outline stitches, carefully tear away the excess mylar. Tear the mylar toward the stitching so it tears away cleanly without disturbing the stitches. Stitch the satin outline.
(Click Image to Enlarge)
Step 8:
Stitch the last color, the text.
(Click Image to Enlarge)
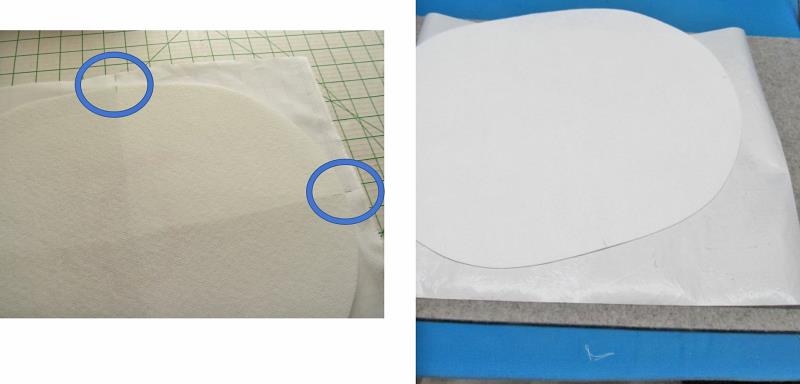
Step 9:
Remove the embroidered fabric from the hoop. Use a pencil on the outer edges of the crease lines (circled) to aid in aligning the placemat to the fabric.
(Click Image to Enlarge)
Step 10:
Press the embroidered fabric well and then flip it over. Very carefully fold the placemat in half one way and then the other, making pencil tick marks at the folds (circles). Align the pencil marks on the placemat to the pencil marks on the fabric; this will center the design on the placemat. Place down a Teflon pressing sheet before pressing the embroidered fabric to the mat, because both sides of the placemat have glue on them.
(Click Image to Enlarge)
Step 11:
Working from the center out, press the embroidered fabric to one side of the mat following the manufacturers’ directions. The mat will adhere firmly to the fabric.
(Click Image to Enlarge)
Step 12:
Trim the excess fabric from around the edge of the placemat. Repeat the steps for any other mats you are going to do.
(Click Image to Enlarge)
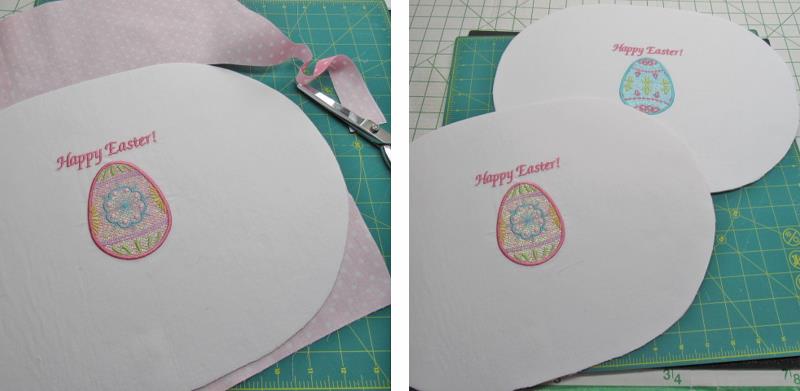
Step 13:
Select the fabric for the reverse side of each placemat. Place the back side of the mat on the wrong side of the fabric and press it.
(Click Image to Enlarge)
Step 14:
Trim the excess fabric from around the placemat, and repeat for the other mats.
(Click Image to Enlarge)
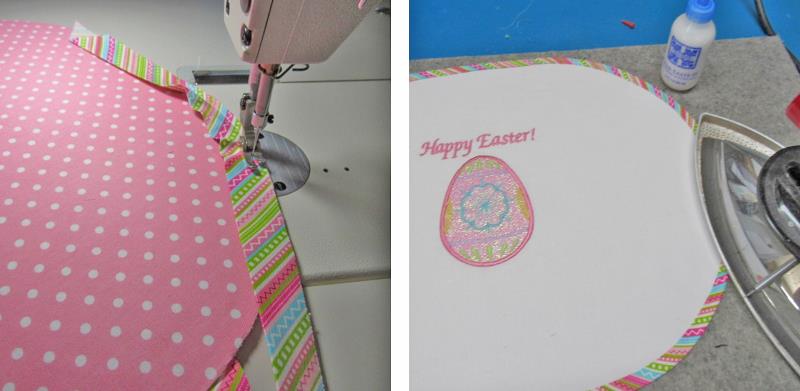
Step 15:
Decide on the binding for the edge. Cut strips 2” wide on the bias and sew them together. Trim and press the seams open and then press the binding in half lengthwise.
(Click Image to Enlarge)
Step 16:
From the wrong side, match the cut of the binding to the outer edge of the placemat; sew the binding through all layers using a ¼” seam. Around the curves ease in some fabric and use your favorite method for the ends of the binding. Flip the binding to the front and press. Tip: after pressing the binding to the front, use fabric basting glue to temporarily hold down the binding for stitching—just follow the directions on the package.
(Click Image to Enlarge)
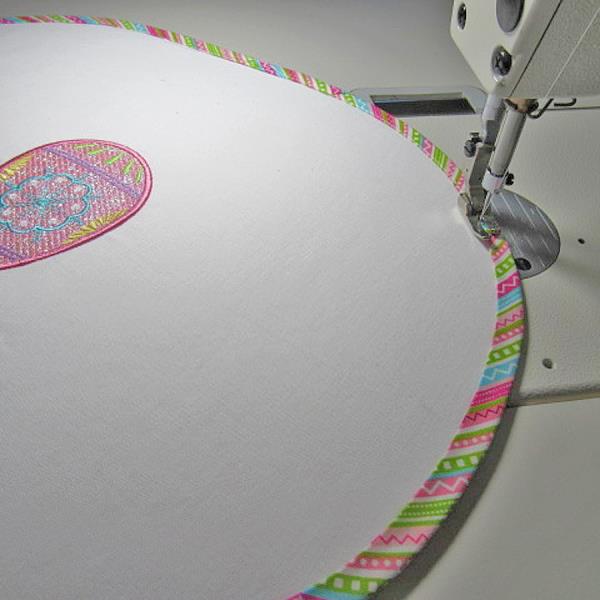
Step 17:
Edgestitch the binding down on all the placemats.
(Click Image to Enlarge)
Step 18:
Congratulations on completing your new placemats for your holiday table.
Ramona Baird has been in the embroidery industry for over 23 years. She and her husband owned a commercial and retail embroidery store in Arizona for many years. She is an experienced digitizer having been mentored by award-winners Pat Williams and Lindee Goodall. Ramona is a contributor to “Creative Machine Embroidery” magazine having 5 covers to her credit. Ramona has worked for Wilcom America and served many years as Education Director for the American Sewing Guild. With a degree in fashion design, she is able to design and execute patterns which Pat Williams says are “out of the box” in creativity and application. Ramona likes to challenge the boundaries of embroidery and bring new and exciting designs, ideas, and projects to EmbroideryDesigns.com. She wants embroiderers of all levels to increase their skills and enjoyment in using their embroidery machine for gift-making and personal pleasure.