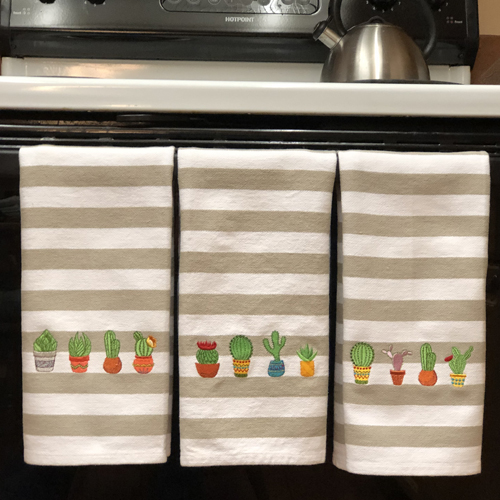
Potted cacti sitting on shelf is a popular decorating theme. The focus of this project is to show you how to line them up on a striped dish to make them appear as they are sitting on a shelf.
The mini cactus designs are available as individual designs if you do not have a 5” x 7” hoop, those will all fit in a 4” x 4” hoop. Three sets of the mini cactus designs are available in units of 4 cacti each to make this project even simpler for those with 5” x 7” or larger hoops. These cacti would also be great designs to stitch on a denim shirt or a zippered bag. Instructions are written to embroider these towels on a Brother® Innovis VE2200 and includes some shots of the screens. Consult your manual if your screen appears differently.
Step 1:
(Click Image to Enlarge)
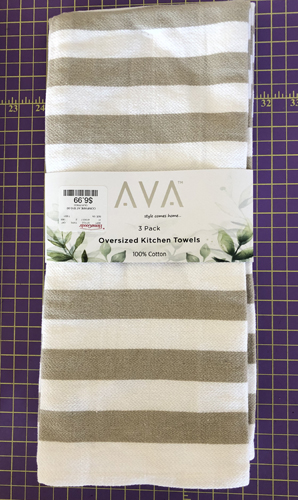
These dishtowels were purchased at Home Goods, but the techniques explained in this project can be used on any striped towel. The one thing all purchased dishtowels have in common is that they will shrink, so be sure to wash and iron your towels before embroidering them.
Step 2:
(Click Image to Enlarge)
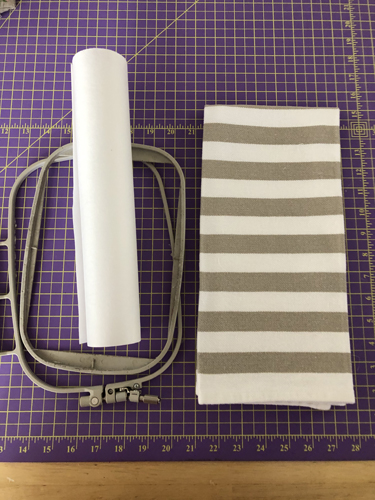
To embroider the project you will need fusible tear-away stabilizer, a washed and ironed dishtowel and a 5” x 7” embroidery hoop.
Step 3:
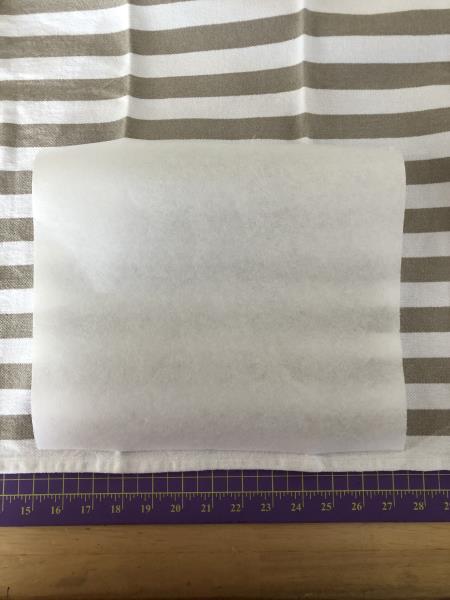
Cut a piece of the fusible tear-away stabilizer 12” x 12” and fuse to the back of the towel following the manufacturer’s instructions. As I wanted to stitch the cacti on the 2nd tan stripe from the bottom, I fused the stabilizer all the way down to the bottom hem of the towel. Even though I wanted to sew closely to the bottom of the towel I wanted the stabilizer to fill the hoop. Note: If your towel has loops on the front or back use regular non-fusible tear-away as tearing away the fusible tear-away may pull the loops loose.
(Click Image to Enlarge)
Step 4:
(Click Image to Enlarge)
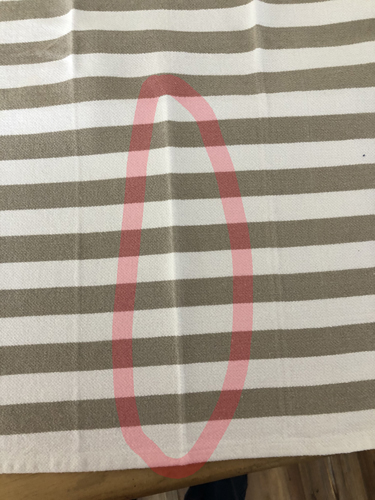
After fusing the stabilizer fold the towel sides together and press a line down the center to use in aligning the towel in the hoop.
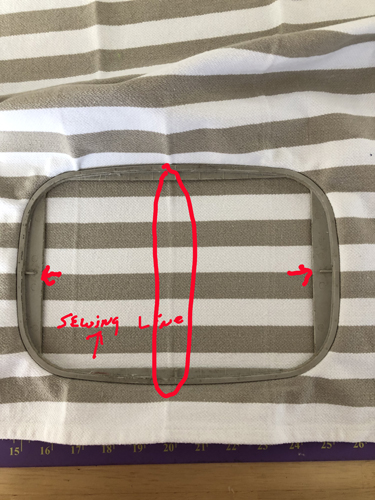
Step 5:
(Click Image to Enlarge)
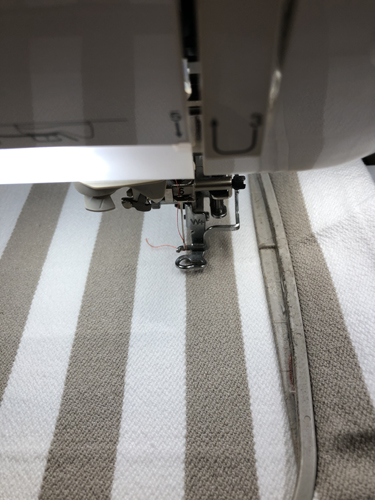
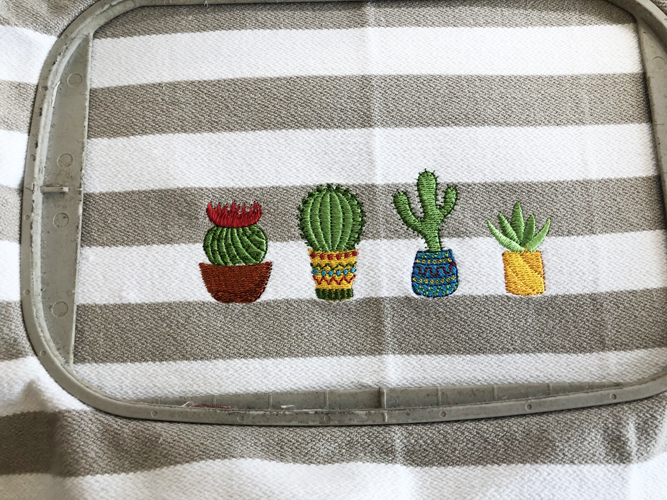
Hoop the towel centering the pressed line with the arrows on the sides of the hoop. Align the stripes of the towel with the marks on the top and bottom of the hoop. If your towel does not have continuous stripes you may want to measure up from the stripe you want to stitch on about 3 1/2” and mark the towel so that you have points to align with the hoop. This will ensure that the stitching stripe is straight in the hoop.
Step 6:
(Click Image to Enlarge)
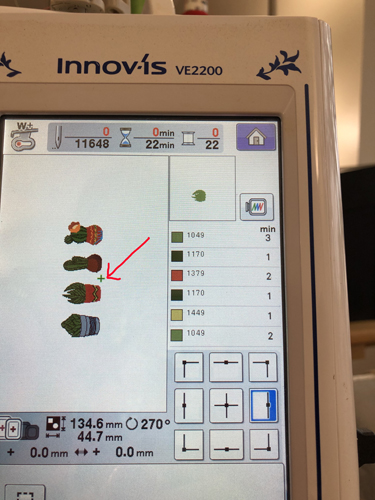
Open the design in your machine. If using a single needle machine you will need to rotate the design 90 degrees to the left. If you are using a multi-needle machine you will not have to rotate the design. Even though the center of these designs is set at the bottom of the design this machine does not recognize that and automatically sets it at the center of the design as indicated by the green plus sign.
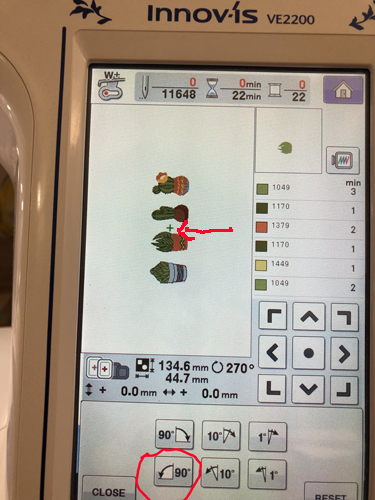
Step 7:
We want the design to center at the bottom of the design so that we can make sure the cacti look like they are sitting on the shelf. To do this touch the trace design feature on the machine.
(Click Image to Enlarge)
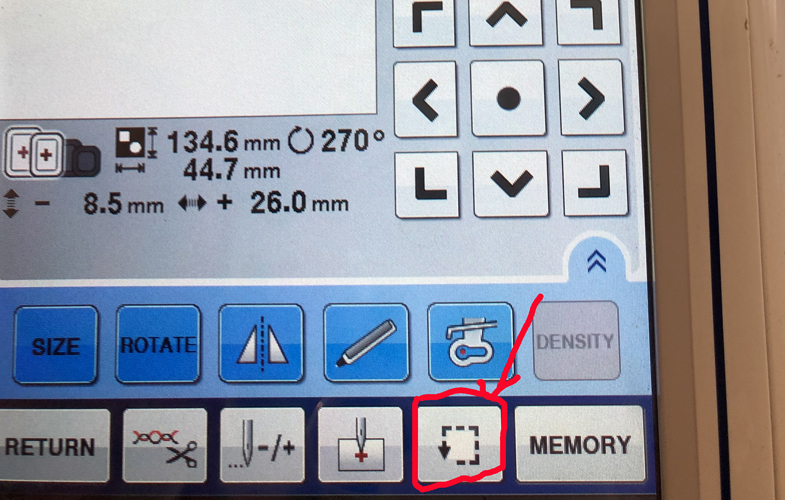
Step 8:
(Click Image to Enlarge)
This opens a new screen where you can touch the right-hand side center block of the placement screen.
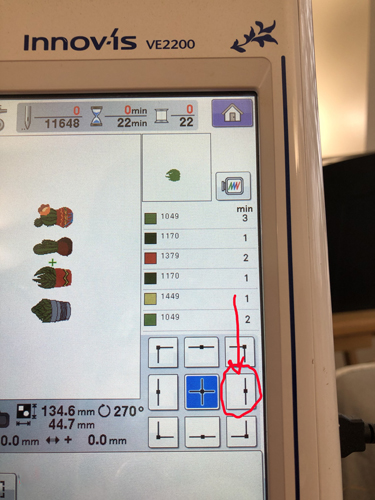
Step 9:
(Click Image to Enlarge)
Now you can see that the center of the design is set at the bottom of the cacti.
Step 10:
(Click Image to Enlarge)
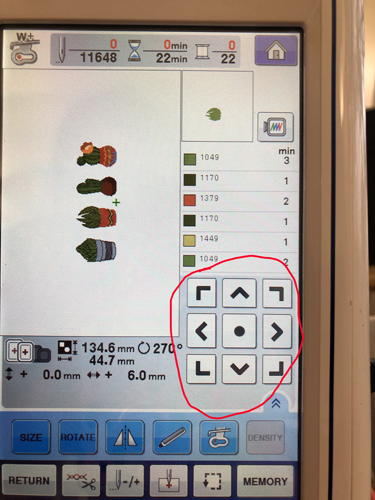
Close the trace window and you will be back at the screen where you can move the actual design to ensure it will right on top of your stripe and that the design is centered over your pressed center of towel line.
Step 11:
(Click Image to Enlarge)
After you position your needle on the towel stripe it is wise to trace the design again to see that your stripe is straight in the hoop.
Step 12:
(Click Image to Enlarge)
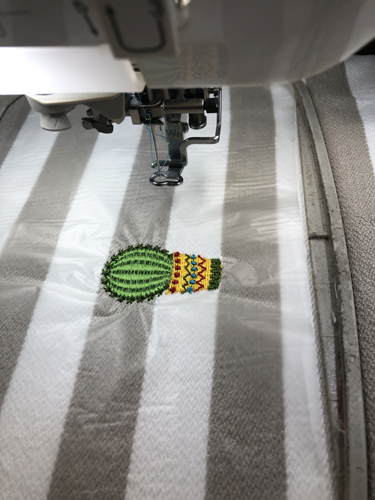
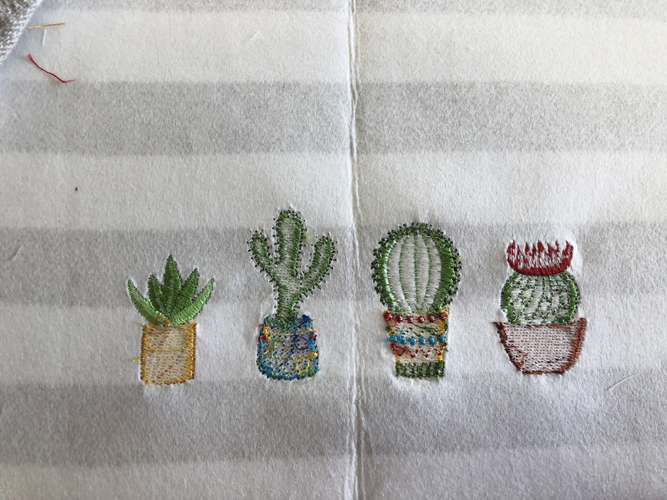
Lay a strip of Solvy® across the embroidery area and follow the color chart to embroidery the row of cacti. Each cacti will stitch out completely. Resist the urge to re-sequence the color chart to reduce the number of color stops. The towels are too soft to maintain the proper registration if the color sequence is changed.
Step 13:
Complete the embroidery and tear off the Solvy® from the front of the design.
(Click Image to Enlarge)
Step 14:
Turn the hoop over and being careful not to cut off any tie-off knots trim the tie off thread tails to neaten the back. Remove the project from the hoop and remove the fusible stabilizer following the manufacturer’s instructions.
(Click Image to Enlarge)
Step 15:
(Click Image to Enlarge)
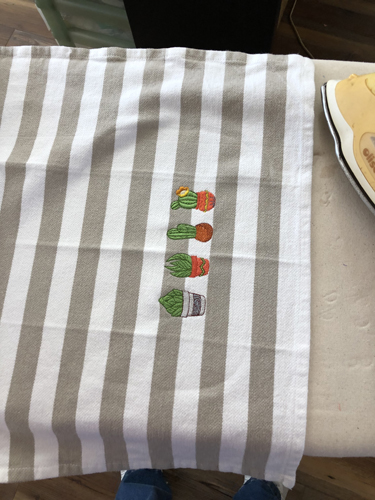
Press the towel again to remove the center fold line and to remove any hoop marks.
Step 16:
Complete all three designs to brighten your kitchen with these embroidered cacti on a shelf!
Award winning Digitizer, Embroidery Educator, Author and a Consultant to the Industry, Pat Williams has 30 years of experience in the embroidery industry. Pat has won multiple awards for her digitizing expertise including the 2007 Impressions Awards Grand Championship, Best of Show as well as the 1st and 2nd Place Awards. Pat’s love of digitizing has afforded her the opportunity to write numerous articles for Impressions magazine in the United States and Images Magazine in Europe. In 2001 Pat was named “Embroidery Educator of the Year.” For many years Pat taught digitizing seminars at the ISS Shows in Long Beach, CA and for Compucon software. She now resides in Tucson, AZ.