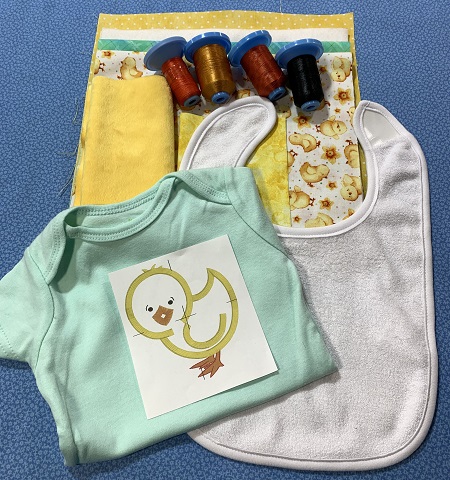
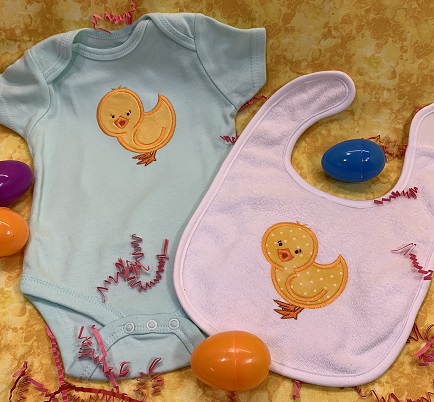
Chirp! Chirp! An adorable baby chick appliqued on baby bib & onesie set. A different type of fabric is used on each chick. The baby chicks are appliqued with a low pile minky and quilter's cotton.
Step 1:
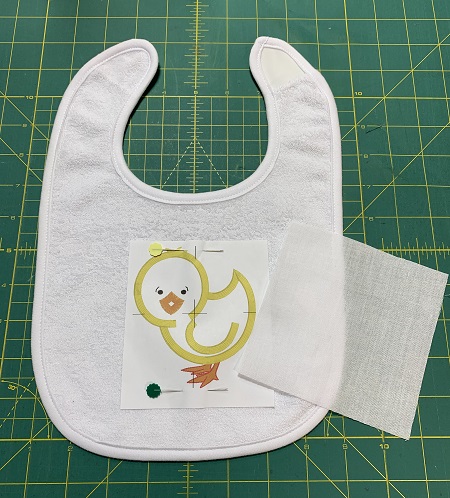
Read the directions before beginning. Select the materials needed for the project. Iron the cotton fabric for the chick. Print the design template. The design template is the actual size of the stitched design. Cut the minky, cotton fabric, Hot Fix adhesive, Pellon SF101, and the Baby Soft Iron On according to the sizes on the materials list.
Step 2:
To make the bib...
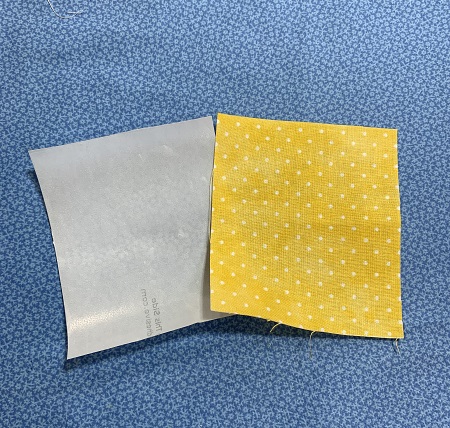
Follow package directions to bond one piece of Hot Fix adhesive to the back of the 5"x5" piece of cotton fabric.
Step 3:
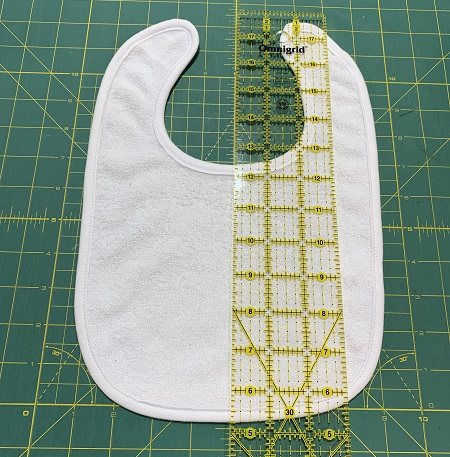
Fold the baby bib in half. Finger press along the fold line. Open the bib with the front side facing you. Lay a ruler along the fold line.
Step 4:
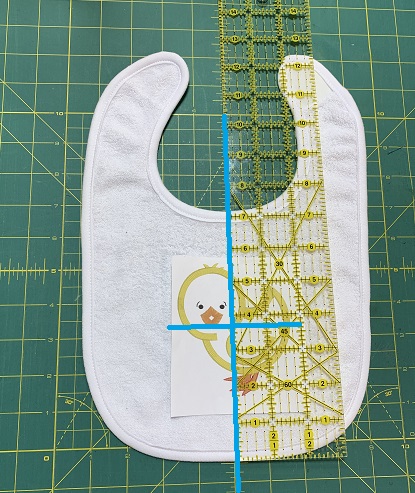
Use the design template to guide placement on the bib. Match the axis on the design template with the ruler. Pin the template to the bib.
Step 5:
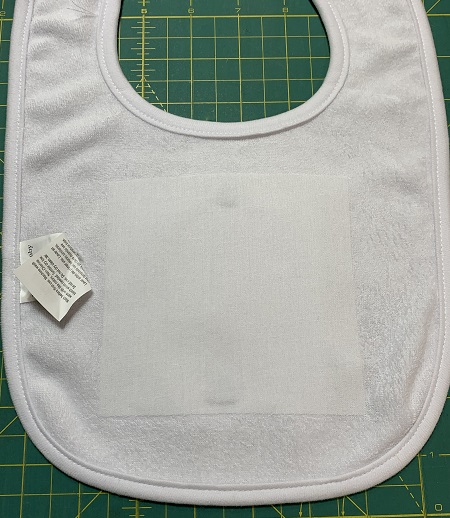
Put one 5"x5" piece of SF101 on the back of the bib directly behind the design template.
Step 6:
Follow package directions to bond the SF101 onto the baby bib. The SF101 will help stabilize the stretchy, terry fabric.
(Click Image to Enlarge)
Step 7:
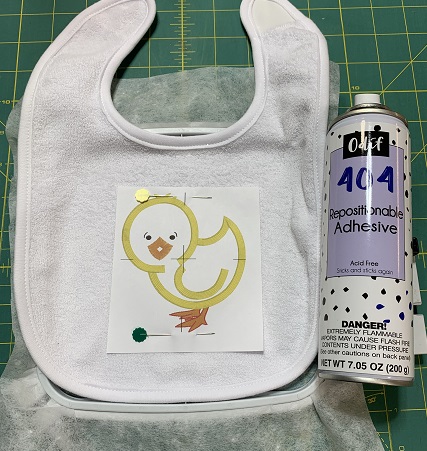
Tautly hoop one piece of tear away stabilizer. Lightly mist the stabilizer surface with 404 Repositionable spray. Center the bib on the stabilizer. Gently press the hand towel onto the stabilizer. Fabric surface must be smooth and wrinkle free. Secure fabric to stabilizer with Wonder Pins.
Step 8:
Applique embroidery uses small pieces of fabric or cloth in different shapes and patterns get stitched to a base cloth in the form of other pictures and designs. There are 3 parts to machine embroidery applique: placement, tack down, and finishing stitches.
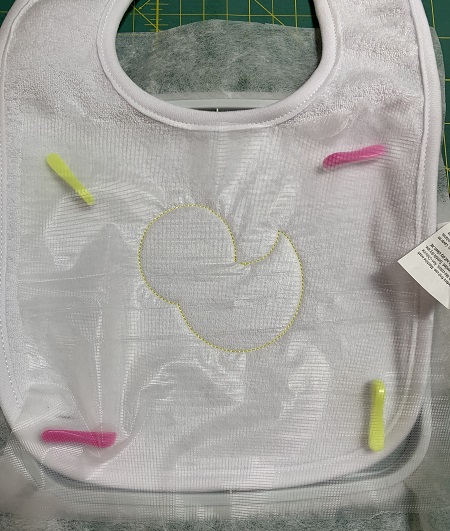
Load the design onto the embroidery machine. A 80/12 embroidery needle is recommended because of the fabric type and embroidery technique. Attach the embroidery hoop. Make sure that the stitching field is clear. Place one piece of water-soluble stabilizer topping on top of the stitching field. Stitch color stop 1 (CS1).
(Click Image to Enlarge)
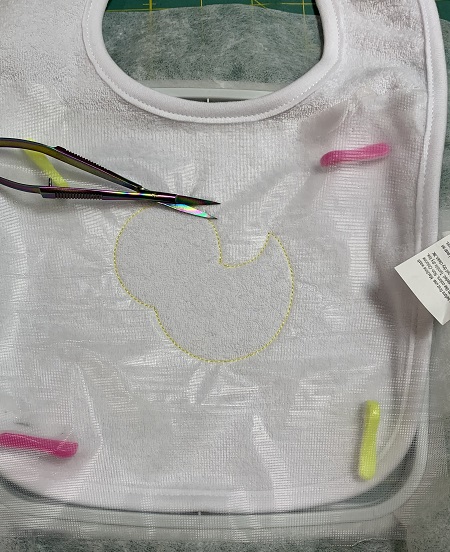
Step 9:
Remove the hoop. Carefully remove the water soluble stabilizer topping inside the ring of placement stitches. Place the 5"x5" piece of cotton fabric over the placement stitches. Re-attach the hoop.
(Click Image to Enlarge)
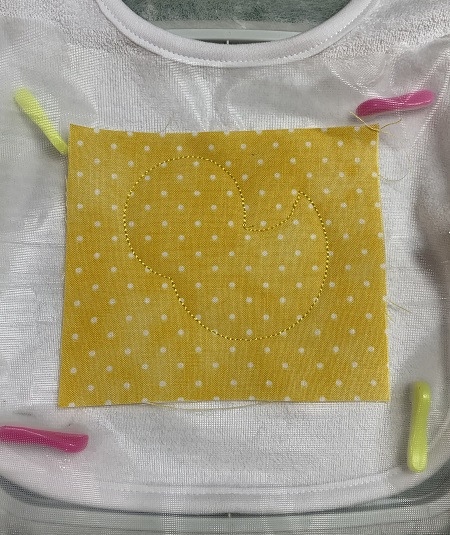
Step 10:
Stitch CS2. CS2 is the tack down stitches. Remove the hoop. DO NOT remove the bib from the hoop.
(Click Image to Enlarge)
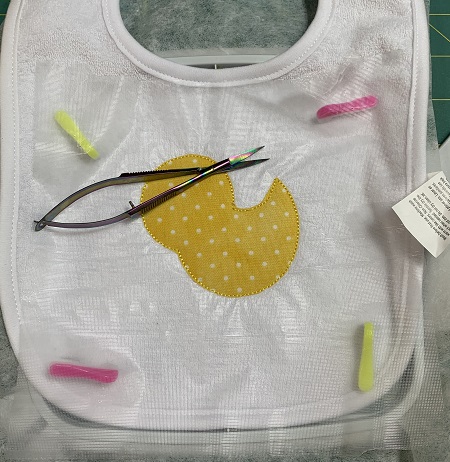
Step 11:
Place the hoop on a solid, flat surface. Trim the extra fabric from around the tack down stitches. Be careful not to cut the stitches or the towel. Re-attach the hoop.
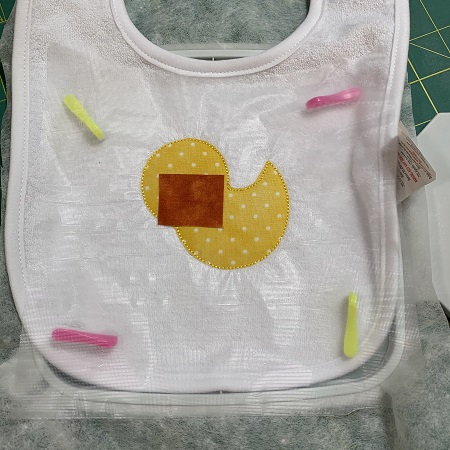
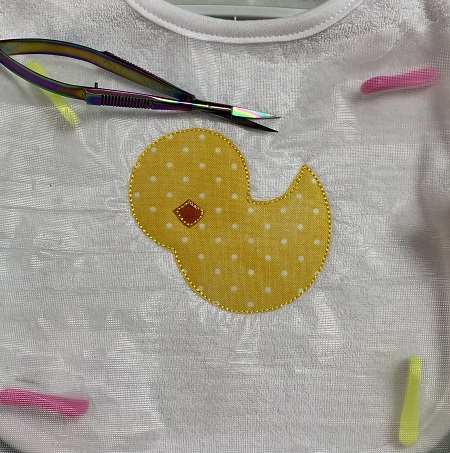
Step 12:
Stitch CS3. CS3 is the placement stitches for the beak. Cover the placement stitches with the 2"x2" piece of orange fabric.
Step 13:
Stitch the tack down stitches. Trim excess fabric from around the beak.
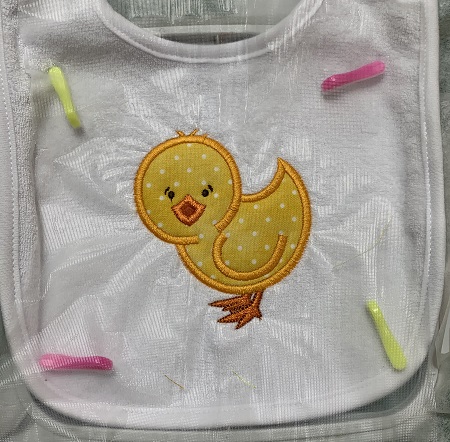
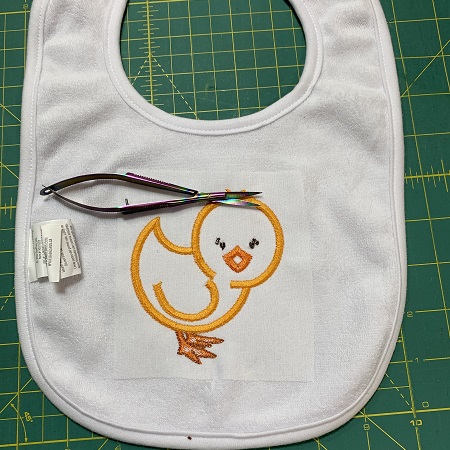
Step 14:
Follow the color guide to finish embroidering the baby chick.
Step 15:
Remove the hoop from the machine. Remove the water soluble topping. Carefully tear away the stabilizer from the around the back of the design. Trim any long threads if needed.
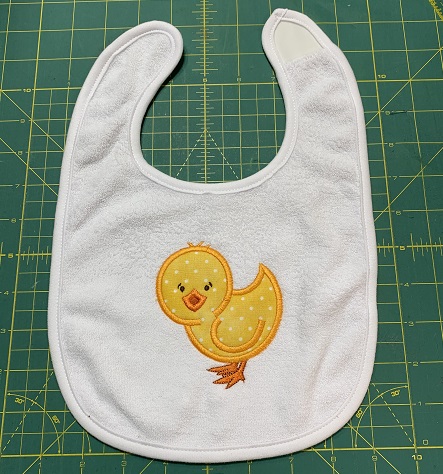
Step 16:
Iron the chick to bond the yellow fabric to the bib. Yay! You have finished with the bib!
Step 17:
(Click Image to Enlarge)
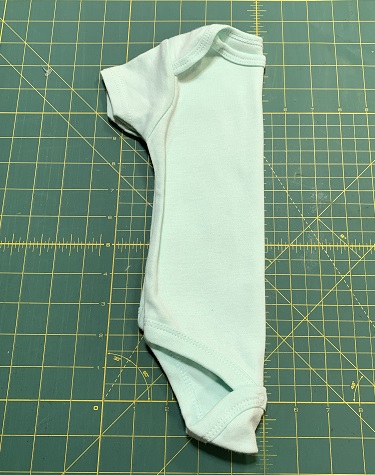
For the onesie...
Fold the onesie in half matching the shoulders and sides. Use an iron to press a line along the fold.
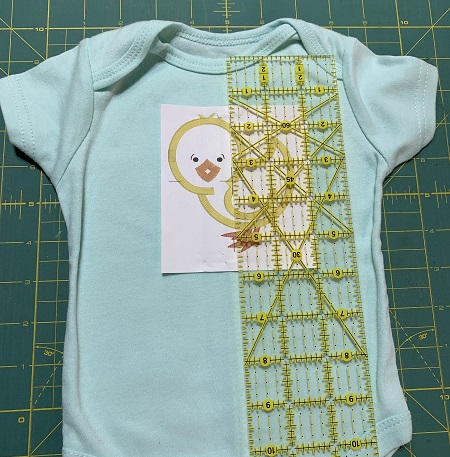
Step 18:
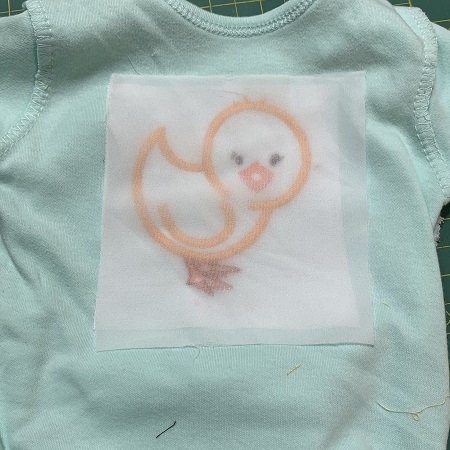
Use the design template to decide where to place the design on the onesie. Match the vertical center line on the design template with the fold line on the onesie. Place the design template about 1.5-3” down from the neckline. Pin the design template onto the shirt.
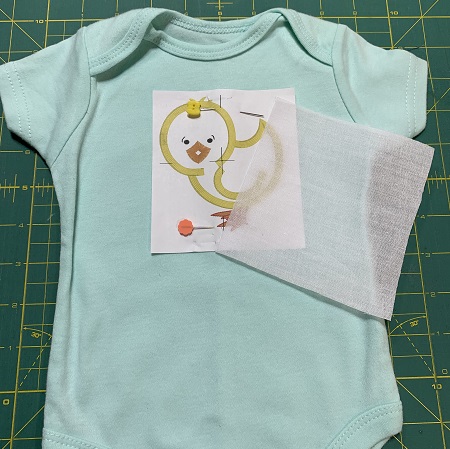
Step 19:
Put one 5"x5" piece of SF101 on the back of the bib directly behind the design template.
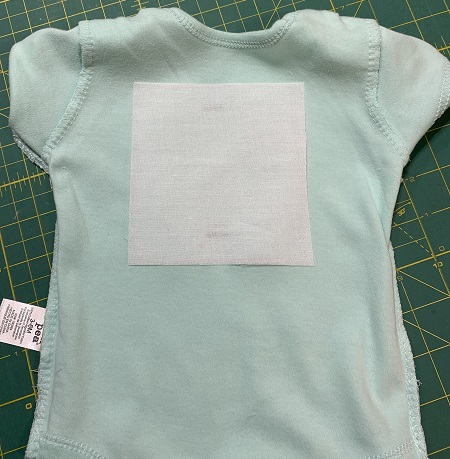
Step 20:
Follow package directions to bond the SF101 onto the onesie. The SF101 will help stabilize the stretchy, knit fabric.
Step 21:
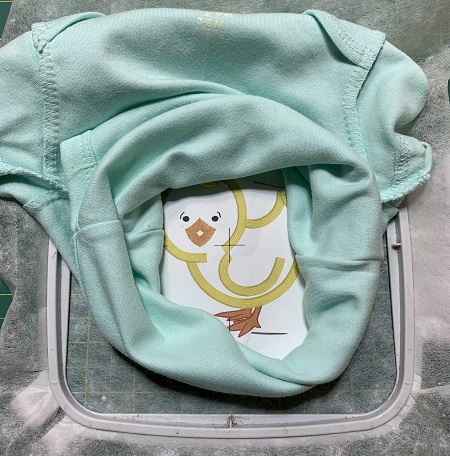
Match the center point on the design template on the onesie to the center point on the stabilizer. Use the axis points to finish centering the onesie on the stabilizer. Pin the onesie to the stabilizer. Fold and pin/tape the rest of the onesie out of the stitching area.
Step 22:
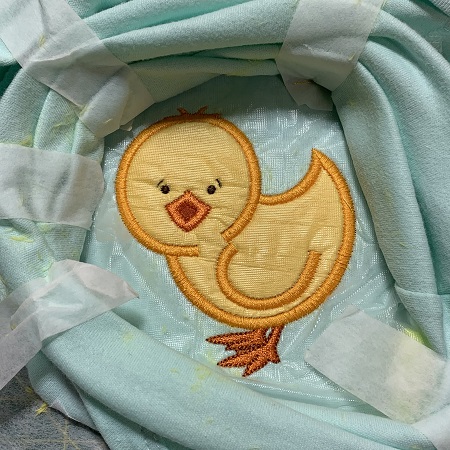
Follow the color stops to applique the baby chick. Refer to steps 8 thru 14 if needed while appliqueing the chick. The onesie has a much tighter stitching field and must be watched closely while stitching.
Step 23:
Remove the hoop from the machine. Remove the tear away the water soluble topping. Carefully tear away the stabilizer from the around the back of the design. Trim any long threads if needed.
Turn the onesie wrong side out. Place one 5"x5" piece of Baby Soft Iron On over the embroidered design. The minky is polyester, and does not have a high heat tolerance. Iron around the outer edges of the chick to bond the Baby Soft Iron On to the onesie. Use a cooler iron to bond the Baby Soft Iron On to the center of the design.
Step 24:
Congrats! You have completed a Baby Chick Set! Super Cute!
Marisa Littleton is a retired educator with a love for teaching and learning. Interests include machine embroidery, hand embroidery, quilting, cooking, and antiques.