Jacobean embroidery became popular in the early 17th century during the reign of King James I whose Latin name was 'Jacobean'. Jacobean embroidery is a style of embroidery design based on fanciful motifs rather than an embroidery technique. Linen was often the fabric of choice for Jacobean embroidery.
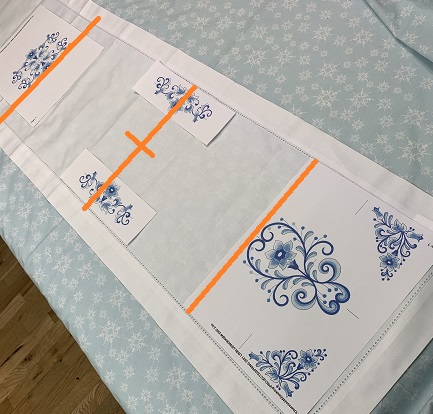
The Jacobean Table Runner has multiple hoop changes. Embrilliance Essentials embroidery software was used to bundle designs to reduce the number of hoop changes. An 8"x11" hoop was used to help reduce time and stabilizer. The designs are available in different sizes; so the runner can be hooped different ways.
Step 1:
Read the directions before beginning. Gather the materials needed for the project. Iron and lightly starch the table runner.
Step 2:
A design template is needed for each end, the sides, and the center of the table runner. Embrilliance Essentials embroidery program was used to make the templates. Combining the designs reduces the number of hooping by half. It saves time and stabilizer.
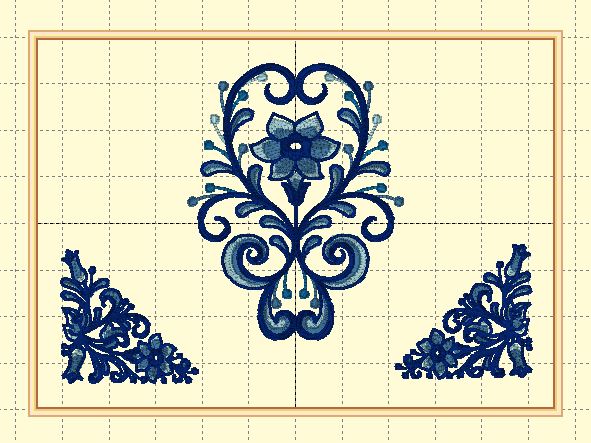
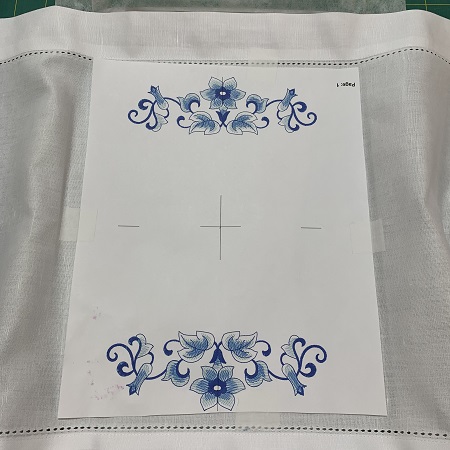
Two embroidery designs were used for the runner ends. The corner designs were used twice. The designs were combined into one 8"x11" template. You may also print 3 separate design templates. Print the design template for the end of the runner.
(Click Image to Enlarge)
Step 3:
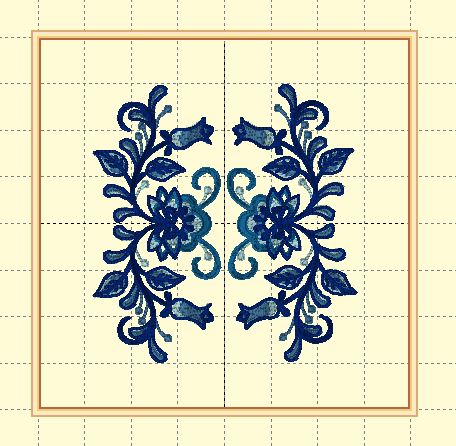
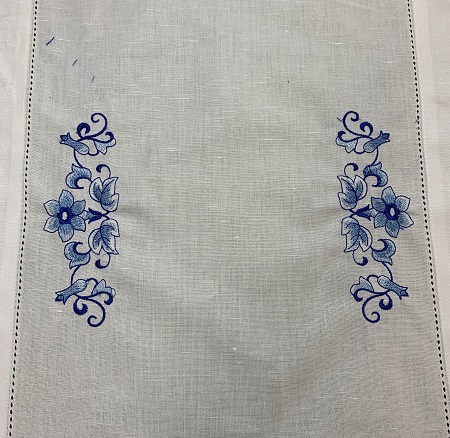
The same Jacobean Border flower design was used for the center and sides of the table runner. Two of the designs were placed face to face for the center design. Print the design template for the center of the table runner.
Step 4:
(Click Image to Enlarge)
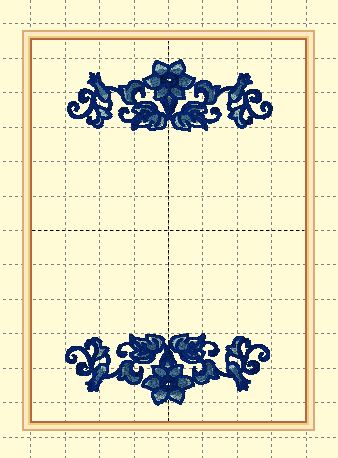
The same Jacobean Border flower was used for the side sections on the table runner. The designs were combined in an 8"x11" hoop. You may also print a single template for each side and use a smaller hoop. Print the design templates.
Step 5:
Use the design templates to determine their placement on the table runner.
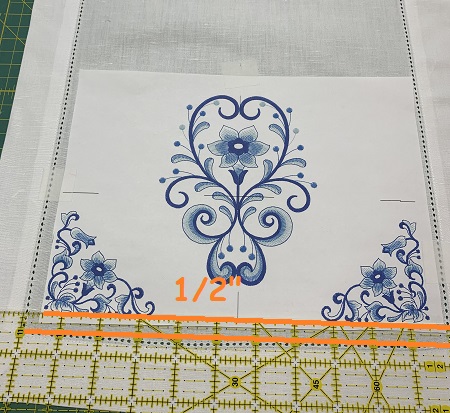
Step 6:
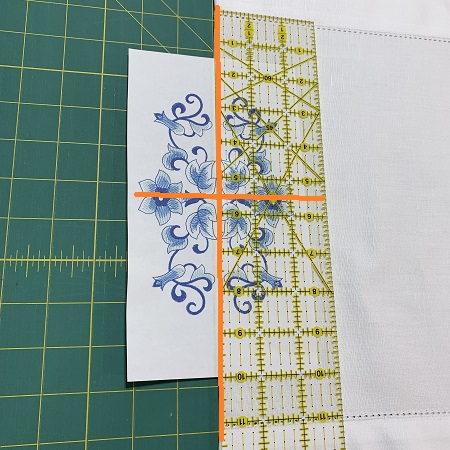
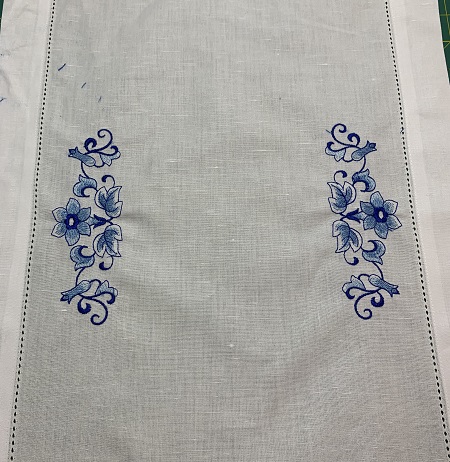
Place the design template 1/2" from the hemstitched border for the runner end.
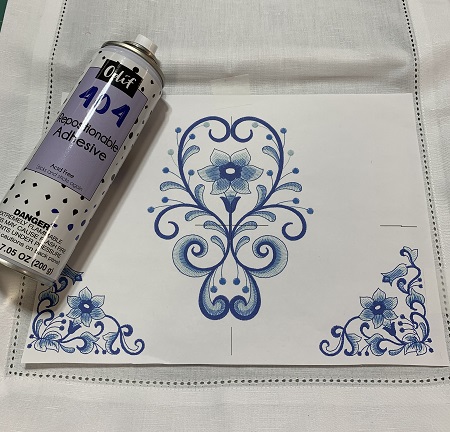
Step 7:
Hoop two pieces of easy tear away stabilizer tautly. Center the design on the hoop. Lightly mist the stabilizer with the 404 Repositionable spray. (404 Repositionable spray is less sticky than the 505 Temporary Adhesive spray and a better choice for the delicate fabric). Gently press the runner onto the stabilizer. Fabric surface must be smooth and wrinkle free. Secure fabric to stabilizer with Wonder Pins.
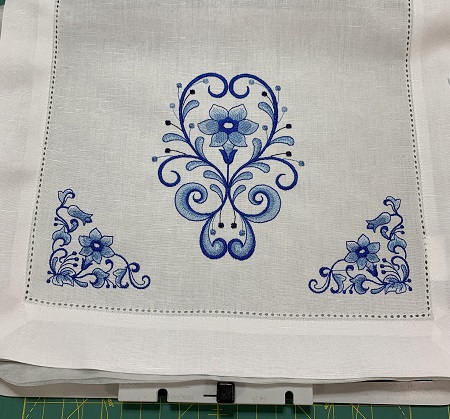
Step 8:
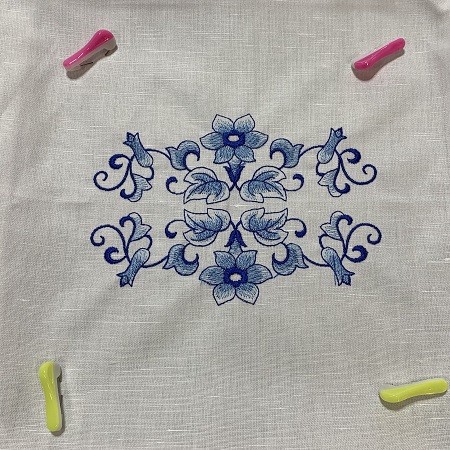
Load the design onto the embroidery machine. A 75/11 embroidery needle is recommended because of the fabric type and design style. Attach the embroidery hoop. Make sure that the stitching field is clear. Stitch the embroidery design.
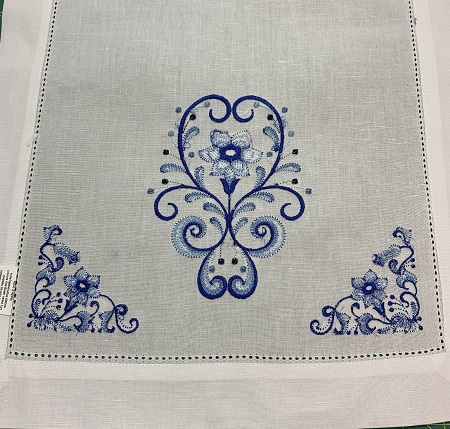
Step 9:
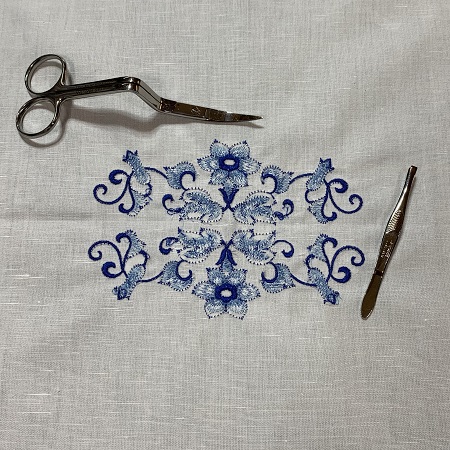
Remove the runner from the hoop. Clip any long threads if needed. A soft touch is needed when removing the stabilizer. Lay the runner on a flat surface with the wrong side up. Press firmly on stitching with one hand while gently removing stabilizer with the other hand. Use tweezers to remove any small remaining pieces of stabilizer.
Step 10:
Repeat steps 6, 7, 8, & 9 for the other end of the table runner.
Step 11:
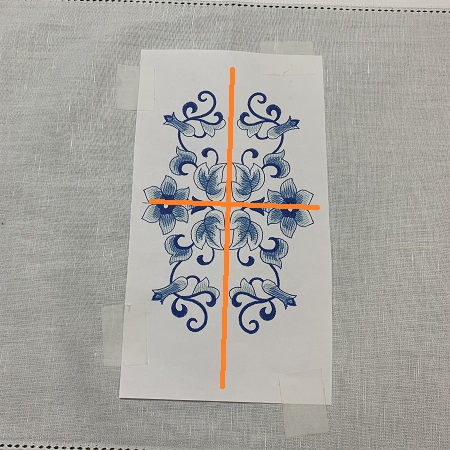
Fold the table runner in half. Finger press the fold line. Center the design template on the fold line.
Step 12:
Open the table runner. Center the design on the fold line. Tape or pin the design template in place on the runner.
Step 13:
Hoop one piece of easy tear away stabilizer tautly. Center the design on the hoop using the axis points. Lightly mist the stabilizer with the 404 Repositionable spray. (The 404 spray is not as sticky as the 505 Temporary Adhesive spray and a better choice for the delicate fabric.) Gently press the table runner onto the stabilizer. Fabric surface must be smooth and wrinkle free. Secure fabric to stabilizer with Wonder Pins.
Step 14:
Load the design onto the embroidery machine. A 75/11 embroidery needle is recommended because of the fabric type and design style. Attach the embroidery hoop. Make sure that the stitching field is clear. Stitch the embroidery design.
Step 15:
Remove the runner from the hoop. Clip any long threads if needed. A soft touch is needed when removing the stabilizer. Lay the runner on a flat surface with the wrong side up. Press firmly on stitching with one hand while gently removing stabilizer with the other hand. Use tweezers to remove any small remaining pieces of stabilizer.
Step 16:
Find the center point between the end and center designs on the runner. Use the design template to center the side designs on the runner.
Step 17:
Hoop one piece of easy tear away stabilizer tautly. Center the design on the hoop using the axis points. Make sure to leave a 1/2" margin from the design edge and the hemstitched border. Lightly mist the stabilizer with the 404 Repositionable spray. (The 404 spray is not as sticky as the 505 Temporary Adhesive spray and a better choice for the delicate fabric.) Gently press the runner onto the stabilizer. Fabric surface must be smooth and wrinkle free. Secure fabric to stabilizer with Wonder Pins.
Step 18:
Load the design onto the embroidery machine. A 75/11 embroidery needle is recommended because of the fabric type and design style. Attach the embroidery hoop. Make sure that the stitch field is clear. Stitch the embroidery design.
Step 19:
Remove the runner from the hoop. Clip any long threads if needed. A soft touch is needed when removing the stabilizer. Lay the runner on a flat surface with the wrong side up. Press firmly on stitching with one hand while gently removing stabilizer with the other hand. Use tweezers to remove any small remaining pieces of stabilizer.
Step 20:
Repeat steps 16, 17, 18, & 19 for other side designs.
Step 21:
(Click Image to Enlarge)
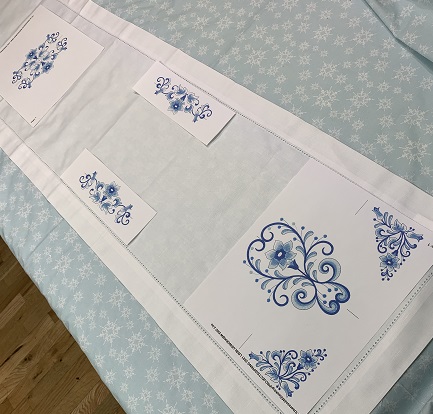
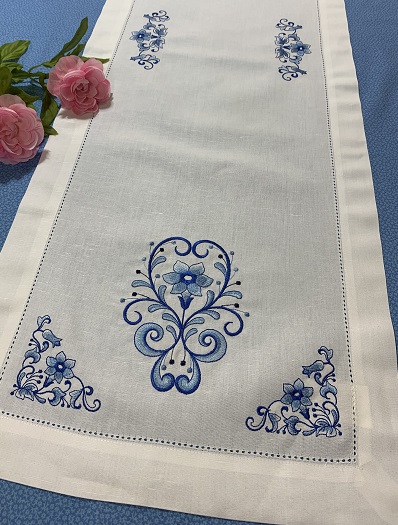
Congrats! You have complete a 'Blue Jacobean Table Runner! WTG! What an accomplishment! Look for matching napkins and place mats to go with your table runner.
Marisa Littleton is a retired educator with a love for teaching and learning. Interests include machine embroidery, hand embroidery, quilting, cooking, and antiques.