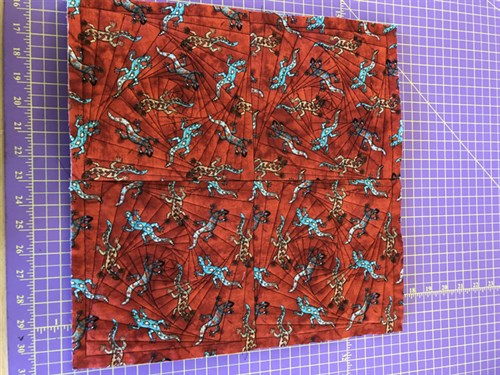
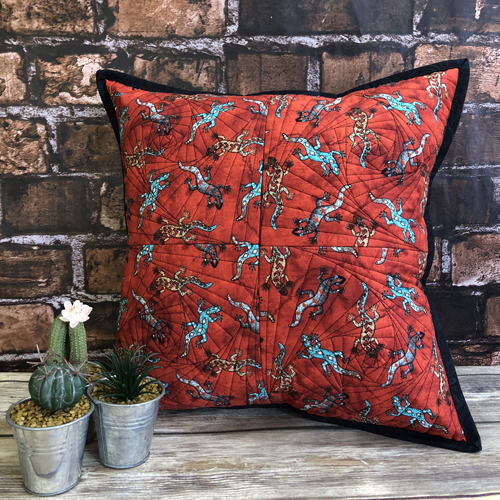
Use a favorite piece of printed fabric for this quilt textured pillow. There is no picture in the embroidery, just a simple twist design to add texture to the pillow. Binding joins the front and back so it is super easy to stitch up.
This project is designed to show how quilting on your embroidery machine can add wonderful texture to any fabric you may want to use in a pillow. As mentioned in the description of this article the front and back panels are joined with binding. To be able to make the pillow cover removable a zipper is inserted in the back of the pillow. This is an easy type of zipper to install. Alternately you can make an envelope back to use on the back of the pillow. The individual quilt blocks for this pillow do not require a back fabric. The same color thread can be used for all color-stops in this project so use any color thread that coordinates or contrasts with your fabric.
Step 1:
(Click Image to Enlarge)
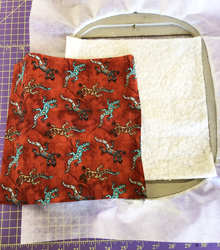
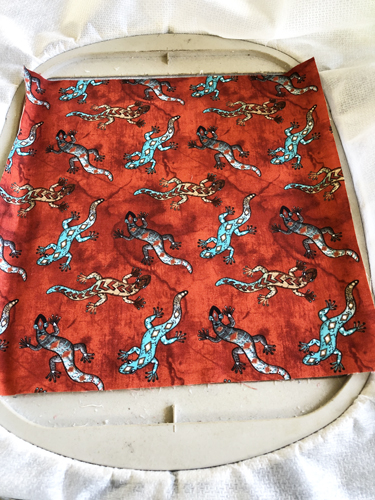
For the pillow fronts cut 4 10” squares of your fabric and batting. For each square of the pillow take one square of fabric and batting and tautly hooped stabilizer to your embroidery machine.
Step 2:
(Click Image to Enlarge)
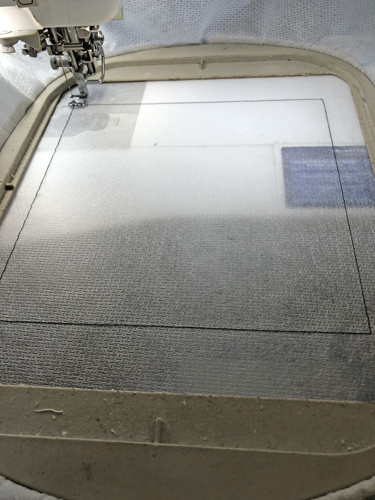
Run color-stop (CS) 1 as a placement line for your batting and fabrics.
Step 3:
(Click Image to Enlarge)
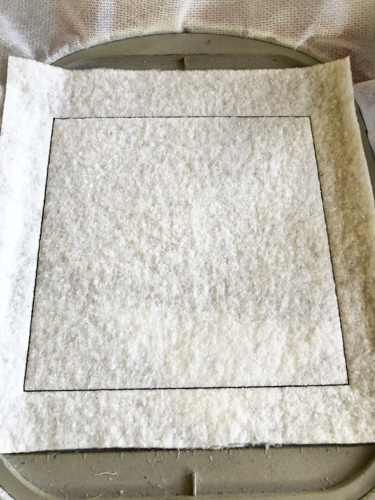
Spray adhesive on the batting and position over the placement lines so that the batting exceeds the placement lines by 1” on all sides. Run CS 2 to tack down the batting.
Step 4:
(Click Image to Enlarge)
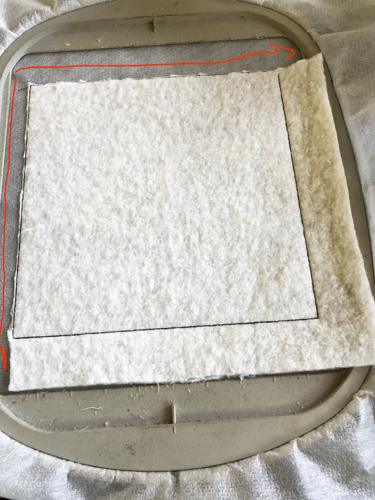
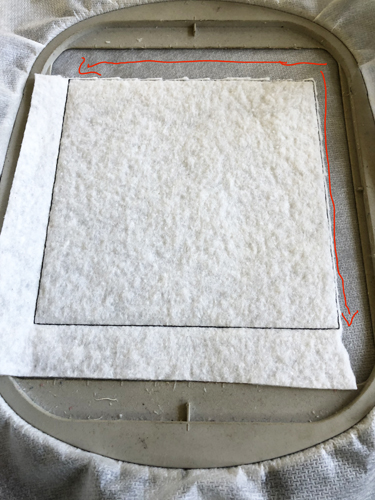
Each block will have the batting trimmed from the sides that will be joined together to make the pillow top. The batting remains on the outside edges of the blocks. This picture shows how to trim the batting for the lower right hand corner block. Trim the batting, as shown, as close as possible to the tack down lines.
Step 5:
(Click Image to Enlarge)
Spray adhesive on the back of a fabric square and position it over the batting so that the fabric exceeds the original placement lines by at east 1” on all sides.
Step 6:
(Click Image to Enlarge)
Run CS 3 to tack down the fabric. Run CS 4 to quilt the block.
Step 7:
(Click Image to Enlarge)
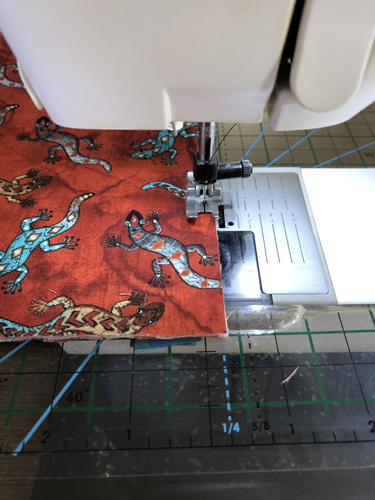
Remove the block from the hoop. Lay the ½” mark of a see-through ruler along the tack down lines and trim all sides to a ½” seam allowance.
Step 8:
(Click Image to Enlarge)
As you make the other three blocks for the pillow top remember to trim the batting on the sides of the blocks that will be sewn together and leave the batting on the sides that will be the outside edges of the blocks. This picture is how the block is trimmed for the lower right-hand corner.
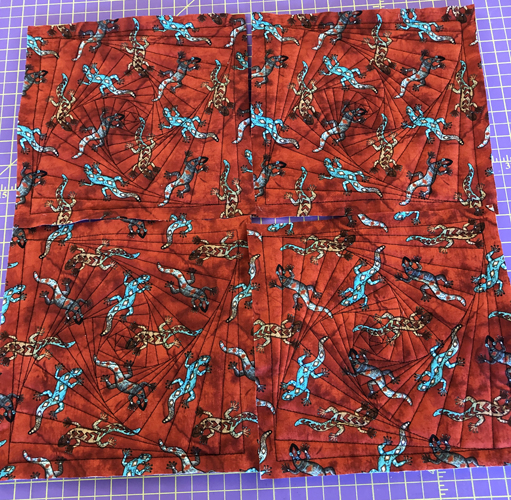
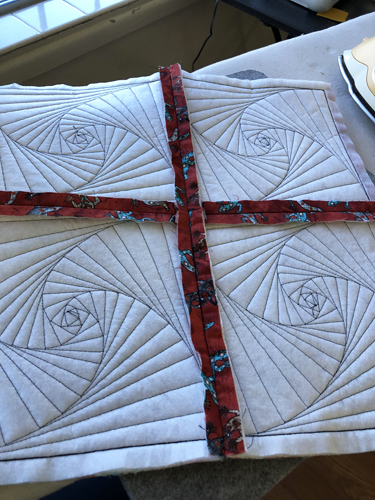
Step 9:
Complete and arrange the four blocks so that the edges of the blocks with batting still attached are on the outside of the pillow top and that the edges with the batting removed are on the inside of the pillow top.
Step 10:
(Click Image to Enlarge)
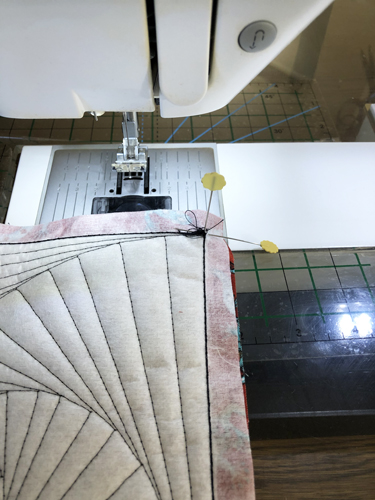
Place the top two blocks right sides together. Stick a straight pin through the top corner stitches of both blocks to perfectly align them. Place a horizontal pin to hold those blocks together and remove the vertical pin.
Step 11:
(Click Image to Enlarge)
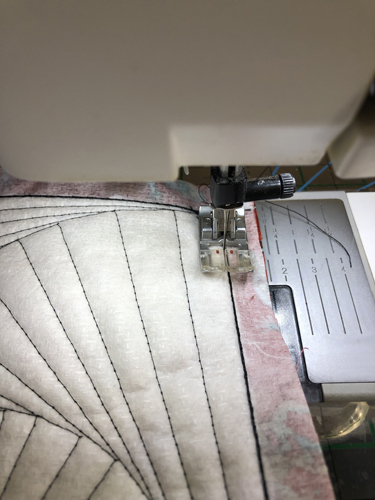
Stitch the top row of blocks together just a threads width inside the tack down stitches from the embroidery.
Step 12:
(Click Image to Enlarge)
12. Lift the top block about every 1 ½” as you stitch the blocks together to make sure the original tack down stitches are aligned. Stitch the bottom two blocks together in the same manner. Press the seam open from the top and back of the blocks.
Step 13:
(Click Image to Enlarge)
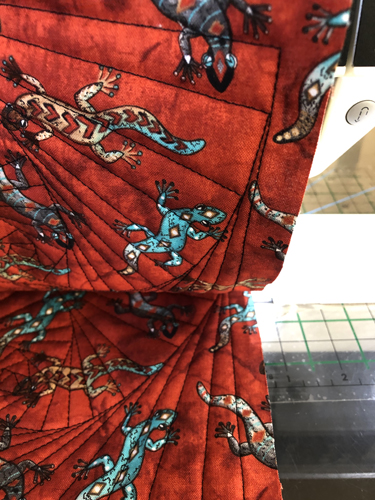
Stitch the two rows of blocks together along the seam allowances without batting.
Step 14:
(Click Image to Enlarge)
Press the seams open from the back and top of the pillow top.
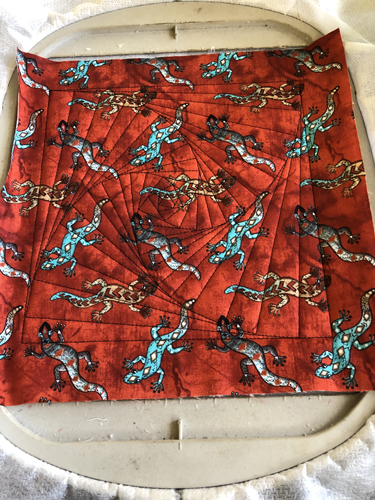
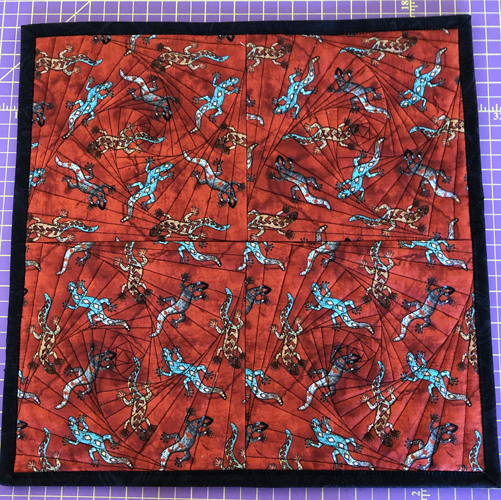
Step 15:
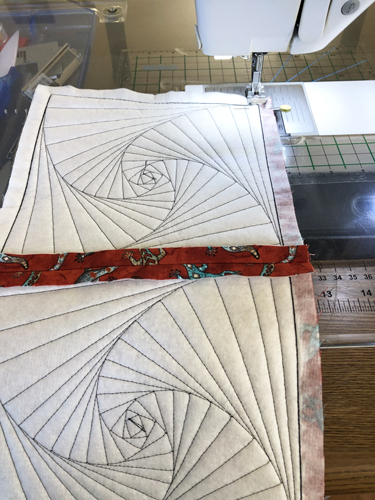
Your pillow top will now look like this. All outside seam allowance will have batting in them.
(Click Image to Enlarge)
Step 16:
(Click Image to Enlarge)
Cut a back for your pillow top the same width and 1” taller than the pillow top. Cut a slice across the taller side of the pillow back to be able to sew a seam for the zipper insertion. You can make this cut wherever you want the zipper to be on the back of the pillow. In can be in the center or towards the top or bottom of the pillow back. In the sample it was cut 6” from the bottom of the pillow back.
Step 17:
(Click Image to Enlarge)
Lay the two sections of the back fabric right sides together. Make a mark 1 ½” in from each end.
Step 18:
(Click Image to Enlarge)
Stitch from the outside edge of the pillow back, with a ½” seam allowance, to your first mark with a regular stitch length. Backstitch at the mark.
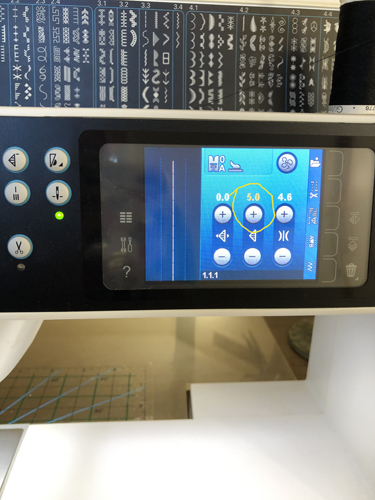
Step 19:
(Click Image to Enlarge)
Without cutting your thread, change your stitch length to a long stitch, 5mm if you have it, and stitch down to the second mark you made. Change back to your regular stitch length at that second mark, backstitch and continue stitching to the end of the pillow back. Press this seam open. Serge or back stitch each side of these seam allowances.
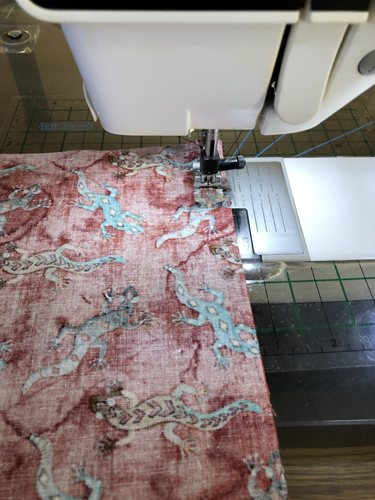
Step 20:
(Click Image to Enlarge)
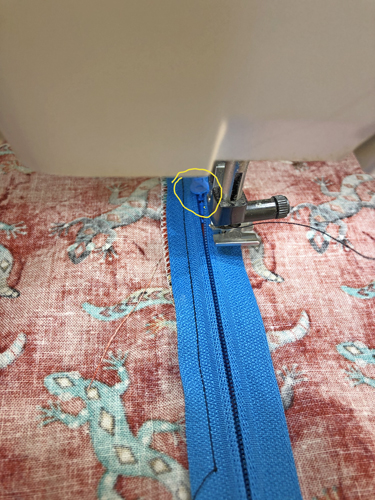
Put a zipper foot on your machine. Lay the zipper face down over the seam with the top zipper tab facing up and the metal zipper stop about 1/2” above where your long seam stitches begin. Pull the zipper open a couple of inches. Start stitching the first side of the zipper until you get close to the zipper tab.
Step 21:
(Click Image to Enlarge)
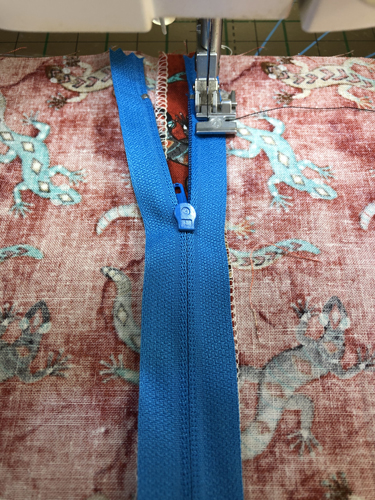
When you get close to the zipper tab stop stitching with the needle down lift the presser foot to its highest position, pull the zipper tab up past the zipper foot. Continue sewing the zipper down to the 1 ½” mark you had made in fabric seam. Pivot and stitch across the zipper. Continue stitching down the second side of the zipper.
Step 22:
(Click Image to Enlarge)
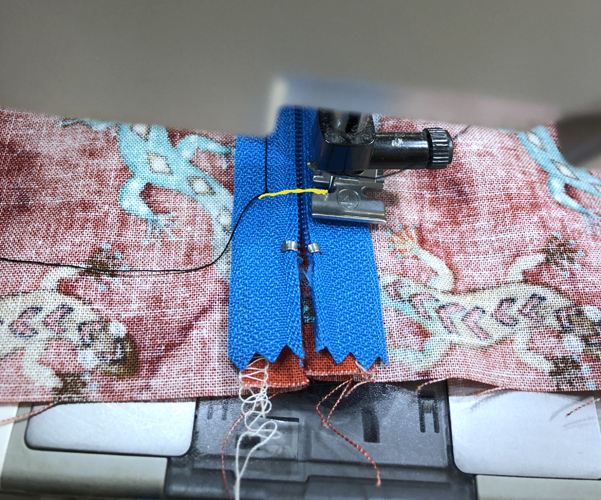
As you approach the top of the zipper stop stitching with the needle down, lift the presser foot and push the zipper tab down past the back of the presser foot and continue stitching to the area even with where you started the zipper stitching.
Step 23:
Pivot and stitch across the top of the zipper and backstitch.
(Click Image to Enlarge)
Step 24:
(Click Image to Enlarge)
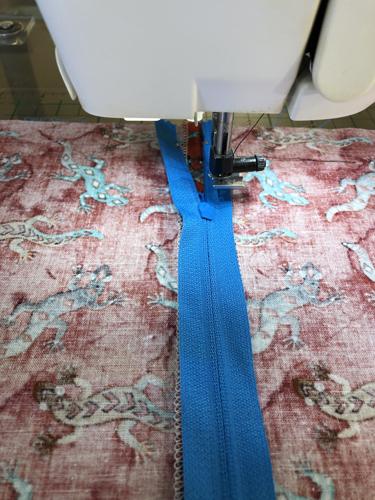
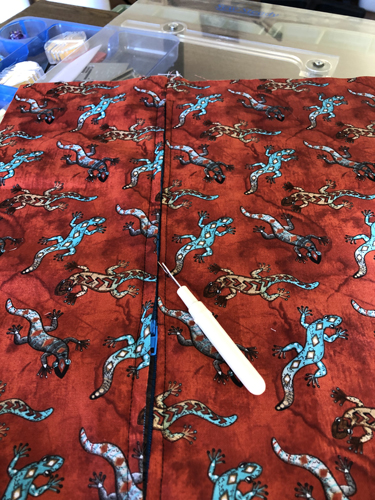
Use a seam ripper to remove the long stitches covering the zipper, pull out any loose threads.
Step 25:
(Click Image to Enlarge)
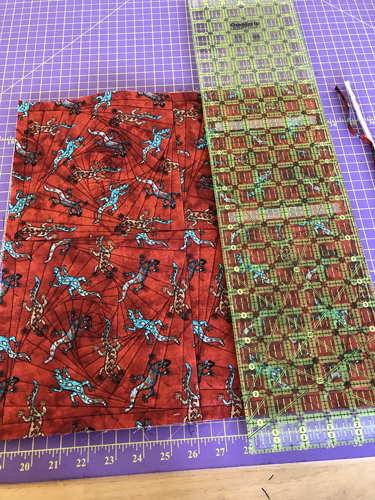
Align the pillow top and back and trim all sides to a ¼” seam allowance.
Step 26:
(Click Image to Enlarge)
Stitch the top and back fabrics, right sides out, with a scant ¼” seam allowance.
Step 27:
Cut two 2 ¼” strips of your binding fabric across the width of the fabric. Join the strips together and bind the pillow cover using your preferred method. Insert the pillow form.
Step 28:
Congratulations your Quilt Textured Pillow is complete!
Award winning Digitizer, Embroidery Educator, Author and a Consultant to the Industry, Pat Williams has 30 years of experience in the embroidery industry. Pat has won multiple awards for her digitizing expertise including the 2007 Impressions Awards Grand Championship, Best of Show as well as the 1st and 2nd Place Awards. Pat’s love of digitizing has afforded her the opportunity to write numerous articles for Impressions magazine in the United States and Images Magazine in Europe. In 2001 Pat was named “Embroidery Educator of the Year.” For many years Pat taught digitizing seminars at the ISS Shows in Long Beach, CA and for Compucon software. She now resides in Tucson, AZ.