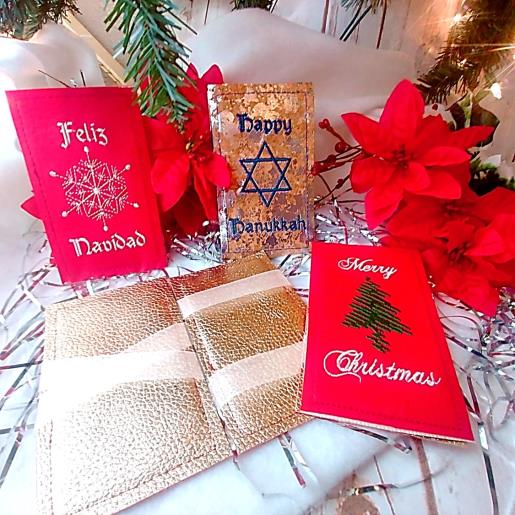
| Preface: | There are six different designs, but each follows the same instructions. The text in in the same color for all, but the design for each has a color stop so may be done in the same or a different color. Vinyl, cork, or even felt may be used for the project; all these will not ravel. The plastic pieces may be cut from plastic recipe dividers or the plastic lids or bottoms (as long as they are smooth) from food cartons such as donuts or tomatoes; I tried both, and each works equally well. The ribbons used in these projects were organza and double-sided satin. Use a ribbon that is the same on both sides because both sides will show as the money is flipped from side to side.
The fun thing about this project is money (or a gift card wrapped in some tissue paper) is inserted on one side. Close the cover, open it up again and the money will be seated under the ribbons—or start with the money tucked under one side of the ribbon, and then close the other side over the money. The money will be under the crossed ribbons one time, open up the wallet again, and the money will be flipped under the two separated ribbons (shown in the instructions below). Have fun making several of these so they’ll be ready for gift giving. |
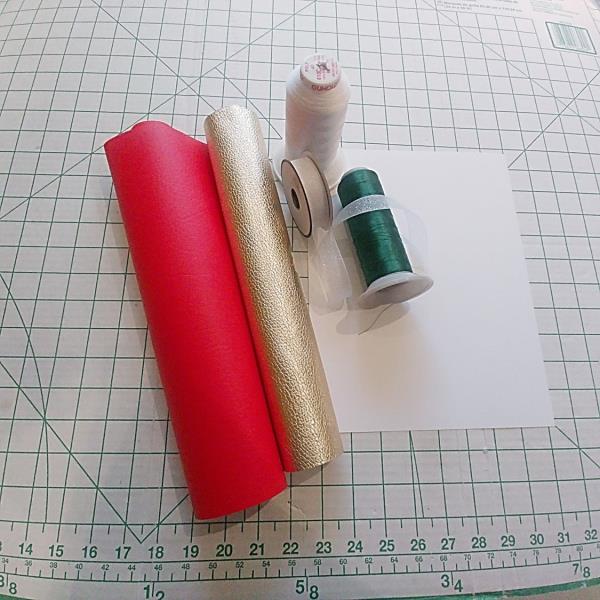
Step 1: | Read through the instructions thoroughly before beginning and assemble all the materials needed to complete the project. The first time the project is done it may take just over an hour to complete. After that, the project takes about 45-50 minutes each. Like-kind steps are done together making the project go faster. |  (Click Image to Enlarge) |
Step 2: | Cut the 4- 5” ribbons. Place the inner hoop over one sheet of the card stock and draw inside the inner hoop. Use the inner hoop to draw on the back side of both vinyl pieces. | 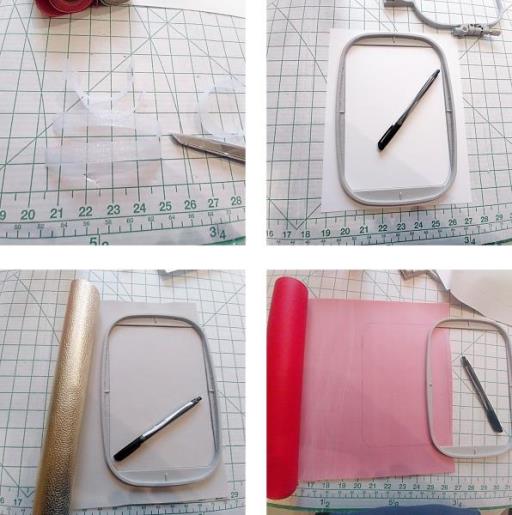 (Click Image to Enlarge) |
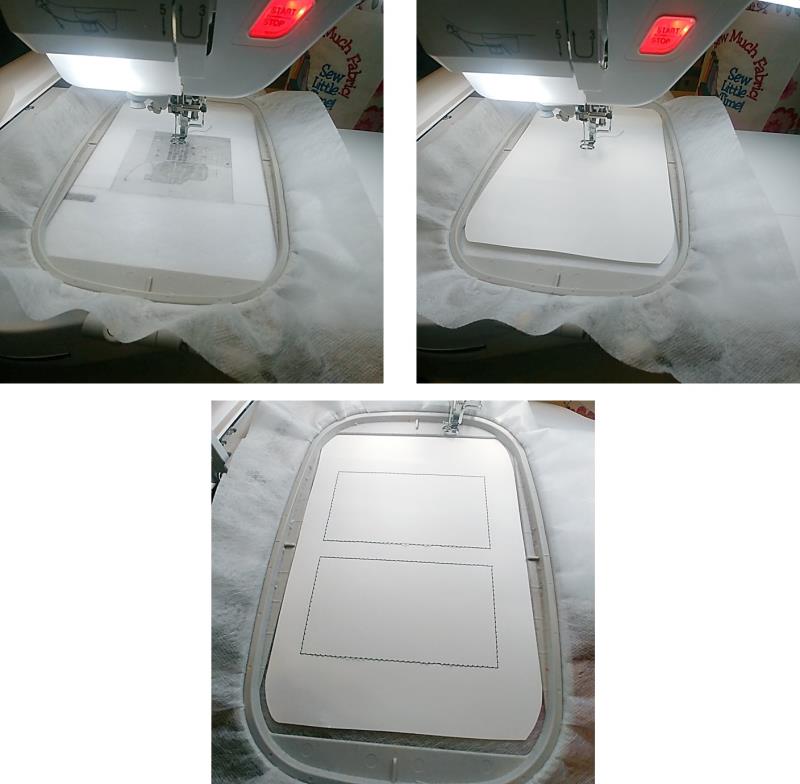
Step 3: | Cut out the paper and vinyl pieces around the lines. Hoop one layer of the stabilizer. | 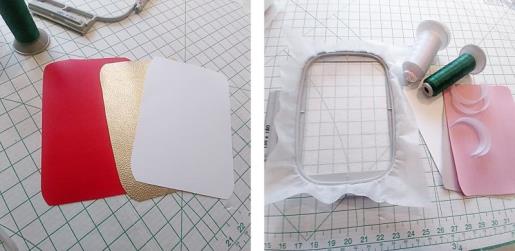 (Click Image to Enlarge) |
Step 4: | Load the design on the machine. Rotate the design to fit in the 5” x 7” hoop area. | 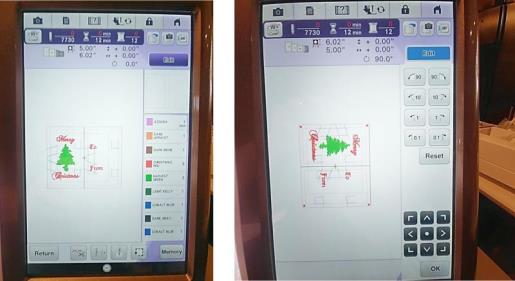 (Click Image to Enlarge) |
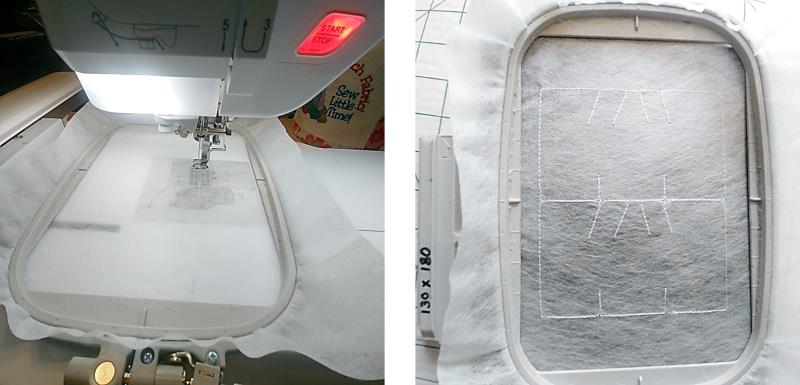
Step 5: | Place the hoop on the machine. Place down the cut-out card stock on top of the stabilizer. Load the first thread color on the machine and stitch color 1, which will be the templates to cut out the plastic pieces. Unhoop the piece and set it aside. | 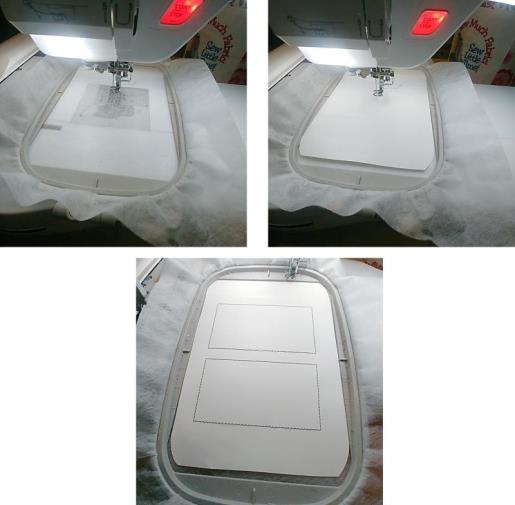 (Click Image to Enlarge) |
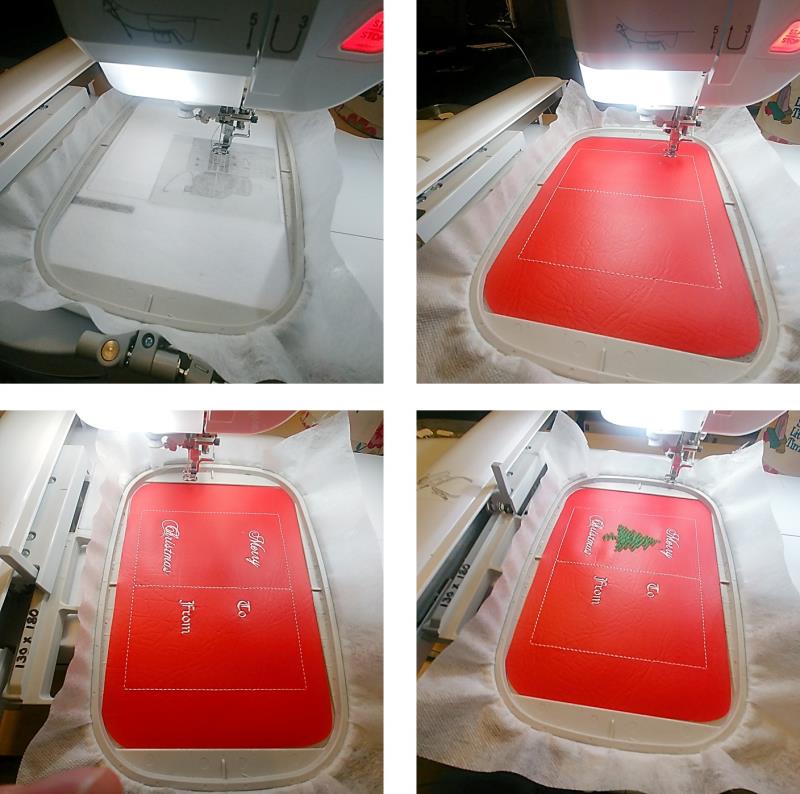
Step 6: | Hoop another layer of stabilizer and place the hoop on the machine. Place down the inside vinyl on top of the stabilizer, right side up. Stitch color 2. Remove the piece from the hoop and set it aside. | 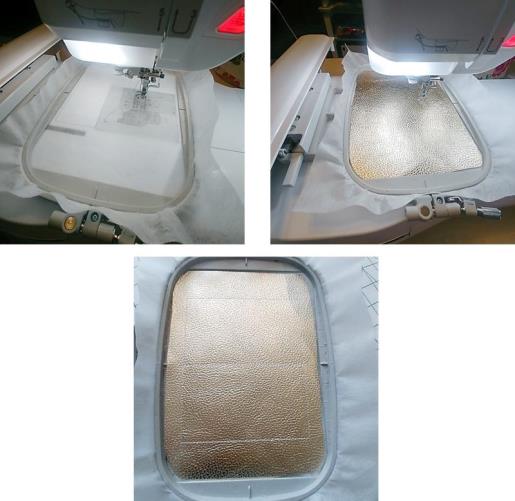 (Click Image to Enlarge) |
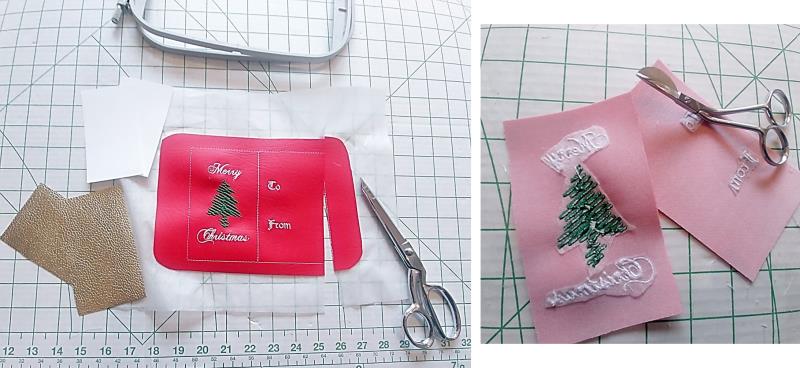
Step 7: | Hope a piece of stabilizer and place the hoop on the machine. Place the outside vinyl, right side up, on the stabilizer. Stitch color 3 which is the outline. Stitch color 4, the text. Stitch color 5 in the chosen color which is the tree design. Note: for the other wallets the design will either be ornaments, Star of David, snowflake, stars, or bells. |  (Click Image to Enlarge) |
Step 8: | Now it is time to cut out everything that was in the hoop; use sharp paper scissors or old fabric scissors that are sharp. Everything will be cut along—but on the inside—of the stitched line. Begin with the cardstock templates (save the scraps to use in step 18), then cut out the inside wallet pieces. Discard the stabilizer. Now cut out the outer wallet pieces Use the small applique scissors to cut away the excess stabilizer from the text and design. Set all the pieces aside. |  (Click Image to Enlarge) |
Step 9: | Hoop a piece of stabilizer. Stitch color 6 which will be the placement lines for the ribbon. | 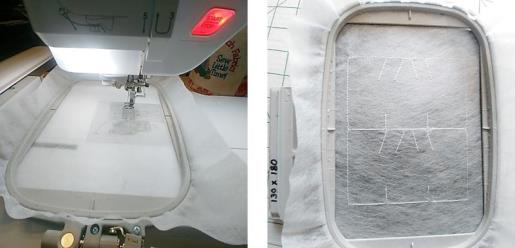 (Click Image to Enlarge) |
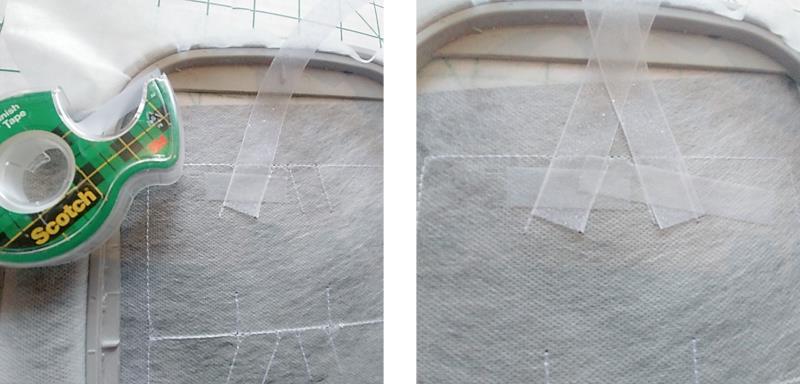
Step 10: | Remove the hoop from the machine, but DO NOT unhoop the stabilizer. Beginning at the top, align one of the ribbon pieces inside the angled lines on the left side as shown. Use the Scotch tape to secure the ribbon in place. Now place the second ribbon between the other two angled lines and tape it in place. | 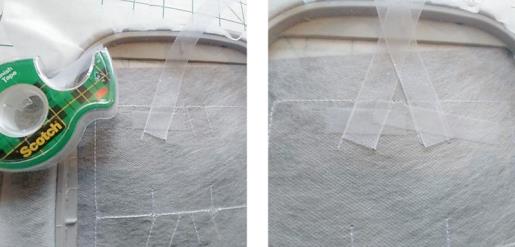 (Click Image to Enlarge) |
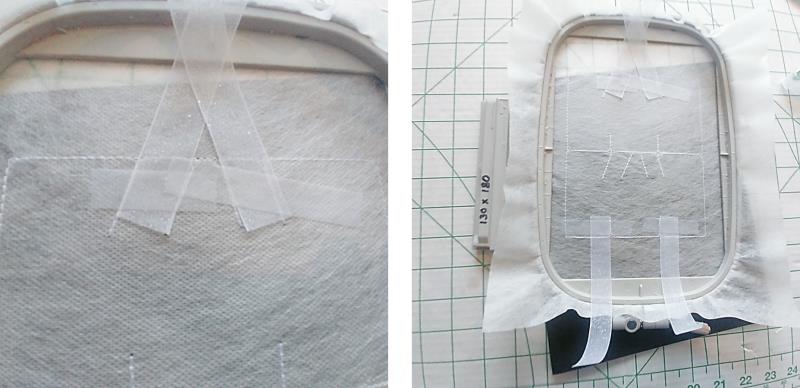
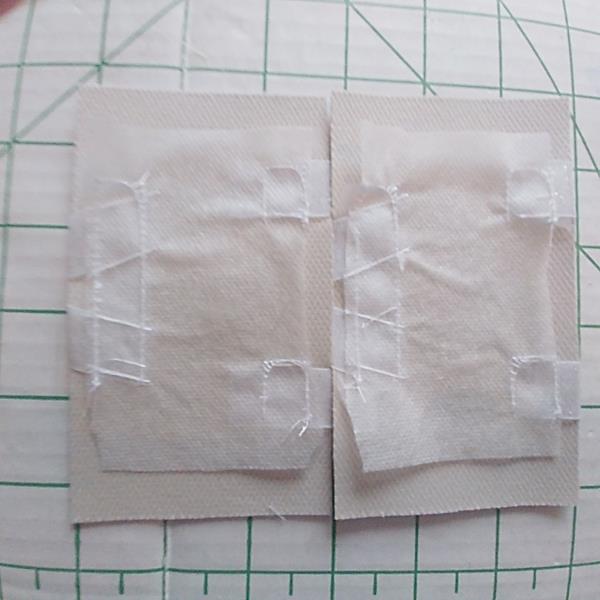
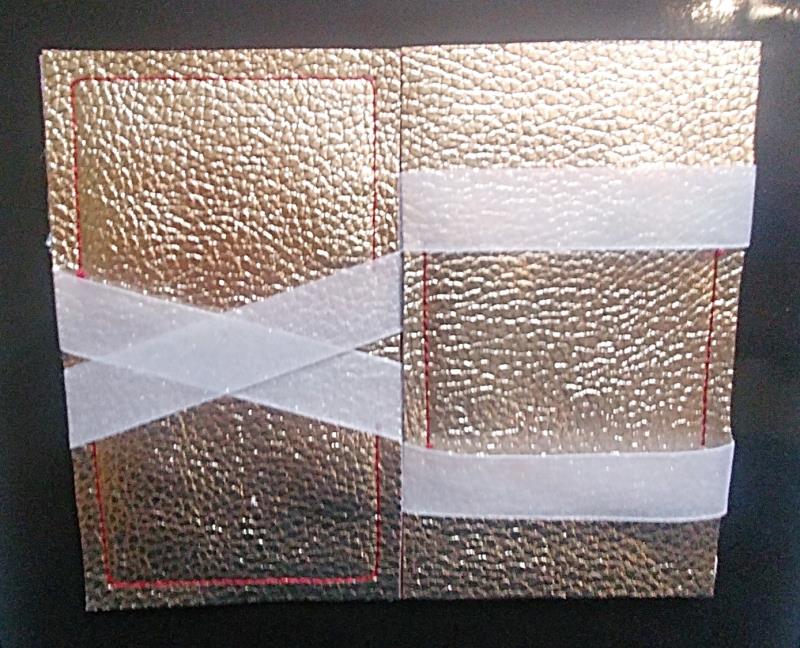
Step 11: | The ribbons should cross and be securely taped as shown in the photo on the left. How take the remaining two ribbons and tape them at the bottom lines of the hoop. The ribbon on the left should be placed and taped to the left of the straight line, and the ribbon on the right should be placed and taped to the right of the straight stitched line as shown. | 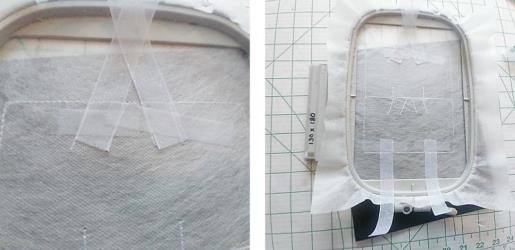 (Click Image to Enlarge) |
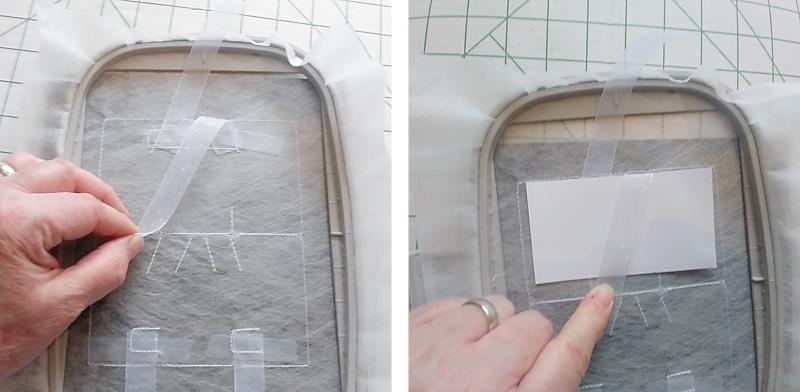
Step 12: | Carefully place the hoop back on the machine. Stitch color 7 which will stitch down the top ribbons. Stitch colors 8 and 9 which will stitch down the lower ribbons. |  (Click Image to Enlarge) |
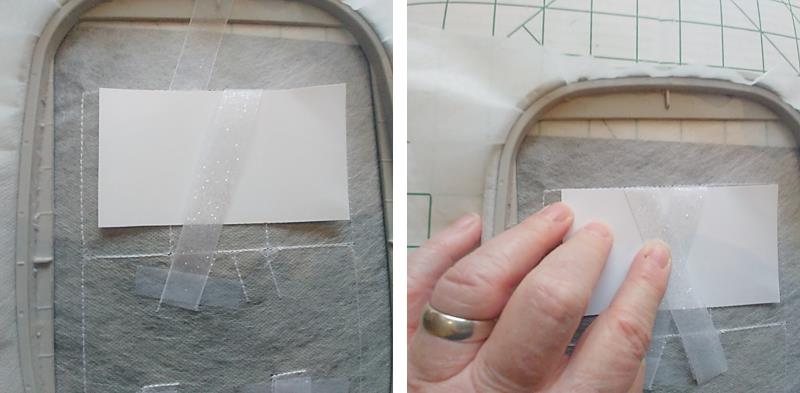
Step 13: | Now the ribbons will be crossed and taped in place. To do this, use the cardstock template and lay it along the top stitching line. Holding the card in place, smooth the right ribbon across the card (keep the top of the ribbon snug against the top of the card at the line) and down to the left set of angled lines in the middle. | 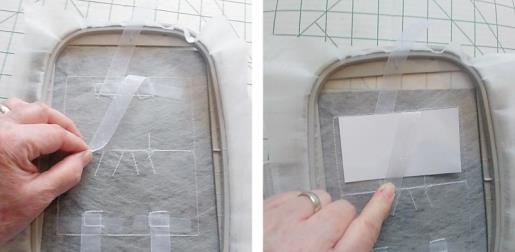 (Click Image to Enlarge) |
Step 14: | Make sure the ribbon is smooth and snug at the top against the card and then tape the ribbon in place. Repeat for the left ribbon, keeping it snug against the card | 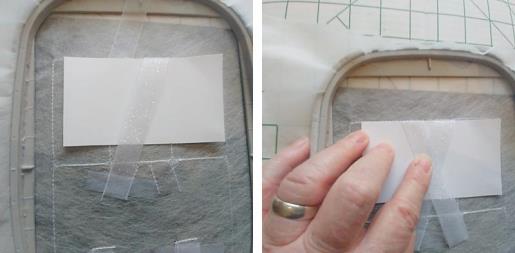 (Click Image to Enlarge) |
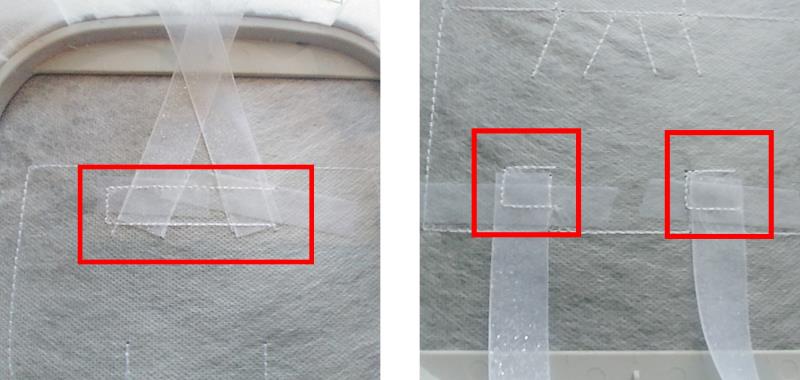
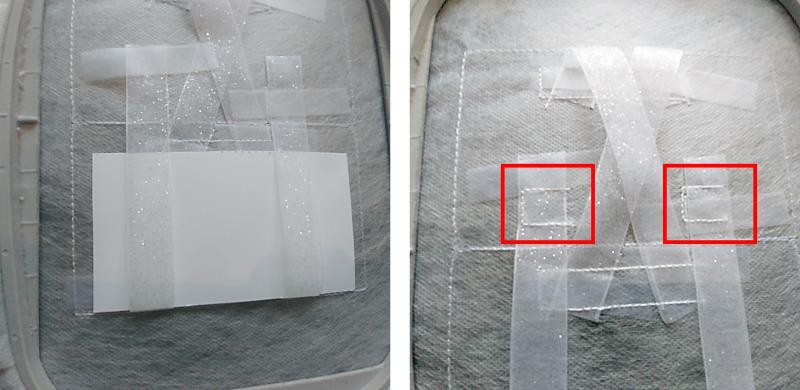
Step 15: | and then tape it in place. Remove the cardstock template. Place the hoop back on the machine. Stitch color 10 which stitches the ribbon ends down. | 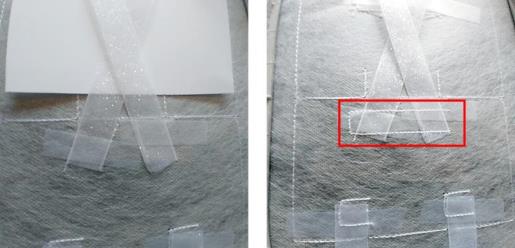 (Click Image to Enlarge) |
Step 16: | Now place the cardstock template at the line at the bottom and smooth the ribbons snuggly against the template and tape the remaining ribbon ends in place as shown. Remove the cardstock template. Stitch colors 11 and 12 which will tack down the ribbon ends. |  (Click Image to Enlarge) |
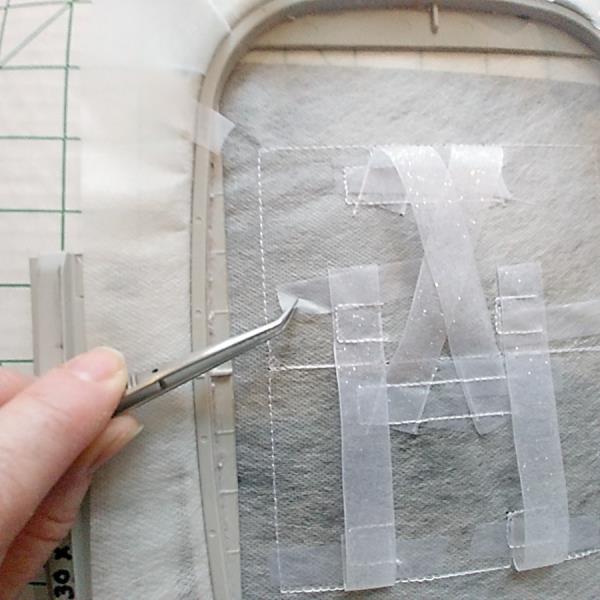
Step 17: | Remove the hoop from the machine. Use a tweezers to remove as much of the tape as possible. |  (Click Image to Enlarge) |
Step 18: | Next will be to place the inside vinyl pieces in place. Place the pieces, right side down, on the second piece of cardstock. Use the cardstock scrap pieces to cover the outer edges about ¼” and spray the back side of each piece with the spray glue. | 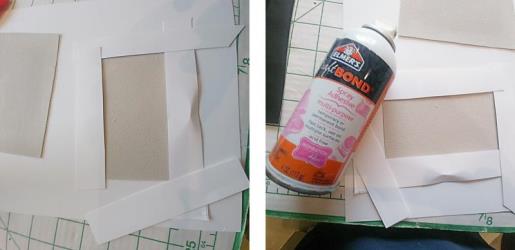 (Click Image to Enlarge) |
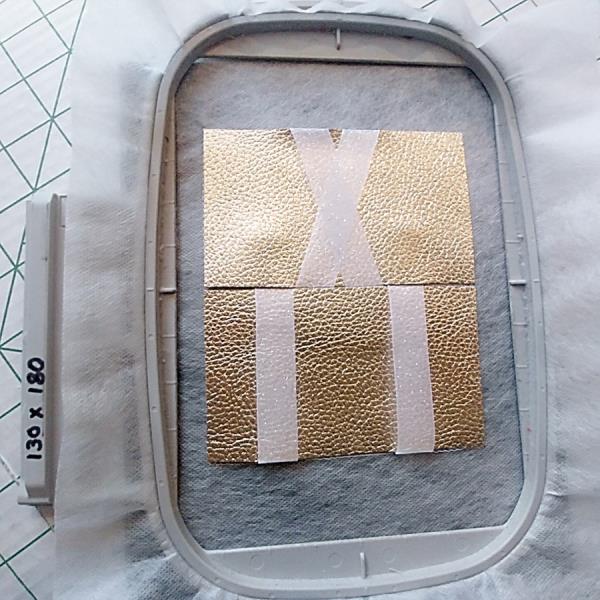
Step 19: | Fold the first piece as shown, insert it under the crossed ribbons and align the cut edges to the stitched lines. Repeat inserting the second piece under the ribbons on the other side. Press the pieces firmly in place. | 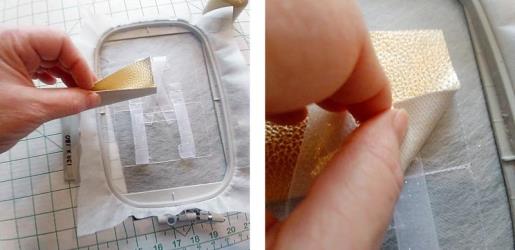 (Click Image to Enlarge) |
Step 20: | The pieces should now look like this. |  (Click Image to Enlarge) |
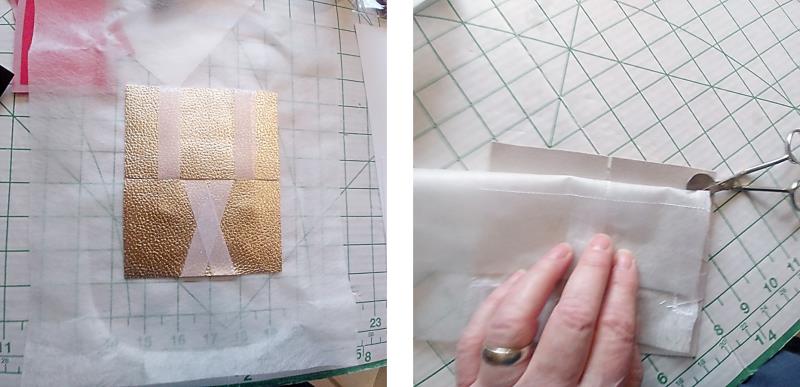
Step 21: | Remove the pieces from the hoop. Next will be to trim the stabilizer about ¼” away from the edges. To do this, place the piece right side down on a table. Roll back the stabilizer exposing about ¼” of the back of the vinyl pieces. Use the small applique scissors and trim away the excess stabilizer. |  (Click Image to Enlarge) |
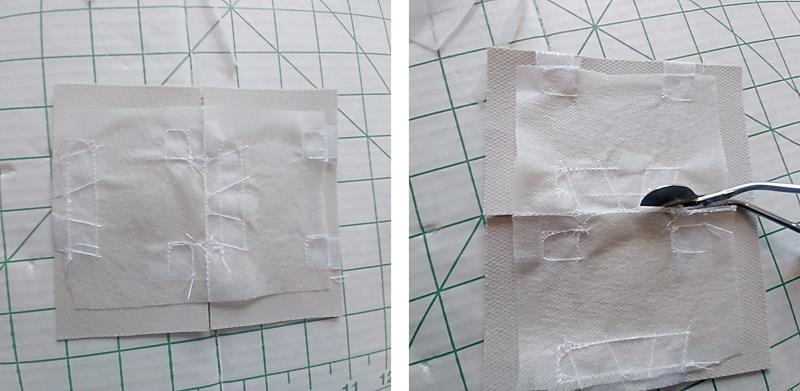
Step 22: | Repeat for the remaining outer edges. Now very, very carefully trim ¼” away from the inside edges. Be very careful not to cut the ribbon pieces! | 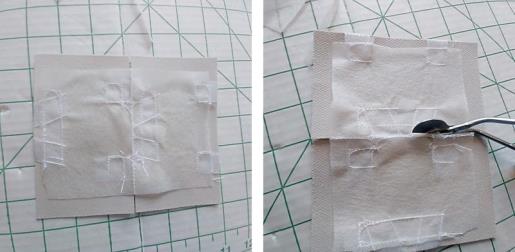 (Click Image to Enlarge) |
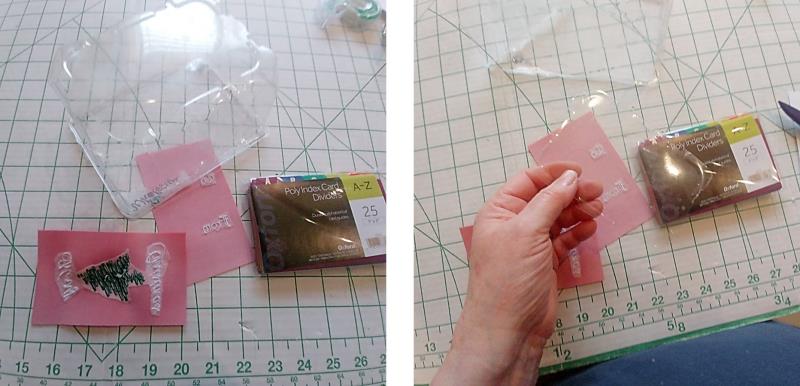
Step 23: | This is how the back side will look. |  (Click Image to Enlarge) |
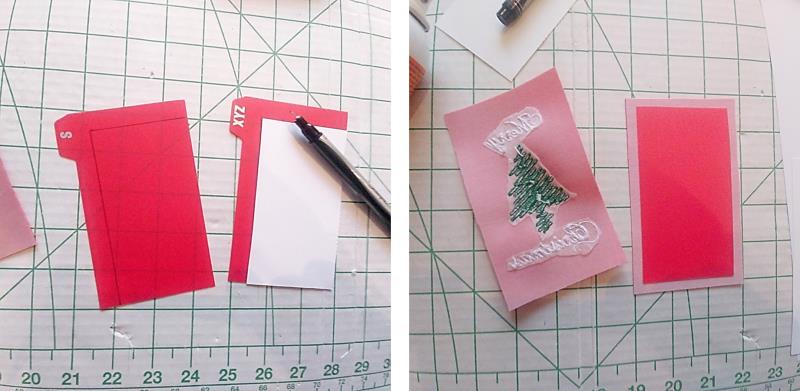
Step 24: | Now is time to cut out the plastic templates. If using the lid or bottom of a plastic food container, cut out the top and bottom away from the sides. I found those worked well and I also found the plastic recipe divider cards worked well. |  (Click Image to Enlarge) |
Step 25: | Use the paper template and trace around it onto two pieces of plastic. Spray one side of the plastic and center it on the back of one side of the outer wallet piece. |  (Click Image to Enlarge) |
Step 26: | Use the can and roll it firmly over the plastic to adhere it to the wallet piece. Repeat for the other side of the wallet piece. | 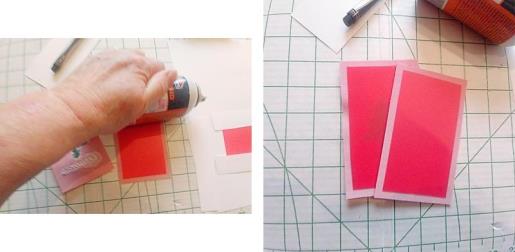 (Click Image to Enlarge) |
Step 27: | Now the front pieces are ready to be glued to the back pieces. Spray the back side of the front pieces and place them over the back pieces, wrong sides together. Be sure to carefully align the cut edges. Use the can to roll along and firmly press the pieces together. | 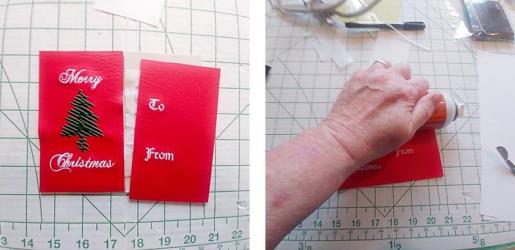 (Click Image to Enlarge) |
Step 28: | This is how the wallet should look at this point. Now will be to stitch the pieces together. | 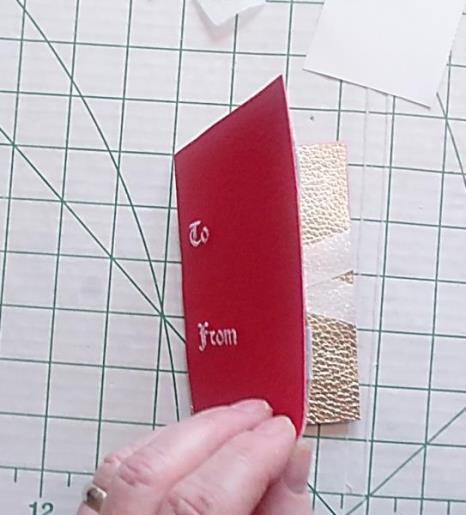 (Click Image to Enlarge) |
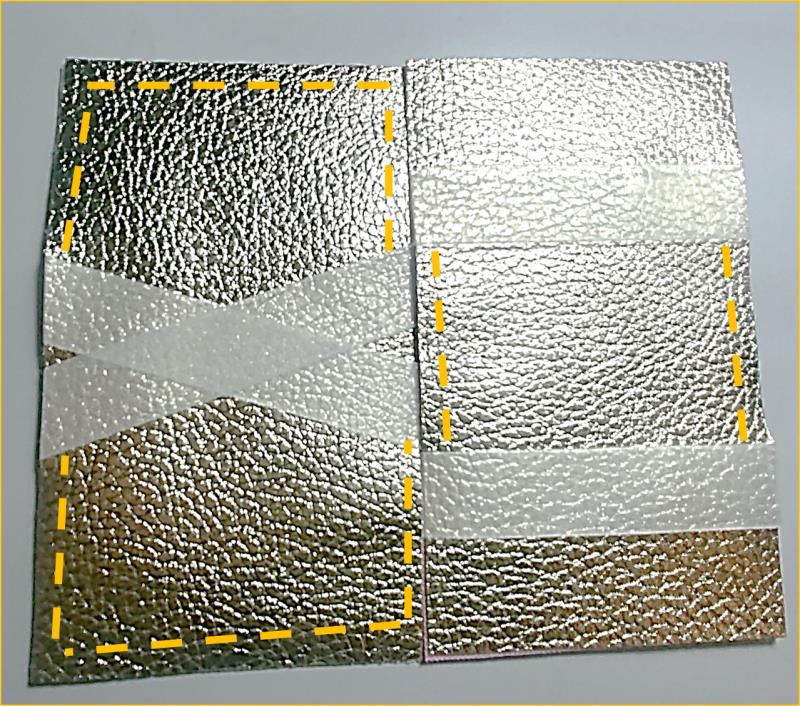
Step 29: | Open up the wallet. Lay the piece as shown. Stitching will be done as shown by the dotted lines. When stitching, be careful not to stitch onto the ribbons. This stitching should be done at scant ¼”. | 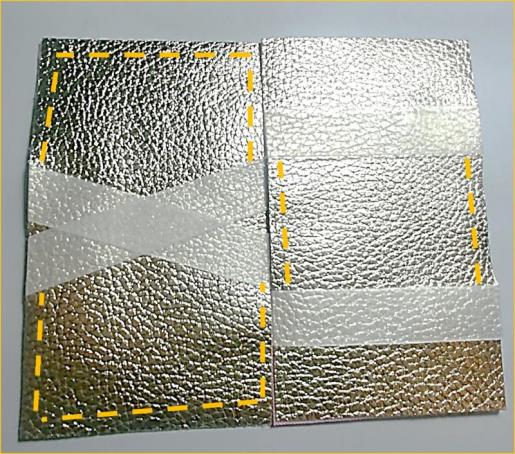 (Click Image to Enlarge) |
Step 30: | Using a 3 or 3.5mm stitch length, and the embroidery thread in the top and bobbin to match the outer wallet, begin at the inside edge, draw up the bobbin thread and hold it securely. Stitch down to the corner, pivot and stitch across the bottom edge, pivot again and stitch up | 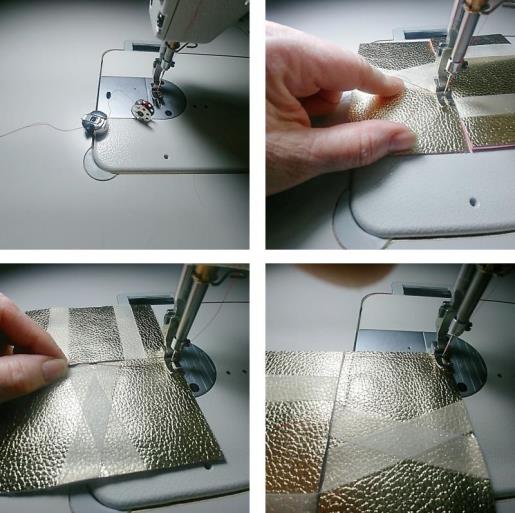 (Click Image to Enlarge) |
Step 31: | to the other ribbon. Keep the needle in the work, raise the presser foot, and stitch back the same way down to the corner, across the bottom and back up to where the stitching began. Pull up the bobbin thread and knot the tails together and clip the threads close to the knot. This makes the work very neat on the front of the wallet, but if you don’t want to knot the tails, you certainly may backstitch and trim the threads. | 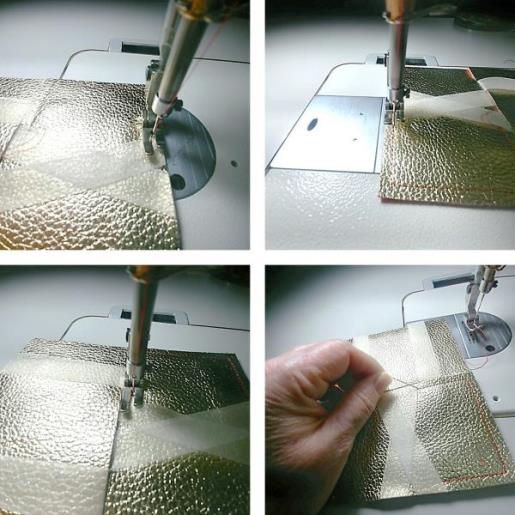 (Click Image to Enlarge) |
Step 32: | Repeat the stitching steps to complete the first part of the stitching as shown. | 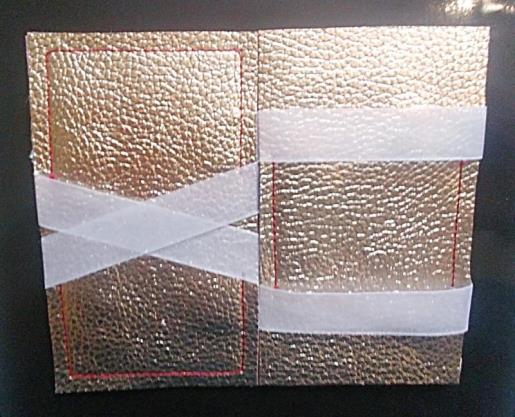 (Click Image to Enlarge) |
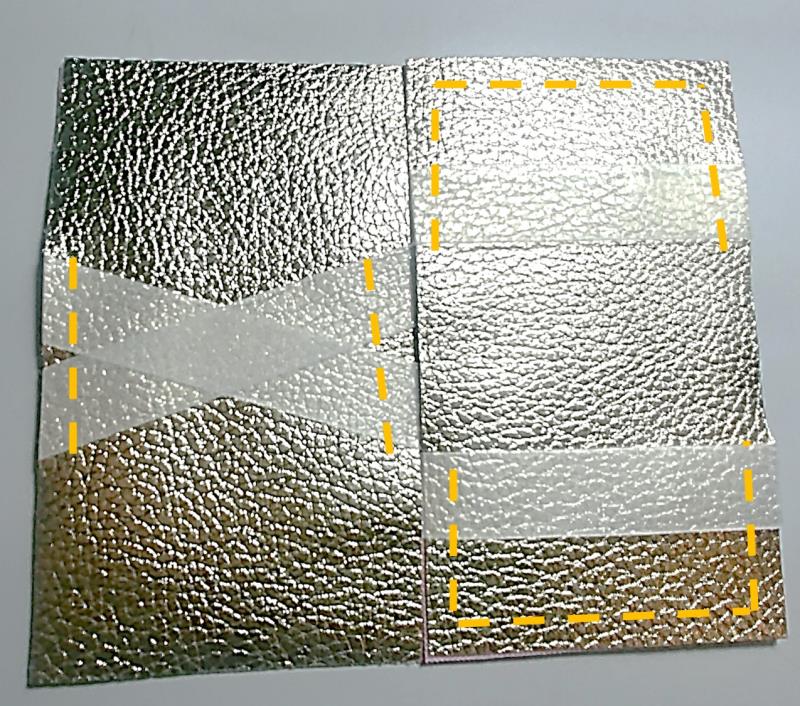
Step 33: | Close up the wallet, flip it over and open it back up so that the stitching now lies underneath the ribbons as shown in the photo on the right. | 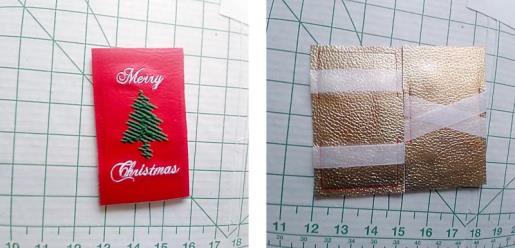 (Click Image to Enlarge) |
Step 34: | The first stitching is referenced in the yellow dotted lines. |  (Click Image to Enlarge) |
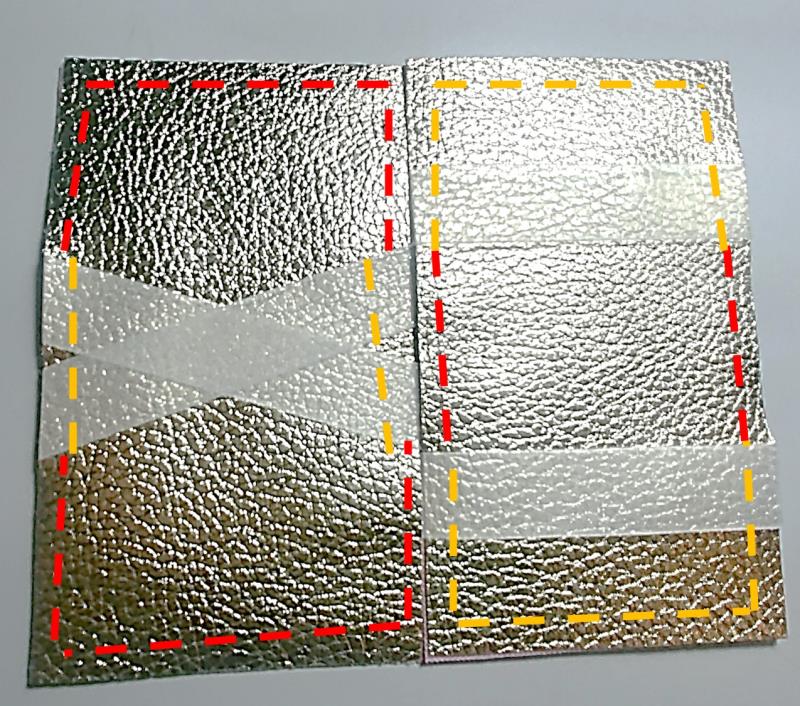
Step 35: | The same stitching will be done again as shown by the red dotted lines. | 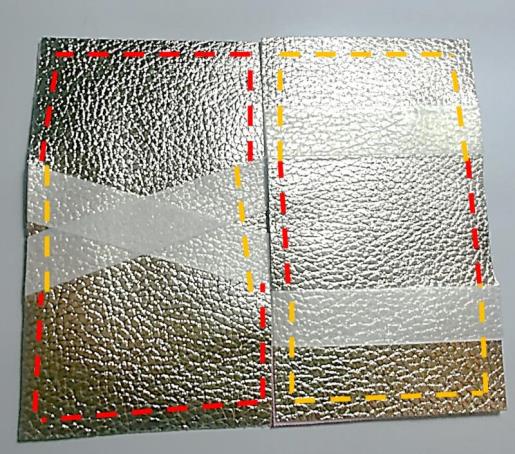 (Click Image to Enlarge) |
Step 36: | The stitching will begin and end where the last stitching began. Sink the needle into the end stitching point, pull up the bobbin thread, and then stitch around the sides to the where the other stitching ended, turn around and stitch back again. Repeat for the other end of the crossed ribbon side, and then the inside edges of the straight ribbon side. Complete the stitching tying off the ends or backstitching for each line of stitching. | 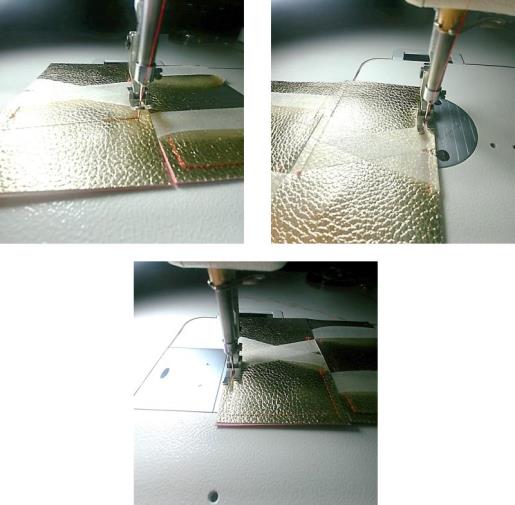 (Click Image to Enlarge) |
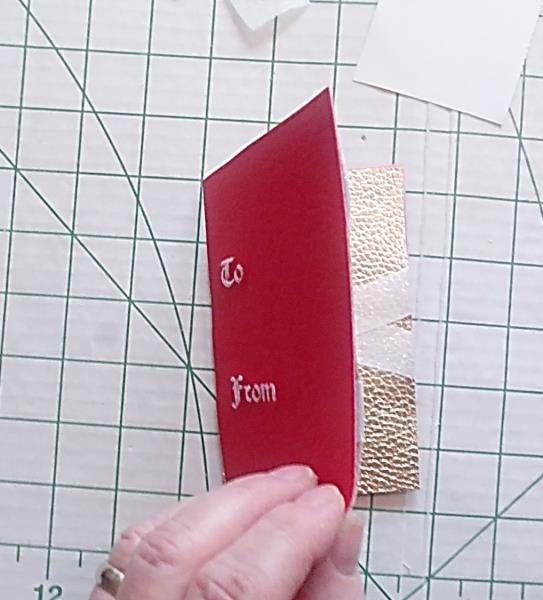
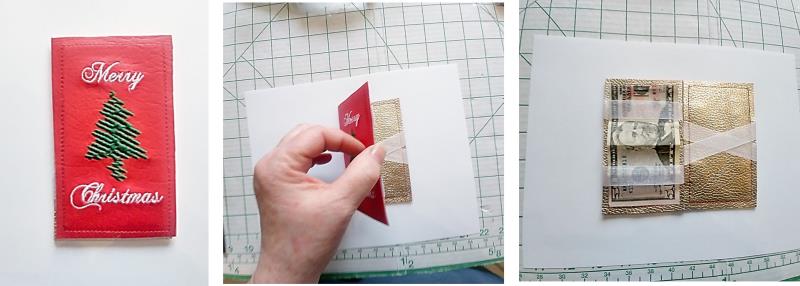
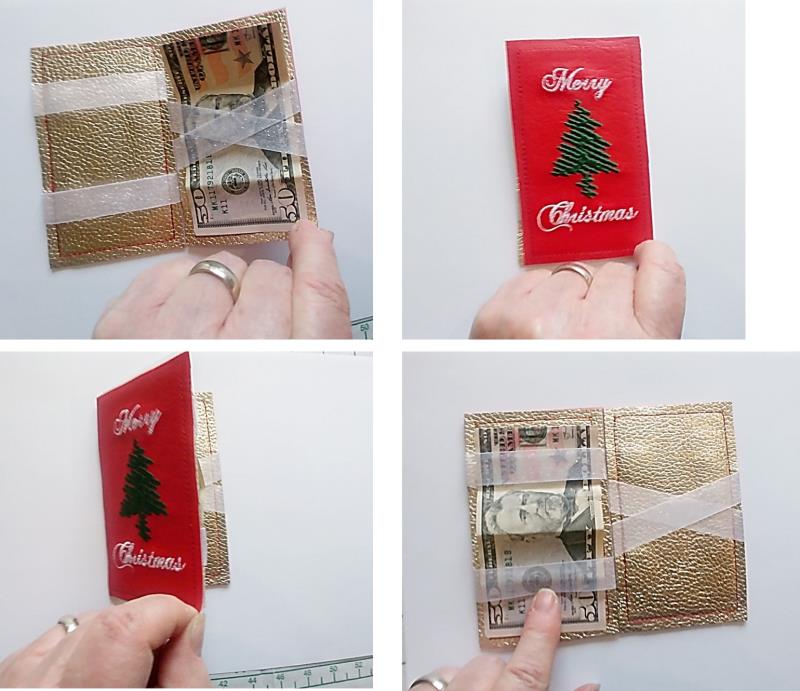
Step 37: | The stitching show all the way around on the front and back, securing the inside to the outside pieces and creating a nice stop stitching. The piece is done. Insert the money under one set of ribbons. |  (Click Image to Enlarge) |
Step 38: | Flip the back closed. Open it up and now the money is under the other side! | 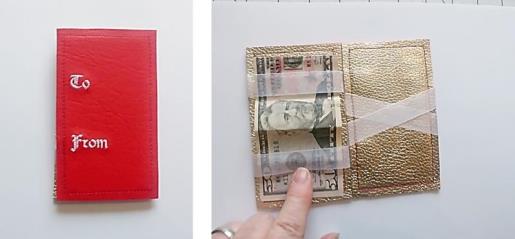 (Click Image to Enlarge) |
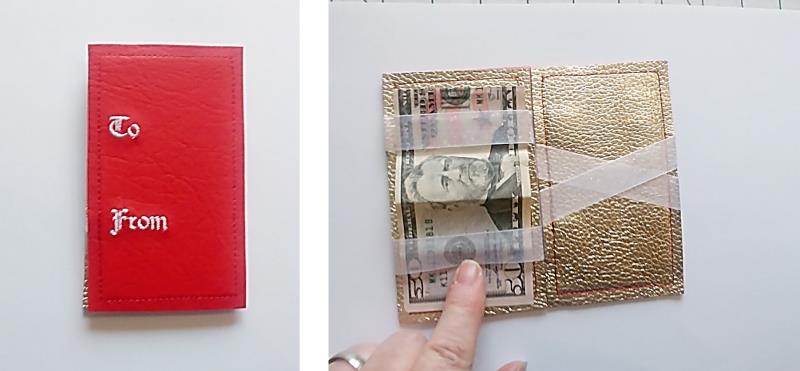
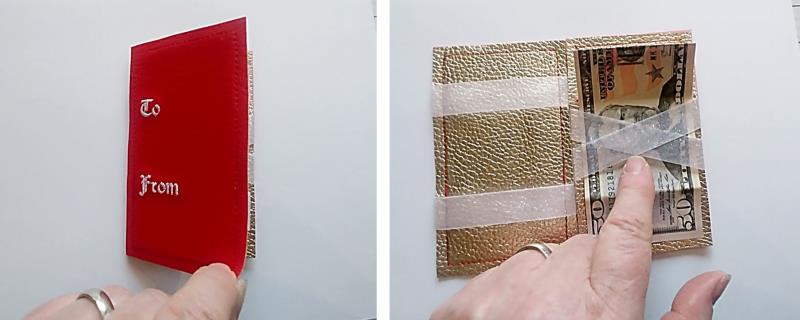
Step 39: | Close the back from the right, | 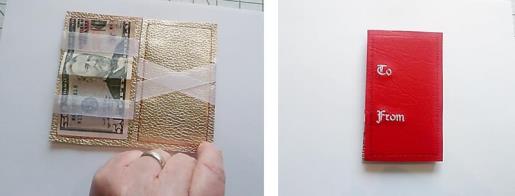 (Click Image to Enlarge) |
Step 40: | open it up from the lower right, and the money is on the other side! |  (Click Image to Enlarge) |
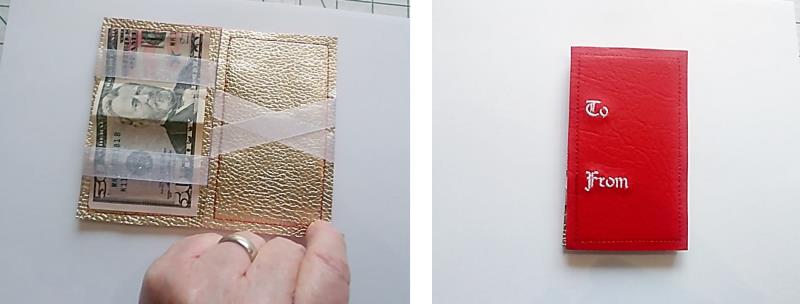
Step 41: | Keep flipping it over and over and the money flips from one side to the other. It works the other way, too. Flip and open from the left to right. It’s MAGIC! Kids love this and so do kids at heart. It’s a fun little “magic” wallet that is sure to delight. Now that I think about it, I think I’ll make some more of these and put a lottery ticket in each for a fun little adult gift. |  (Click Image to Enlarge) |
Step 42: | Congratulations on making your ITH Magic Wallet. Make several to gift and for Santa’s stocking stuffers. I bet co-workers would like them, too. | 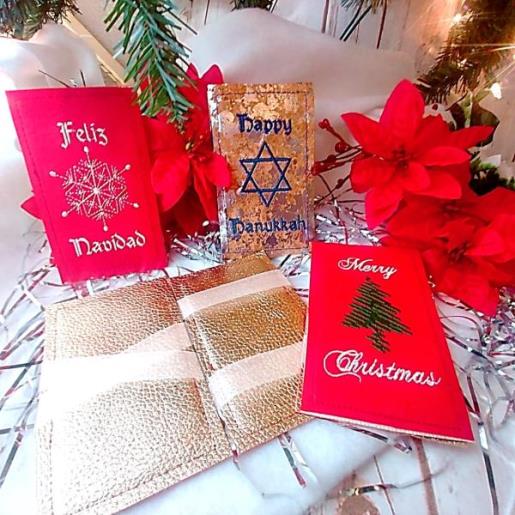 (Click Image to Enlarge) |
|