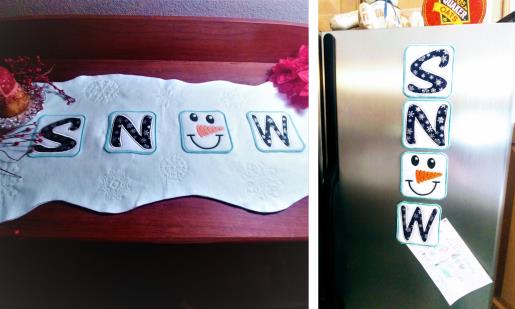
Here’s are a couple of fast and cute projects for you to stitch up and leave out all winter long. There are many uses for this design set—more suggestions are at the end of the instructions.
Step
of
Let It SNOW! Quilted Table Runner and Magnet Set
By Ramona Baird
This project is so much fun to do! The SNOW pieces are basically applique made puffy with the fleece. The table runner has only free-form cut edges so use fleece or a stable batting like Battilizer®. The table runner is “quilted” together with the snowflake designs and then cut to shape. The magnets are done just like the SNOW pieces for the table runner, and then an adhesive magnet is cut and adhered to the back.
Step 1:
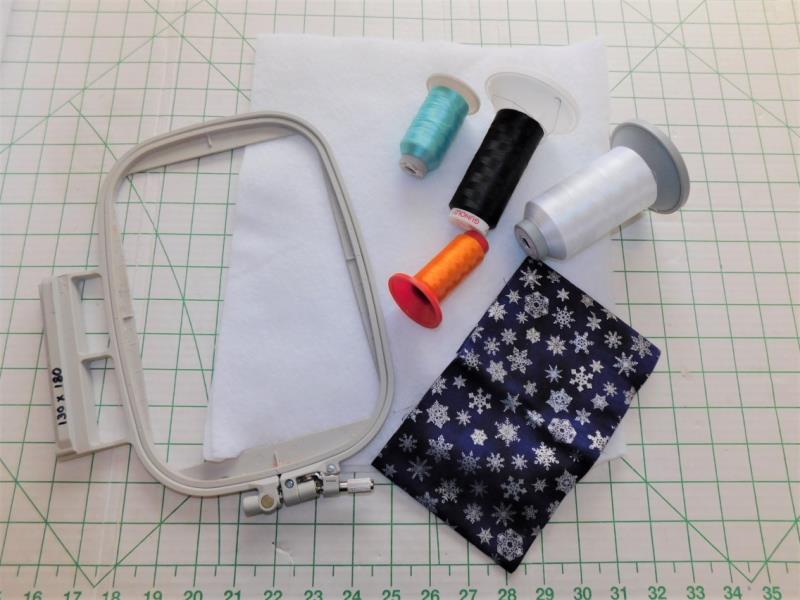
Read through the instructions thoroughly before beginning and assemble all the materials needed to complete the project. Print a sheet for each design to be used as templates.
(Click Image to Enlarge)
Step 2:
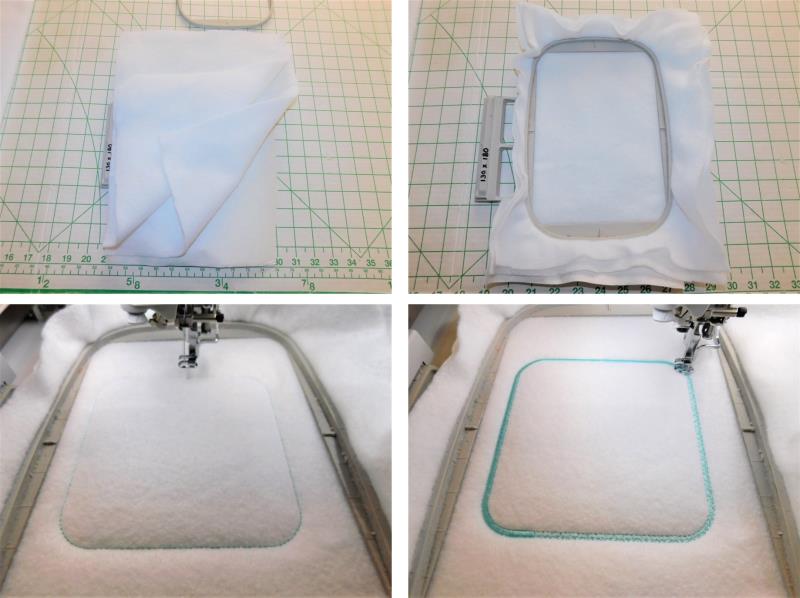
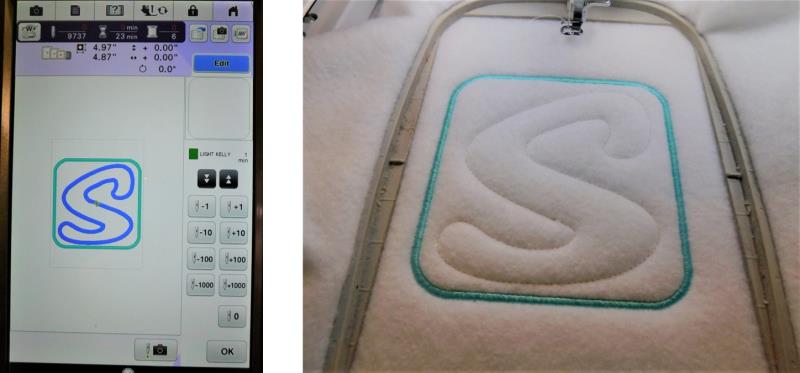
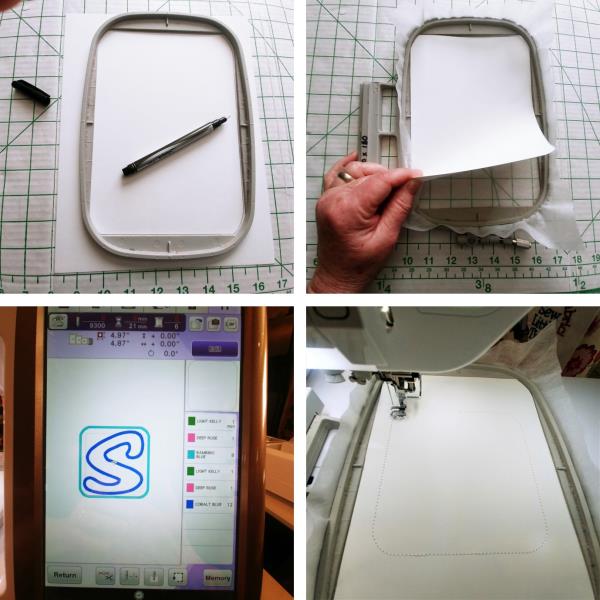
To keep the fleece stable while stitching the SNOW applique pieces, it is necessary to include the two layers of batting with the stabilizer in the hoop. Place down a piece of tearaway stabilizer and then place two pieces of batting on top; hoop all three layers together. Load the “S” applique design on the machine. Stitch color 1, which will sew the applique outline and border.
(Click Image to Enlarge)
Step 3:
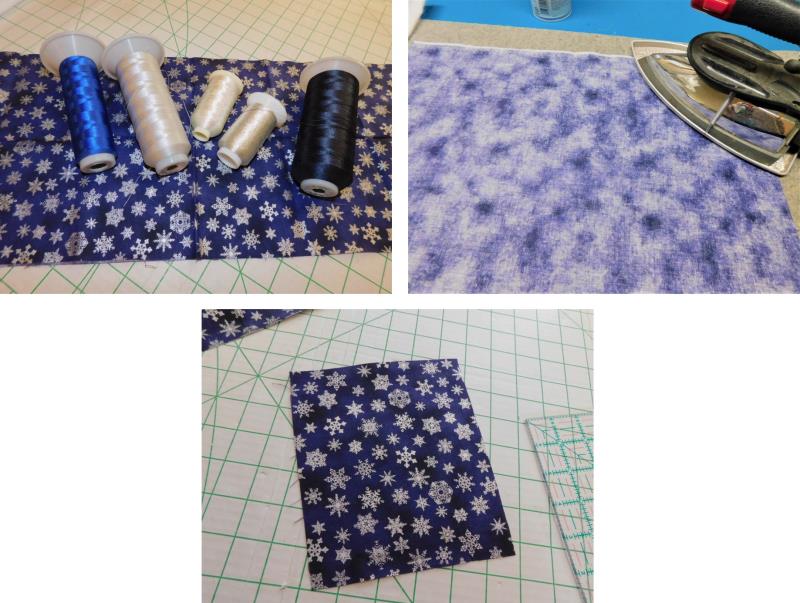
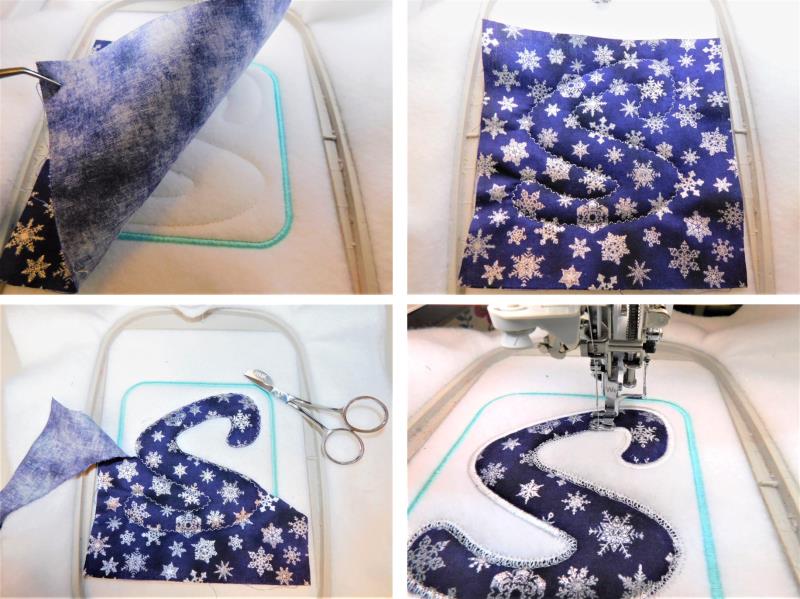
Choose the thread color for the letter outline. Depending upon the snowflakes in the themed fabric and the background color, your choice of color could be white, metallic silver or gold, or the background fabric color—the choice is yours. Press the fabric with spray starch on both the front and back so it is pretty stiff and then cut it to size.
(Click Image to Enlarge)
Step 4:
Stitch color 2 which will stitch the “S” shape.
(Click Image to Enlarge)
Step 5:
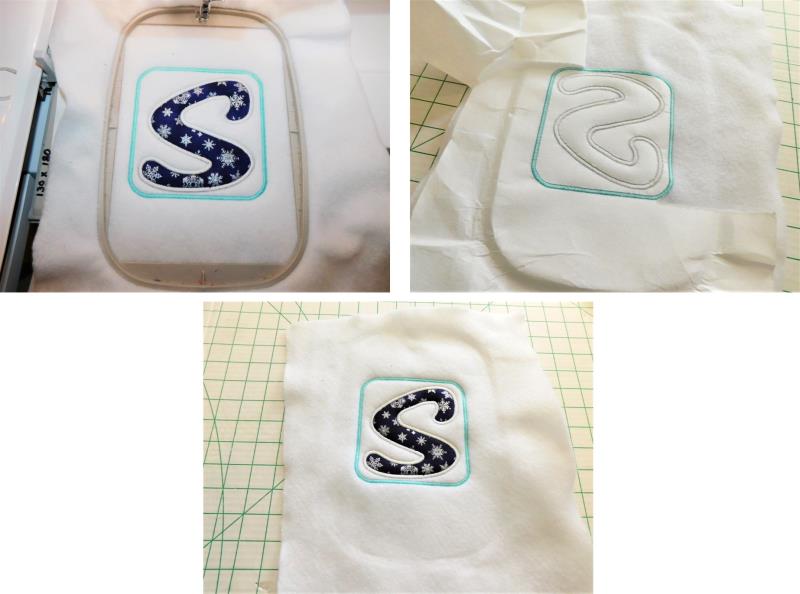
Place the snowflake fabric, right side up, on top of the outline. Stitch color 3 which will tack down the fabric. Remove the hoop from the machine and place it on a flat surface (do not un-hoop the fabric). Use small sharp scissors, like a small applique scissor, to very carefully cut away the fabric from outside the outline. Place the hoop back on the machine and stitch color 4, the satin outline.
(Click Image to Enlarge)
Step 6:
Remove the piece from the hoop after the stitching has finished and remove the excess stabilizer from the outside. Set the piece aside.
(Click Image to Enlarge)
Step 7:
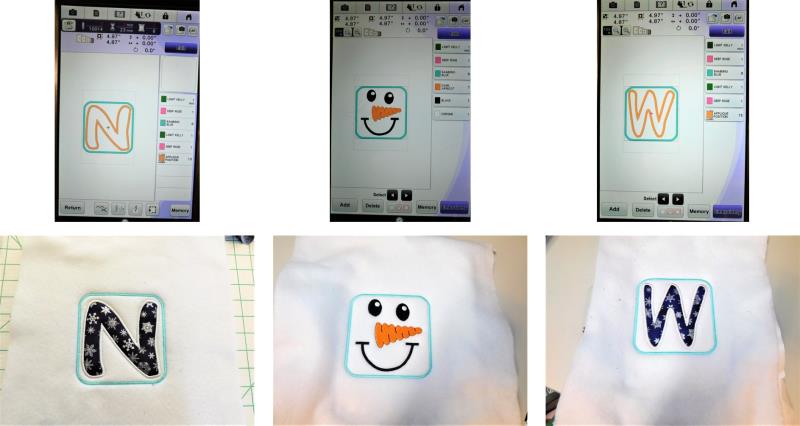
Repeat steps 2-6 for the N, Face, and W.
(Click Image to Enlarge)
Step 8:
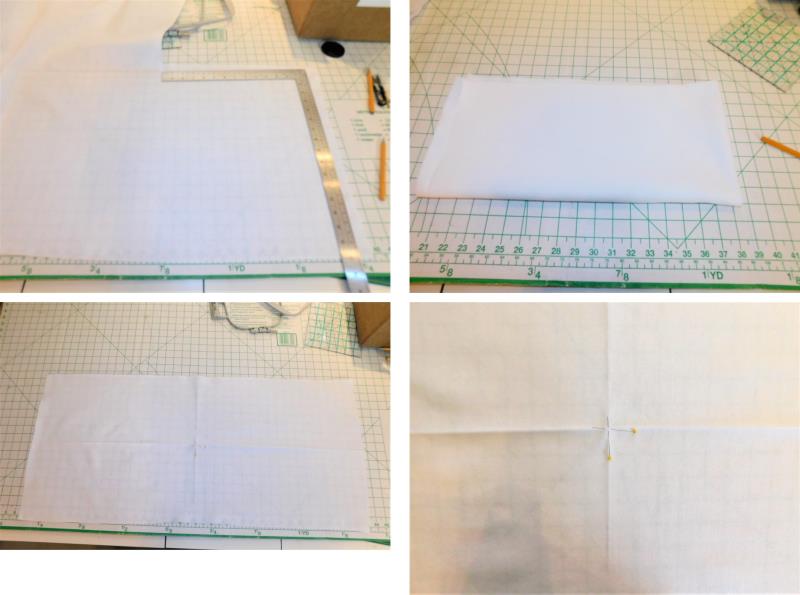
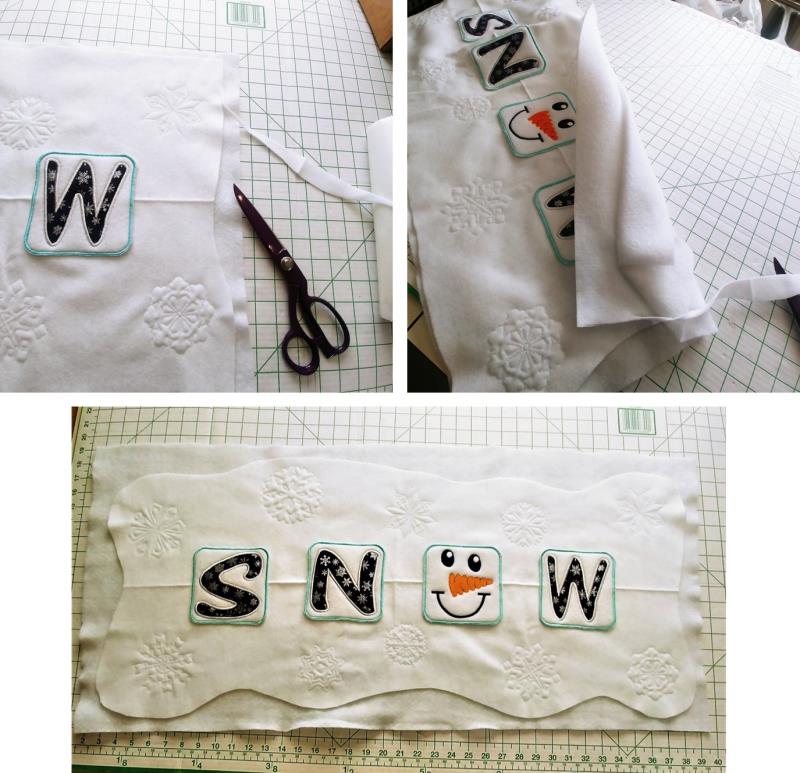
Cut the 2- 19” x 39” white fleece pieces; set one piece aside for the bottom of the table runner. Quarter-fold the remaining piece and lightly crease. Open up the piece and place pins to mark the center.
(Click Image to Enlarge)
Step 9:
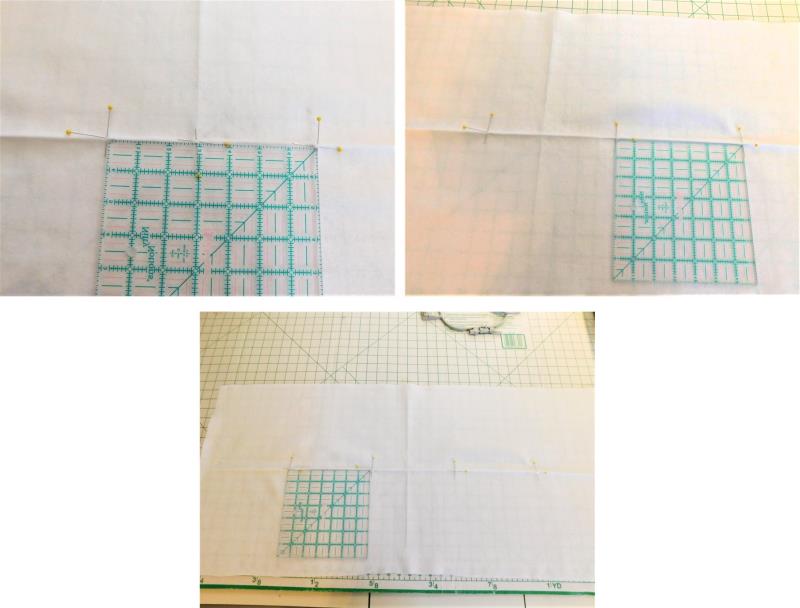
Now pins will be placed to space all the SNOW applique pieces. Place pins 3” along the horizontal fold line to the left and right of the center pin. Now place pins 6” to the right and left of these pins. Remove the center pins leaving four sets of pins placed 6” apart.
(Click Image to Enlarge)
Step 10:
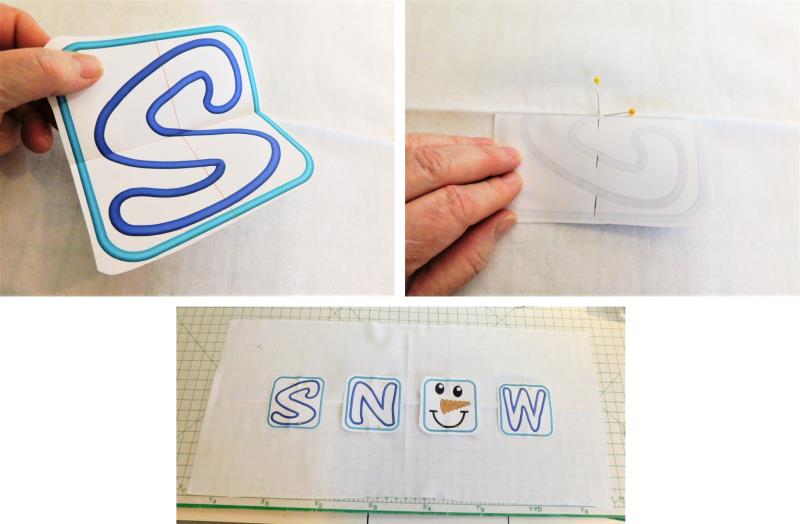
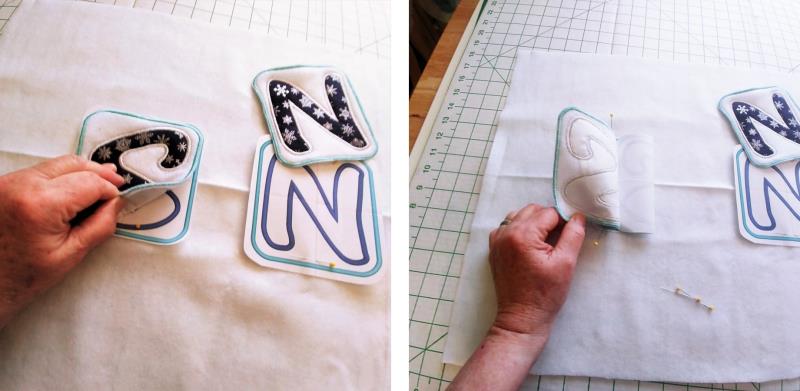
Cut out the paper templates for the SNOW letters and face. Fold each letter in half horizontally. Align the fold line of the letter to the first set of pins on the left, centering the vertical line at the vertical pin. Open up the paper, hold it in place and carefully remove the alignment pins and use them to pin the paper template in place. Repeat these steps for all the letters and face.
(Click Image to Enlarge)
Step 11:
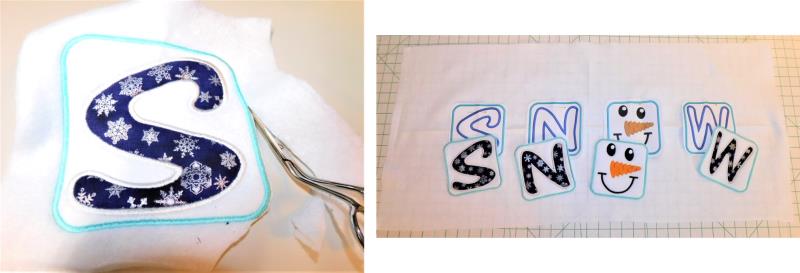
Trim the stitched letters and face appliques close to the outer most stitching line. Be very careful not to cut any of the stitching.
(Click Image to Enlarge)
Step 12:
Lay the appropriate letter and face applique over the paper template. Carefully remove the paper template and pin down the applique piece. Repeat for the remaining applique pieces.
(Click Image to Enlarge)
Step 13:
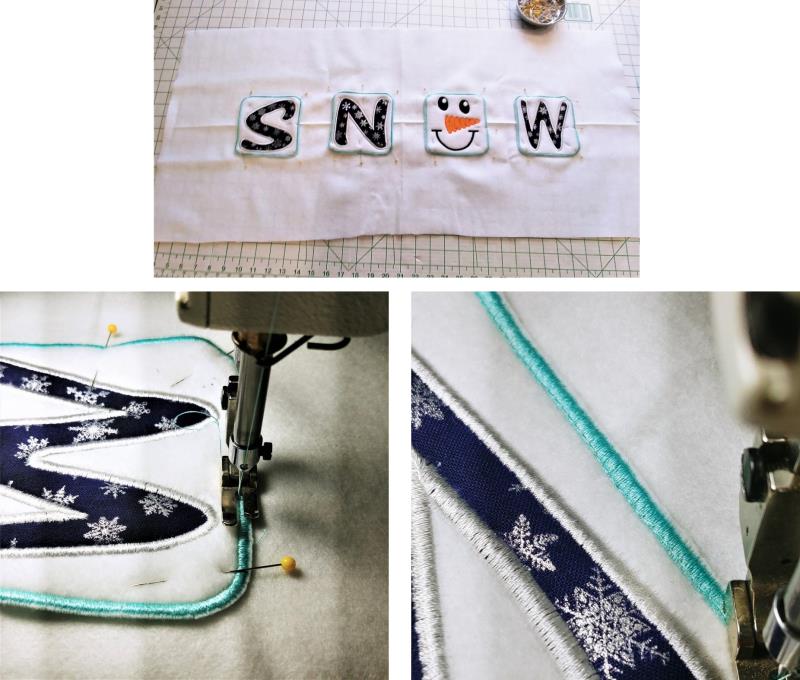
Place the embroidery thread used for the applique satin stitching on the sewing machine. Stitch down each applique to the fleece. I stitched along the inside edge of the applique.
(Click Image to Enlarge)
Step 14:
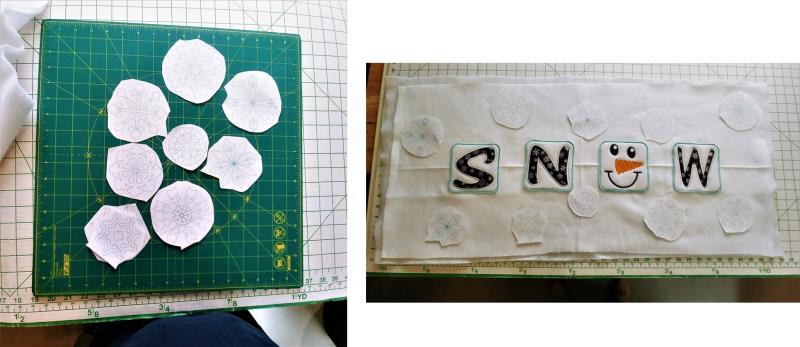
Now is time to complete the table runner. Cut out the templates for all the snowflakes. On a flat surface, place down the second piece of fleece that was set aside. Place the appliqued piece on top, right side up. Smooth the pieces together. Now scatter and place the snowflake appliques as desired and pin the paper through both pieces of fleece, doing this for all the snowflake templates.
(Click Image to Enlarge)
Step 15:
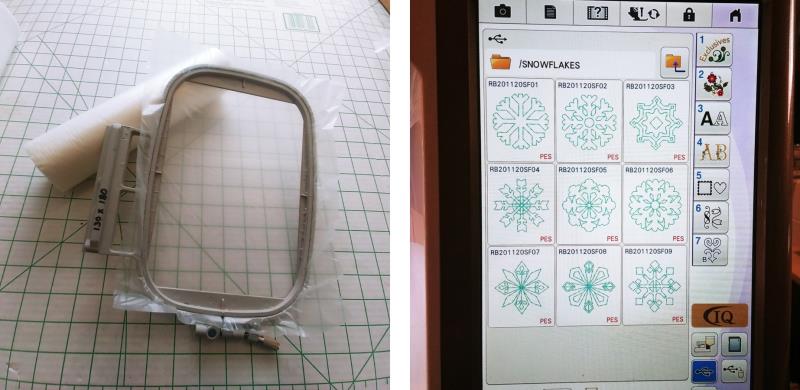
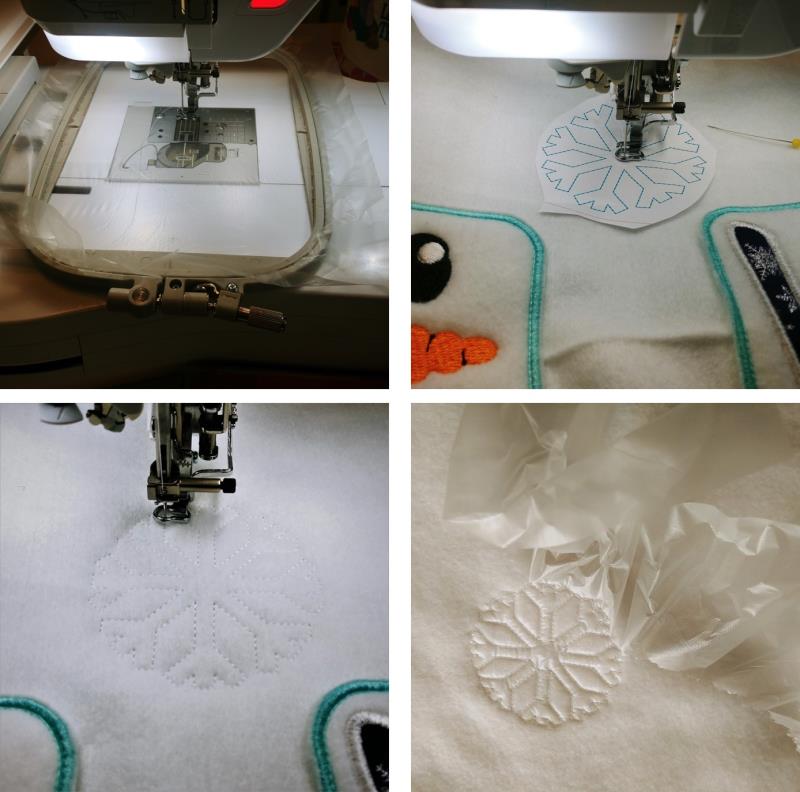
Hoop a layer of water-soluble topper stabilizer. Load the snowflake designs on the machine.
(Click Image to Enlarge)
Step 16:
Place the hoop on the machine. Choose the first snowflake. Locate the same snowflake on the table runner. Place the table runner on the hoop, centering the template under the needle. Remove the template and stitch the snowflake. Remove the hoop from the machine, remove the fabric and carefully tear away the excess stabilizer.
(Click Image to Enlarge)
Step 17:
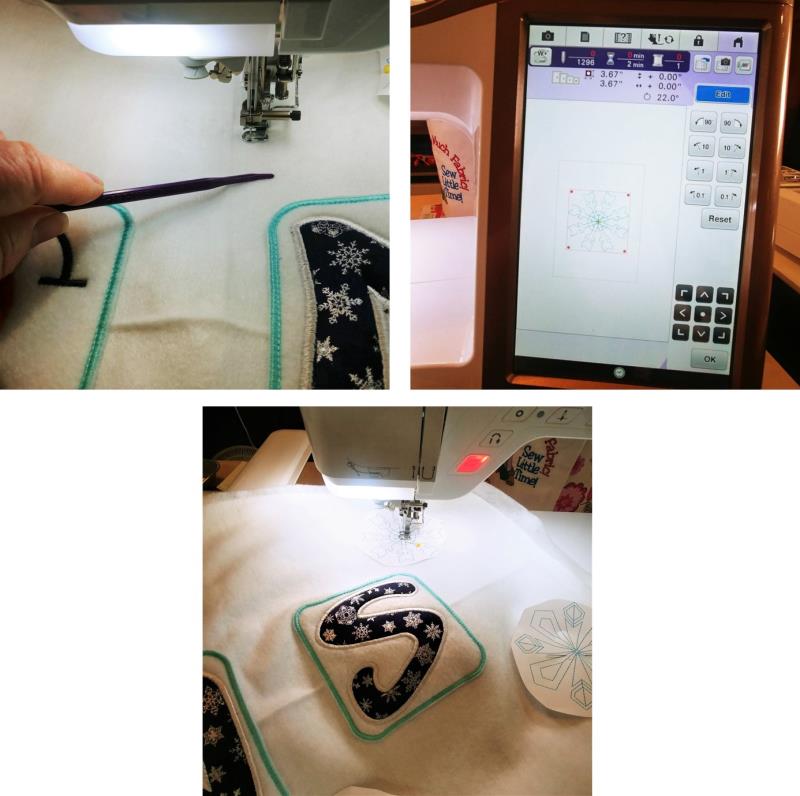
I found the table runner did not shift while being stitched, but if you do, use an awl or carefully with your hands, hold the fabric in place along the hoop edges. Be very careful if you do this so your fingers stay away from the needle and needle bar screw if it sticks out. Bring up the next snowflake, and repeat the steps for hooping stabilizer, aligning the table runner and stitching.
(Click Image to Enlarge)
Step 18:
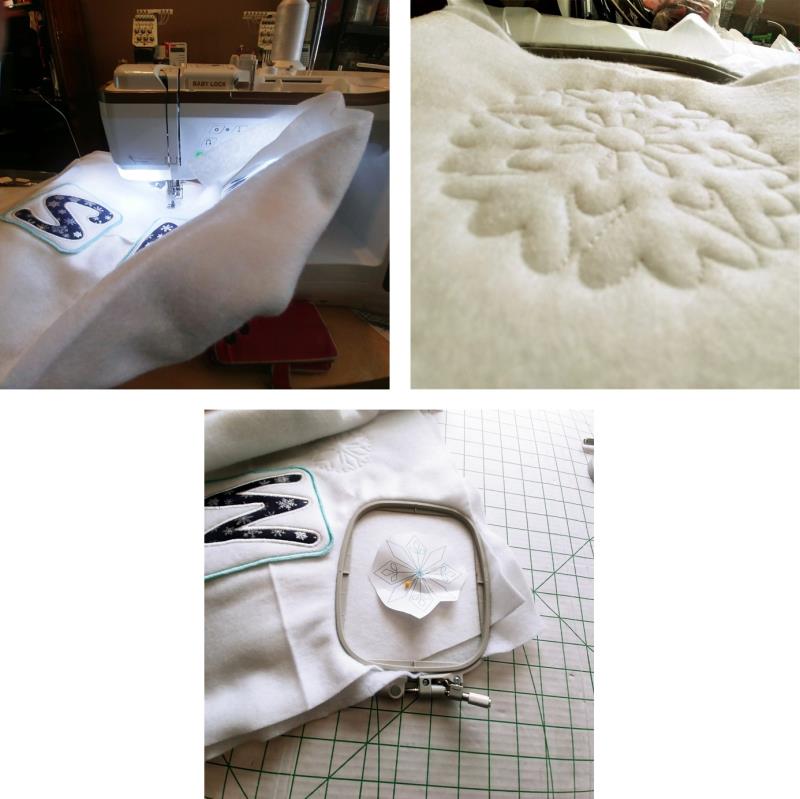
As necessary, use your hands to keep the weight of the stabilizer supported so it doesn’t cause drag while the machine stitches. The snowflakes provide a nice lofty quilted area. Here is also an option: instead of hooping a piece of WSS, use a smaller hoop that will fit the snowflake design and hoop both pieces of the fleece in the hoop and stitch—no WSS is needed.
(Click Image to Enlarge)
Step 19:
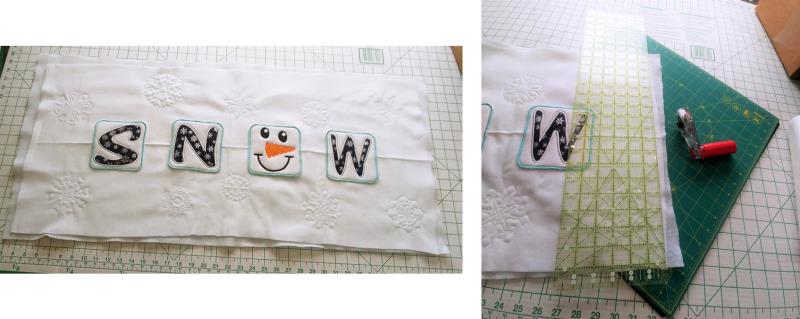
Once all the snowflakes are stitched it is time to finish up the table runner. You have options here. The edges can be squared up to have a rectangular table runner and the edges left raw or stitched together.
(Click Image to Enlarge)
Step 20:
A second option is to leave the bottom fleece piece of the table runner in a rectangular shape and free-form cut the top appliqued layer.
(Click Image to Enlarge)
Step 21:
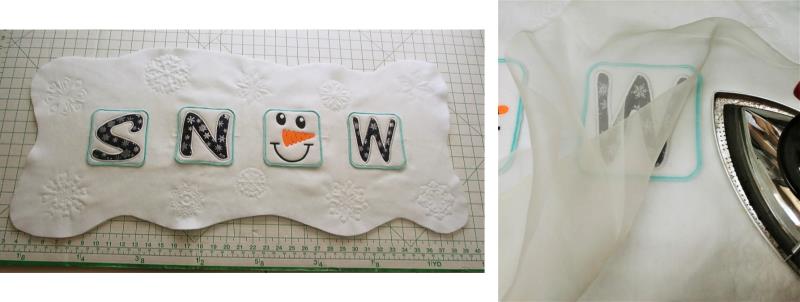
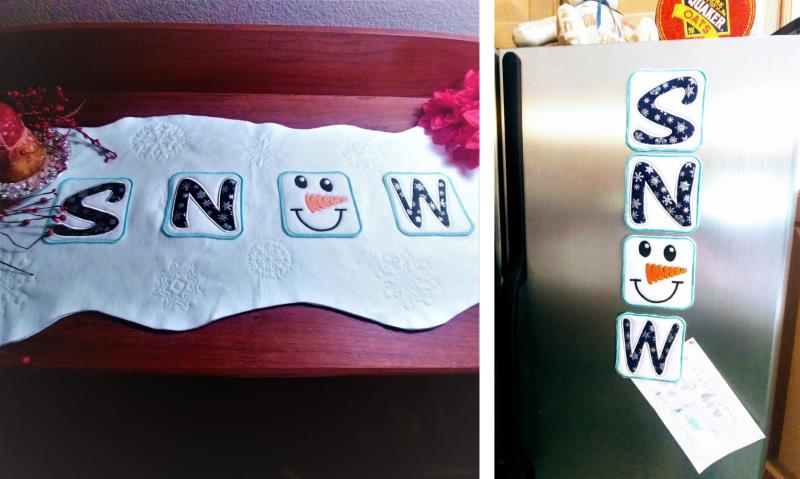
A third option which I chose, is to free-form cut both layers. If after doing all the stitching there is any pressing of the fleece that is needed, use a silk organza press cloth over the area and use a low-temp iron to remove the creases. Please test on a piece of scrap fleece first to test the iron temp. Also, do not lay the iron on the fleece as it will flatten it. Instead, hold the iron just above the piece over the pressing cloth and just let the head gently relax the fleece to remove the crease.
(Click Image to Enlarge)
Step 22:
These SNOW appliques were used to make really cute refrigerator magnets, too! As you will see, the basics are the same for stitching. To begin, hoop a piece of stabilizer. Place the piece of card stock on a flat surface and lay the inner hoop over the paper and trace around the inside of the hoop. Cut out the paper along the drawn line. Load the S design on the machine and stitch the first color which is the outline shape for the design.
(Click Image to Enlarge)
Step 23:
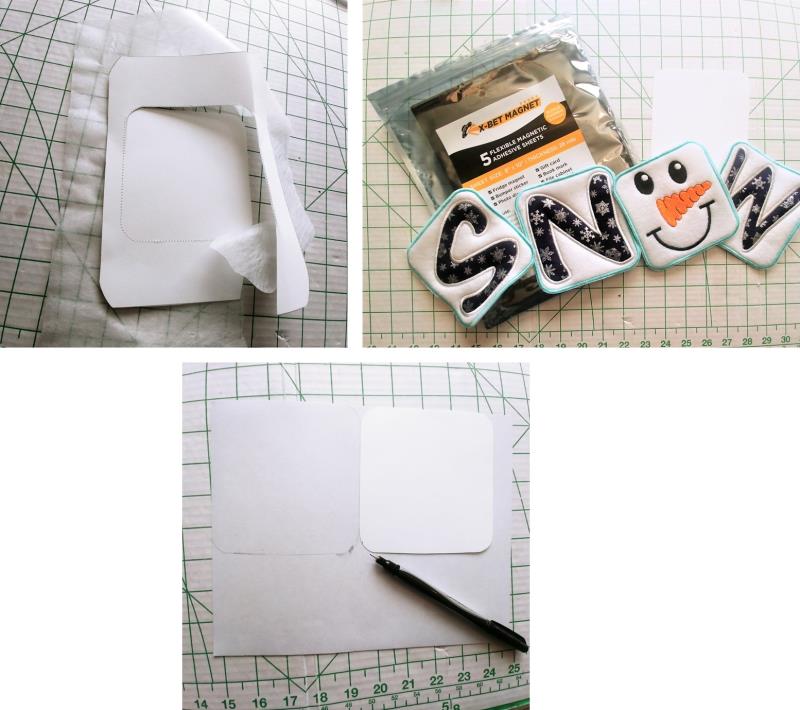
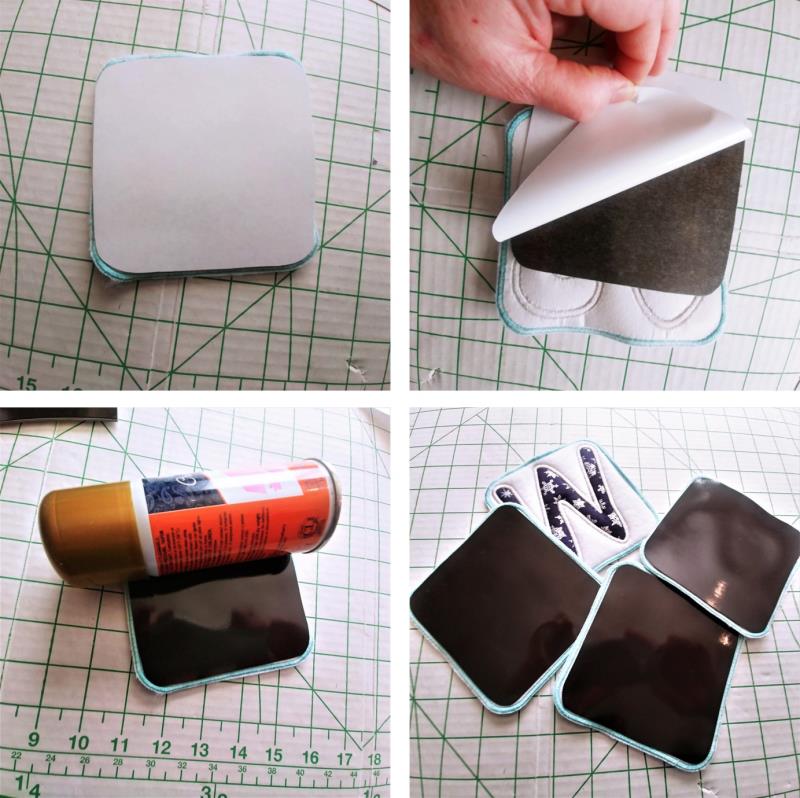
Cut out the paper 1/8” inside the stitching line. Stitch all the SNOW applique pieces as was done for the table runner. There is a protective paper on the back side of the magnetic sheets. Using the card stock template, trace two on the back paper for the magnetic sheet; repeat for the other magnetic sheet.
(Click Image to Enlarge)
Step 24:
Using the back side of each applique, check the fit of the magnetic piece for each applique, trimming further if needed. The magnetic piece should be just inside the stitching line for the applique. One by one, remove the protective paper from the magnet and place the adhesive side down on the back side of the applique. Use a can to firmly roll along the magnet to secure the adhesive to the back of the applique. Repeat for all applique pieces.
(Click Image to Enlarge)
Step 25:
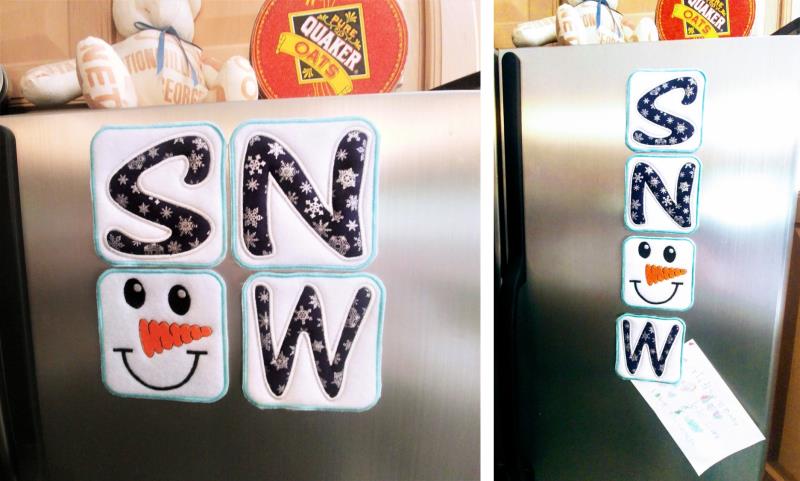
Place the magnets on the refrigerator. Note: these applique pieces could also be used for a pillow, using the layout on the left or as a wall hanging if used how they are shown in the photo on the right. These applique pieces have so many uses!
(Click Image to Enlarge)
Step 26:
Congratulations on creating your new SNOW quilted table runner and magnets set! Enjoy your new SNOW set for years to come.
Ramona Baird has been in the embroidery industry for over 23 years. She and her husband owned a commercial and retail embroidery store in Arizona for many years. She is an experienced digitizer having been mentored by award-winners Pat Williams and Lindee Goodall. Ramona is a contributor to “Creative Machine Embroidery” magazine having 5 covers to her credit. Ramona has worked for Wilcom America and served many years as Education Director for the American Sewing Guild. With a degree in fashion design, she is able to design and execute patterns which Pat Williams says are “out of the box” in creativity and application. Ramona likes to challenge the boundaries of embroidery and bring new and exciting designs, ideas, and projects to EmbroideryDesigns.com. She wants embroiderers of all levels to increase their skills and enjoyment in using their embroidery machine for gift-making and personal pleasure.