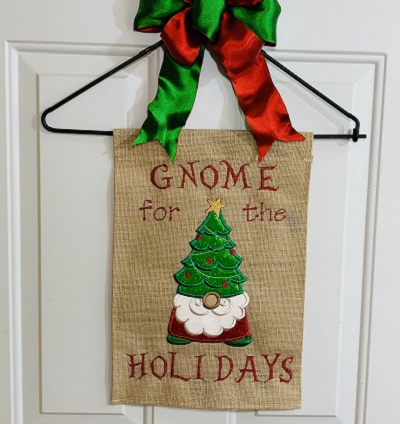
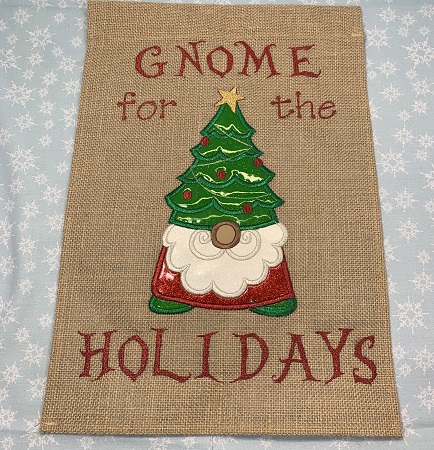
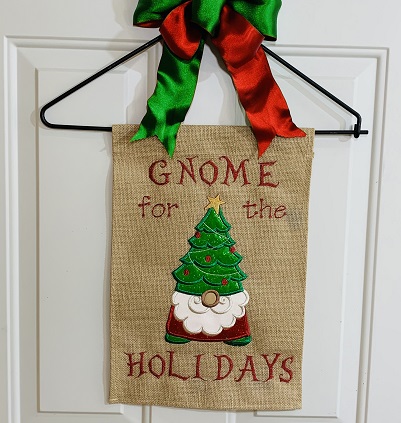
'Gnome for the Holidays' flag uses marine glitter vinyl and metallic thread. The gnome design is available in 4 sizes. The 5.59" W x 9.81" H size was used for this project. Three hoop changes are used on the flag. An 8"x12" hoop was used to make this flag on a single needle embroidery machine. Sewer's Aid makes a huge difference if using metallic thread in projects.
Step 1:
Read all directions before beginning the project. Gather the materials for the project.
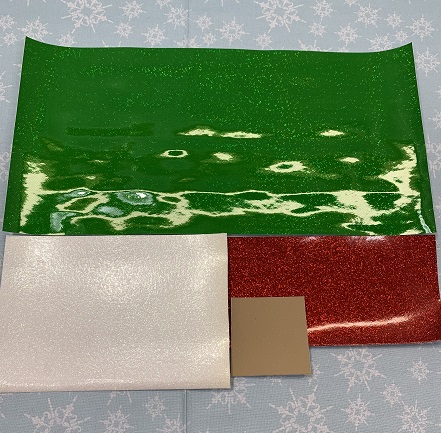
Cut one piece of green glitter vinyl 6"x10.5". Cut one piece of red glitter vinyl 4.5"x6.5". Cut one piece of white glitter vinyl 5.5"x3.5". Cut one piece of tan vinyl 2"x2".
Step 2:
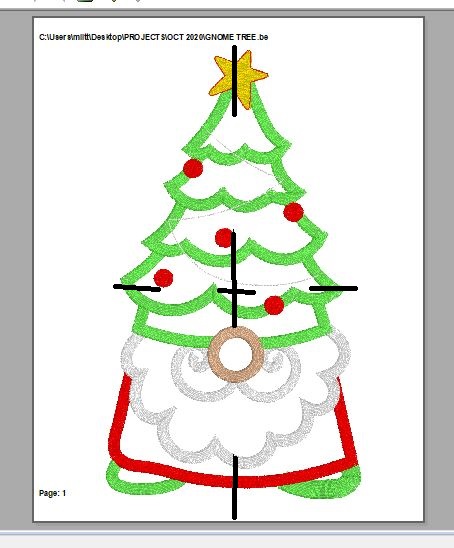
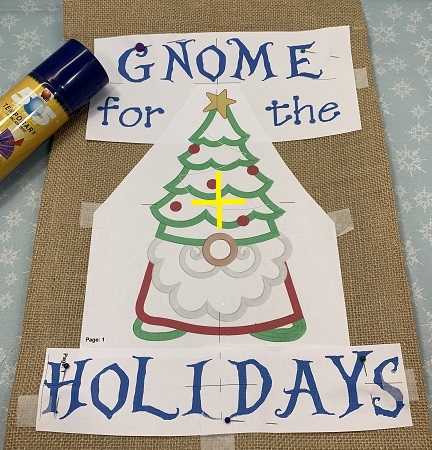
A template is a printout of the design from an embroidery software program. The template is the actual size of the design which makes a great visualization tool. The vertical and horizontal axis on the template provides perfect placement of the embroidery designs.
3 different design templates were used to make this flag. The first template is of the 'Christmas Tree Gnome' design. Print a design template.
(Click Image to Enlarge)
Step 3:
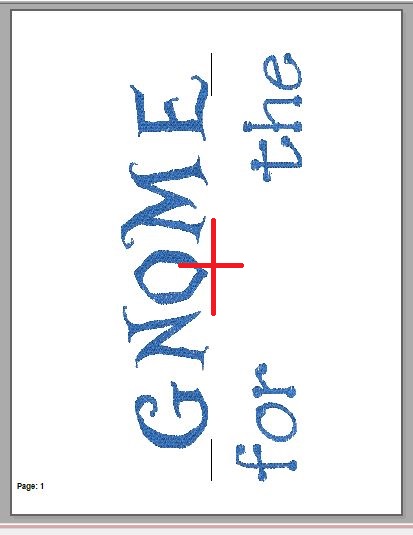
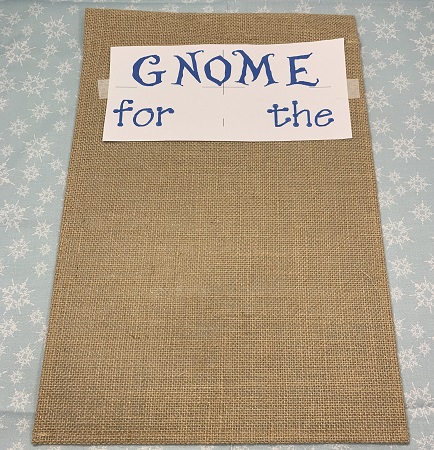
The caption 'Gnome for the Holidays' was used with the 'Christmas Tree Gnome' design with 'Alice' font. The caption is separated into 2 parts. A caption 'Gnome for the' was made for the top of the flag. Embrilliance 'Essentials' embroidery software program was used to make the caption and design templates.
Print the design template 'Gnome for the'.
(Click Image to Enlarge)
Step 4:
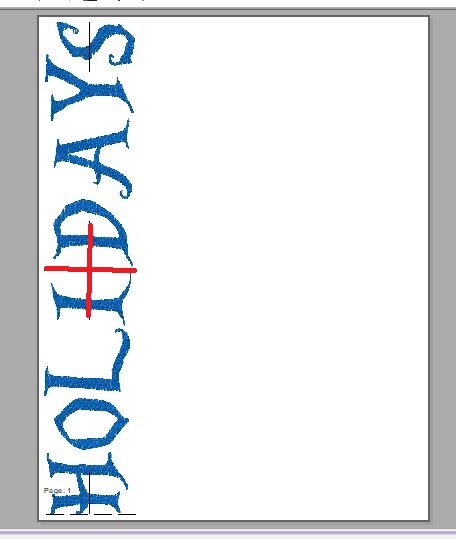
Make the caption for 'Holidays' in an embroidery software program. Print the design template.
(Click Image to Enlarge)
Step 5:
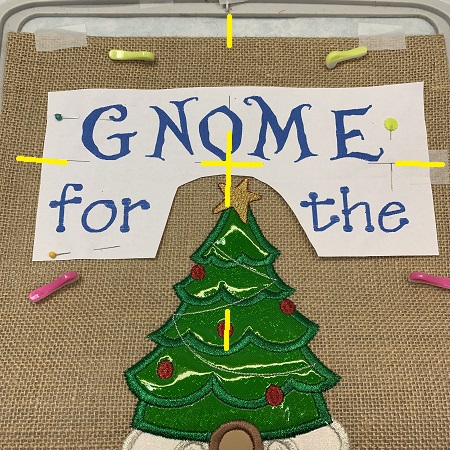
Use the three design templates to guide placement on the flag. Begin by centering the design template 'Gnome for the' at the top part of the flag.
Step 6:
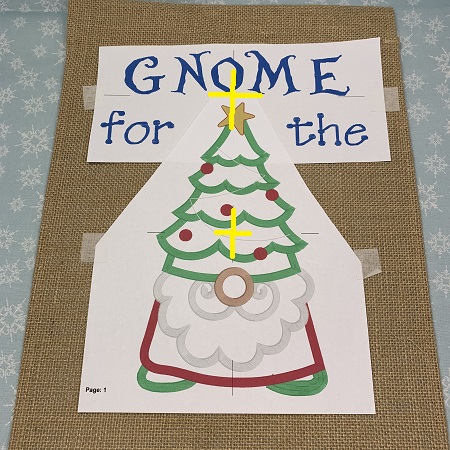
Next, center the 'Christmas Tree Gnome' design template on the flag. Line up the vertical (top to bottom) line on both design templates for placement accuracy.
Step 7:
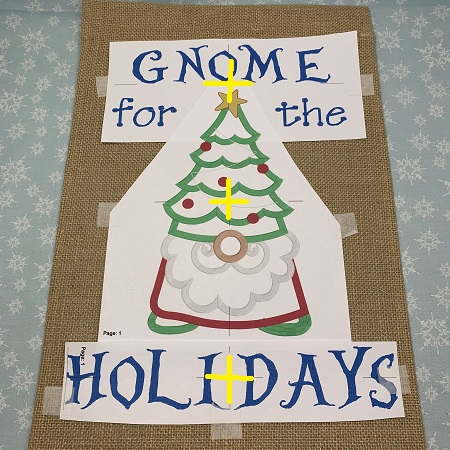
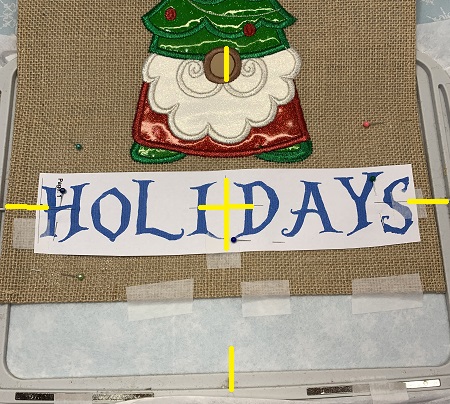
Add the 'Holidays' design template on the flag. Again, use the vertical lines to center all three designs on the flag in the same place. After you have all three design templates in place, temporary secure them in place with 505 Temporary Adhesive spray, pins, or painter's tape.
Step 8:
The commercial burlap flag used for this project has a vinyl-like backing on it. The backing adds a strong stabilizer factor to the burlap. Because of this backing, a tear-away stabilizer was used on the flag. A cut-away stabilizer may be a better choice depending on your flag material.
Hoop one piece of medium weight tear-away stabilizer. Mark the center of the stabilizer. Center the 'Christmas Tree Gnome' design on the stabilizer. Use 505 Temporary Adhesive spray to secure the flag to the stabilizer. Pins may be added to make the flag more stable.
Step 9:
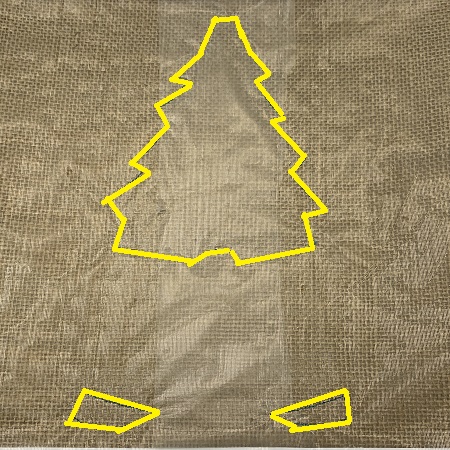
Load the design onto the machine. Attach the embroidery hoop. Check the needle and bobbin. If using a design template for placement, carefully remove the gnome design template from the flag. Cover the stitching field with water soluble topping stabilizer. The topping keeps the stitches from sinking into the fabric.
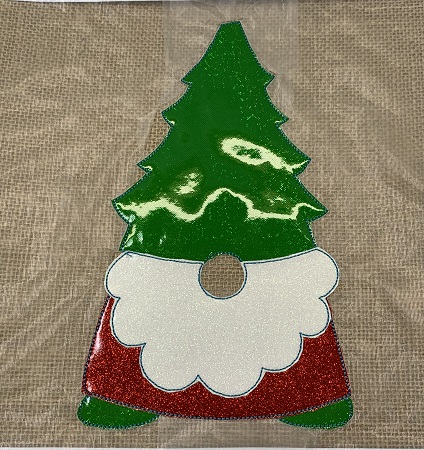
The gnome is appliqued onto the flag. The first color stop (CS) is placement stitches. Stitch CS1.
Step 10:
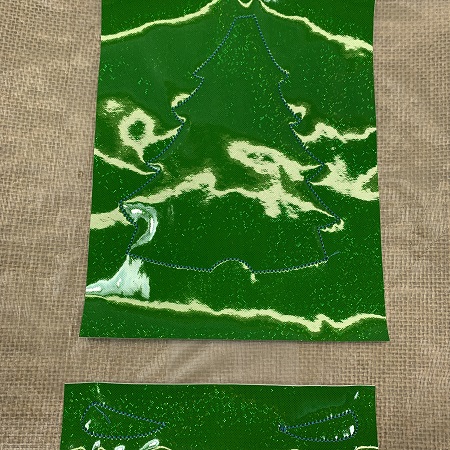
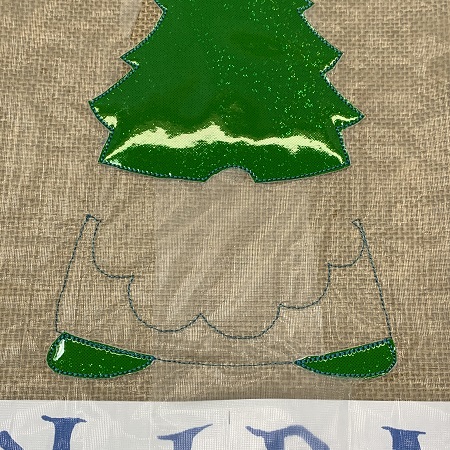
Remove the hoop from the machine. DO NOT remove the flag from the hoop. Cover the placement stitches with green vinyl. Re-attach the hoop. CS2 is tack down stitches. Stitch CS2.
Step 11:
Remove the hoop from the machine. DO NOT un-hoop the project.
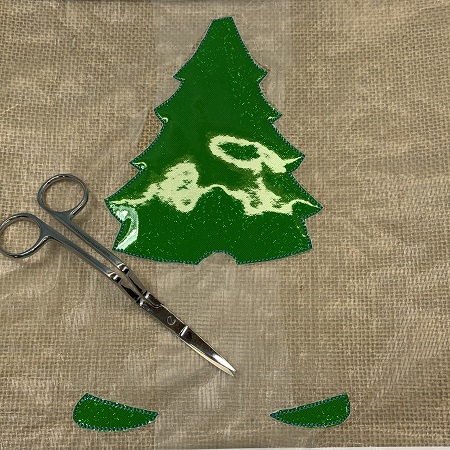
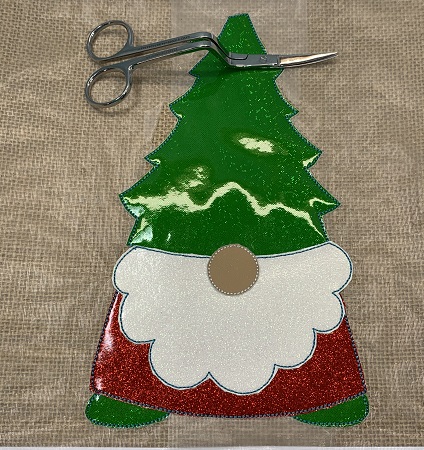
Use applique scissors to trim excess vinyl from around the stitching. Trim closely to the stitching but do not cut the stitches. Re-attach the hoop.
Step 12:
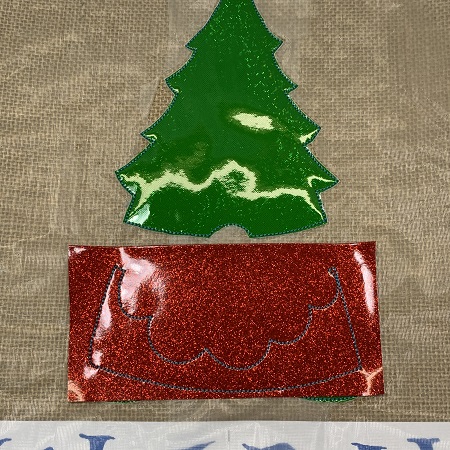
Stitch CS3. CS3 is the placement stitches for the red winter coat.
Step 13:
Remove the hoop from the machine. DO NOT un-hoop the flag. Place the red vinyl over the placement stitches. Re-attach the hoop.
Step 14:
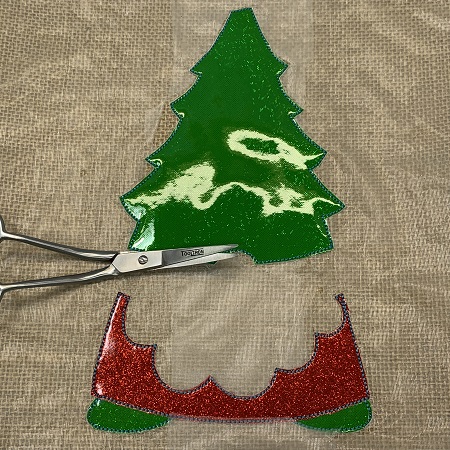
CS4 is the tack down stitches for the red vinyl. Stitch CS4.
Remove the hoop from the machine. DO NOT un-hoop the flag. Trim excess vinyl from around the stitches. Re-attach the hoop.
Step 15:
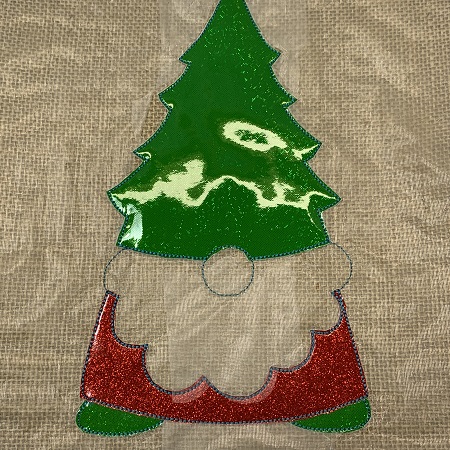
Stitch CS5. CS5 is the placement stitches for the beard.
Step 16:
Stitch CS6. CS6 is the tack down stitches for the beard. Remove the hoop from the machine. DO NOT un-hoop the flag. Trim excess vinyl from around the stitches. Re-attach the hoop.
Step 17:
CS7 is the placement stitches for the nose. Stitch CS7. Remove the hoop from the machine. DO NOT un-hoop the flag. Cover the placement stitches with the tan vinyl. Re-attach the hoop.
CS8 is the tack down stitches for the nose. Stitch CS8. Remove the hoop from the machine. DO NOT un-hoop the flag. Trim excess vinyl from around the stitches. Re-attach the hoop.
Step 18:
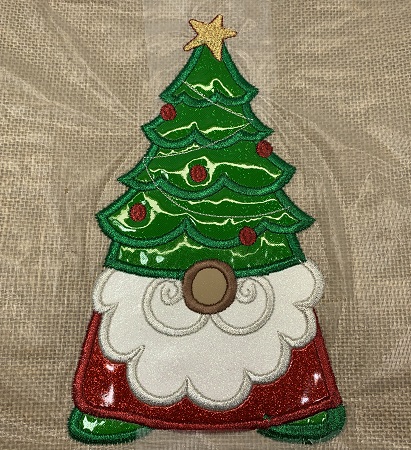
Follow the color guide to finish embroidering the gnome design. After the design has finished stitching, remove the hoop from the machine.
Step 19:
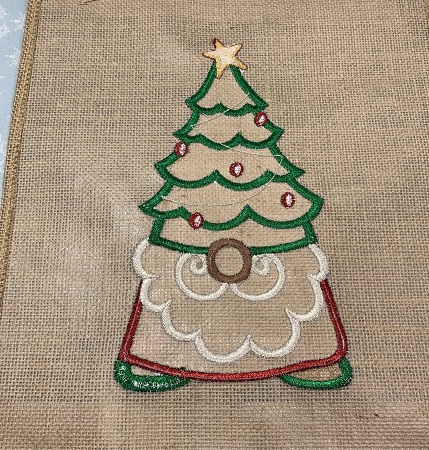
Remove the flag from the hoop. Carefully remove the water soluble topping. Tear-away the stabilizer from the back of the flag. Trim long threads if needed.
Step 20:
Hoop one piece of tear-away stabilizer. Mark the center of the stabilizer. Center the caption 'Gnome for the' on the stabilizer. Use 505 Temporary Adhesive spray to secure the flag to the stabilizer. Use pins for additional stability.
Step 21:
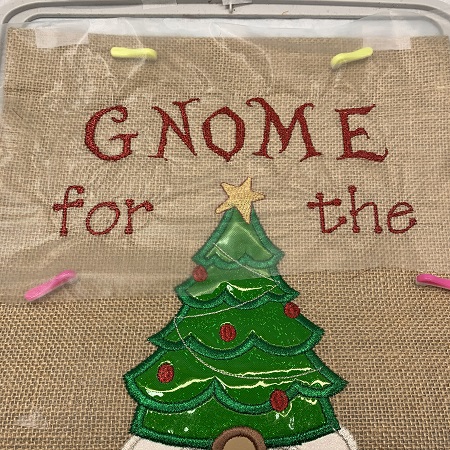
Load the design 'Gnome for the' onto the machine. Attach the embroidery hoop. Remove the design template. Cover the stitching field with water soluble topping to keep the stitches from sinking into the fabric.
Stitch the design. Remove the hoop from the machine. Remove the flag from the hoop. Gently remove the water soluble topping from the top of the flag. Carefully tear-away the stabilizer from the back of the flag. Trim long threads if needed.
Step 22:
Load the design 'Holidays' onto the machine. Attach the embroidery hoop. Remove the design template. Cover the stitching field with water soluble topping to keep the stitches from sinking into the fabric.
Stitch the design. Remove the hoop from the machine. Remove the flag from the hoop. Gently remove the water soluble topping from the top of the flag. Carefully tear-away the stabilizer from the back of the flag. Trim long threads if needed.
Marisa Littleton is a retired educator with a love for teaching and learning. Interests include machine embroidery, hand embroidery, quilting, cooking, and antiques.