


PROJECT INSTRUCTIONS


PROJECT INSTRUCTIONS

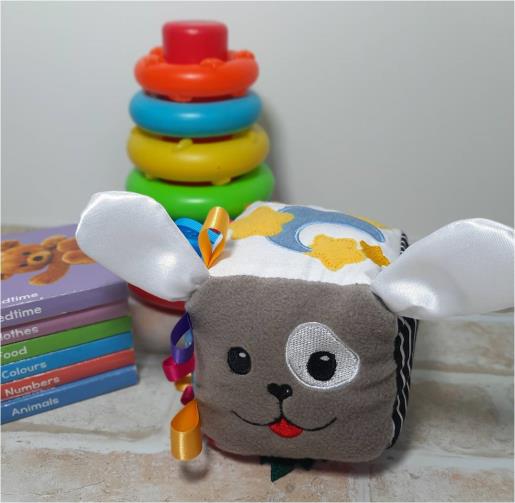
Sensory Cube Embroidery Project
By
Kylie Burke
on
November 09, 2020
PROJECT DETAILS
SKILL LEVEL
Intermediate
TIME REQUIRED
03:00
Description
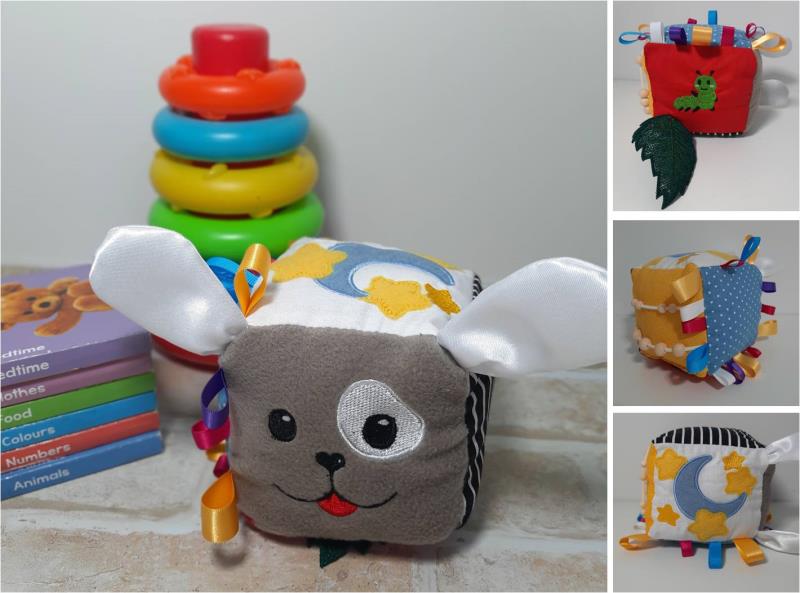
Using multiple embroidery designs you can create this bright, fun and educational sensory cube for a little one. Use different fabrics like satin, felt and denim to provide different sensory experiences.
Project Preview Video

QUICK VIEW
FSL Leaves Bookmark
$10.00
$4.00
Circle Price: $4.00

QUICK VIEW
Tear Away Stabilizer
$7.98
Circle Price: $7.18

Water Soluble Stabilizer - 12" x 25 Yds
$32.46
Circle Price: $29.21

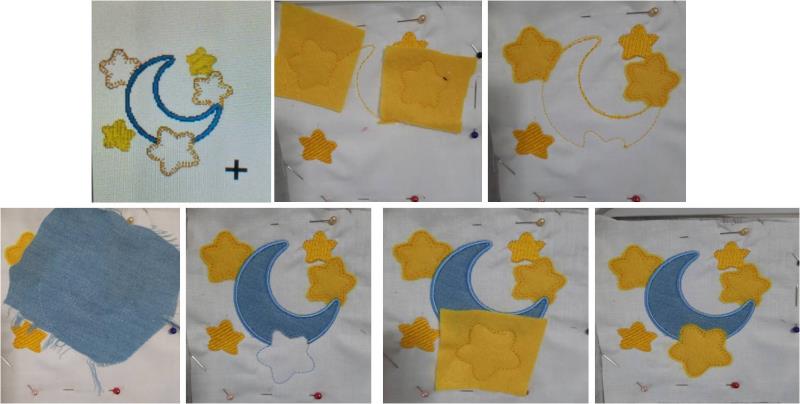
Moon & stars Applique
$12.00
Circle Price: $10.80

Green Bug
$5.79
$0.99
Circle Price: $0.99

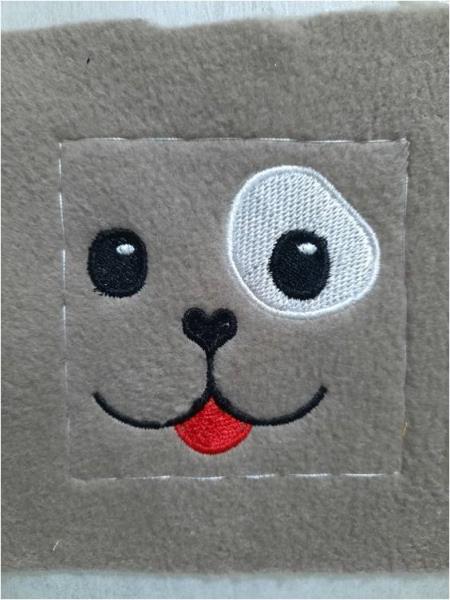
Puppy Dog Face
$5.99
Circle Price: $5.39


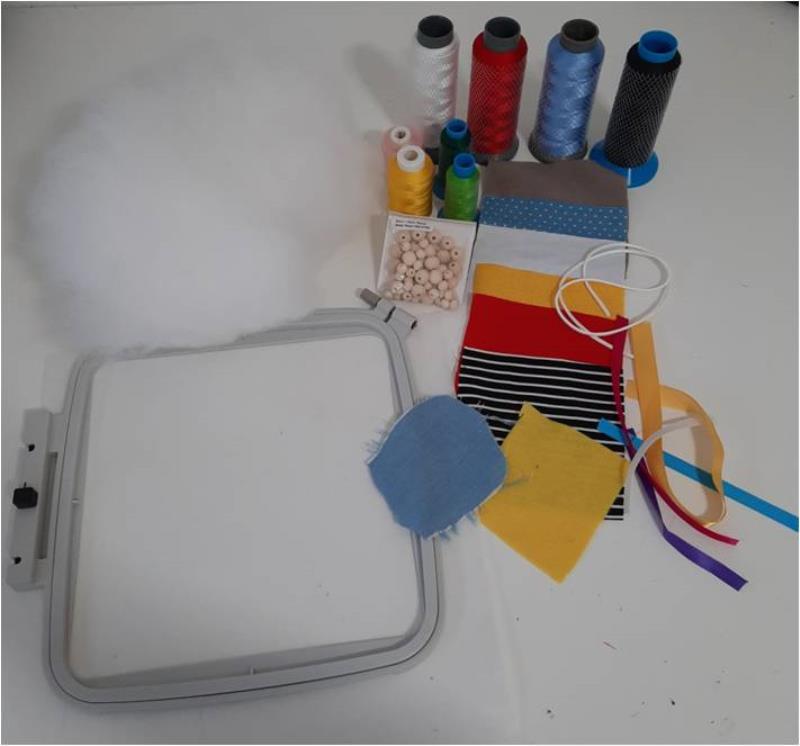
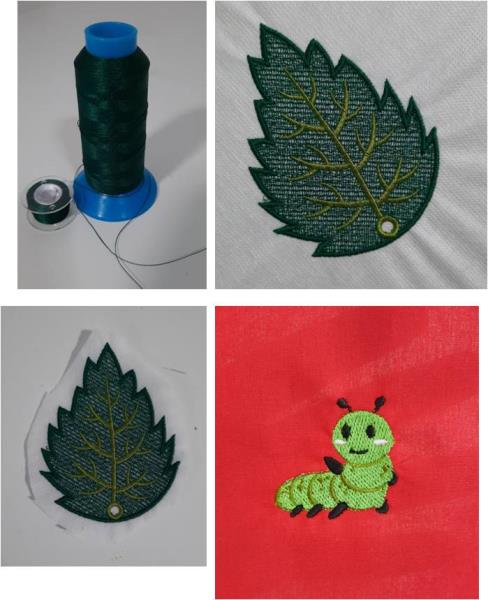
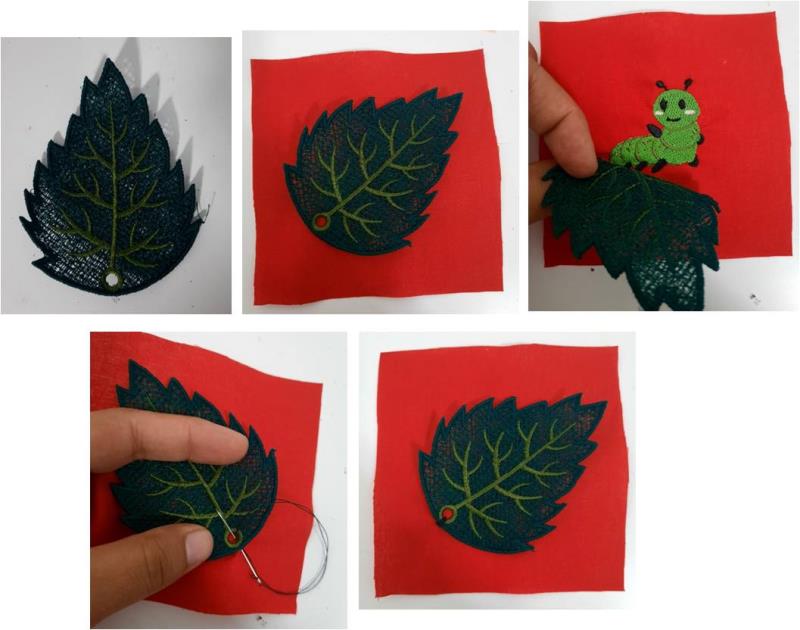
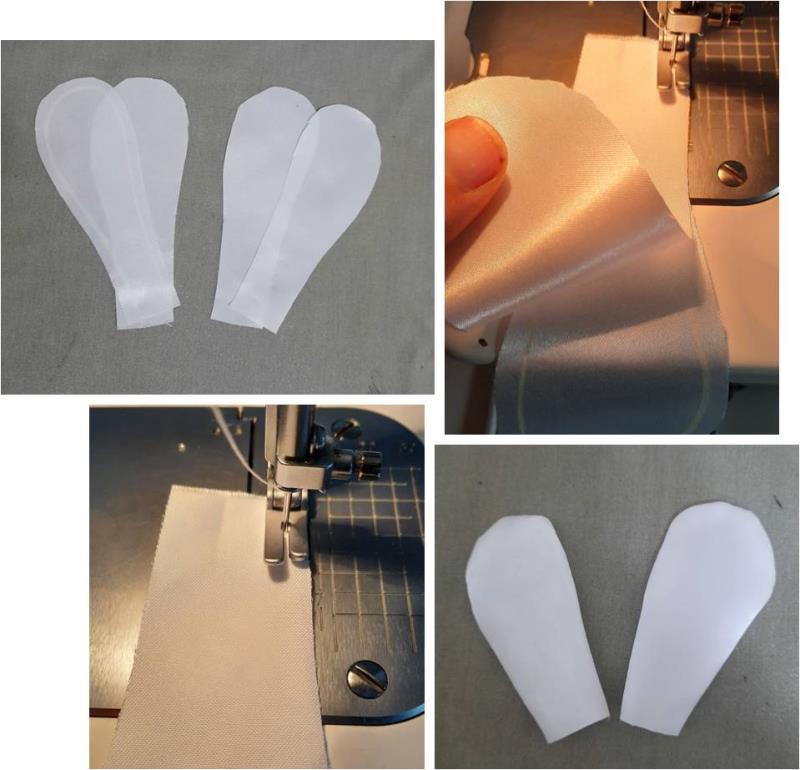
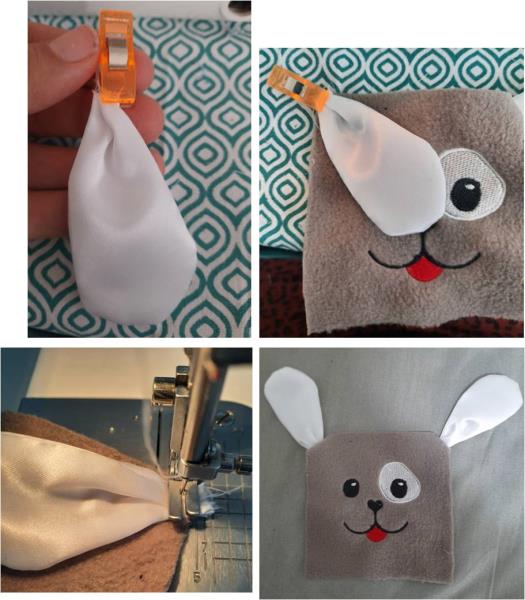
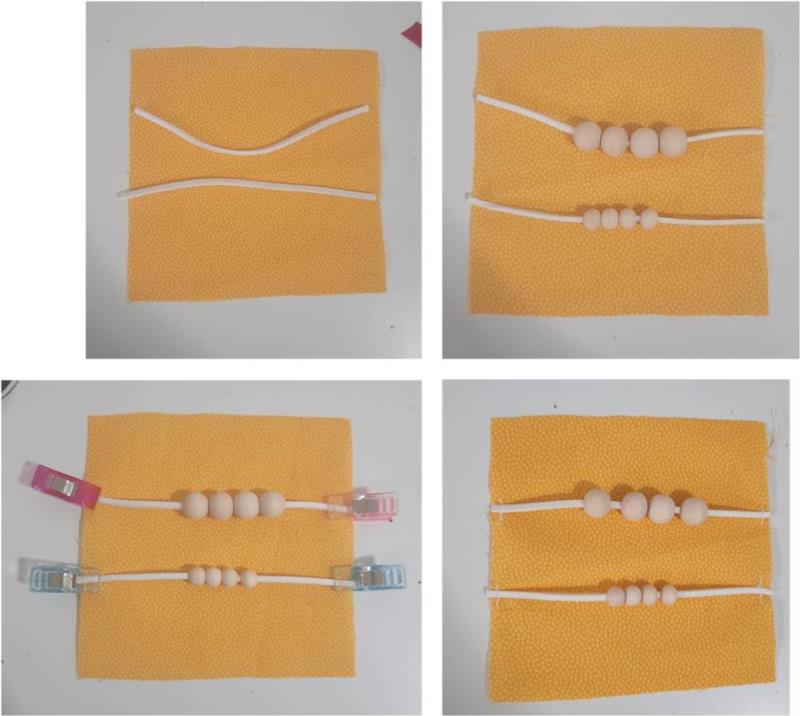
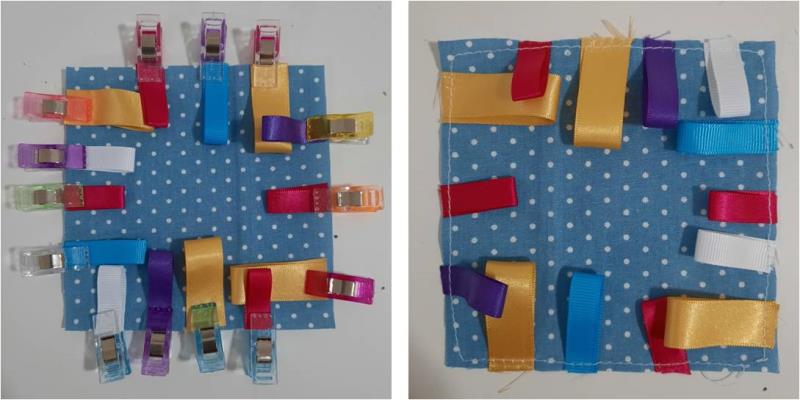
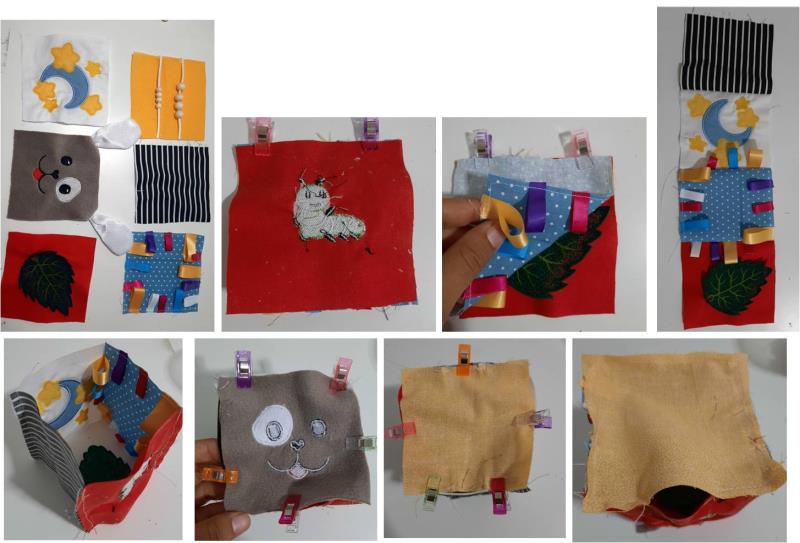
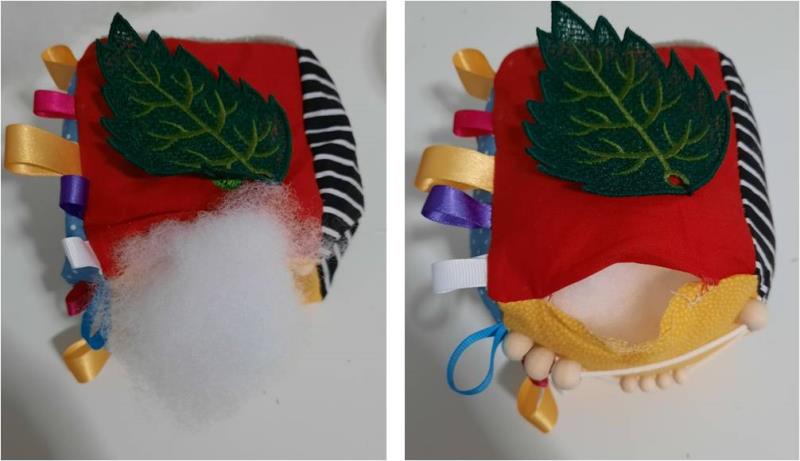
| Materials 6 of 4 ½” squares in your selected fabrics (I have selected 2 contrasting fabrics, plain white and plain red, yellow spots and a brown fleece) Embroidery threads Tearaway stabilizer Water soluble stabilizer Yellow felt for stars applique a scrap of denim for the moon 4” x 8” piece of white satin for ears Assorted colors and lengths of ribbon 2 x 4 ½” pieces of leatherette strapping Wooden beads Polyester filling |
| Designs used in this project |
| Final Product: What You Will Create |
 |
|
Projects You May Like
Meet the Author:
Kylie Burke

Kylie is based in Australia and loves creating and sharing her unique pieces.
Feedback
Characters Remaining
Please Login to Submit a Feedback
Invalid Characters, Please enter a valid Comment
Please enter a valid Comment
Reviewed On
Link is Broken, Please check the URL