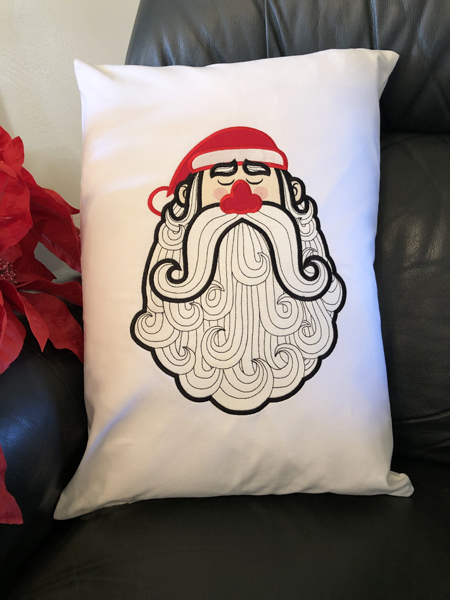
Update your Christmas décor with this modernized Santa Portrait Pillow. This large applique can be stitched on any project, he makes a wonderful 20” x 14” pillow in only 2 ½ hours.
Due to the number of appliques in this design the colors that show up on your machines are not necessarily the colors that you will stitch as all placement lines will show up as a golden brown color and all tack down lines will show up as a grey color. Print the color chart from the design page and use it as a guide to stitch out the design. The sample for this project was stitched on a multi needle machine, therefore the design has been rotated to fit the 12” x 8” hoop used on that machine.
Step 1:
(Click Image to Enlarge)
Cut 2 21” x 15” rectangles of white Kona cloth® and 1 of lightweight interfacing. Fuse the interfacing the to a Kona Cloth® rectangle that will be the front of the pillow. Fold the fused fabric in half lengthwise and finger press to create a crease. Fold the fabric in half crosswise and finger press to create a crease. This will mark the center of the fabric.
Step 2:
(Click Image to Enlarge)
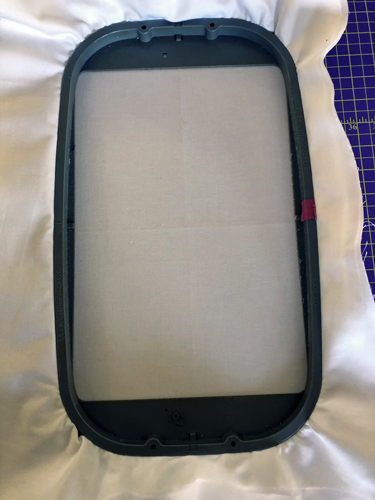
Tautly hoop the stabilizer and the front fabric in the hoop aligning the creases with the marks on the hoop so that your design will be centered.
Step 3:
(Click Image to Enlarge)
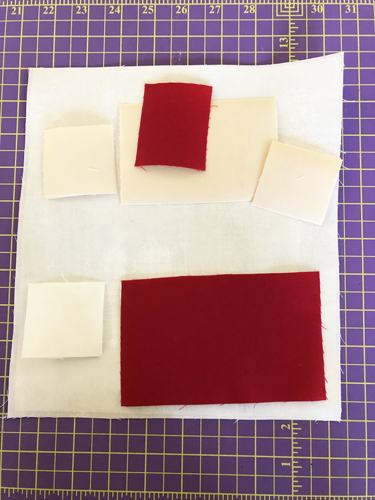
3. Cut for the appliques:
a. Peach or beige fabric – 1 4 ½” x 3” rectangle for the face and 2 2 ½” x 2” rectangles for ears b. Red fabric – 1 3 ½” x 5” rectangle for the hat and 1 2 ½” x 2” rectangle for the nose c. White Grunge fabric – 1 10” x 9” rectangle for the beard and 1 2 ½” x 4 ½” for the hat cuff and 1 2” x 2” square for the hat ball. The eyebrows will be cut later from scraps from the beard fabric. d. Cut a piece of Heat N Bond Lite® to fit each applique piece and fuse to the applique fabrics following the manufacturer’s instructions.
Step 4:
(Click Image to Enlarge)
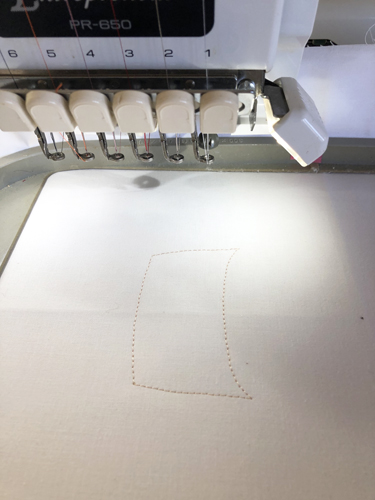
Run color-stop 1 (CS) in a thread to match your face fabric as a placement line.
Step 5:
(Click Image to Enlarge)
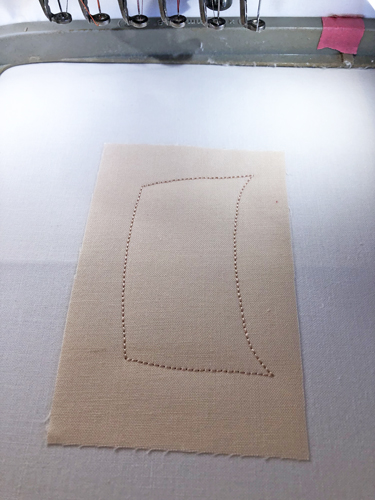
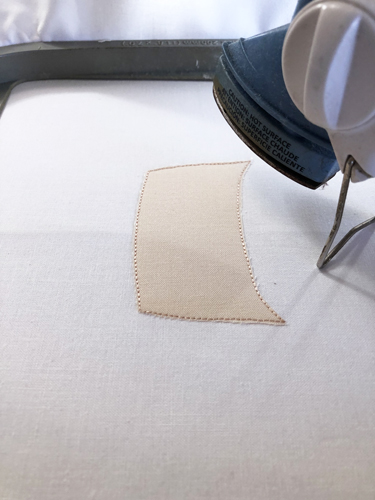
Remove the paper backing from the face fabric and spray the back with a little adhesive. Position the applique piece right side up over the placement lines. Run CS 2 to tack down the applique.
Step 6:
(Click Image to Enlarge)
Remove the hoop from the machine, do not unhoop, and place it on a flat surface. Trim the applique as close as possible to the tack down stitches and press the applique. Tip: Lifting the fabric outside of the tack down line up and towards the center of the applique while trimming will let you get up right up to the tack down lines to trim.
Step 7:
(Click Image to Enlarge)
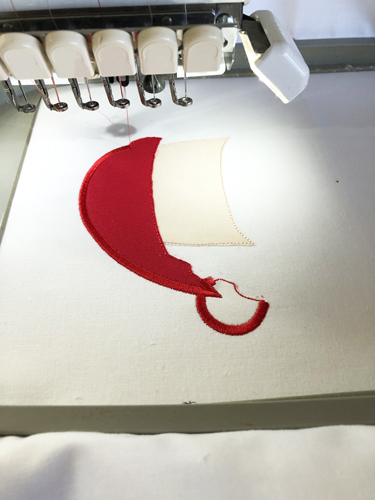
Run CS 3 through 6 as placement lines and tack downs for the hat and ball. Red was used for the white ball on the cap as its border will be red.
Step 8:
(Click Image to Enlarge)
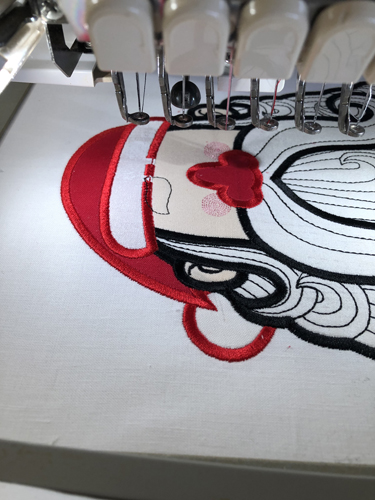
Run CS 7 in red to border the hat and ball.
Step 9:
(Click Image to Enlarge)
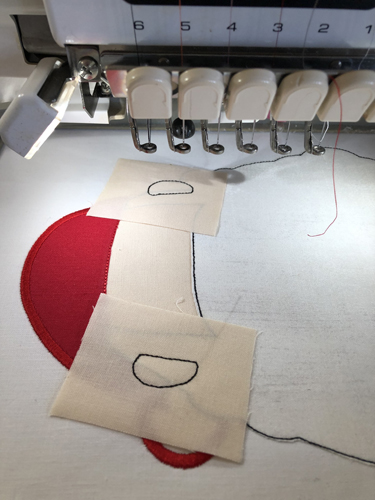
CS 8 through 14 are all run in black thread. The serve as placement and tack down stitches for the beard and ears and will border those appliques. Use the same techniques as above to apply each applique in turn.
Step 10:
(Click Image to Enlarge)
Note: When you trim the beard do not dispose of the trimmed off fabric. You will later use small pieces of that to applique the eyebrows.
Step 11:
(Click Image to Enlarge)
Run CS 15 in rustic pink for the cheeks.
Step 12:
(Click Image to Enlarge)
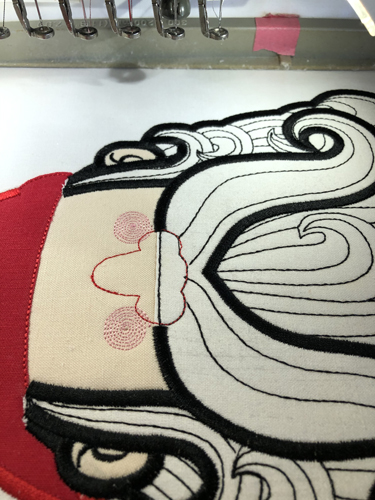
CS 16 through 20 are run in red as placement lines and tack downs for the nose applique, hat cuff and to border those appliques.
Step 13:
(Click Image to Enlarge)
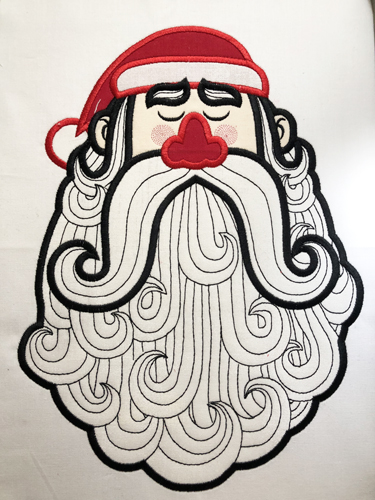
The rest of the CSs are run in black as placement lines, tack downs and borders for the eyebrows.
Step 14:
(Click Image to Enlarge)
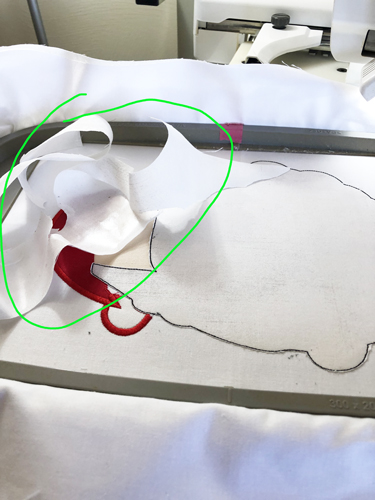
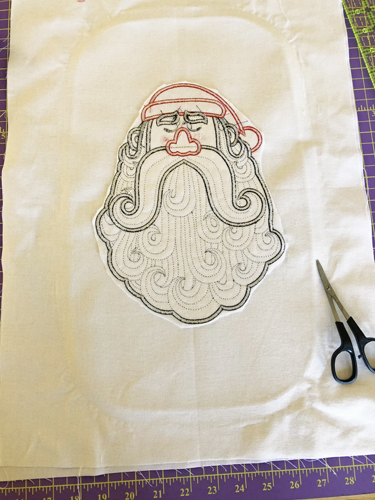
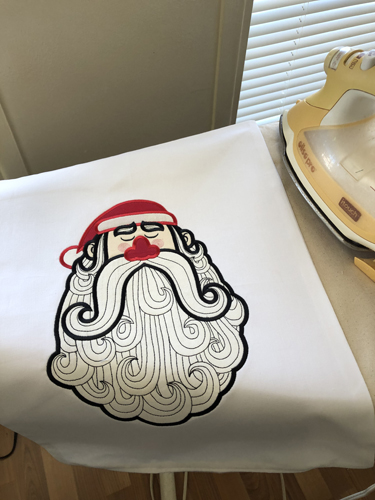
Trim away the excess stabilizer around the applique. Press the pillow front to remove the hoop marks and wrinkles.
Step 15:
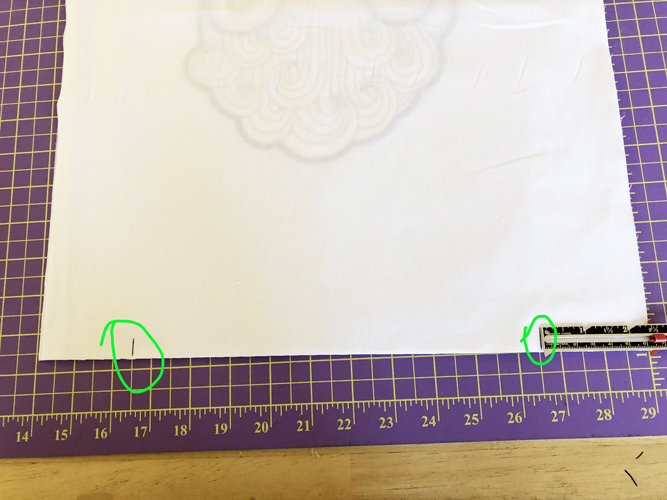
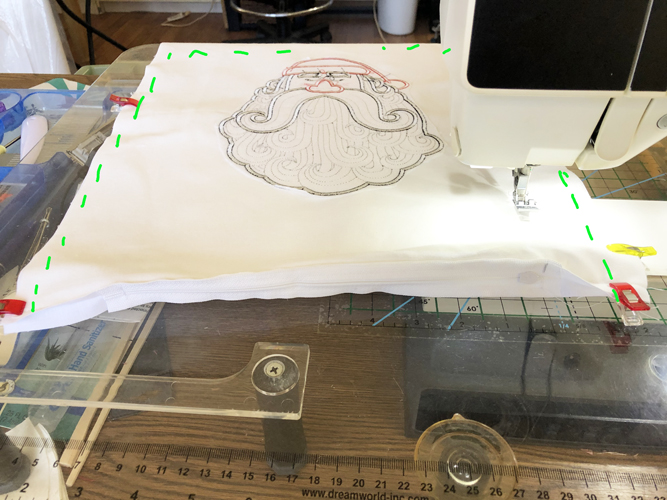
Align the pillow front and back right sides together. On the bottom of the pillow make two marks 2 ¼” in from each side.
(Click Image to Enlarge)
Step 16:
(Click Image to Enlarge)
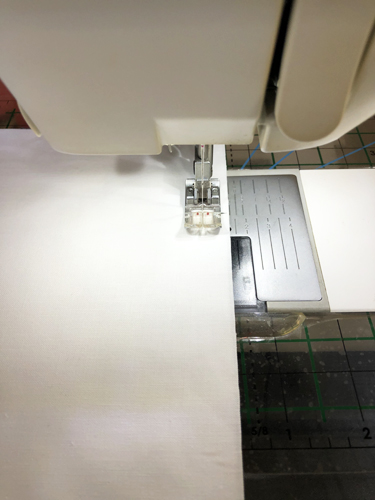
With a ½” seam allowance stitch from one side of the pillow to the first mark with a normal stitch length. Back stitch at the mark and change your stitch length to a 4mm or longer stitch length. Stitch with the long stitch length to the second mark, change your stitch length to your regular sewing stitch length. Even though you are continuing sewing a continuous line sew just past the 2nd mark, back stitch to the 2nd mark and then complete your seam across the pillow bottom.
Step 17:
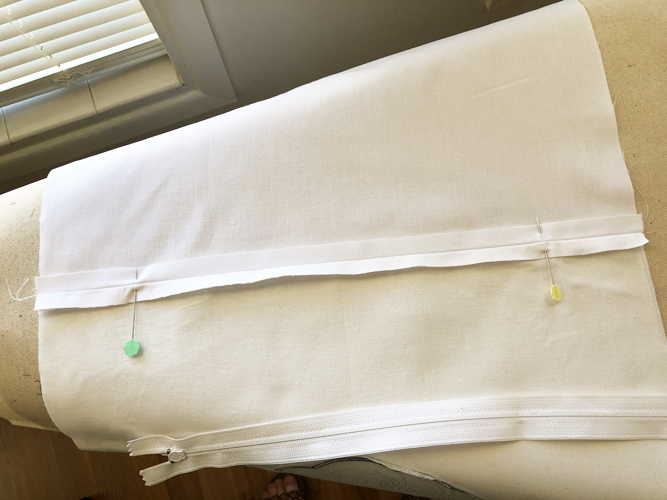
As I had used a heat removable pen to make my marks, I put straight pens in where the marks were before I press this seam open.
(Click Image to Enlarge)
Step 18:
(Click Image to Enlarge)
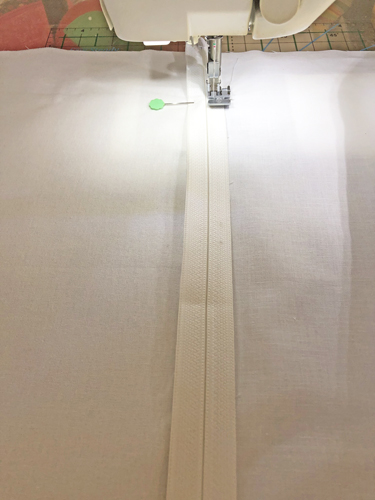
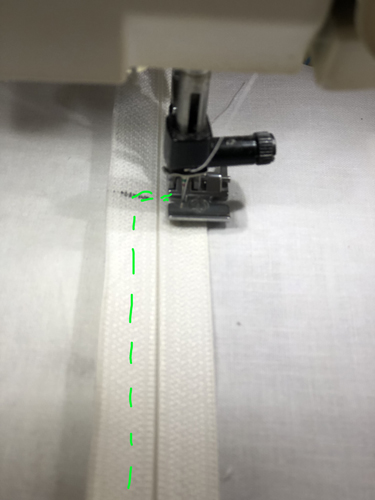
Put a zipper foot on your machine. Lay the zipper over face down over the seam so that the top and end of the zipper extend beyond the two marking pins in your seam. Align the center of the zipper with the seam in the fabric and pin your zipper into place. Starting at the pin that is towards the top of the zipper stitch the zipper through all layers of fabric.
Step 19:
(Click Image to Enlarge)
When you reach the 2nd mark or pen marking stop with the needle down in the fabric, pivot, and stitch right across the zipper. Backstitch over the zipper bottom and forward again. Pivot with the needle down in the fabric and start stitching up the other side of the zipper.
Step 20:
(Click Image to Enlarge)
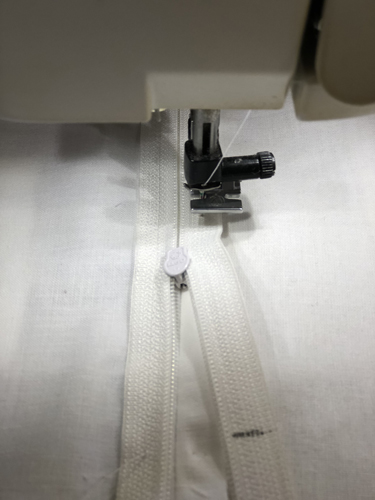
Stop sewing 3 or 4 inches before you reach the start point on this side of the zipper. With the needle down, raise your presser foot and open the zipper so that the tab is behind the presser foot.
Step 21:
(Click Image to Enlarge)
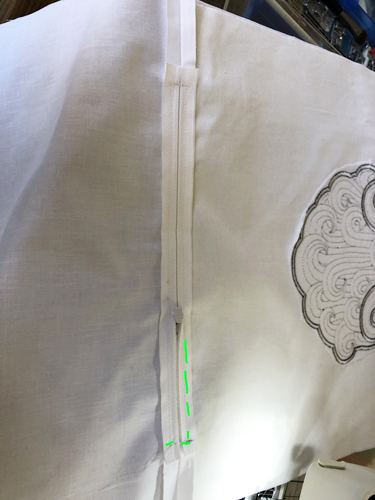
Laying the zipper teeth together continue stitching to the point where you started stitching the other side of the zipper down. Pivot and stitch and backstitch over the two zipper tapes. Trim both ends of the zipper to ½”.
Step 22:
(Click Image to Enlarge)
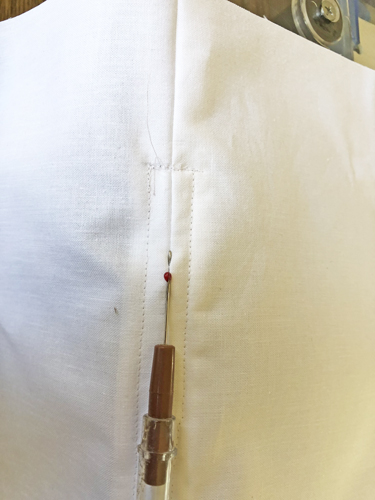
Use a seam ripper to remove the basting stitches over the zipper.
Step 23:
Use clips or pins to align the front and back of the pillow cover. Fold the seam allowances down on the bottom where the zipper is to get better corners. Stitch the three open sides of the pillow cover with a ½” seam allowance.
(Click Image to Enlarge)
Step 24:
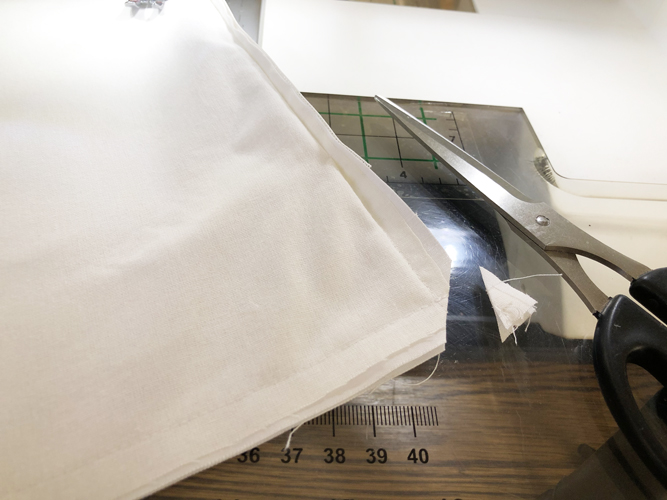
Trim diagonally across all 4 corners.
(Click Image to Enlarge)
Step 25:
(Click Image to Enlarge)
Turn the pillow cover right side out through the zipper. Use a point turner or blunt object to poke out the corners. Press the pillow cover.
Step 26:
Insert the pillow form working the corners into position. Congratulations your Santa Portrait Pillow is complete!
Award winning Digitizer, Embroidery Educator, Author and a Consultant to the Industry, Pat Williams has 30 years of experience in the embroidery industry. Pat has won multiple awards for her digitizing expertise including the 2007 Impressions Awards Grand Championship, Best of Show as well as the 1st and 2nd Place Awards. Pat’s love of digitizing has afforded her the opportunity to write numerous articles for Impressions magazine in the United States and Images Magazine in Europe. In 2001 Pat was named “Embroidery Educator of the Year.” For many years Pat taught digitizing seminars at the ISS Shows in Long Beach, CA and for Compucon software. She now resides in Tucson, AZ.