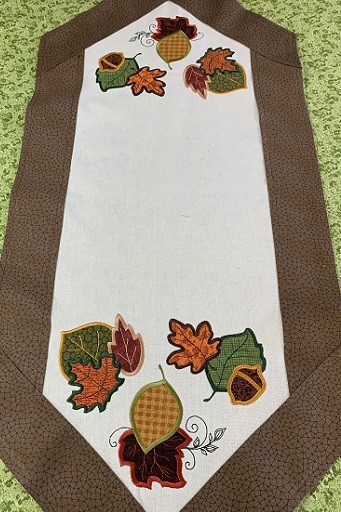
Fall Table Runner in neutral tones of beige & brown with splashes of color from appliqued leaves. The leaves make this runner versatile for all your fall decor themes.
Fall Table Runner in neutral tones of beige & brown with splashes of color from appliqued leaves. The leaves make this runner versatile for all your fall decorating themes. Basic sewing skills are needed to complete this project. Instead of making a runner, a commercial table runner would work well for this project also. An applique technique is used for this project. The runner is floated onto the stabilizer. A single needle embroidery machine was used for this project.
Step 1:
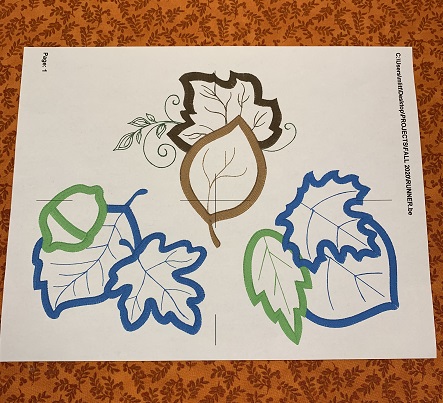
Three embroidery designs were used to make this runner. The dimensions of each design are 4"x4". Each design may be placed on the runner by itself to make the arrangement. You will need to hoop each design separately.
An option is putting the designs together. Embrilliance Essentials embroidery software program was used to combine the embroidery designs to size 8"x12". Combining the designs saves time & money for the project. Print the design template/s.
Step 2:
Read the directions for the project. Gather and prepare the materials.
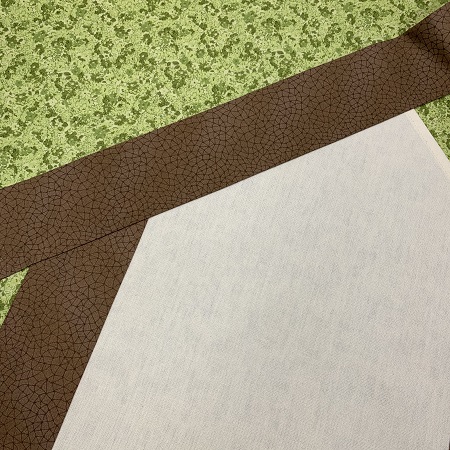
Step 3:
Cut one piece of beige/neutral blend fabric 18"x36".
Cut three strips 3"x WOF of brown/chocolate fabric.
Step 4:
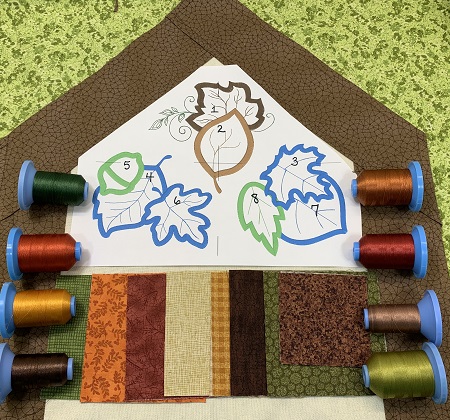
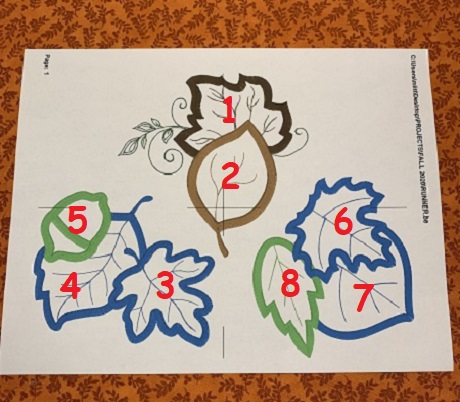
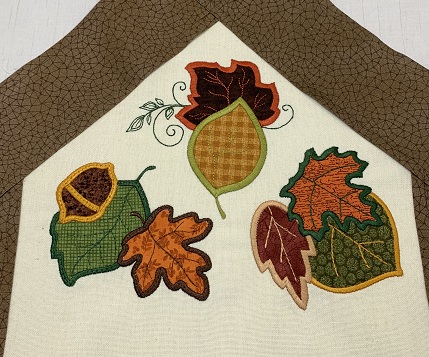
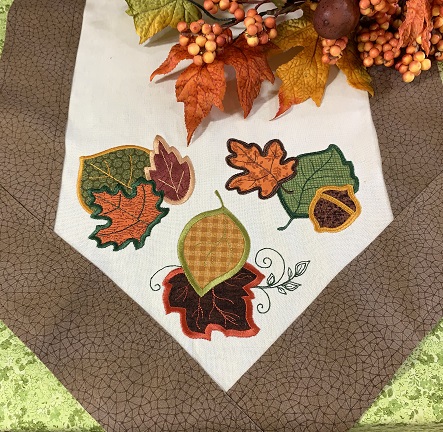
Cut the fabric needed for the appliqued pieces. The picture shows the number where each fabric piece will be used in the design. Colors match the project sample. Leaf 1: Cut two 4"x4" pieces of brown fabric. Leaf 2: Cut two 3"x4" pieces of gold blend fabric. Leaf 3: Cut two 4"x4" pieces of rust fabric. Leaf 4: Cut two 4"x5" pieces of green fabric. Acorn 5: Cut two 3"x3" pieces of brown blender fabric. Leaf 6: Cut two 4"x4" pieces of orange blender fabric. Leaf 7: Cut two 4"x4" pieces of green blender fabric. Leaf 8: Cut two 3"x4" pieces of tan fabric.
Step 5:
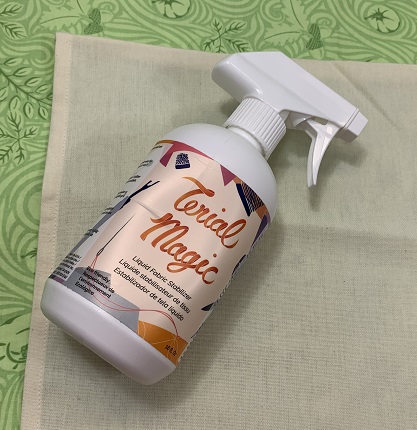
Lightly mist both sides of all fabric with Terial Magic fabric stabilizer. Let the fabric become semi-dry. Iron the fabric. The fabric should feel stiff. If the fabric is still soft and pliable in places, apply more Terial Magic. Let the Terial Magic semi-dry, and iron again.
Step 6:
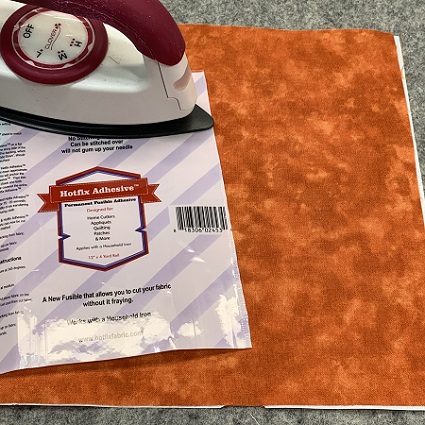
Use the chart to cut the fusible adhesive (Heat n Bond lite or Hotfix Permanent Adhesive) for these fabric pieces. Follow package directions to fuse the permanent adhesive to the back of the fabric pieces. Leaf 1: Two 4"x4" pieces for the brown fabric. Leaf 2: Two 3"x4" pieces for the gold blend fabric. Leaf 3: Two 4"x4" pieces for the rust fabric. Leaf 4: Two 4"x5" pieces for the green fabric. Acorn 5: Two 3"x3" pieces for the brown blender fabric. Leaf 6: Two 4"x4" pieces for the orange blender fabric. Leaf 7: Two 4"x4" pieces for the green blender fabric. Leaf 8: Two 3"x4" pieces for the tan fabric.
Step 7:
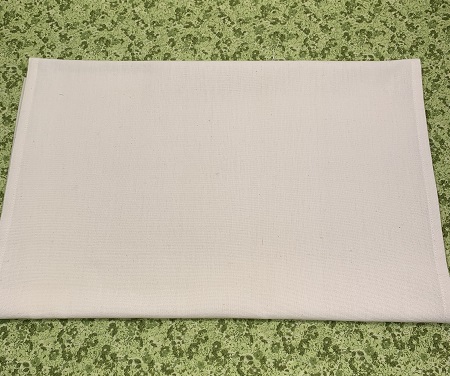
Double fold 1/2" on each long side of the table runner. Press with an iron.
Topstitch along the edge of the runner.
Step 8:
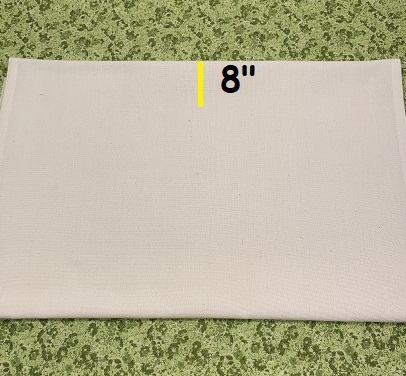
Mark the center point on each end of the beige fabric.
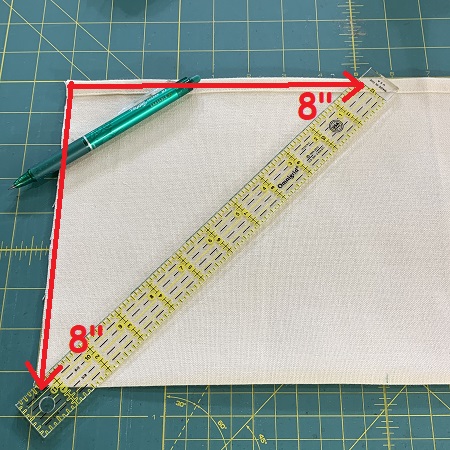
Step 9:
Measure 8" down from each corner. Mark the fabric with a fabric pen.
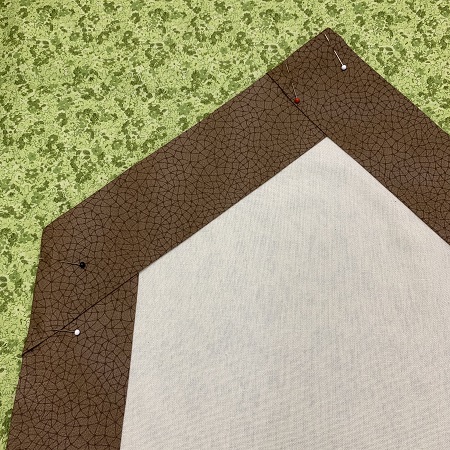
Step 10:
Draw a line from the center point to the mark on each side. Cut each corner off.
Step 11:
Double fold the raw edges down 1/2". Press with an iron. Topstitch a seam along the edges.
(Click Image to Enlarge)
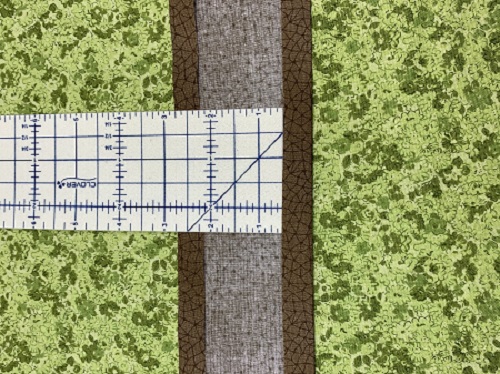
Step 12:
Double fold the raw edges down 1/2" on the long sides of the 3" brown strip.
Step 13:
Pin the brown strips onto the long sides the beige fabric.
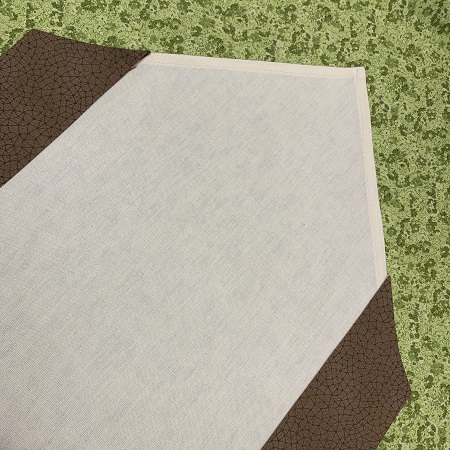
Step 14:
Leave an 1" fabric allowance on each end of the brown strip for the hem. Fold the overlap down & pin in place. Topstitch all sides of the brown fabric onto the beige fabric.
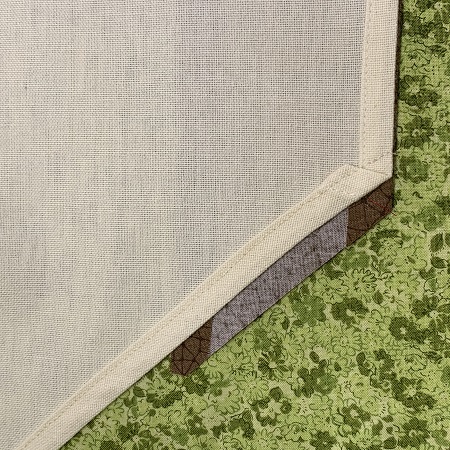
Step 15:
Measure the length of one side of the end point on the runner. Leave a hem allowance on each end.
Step 16:
Tuck the end of the strip to the back & pin in place. Repeat for the other side. Topstitch the brown strip to the beige fabric.
Repeat step 15 & 16 for the other end of the runner.
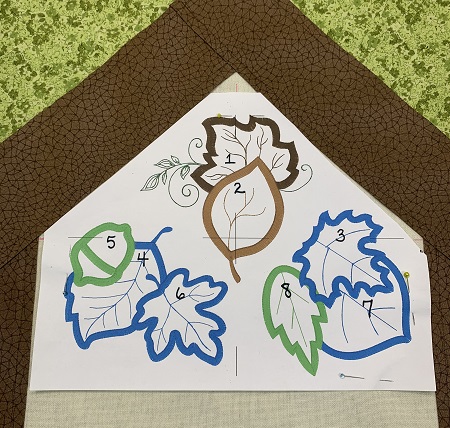
Step 17:
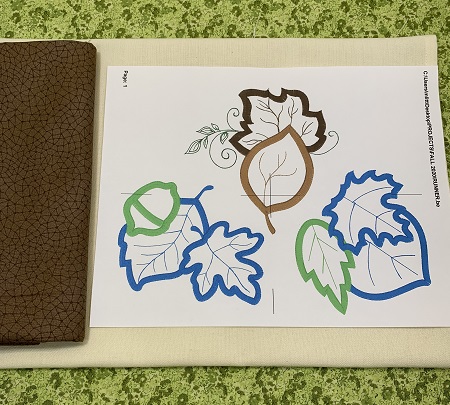
Decide where you are placing the designs. Use the design template as a placement guide on the runner. The design template is the exact size as the stitched design.
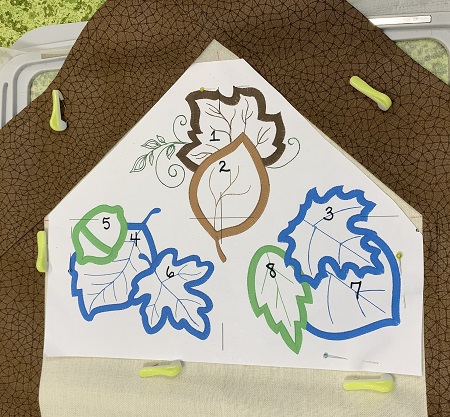
Step 18:
Hoop one piece of medium weight cut away stabilizer. Do not put the runner in the hoop.
Float the runner on top of the stabilizer. Match the center point on the hoop/stabilizer with the center point on the design. Lightly mist 505 Temporary Adhesive spray on the stabilizer. Use pins to help secure the runner to the stabilizer.
Attach the hoop. Load the design. Check the needle & bobbin area.
Step 19:
Follow the color stops to stitch the design. The leaves are appliqued onto the runner. Each appliqued piece will have a placement stitch, a tack down stitch, and a finishing stitch.
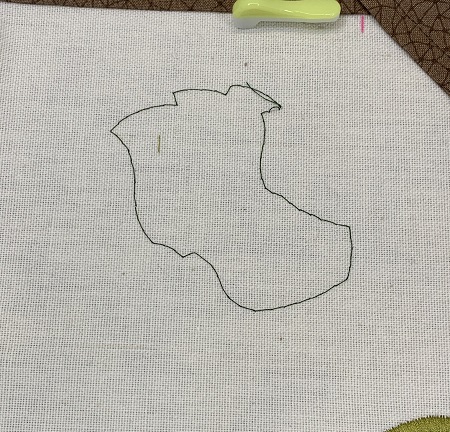
Step 20:
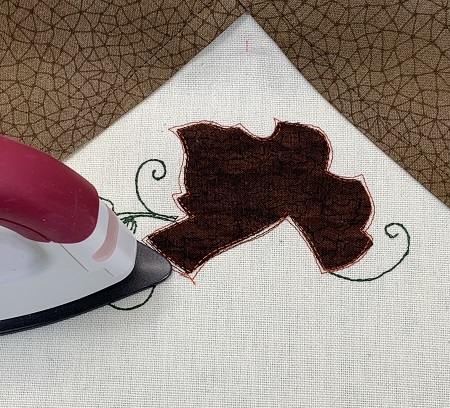
After the tack down stitches, trim the excess fabric from around the stitches. Applique scissors are recommended. Trim close to the stitches without cutting the stitches.
After trimming the excess fabric, use a small iron fuse the appliqued fabric to the base/beige fabric. Follow package directions to fuse the permanent adhesive.
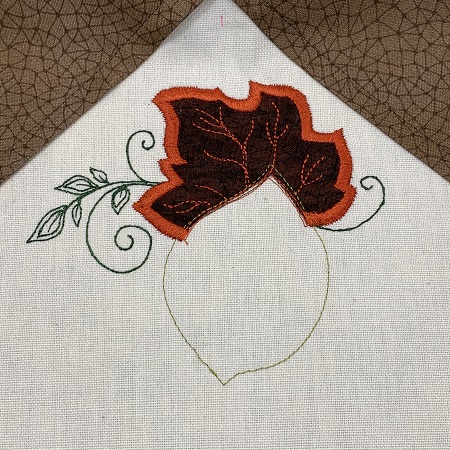
Step 21:
Finishing stitches are added after the tack down stitches.
Step 22:
Follow the color guide and chart to stitch the designs.
Step 23:
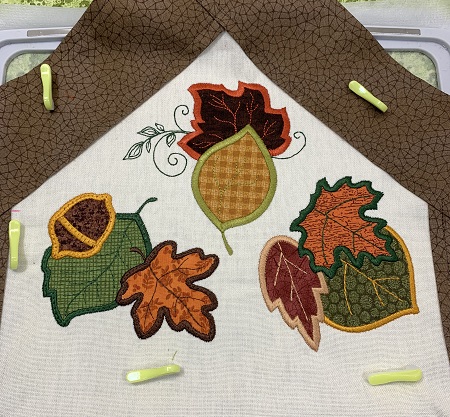
Once the design has finished, remove the hoop from the machine. Trim excess stabilizer from around the designs. Trim threads if needed.
Step 24:
(Click Image to Enlarge)
Repeat the steps 18-23 for the other end of the runner.
Step 25:
Great job! You have complete a Fall Table Runner. WTG!
Marisa Littleton is a retired educator with a love for teaching and learning. Interests include machine embroidery, hand embroidery, quilting, cooking, and antiques.