


PROJECT INSTRUCTIONS


PROJECT INSTRUCTIONS

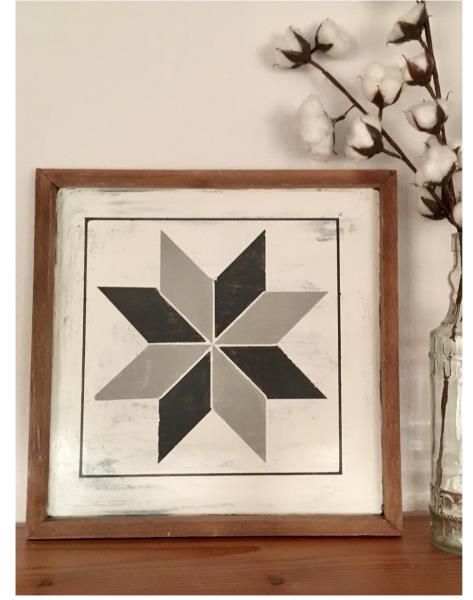
Rustic Mini Barn Quilt/SVG Embroidery Project
By
Linda Mills
on
September 28, 2020
PROJECT DETAILS
SKILL LEVEL
Intermediate
TIME REQUIRED
02:00
FINISHED SIZE
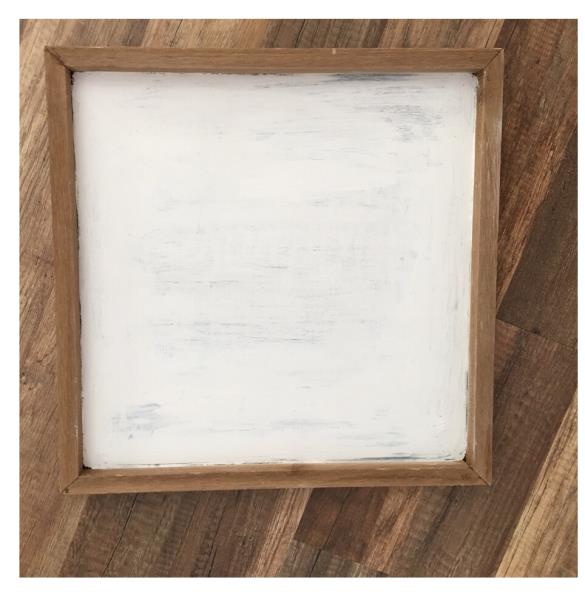
15 x 15 inches
Description
A simple symmetry SVG design and paints will create a Rustic Mini Barn Quilt that has become a popular indoor wall home décor piece in today’s home decorating style.
Project Preview Video

QUICK VIEW
Patriotic Quilt Square
$2.99
Circle Price: $2.24

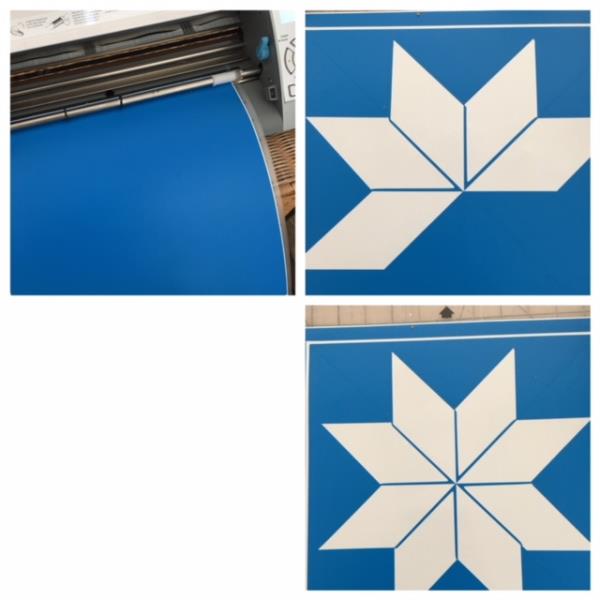
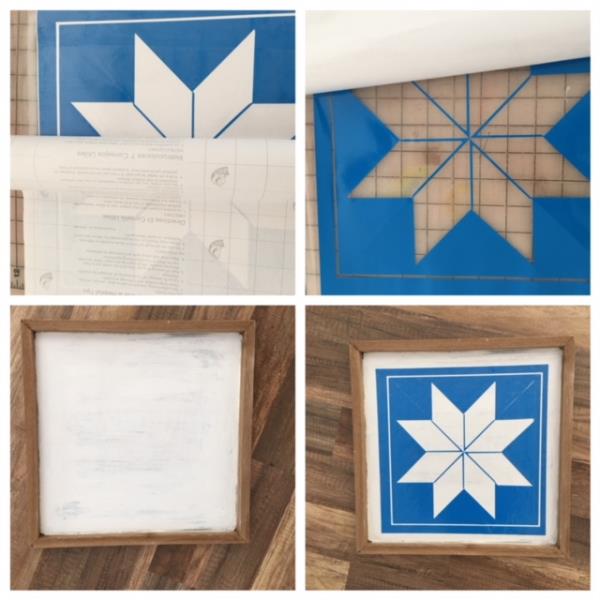
| Materials BLANK WOODEN FRAME (15” X 15”) PURCHASE FROM ANY CRAFT / HOBBY STORE ACRYLIC PAINTS WATER BASE ( 3 COLORS) SEE ** BELOW CLEAR MATTE SPRAY ADHESIVE BACK VINYL FOR STENCIL (1- 12” X 12”) TRANSFER TAPE PAINT BRUSHES WEEDING TOOLS CUTTING MACHINE ( CRICUT, SILHOUETTE CAMEO ) |
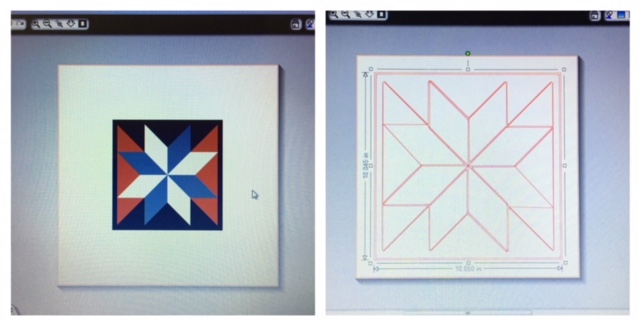
| Designs used in this project |
| Final Product: What You Will Create |
 |
|


Projects You May Like
Meet the Author:
Linda Mills

Linda loves to create by sharing her different sewing and machine embroidery techniques so others can utilize their machines to the fullest
Feedback
Characters Remaining
Please Login to Submit a Feedback
Invalid Characters, Please enter a valid Comment
Please enter a valid Comment
Reviewed On
Link is Broken, Please check the URL