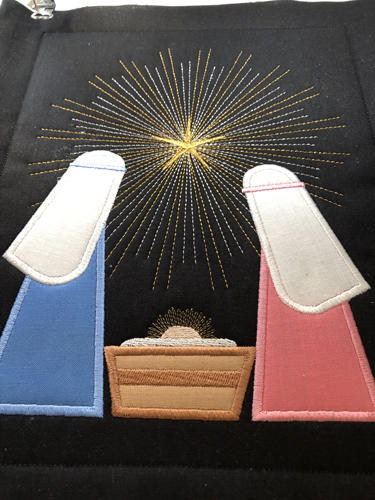
Please print the color chart from the page where the design is purchased. You will need to follow the color chart as the metallic thread colors and the colors used for the placement and tack down lines will appear differently on your embroidery machine. Do use white or other light-colored fabric for the back of the quilt block. Due to the black thread placement and tack down lines they will be hard to see if embroidered on black fabric when it come time to trim down the center block.
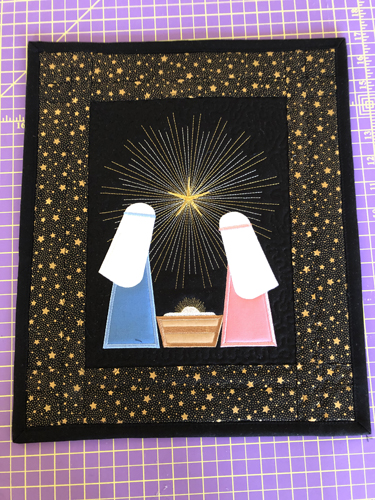
Step 1:
(Click Image to Enlarge)
For the center block:
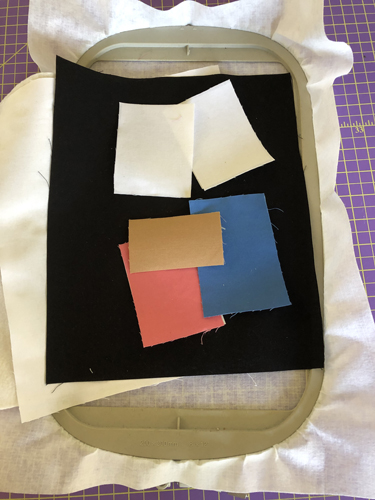
a. 1 10” x 12” rectangle each of Black Kona Cloth®, White Kona Cloth® and Battilizer®. b. Cut the applique pieces per the materials list, with Heat N Bond Lite® applied to the back of each applique. c. Tautly hoop the stabilizer in your embroidery hoop.
Step 2:
(Click Image to Enlarge)
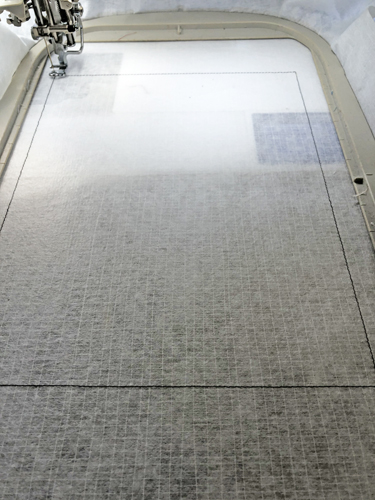
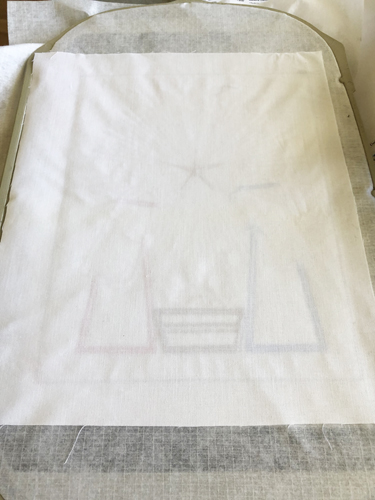
Run the 1st color stop (CS) in black as a placement line.
Step 3:
(Click Image to Enlarge)
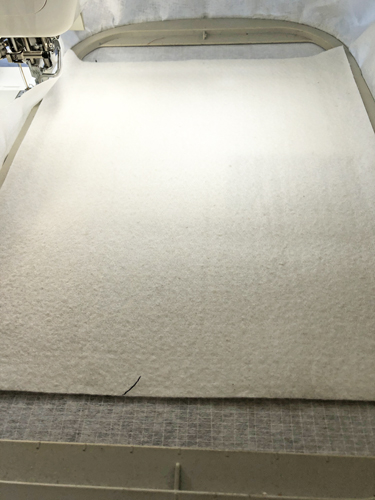
Spray adhesive on the back of the Battilizer® and position it over the placement lines so the Battilizer® exceeds the placement line by ½” on all sides.
Step 4:
(Click Image to Enlarge)
Spray adhesive on the back of the black fabric and align over the Battilizer®. Run CS 2 in black to tack the fabric and batting down.
Step 5:
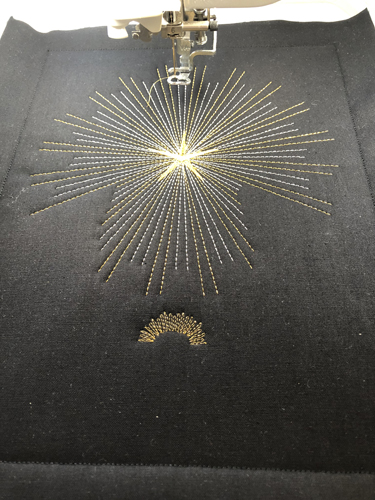
(Click Image to Enlarge)
Run CS 3 in 50wt metallic silver and CS 4 in 50wt metallic gold to embroidery the star and halo. If you do not wish to use metallic thread use silver and gold colors or your choosing. For those of you using metallic thread do make sure it is 50wt as the density in the star is digitized for that weight. 40wt metallic will likely be too heavy.
Step 6:
(Click Image to Enlarge)
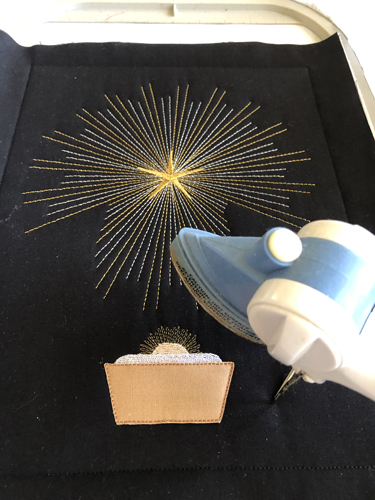
Run CS 5 in Loofah for the baby’s head and CS 6 in White for the sheet. The next CS is the placement line for the first applique, stitch it in Caramel.
Step 7:
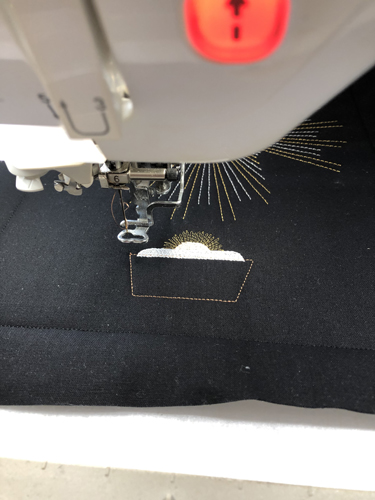
Remove the paper from the Heat N Bond Lite on the manger applique, spray a little adhesive on the back and position over the placement lines, tack down with CS 8 with Carmel.
(Click Image to Enlarge)
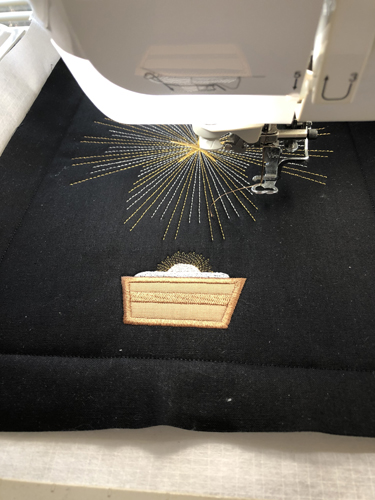
Step 8:
(Click Image to Enlarge)
Remove the hoop from the machine, do not unhoop. Trim the excess fabric from the applique right up to the tack down lines. Press the applique with an applique iron.
Step 9:
(Click Image to Enlarge)
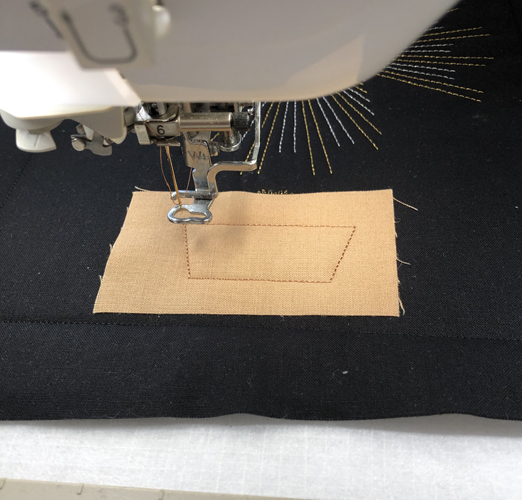
Return the hoop to the machine and run CS 9 in Carmel to stitch the detail and border on the manger.
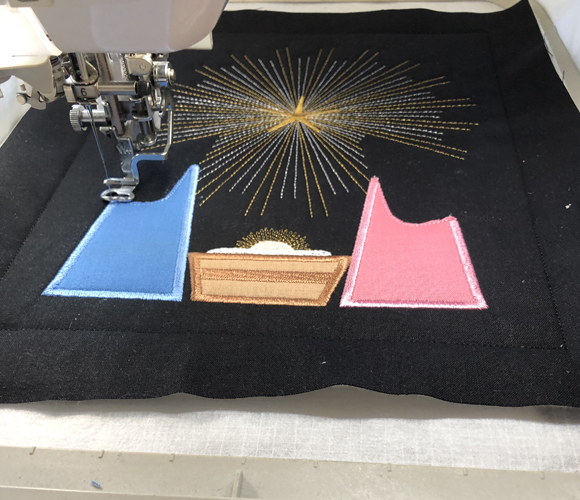
Step 10:
Repeat this applique method for Mary’s robe with CSs 10, 11 and 12 in Rustic Pink. Applique Joseph’s robe with CS 13, 14 and 15 in Little Boy Blue.
(Click Image to Enlarge)
Step 11:
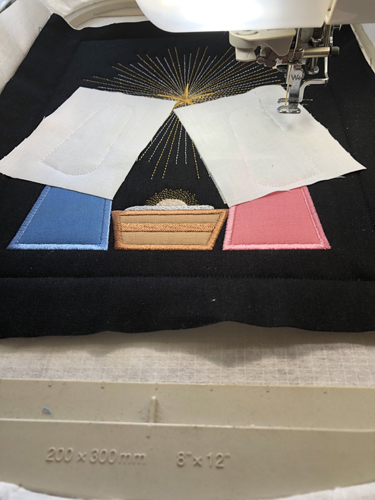
(Click Image to Enlarge)
The two headdresses are slightly different as the placement line and tack stitches for Joseph’s headdress run with CS 16 and 17, then Mary’s headdress is applied with CS 18 and 19 using white thread. Then you remove the hoop to trim and press down both headdresses at one time. Return the hoop to the machine to border both with CS 20.
Step 12:
(Click Image to Enlarge)
Run CS 21 in Little Boy Blue and CS 22 in Rustic Pink to embroider the bands on the headdresses.
Step 13:
(Click Image to Enlarge)
Remove the hoop from the machine, do not unhoop, lay the hoop face down on a flat surface. Spray the back fabric with adhesive spray and position over the placement lines so that the fabric exceeds the placement lines by ½” on all sides. For ease in cutting out the quilt block do use a light-colored fabric for the back.
Step 14:
(Click Image to Enlarge)
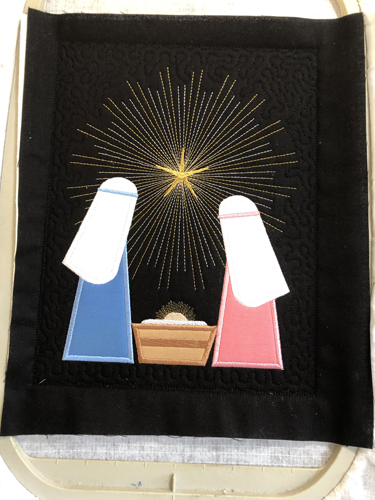
Return the hoop to the machine and run CS 23 and 24 in black thread to tack down the back fabric and to quilt the block.
Step 15:
(Click Image to Enlarge)
Remove the block from the hoop. Lay it face down on your cutting mat. Lay the ¼” mark of a see-through ruler along the tack down stitches and trim to a ¼” seam allowance on all sides.
Step 16:
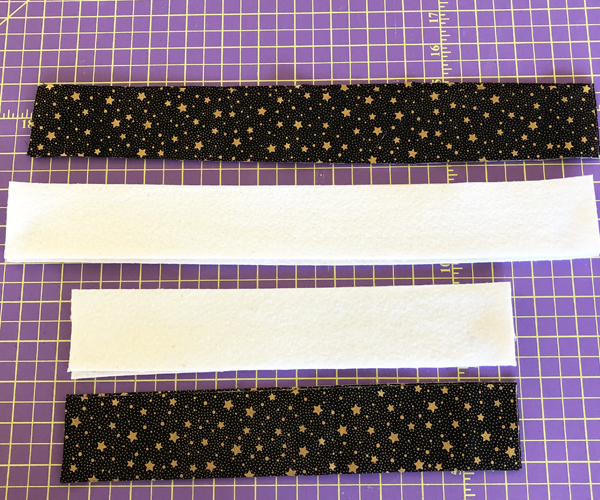
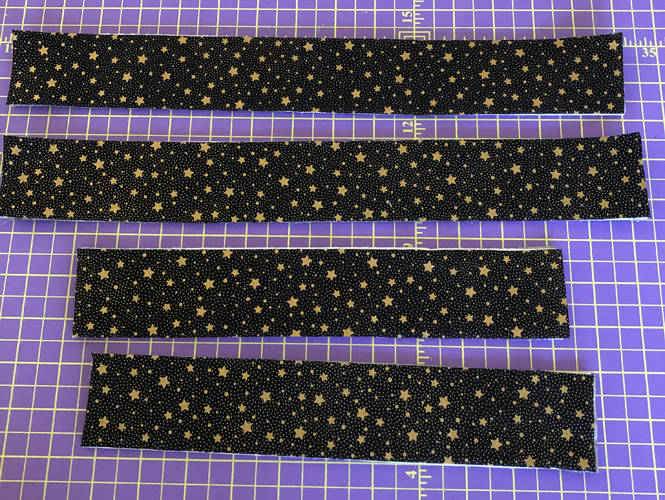
For the borders cut:
a. 4 border fabric strips 10” by 2” b. 4 border fabric strips 15” x 2” c. 2 Battilizer® strips 10” x 2” d. 2 Battilizer® strips 15” x 2”
(Click Image to Enlarge)
Step 17:
Make quilt sandwiches for the borders by spraying adhesive on one side of Battilizer® strip and aligning a corresponding fabric strip over the top. Spray the other side of the Battilizer® and align a corresponding strip of fabric on that side.
(Click Image to Enlarge)
Step 18:
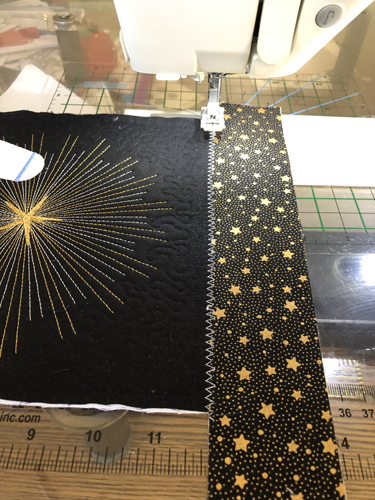
(Click Image to Enlarge)
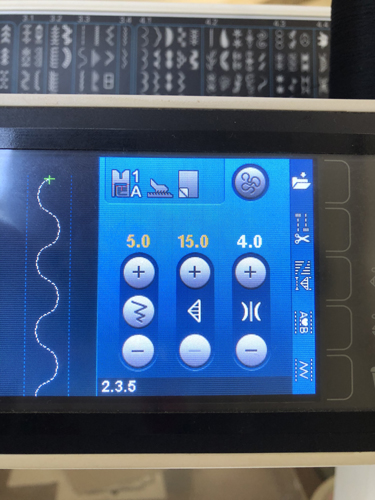
Butt one of the shorter border sandwiches across the top of the quilt block, having the sandwich strip exceed the width of the block about an inch, without gaps or overlaps. Using a wide zigzag stitch (5 to 5.5mm) widely spaced to zigzag the block to the border. Use black thread. The white thread was used in the photo so that you could see it. Attach the remaining short border to the bottom of the quilt block in the same manner.
Step 19:
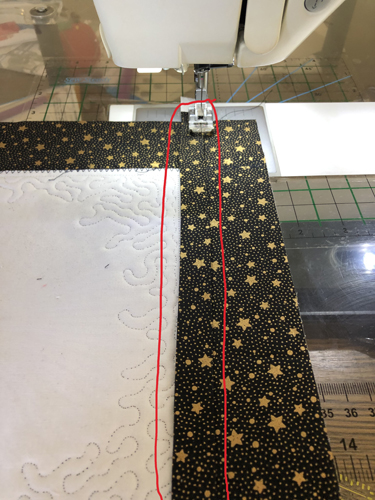
(Click Image to Enlarge)
Trim the border strips even with the sides of the quilt block.
Step 20:
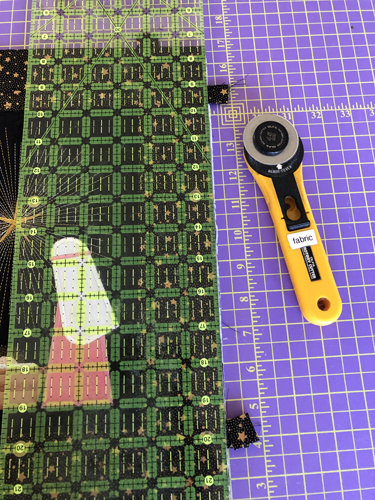
(Click Image to Enlarge)
Attach the side borders in the same fashion and trim them even with the mini quilt top and bottom.
Step 21:
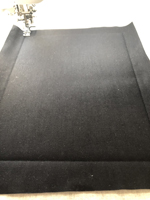
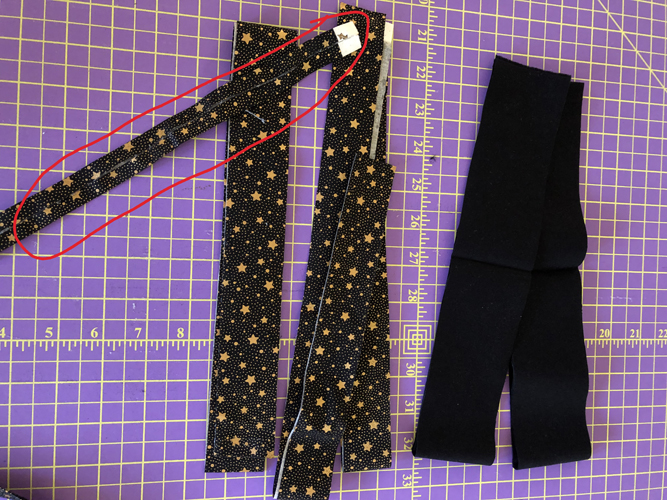
Cut two strips of sashing 1 ¼” by the width of the fabric and two strips 1 ½” wide by the width of the fabric. Press both sides of the sashing into the center of the strips. I used the same fabric as the borders intentionally so they would not break up the star pattern in the borders. You may use a contrasting color if desired. Keep the narrow strips separate from the wider sashing strips. The narrow strips will be used on the back of the mini quilt, the wider ones will be stitched to the front. Cut 2 2 ¼” strips of black fabric for the binding.
(Click Image to Enlarge)
Step 22:
(Click Image to Enlarge)
I generally use a serpentine stitch to sew the sashing strips to the mini quilts though you can use a straight stitch.
Step 23:
(Click Image to Enlarge)
Working on the back of the quilt first, center a narrow sashing strip over the vertical seams the sashing strips should extend approximately ½” over the top and bottom of the mini quilt. Stitch down both sides of the sashing. Turn the mini quilt face up and stitch the wider sashing strips across the vertical seams on the front. Turn the mini quilt face down and stitch the narrow sashing strips across the horizontal seams and stitch down. These two should extend all the way across the mini quilt and have the sashing exceed the width of the mini quilt by ½” on both sides. Turn the quilt to right side up and stitch the corresponding wider sashing strips over the horizontal seams and across the borders on the front.
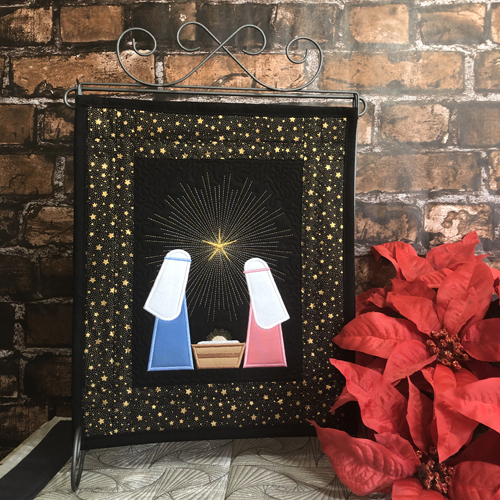
Sew on a hanging sleeve to hang your mini quilt from a 12” x 14” Ackfeld Wire Manufacturing stand. The fabric for this sleeve was cut at 12” x 3 1/2'”. If you do not know how to make one see our article Attaching a Hanging Sleeve to a Mini Quilt.Congratulations your Nativity Applique Mini Quilt is complete!
Award winning Digitizer, Embroidery Educator, Author and a Consultant to the Industry, Pat Williams has 30 years of experience in the embroidery industry. Pat has won multiple awards for her digitizing expertise including the 2007 Impressions Awards Grand Championship, Best of Show as well as the 1st and 2nd Place Awards. Pat’s love of digitizing has afforded her the opportunity to write numerous articles for Impressions magazine in the United States and Images Magazine in Europe. In 2001 Pat was named “Embroidery Educator of the Year.” For many years Pat taught digitizing seminars at the ISS Shows in Long Beach, CA and for Compucon software. She now resides in Tucson, AZ.