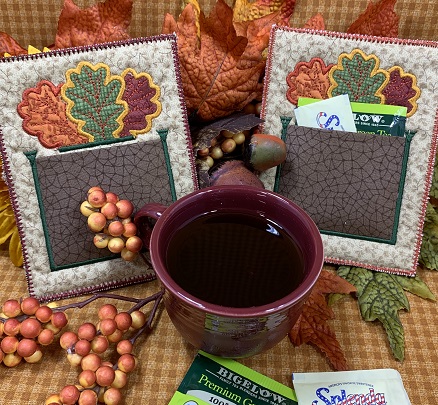
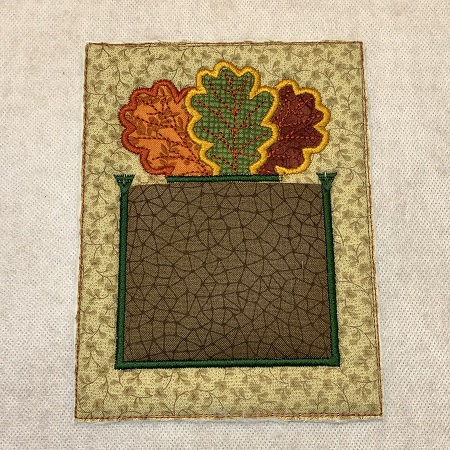
Two for tea? Or tea for me? Either way, you will be ready with this handy fall rug mug. The pocket can hold a tea bag and sugar packets. Great for an on the go treat of a favorite drink.
Appliqued fall mug rug with a pocket for a tea bag or sugar packets. Slip the mug rug in your lunch bag or purse to use with your favorite drink. Applique is the embroidery technique used for this In The Hoop project. In the Hoop means that most or all of the project is stitched in the embroidery hoop.
Appliqué is the technique of stitching small pieces of fabric onto a larger piece to create a design. Applique can be pre-cut or trimmed in place. A three step process is used to applique: placement stitches, tack down stitches, and finishing stitches.
Step 1:
Read all the directions before your begin the project. Gather and prepare the materials. Cut the fabric, batting, and cutaway stabilizer into the sizes on the materials list. Lightly starch and iron the fabric.
Step 2:
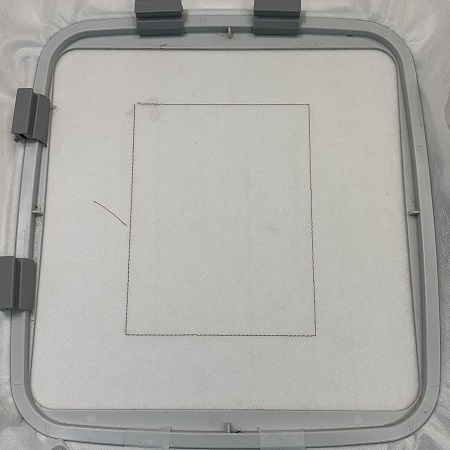
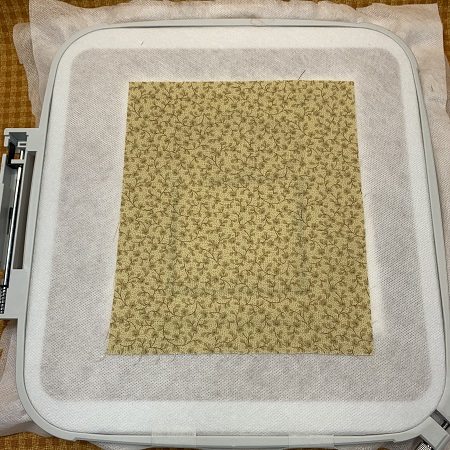
Load the embroidery design onto the machine. A size 80/12 embroidery needle is suggested. Hoop one piece of water soluble stabilizer.
Stitch the first color stop. The first color will be a placement stitch for the batting and neutral fabric. Remove the hoop from the machine. DO NOT remove the stabilizer from the hoop.
Step 3:
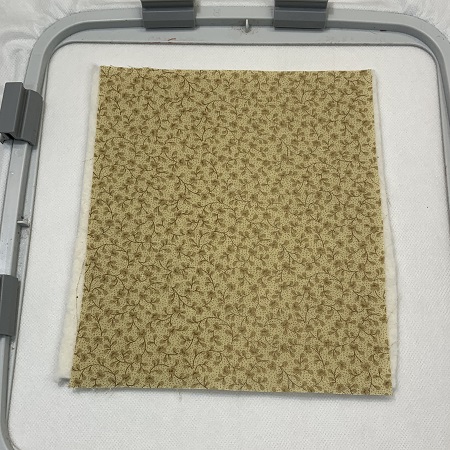
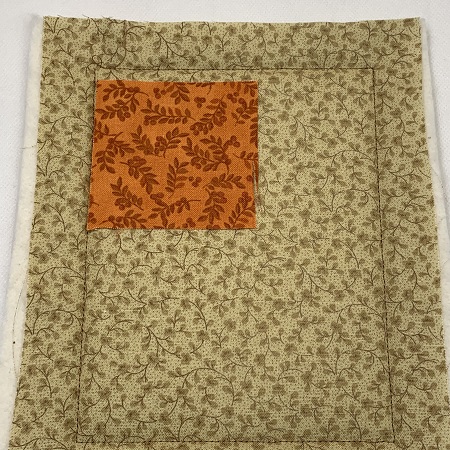
Lightly mist the stitched area with a temporary adhesive spray. Place the 6"x7" piece of low nap batting over the placement stitches. Make sure that the batting covers all of the placement stitches.
Lightly mist the batting with a temporary adhesive spray. Place the 6"x7" piece of neutral fall fabric on top of the batting. The fabric surface should be smooth and wrinkle free.
Step 4:
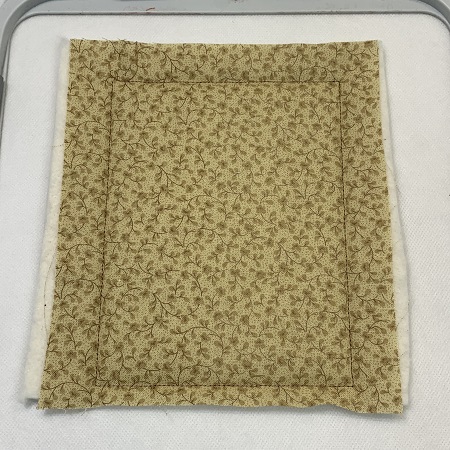
Attach the hoop. Stitch the next color. This step will tack down the fabric to the stabilizer.
Step 5:
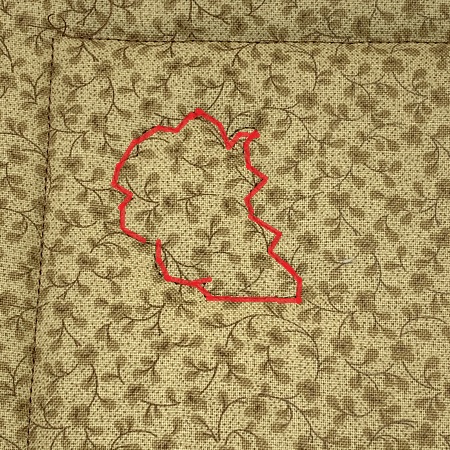
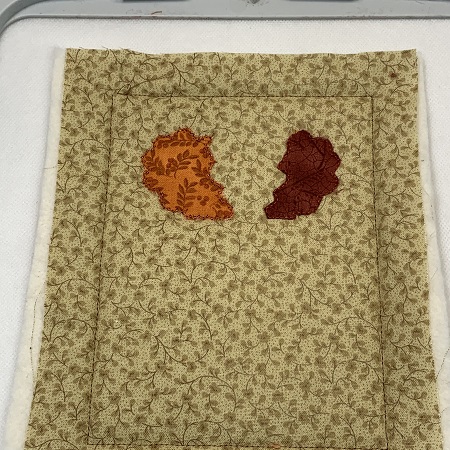
Stitch the next color stop. This step is the placement stitches for the first leaf.
Step 6:
Place one 2.5"x2.5" piece of fabric over the placement stitches.
Step 7:
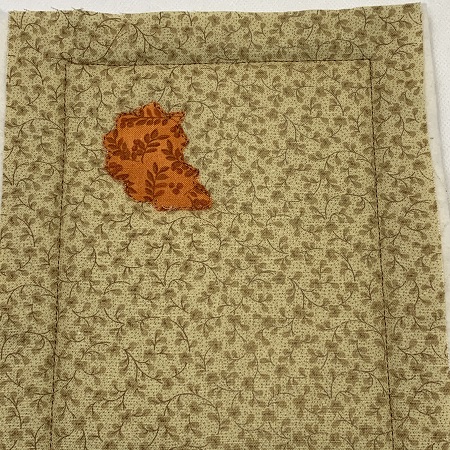
Stitch the next color. This step will tack down the leaf fabric.
Remove the hoop from the machine. Do not un-hoop the project. Trim excess fabric from around the leaf. Attach the hoop.
Step 8:
The next color is the placement stitches for the next leaf. Stitch the next color.
Step 9:
Place a 2.5"x2.5 piece of fabric over the placement stitches. Stitch the tack down stitches.
Remove the hoop from the machine. Do not un-hoop the project. Trim excess fabric from around the leaf. Attach the hoop.
Step 10:
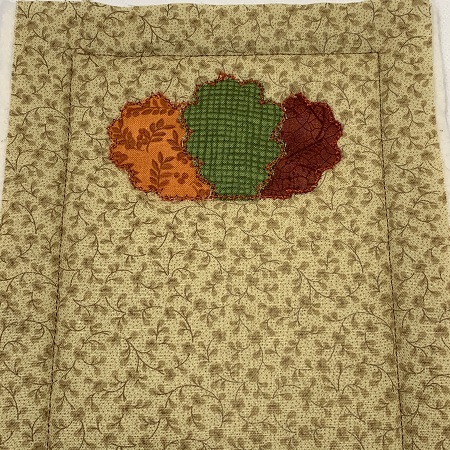
Repeat the process for the last leaf. Stitch the placement stitches. Place a 2.5"x2.5" piece of fabric over the placement stitches. Stitch the tack down stitches.
Remove the hoop from the machine. Do not un-hoop the project. Trim excess fabric from around the leaf. Attach the hoop.
Step 11:
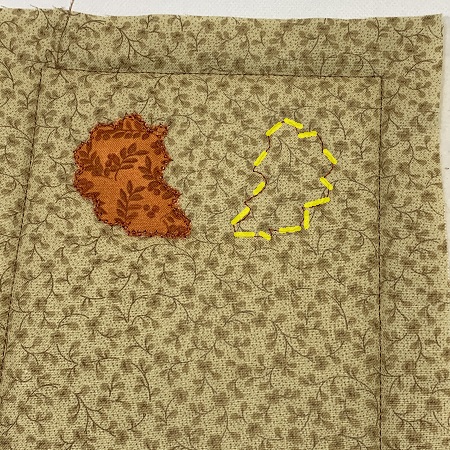
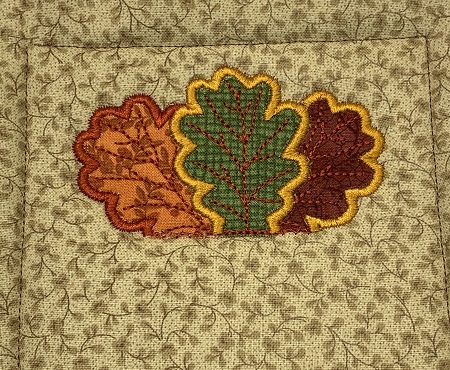
The finishing stitch is the last part of an applique technique. The finishing stitch will outline the leaves with a satin stitch. Follow the color guide to stitch around the leaves.
Step 12:
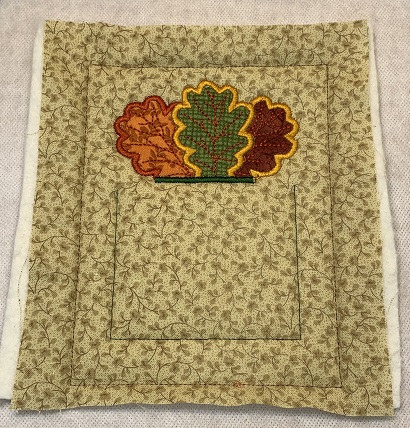
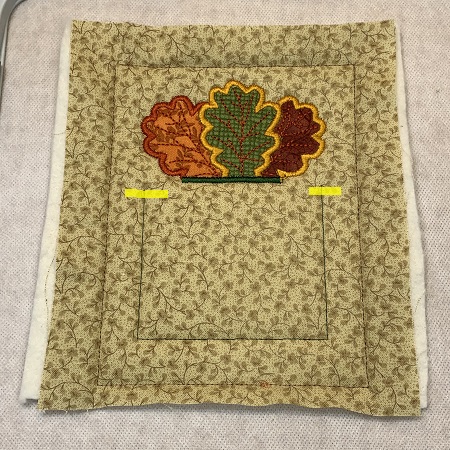
After the leaves are finished stitching, the next step will be the placement stitches for the pocket. Use your stitch guide on your machine as a reference. Stitch the placement stitch for the pocket.
Step 13:
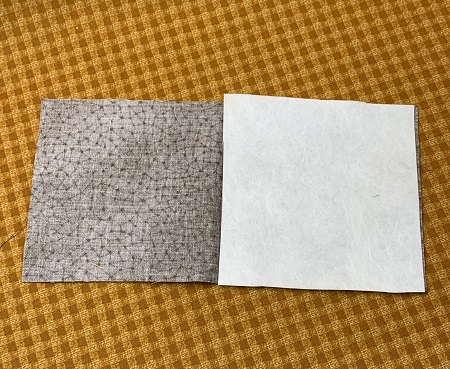
Place the 4"x8" piece of fabric print side down on a flat surface. Place the 4"x4" piece of firm stabilizer on half of the fabric. Fold the fabric down to cover the stabilizer.
Step 14:
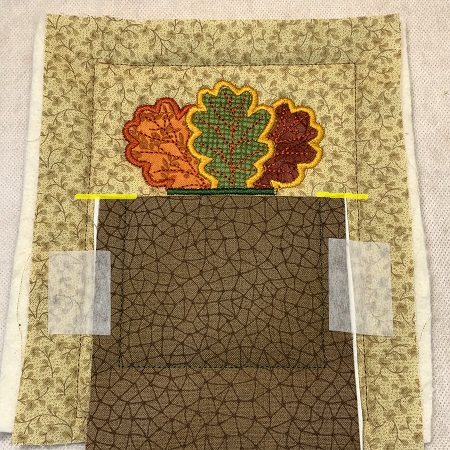
Notice each end of the placement stitches for the pocket. The top of the pocket will line up at the endpoints on each side.
Step 15:
Place the pocket over the placement stitches. The folded side of the pocket will be at the top of the mug rug. Line up the pocket opening with the placement stitch endpoints. Use tape to hold the pocket in place. Attach the hoop. Tack down the pocket.
Step 16:
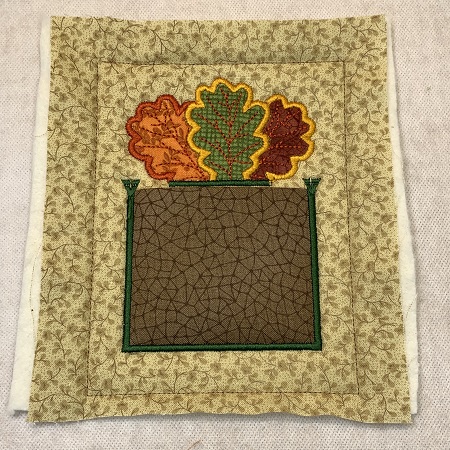
Remove the hoop from the machine. Do not un-hoop the project. Trim excess fabric from around the pocket. Attach the hoop. Follow the color guide to finish stitching around the pocket. Remove the hoop from the machine.
Step 17:
Place one piece of 6"x7" fabric over the stitched area on the BACK of the hoop. Use tape to hold the fabric in place.
Step 18:
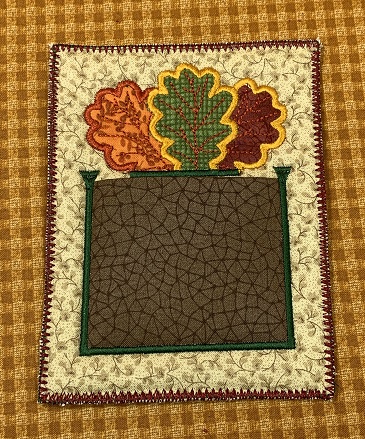
Finish stitching the rug mug. Trim excess fabric and stabilizer from around the rug mug. The rug mug is designed to have a raw edge finish around the sides. Moisten around the edges of the mug rug to remove any remaining water soluble stabilizer.
Step 19:
(Click Image to Enlarge)
An alternative to the raw edge finish is topstitching around the edges of the rug mug. The sample shows zig zag stitching around the edges.
Marisa Littleton is a retired educator with a love for teaching and learning. Interests include machine embroidery, hand embroidery, quilting, cooking, and antiques.