This project is quite the labor of love with over 5 hours of embroidery work alone. If you wind your own bobbins, it is best to have numerous bobbins wound before beginning this project. I used approx 20 bobbins for this design.
Step 1:
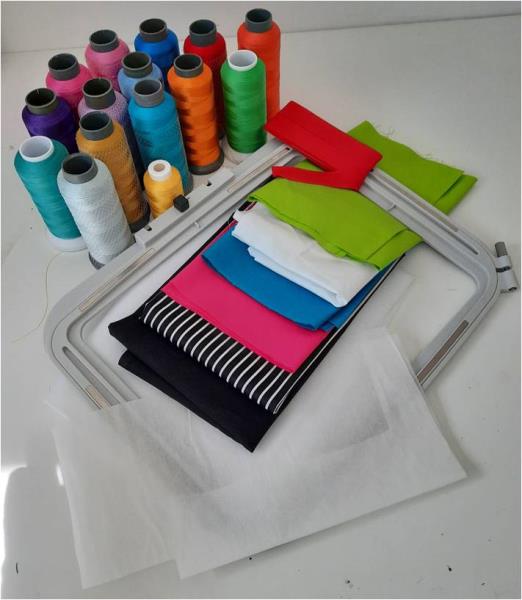
Gather the materials and read through the instructions before beginning. As for thread colors, I selected these as I went along, using bold bright colors which not only complimented the design but also ones which stood out on each appliqué square.
(Click Image to Enlarge)
Step 2:
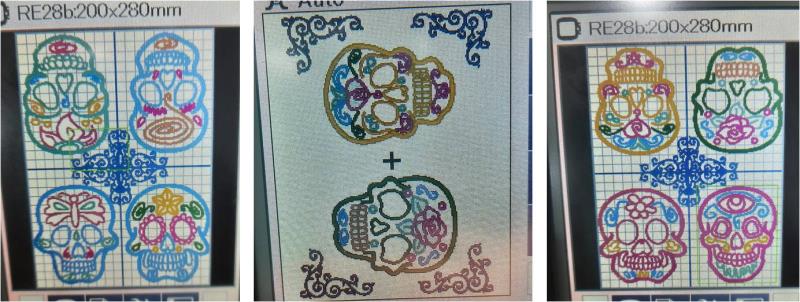
In your embroidery software program, or simply on your machine, open each skull design and orientate them to create the following layout. I used the largest skull designs in the pack. Then load the scroll border design. For each end of the runner, I used 4 of the scroll borders to create the centre scroll design, overlapping a little to create a close design. For each end of the runner, I decreased the skulls to 90% size and the scroll is 80% size to ensure a good fit. For the centre of the table runner, the skulls and scroll border are 100% size.
(Click Image to Enlarge)
Step 3:
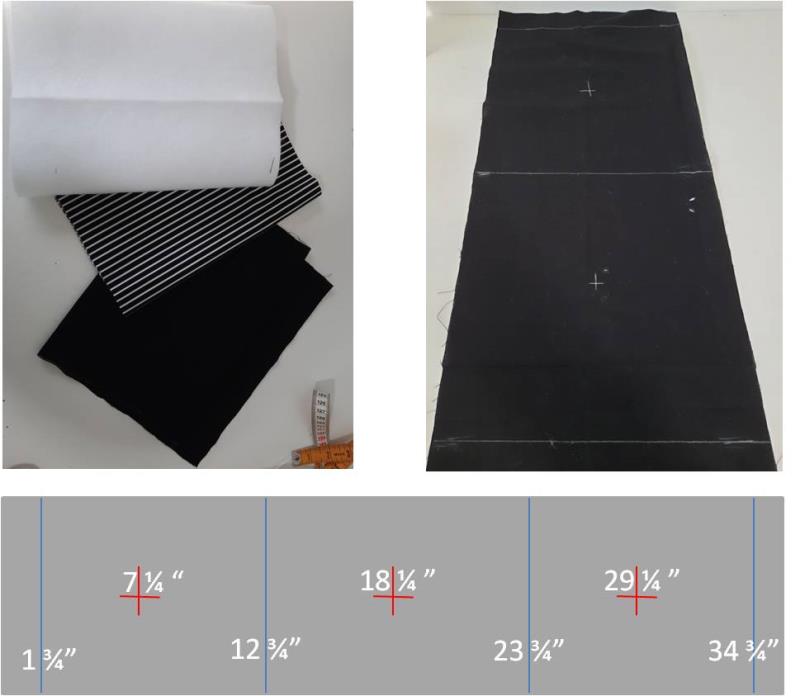
Cut your plain black cotton, fusible fleece and cotton backing fabric to 11” x 36.5”. Now to mark the sections and centre for each hooping, on the plain black panel mark the middle of the length of the fabric at 18 ¼” then measure across the width at this point and mark the centre. Then follow the below image which notes the measurements for each of your markings with the red crosses representing the middle of your embroidery designs.
(Click Image to Enlarge)
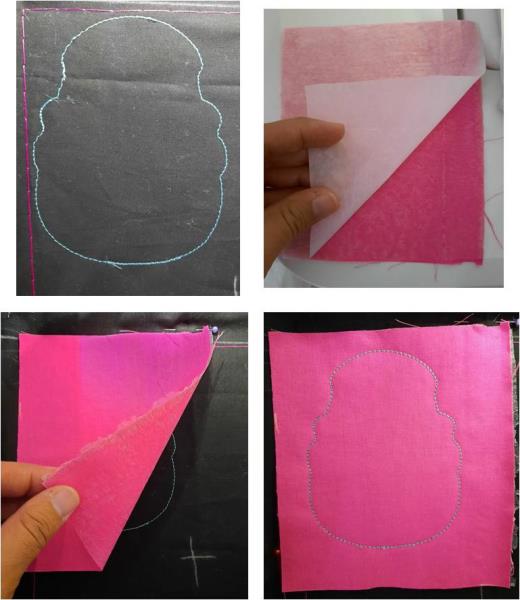
Step 4:
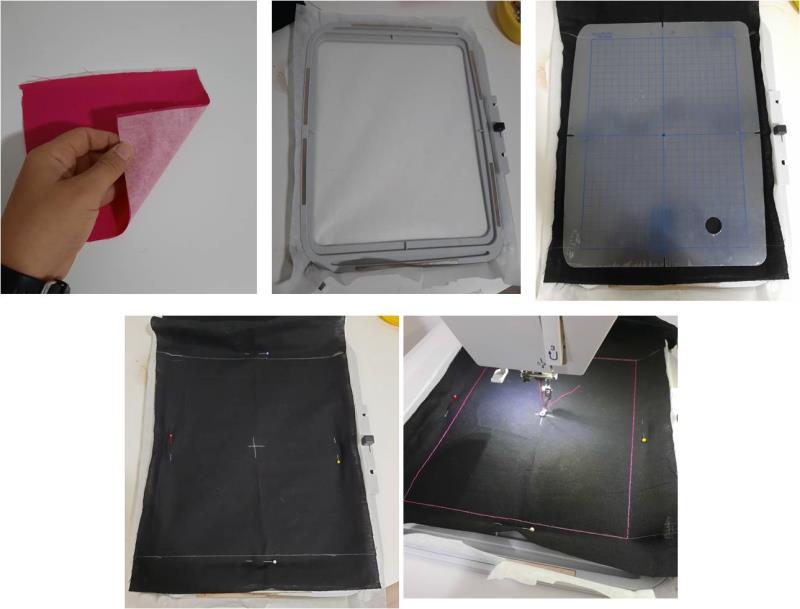
On the back of each colored appliqué piece, apply the Heat N Bond following manufacturers instructions, leaving the paper backing on. Hoop the tear away stabilizer and lay the black panel on top to stitch one end of the table runner, ensure it is centered. Pin in place then use a tack down stitch to hold in place.
(Click Image to Enlarge)
Step 5:
The first step is the placement stitch for the colored appliqué piece, once that stitches, peel the paper backing off one of your colored rectangles, lay it over the outline stitch and then stitch it down.
(Click Image to Enlarge)
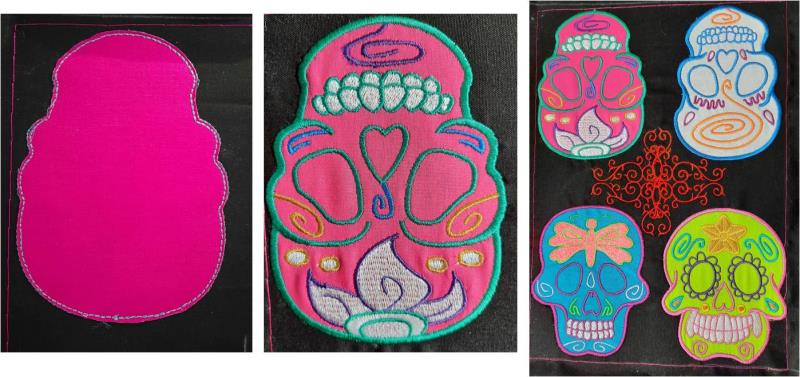
Step 6:
Remove the hoop from the machine, but do not undo the hoop. Using embroidery scissors trim the excess appliqué fabric away but cutting closely around the outline stitch, but be sure not to cut the stitching. Use an appliqué iron to press the appliqué and allow it to bond. Stitch out the remainder of the design with bright, bold colors. Follow steps 5 & 6 for the remaining 3 skulls, then stitch the scroll design. This completes one section of the 3 on your table runner.
(Click Image to Enlarge)
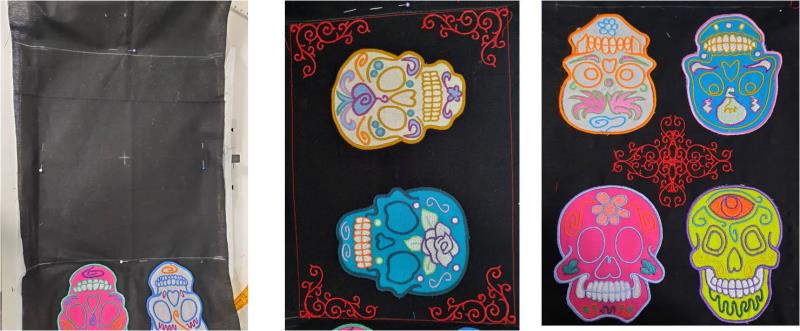
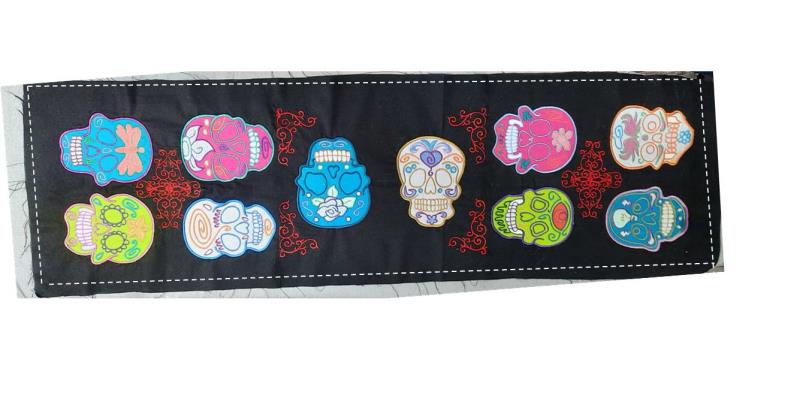
Step 7:
Repeat steps 4,5 & 6 for the remaining 2 sections of your table runner
(Click Image to Enlarge)
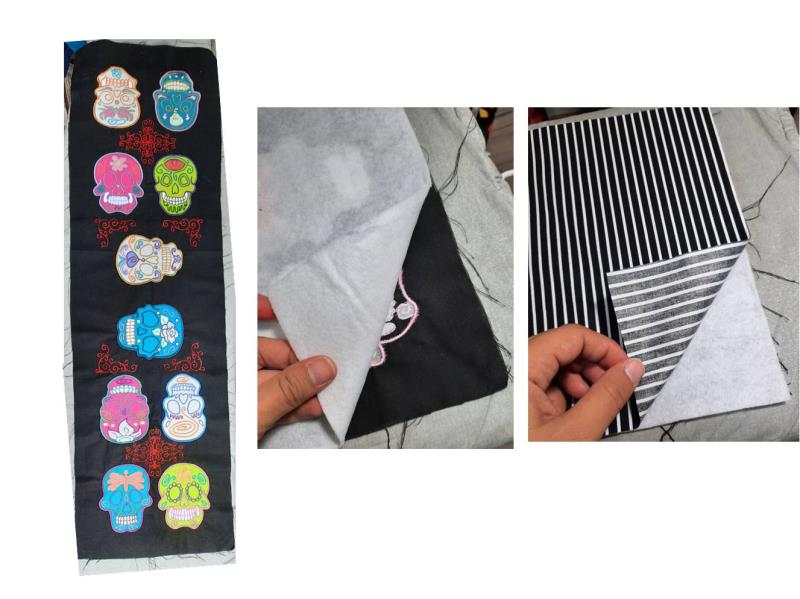
Step 8:
Once all 3 hoopings are complete, unhoop the design and tearaway the stabilizer from the back. Turn the panel right side down and lay the fusible fleece to the back, press to bond. Then lay the backing panel on top of the fleece and pin all around the edges to hold all 3 layers together.
(Click Image to Enlarge)
Step 9:
Stitch all the way around, through all 3 layers, using a ¼” seam. Then choose your desired binding method to finish off the edges of your table runner.
(Click Image to Enlarge)
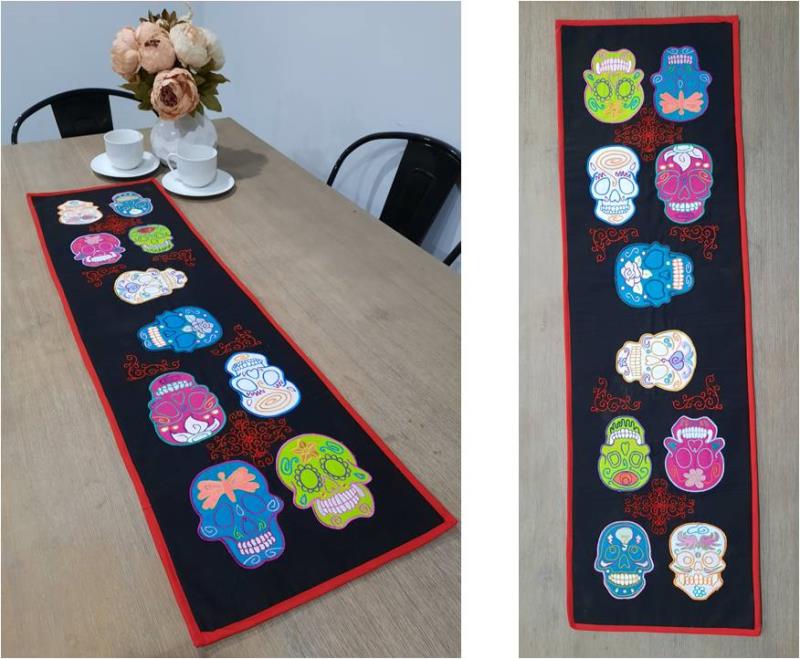
Step 10:
Your sugar skulls table runner is now complete and ready to brighten up your table