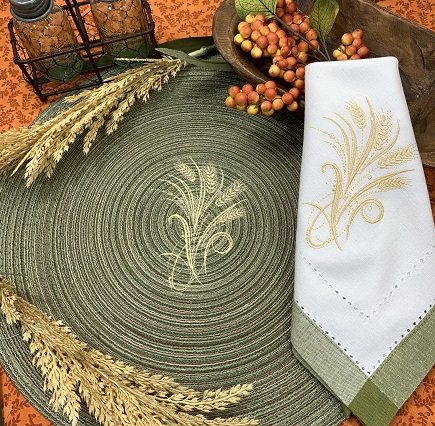
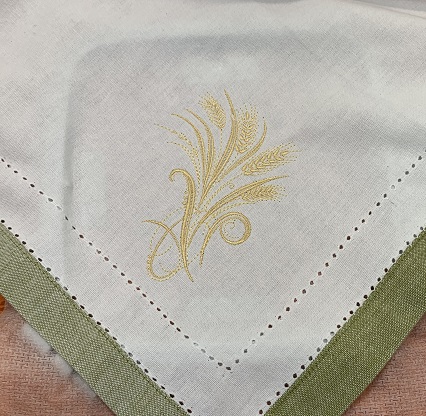
Who needs fall flowers when you have wheat? Wheat spikes add a natural, rustic touch to all fall themes. Start your next table setting with wheat place mats and matching napkins.
Who needs fall flowers when you have wheat? Wheat spikes add a natural, rustic touch to all fall themes. Start your next table setting with wheat place mats and matching napkins. A single needle embroidery machine was used to make this project. The design is available in 5 sizes. I used the same size on the place mat and napkin. You could use a larger size on the placemat and a smaller size on the napkin.
Step 1:
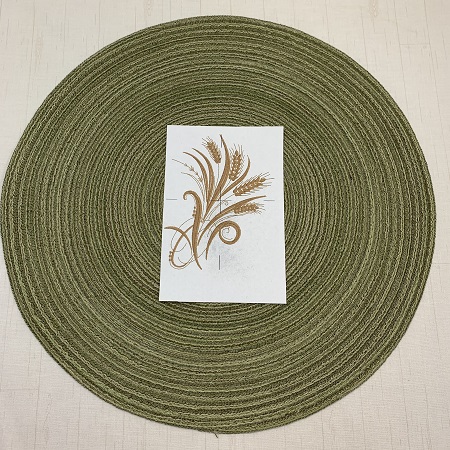
Preparation: Read the directions before beginning. Gather the materials needed for the project. The design was rotated slightly using an embroidery software program. Many embroidery machines have a rotating feature. Embrilliance Essentials software program was used to rotate and print the design template.
Step 2:
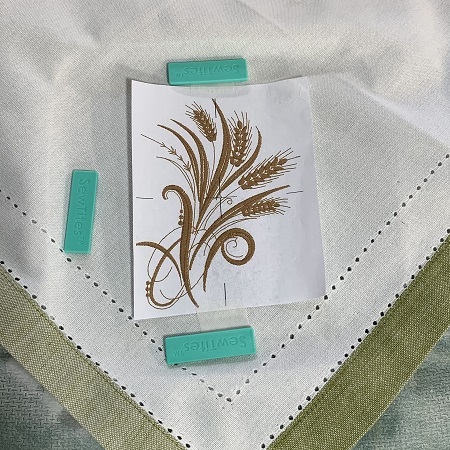
Design Placement on Placemat: The design template is the actual size of the stitched design. Use the design template as a placement guide. Center the design template on a place mat.
Step 3:
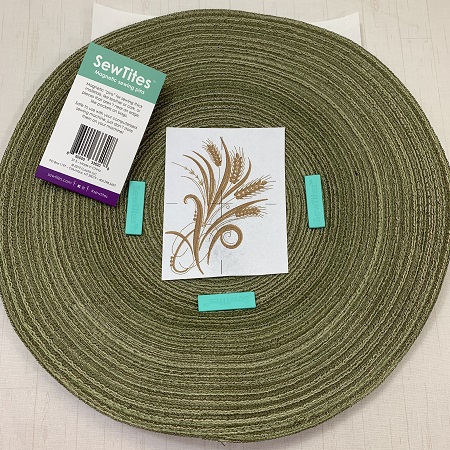
Hooping: Hoop one piece of cut-away stabilizer (2.0 oz.). The place mat will 'float' on the stabilizer. It does not go in the hoop. Center the place mat on top of the stabilizer. Use the center point on the design template and axis points on the hoop as guides. Secure the place mat on the stabilizer. Sew Tites (magnets) were used to hold the place mat in place. Pins or a temporary adhesive spray may also be used to secure the place mat on the stabilizer.
Step 4:
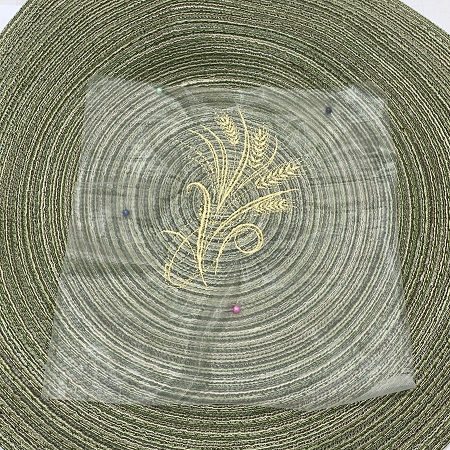
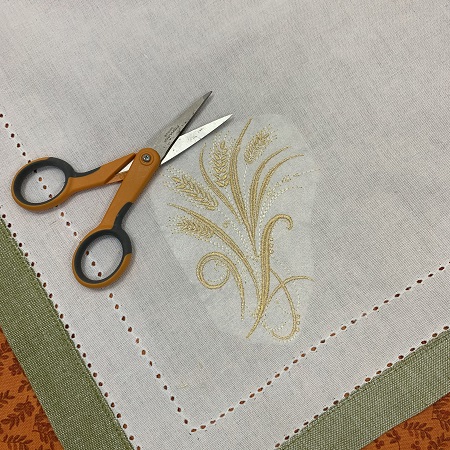
Stitching: The placemats have ridges and the design can sink or disappear on the uneven surface. Place a piece of lightweight water-soluble topping on top of the placemat. The topping will help the stitches to land evenly on the surface.
Attach the hoop to the machine and check to make sure that everything is clear so that the hoop will move freely. Load the embroidery design on your machine. A 90/14 embroidery needle is recommended because of the texture of the place mat. Stitch the design. Use the color guide on the machine and printed chart as a guide.
Step 5:
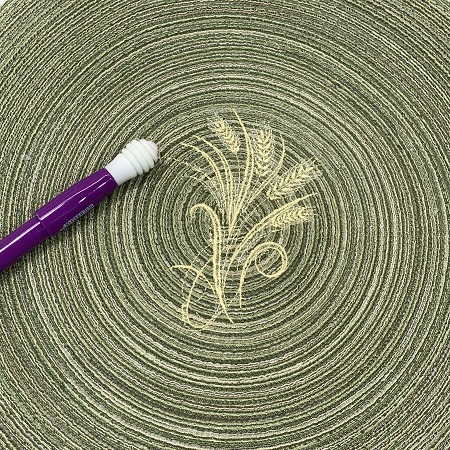
After embroidering, gently tear the water-soluble topping away from the top. Remove lingering bits of the water-soluble topping with a damp cloth or the honeycomb tip on the Fix a Seam seam ripper.
Step 6:
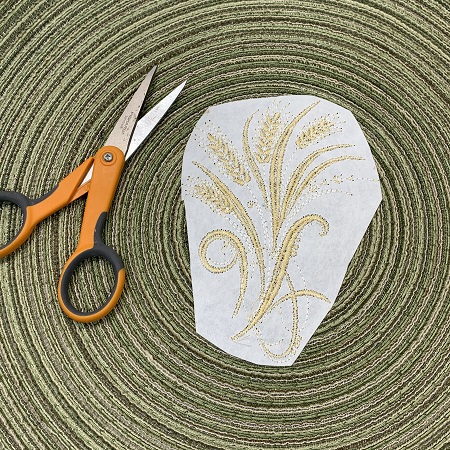
Trim the cutaway stabilizer away from the back leaving approximately ½” from the stitches. Trim any thread as needed on the back of the placemat.
Repeat Steps 1-6 if you want to make a set of place mats.
Step 7:
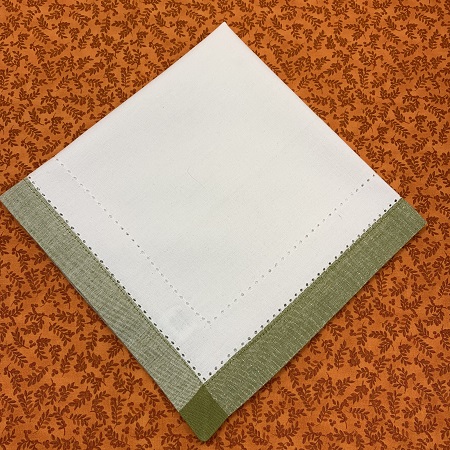
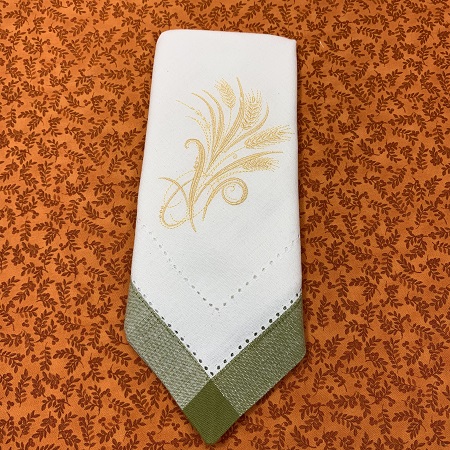
Napkin: Fold the napkin in half. Fold the napkin in half again. You will have 1/4 of the napkin surface showing at this point.
Step 8:
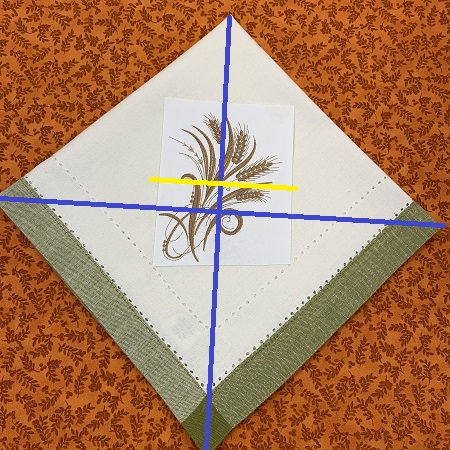
Center the design template on the napkin.
Step 9:
Hooping: Hoop one piece of No Show mesh cut away stabilizer. Float the napkin on the stabilizer. Secure the napkin to the stabilizer.
Step 10:
Attach the hoop to the machine and check to make sure that everything is clear so that the hoop will move freely. Load the embroidery design on your machine. A 75/11 embroidery needle is recommended because of the cotton fabric. Stitch the design. Use the color guide on the machine and printed chart as a guide.
Step 11:
Trim the No Show mesh cutaway stabilizer away from the back leaving approximately ½” from the stitches. Trim any thread as needed on the back of the placemat.
Step 12:
Repeat Steps 7-11 if you want to add more napkins to your set.
Marisa Littleton is a retired educator with a love for teaching and learning. Interests include machine embroidery, hand embroidery, quilting, cooking, and antiques.