| Preface: | There are four embroidered pattern pieces used to create the whole ring. Four of each design is embroidered for a total of 16 pieces to create the pillow. Doing the sections in the hoop is much like the traditional paper-piecing method of stitching and flipping fabrics. Be sure to do a test of the technique.
There are two options for the “quilting” portion of each design. The first is to use embroidery thread to quilt the last color. The second is to use water soluble thread for the last color. After the pieces are assembled, embroidery floss is used to run the needle in and out of the needle penetrations, over the water-soluble thread, to get “perfect” hand quilting! This gives the project a more old-fashioned look to the project
.
For each of the 16 parts, the embroidery is done in the same manner. Hoop one layer of poly mesh stabilizer with one piece of white fabric. To create the wedding ring pattern, color stops are programmed to allow placement, seaming, flipping, and tack down of the four fabric sections. Colors 1-8 may all be stitched with the embroidery thread color that will be used for the satin stitch. Before color 8 stitches, remove the hoop from the machine and trim the fabrics close to the inner and outer arc stitching lines Color 9 will sew the hand quilting guide-line in WS thread. |
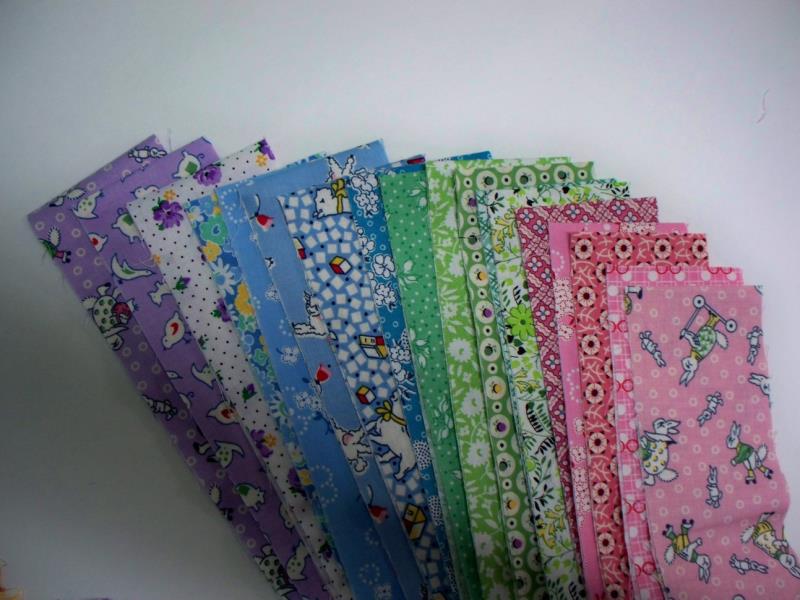
Step 1: | Read through the instructions thoroughly before beginning and assemble all the materials needed to complete the project. Choose 1930’s fabrics in your choice of colors. The instructions show using one color scheme, which as it turned out, was not the look wanted, so about half way through the photos, you’ll see the actual colors used which gave a softer look to the final project. Starch and press the fabric well. |  (Click Image to Enlarge) |
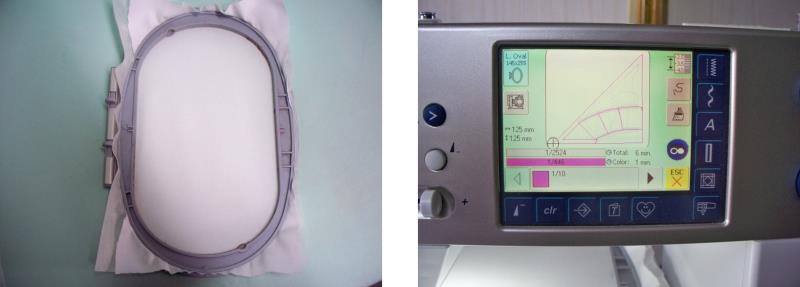
Step 2: | Hoop one piece of white fabric with one piece of stabilizer. Load design RBWRP01 on the machine | 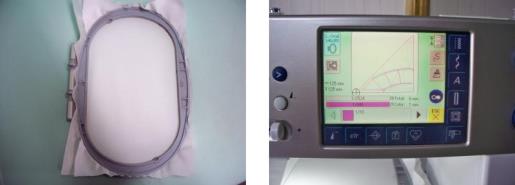 (Click Image to Enlarge) |
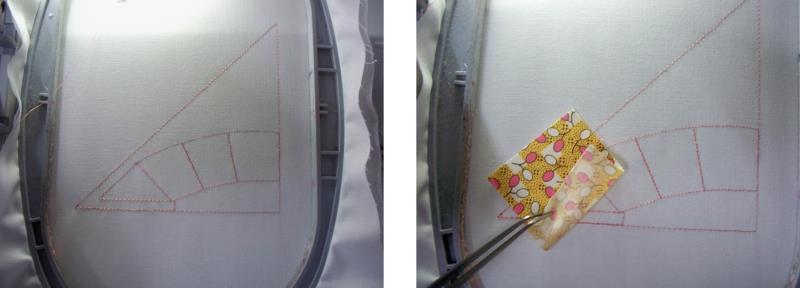
Step 3: | Stitch color one which will sew the outer cutting line and fabric placement lines. The machine stops, allowing the first fabric to be place right side up over the corner triangle. | 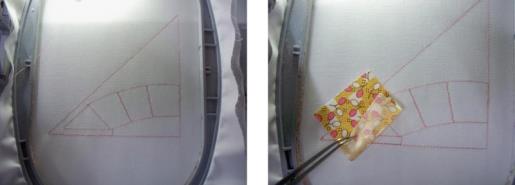 (Click Image to Enlarge) |
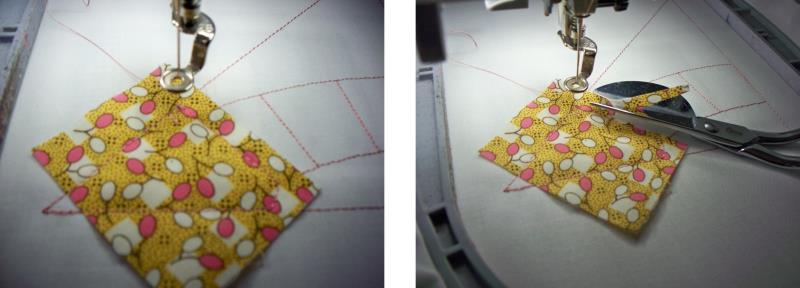
Step 4: | Press the start button to stitch color 2 which will tack down the fabric; trim the fabric close to the stitching line. Depending on the machine, you may be able to trim the fabrics while the hoop remains on the machine. If not, very carefully remove the hoop from the machine but do not remove the fabric from the hoop. Lay the hoop on a flat surface and carefully trim the excess fabric outside of the stitching line. |  (Click Image to Enlarge) |
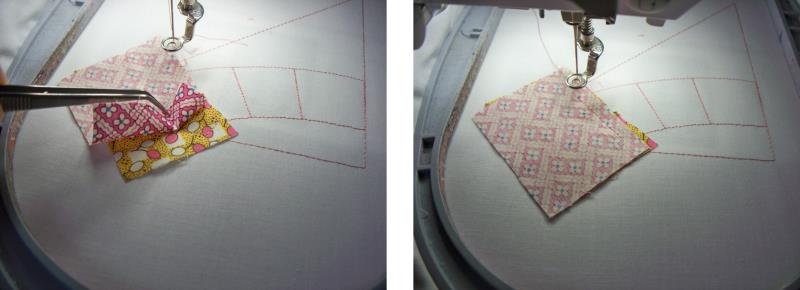
Step 5: | Place the next fabric, right side down, aligning the edge of the fabric to the tack down line just sewn inside the arc. Flip the second fabric over to be sure when it is sewn it will cover the second section; then flip it back and stitch color three, which will sew the seam line. |  (Click Image to Enlarge) |
Step 6: | Flip the second fabric right side up and finger press along the seam line. Usually the fabrics will stay in place for the tack down stitching, but if needed, use a very small amount of glue stick to hold the fabric in place. Stitch color four which will tack down this fabric section. From here on out, you are basically repeating the same steps of placing the fabric right side down, stitching the seam, flipping, stitching and trimming. | 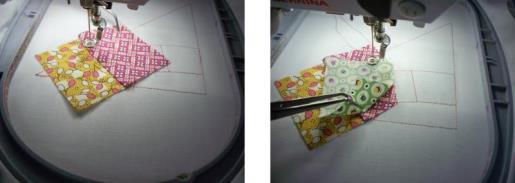 (Click Image to Enlarge) |
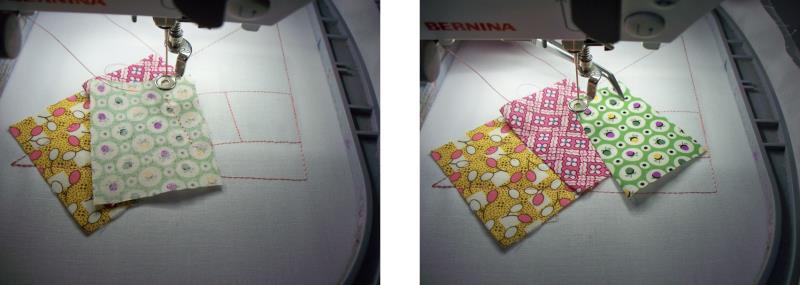
Step 7: | Place the fabric, sew the seam | 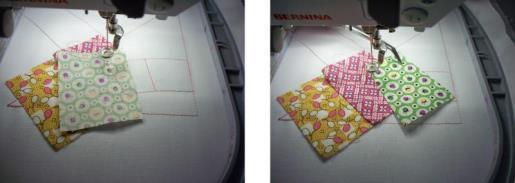 (Click Image to Enlarge) |
Step 8: | and trim. Place the next fabric right side down, | 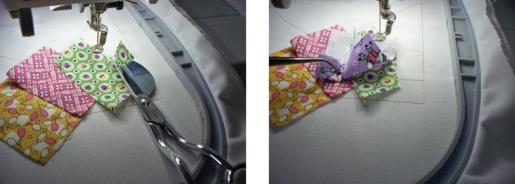 (Click Image to Enlarge) |
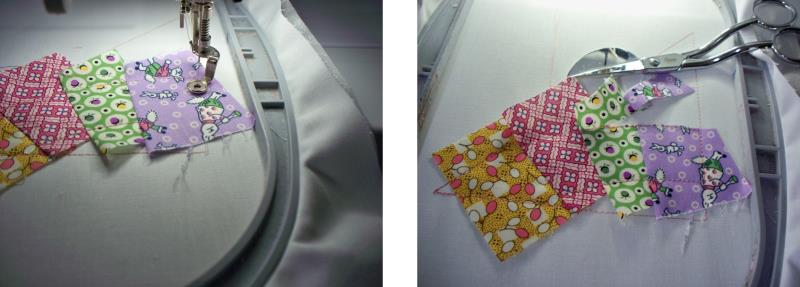
Step 9: | sew the seam, and trim. |  (Click Image to Enlarge) |
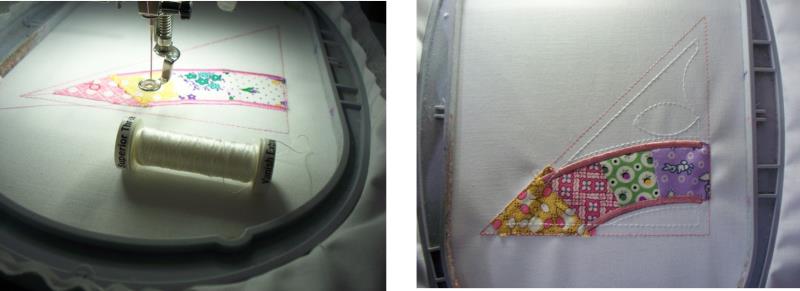
Step 10: | The photo on the left shows how the fabrics should look at this point. Color 9 sews the satin stitches around the outer edges. Use an embroidery thread color that will coordinate with all the colors of fabric used in the design. | 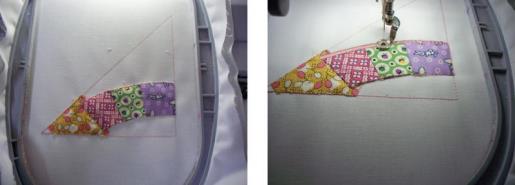 (Click Image to Enlarge) |
Step 11: | At this point make a decision—will you use embroidery thread for the quilting design or water-soluble thread to do the hand stitching. The choice is yours. If using water-soluble thread, place it in the top spool of the machine (regular embroidery bobbin thread may be used in the bobbin). The quilting lines and inside seam lines for sewing the sections together are the last color sewn. Please note, if water-soluble thread is used, be sure that any pressing is done with a dry iron and your hands are free from moisture at all times or the thread will dissolve away. |  (Click Image to Enlarge) |
Step 12: | Sew four of each section RBWRP01, RBWRP02, RBWRP03, RBWRP04. One of each section will be assembled as shown in the picture on the left. Also, if the machine hoop happens to be large enough, you can gang up sections for sewing to save a little time. | 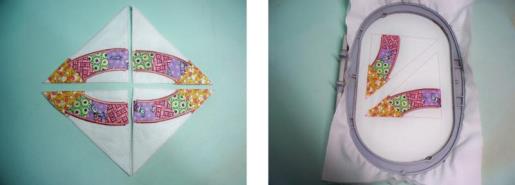 (Click Image to Enlarge) |
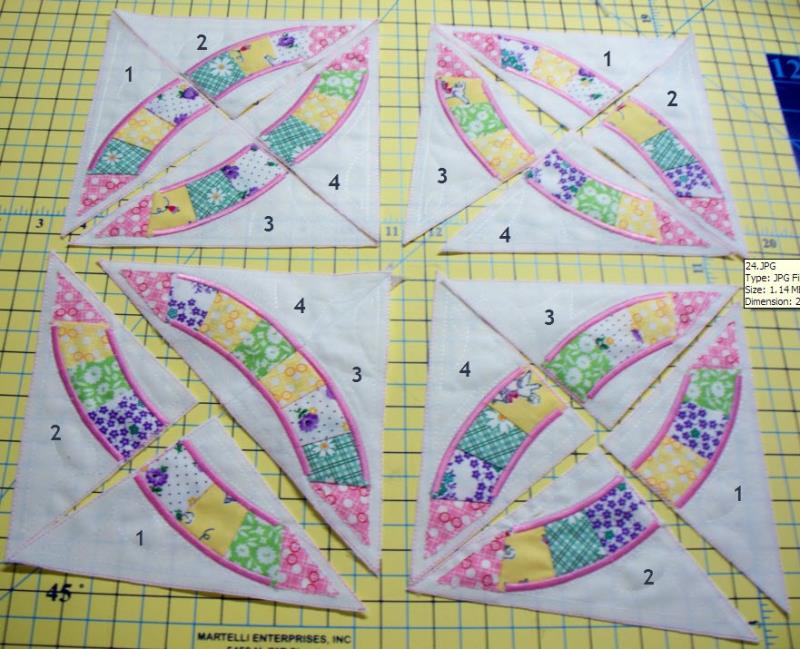
Step 13: | Afterall 16 sections are stitched and trimmed, lay out the sections as show, mirroring Parts 1 & 2, and parts 3 & 4. | 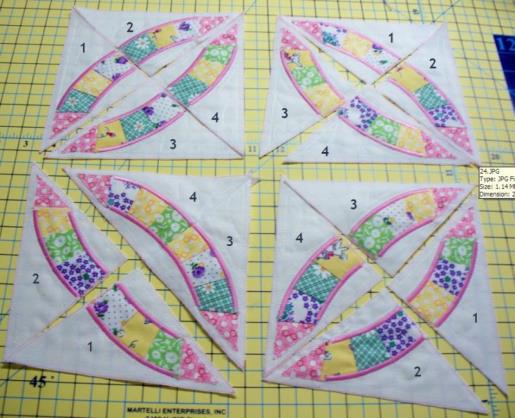 (Click Image to Enlarge) |
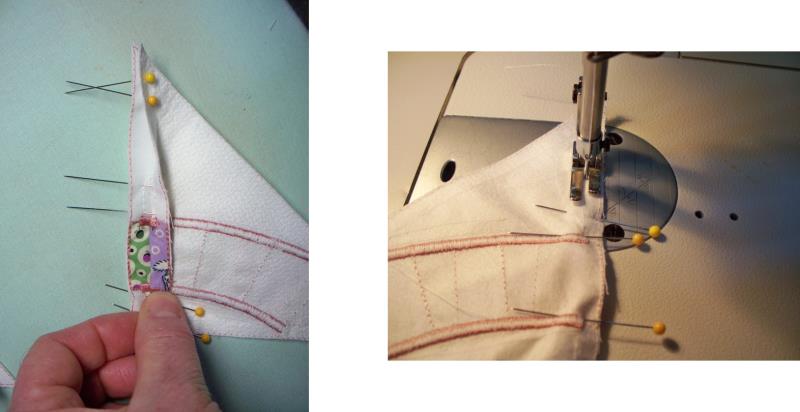
Step 14: | Group the quadrant sections for stitching them together. Begin with a mirrored corner section, place them right sides together | 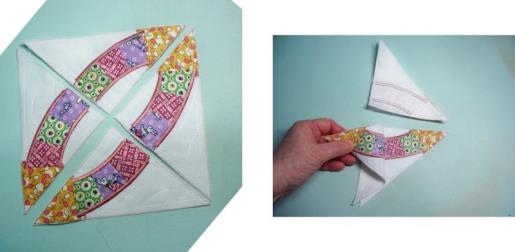 (Click Image to Enlarge) |
Step 15: | matching all the points along the top, middle and bottom of the water-soluble stitching line and satin stitch. Also, be sure the corner seam lines and points meet exactly. Thread the sewing machine and sew the seam using the water-soluble line as a stitching guide. | 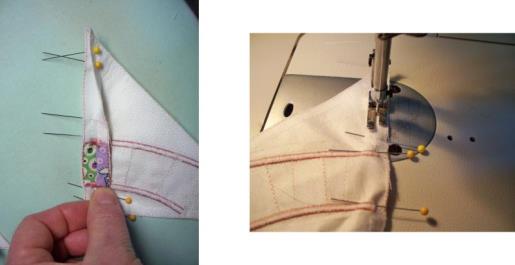 (Click Image to Enlarge) |
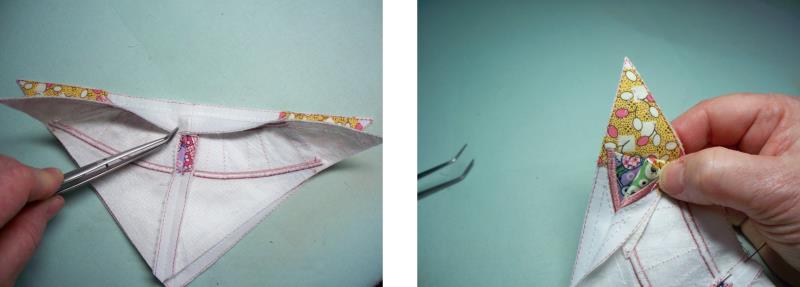
Step 16: | Press the seam open. Repeat for the mirrored sections of parts 3 & 4. | 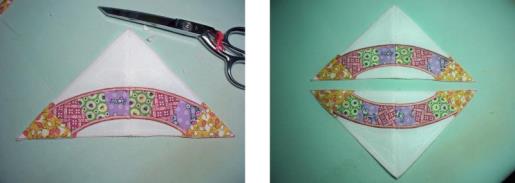 (Click Image to Enlarge) |
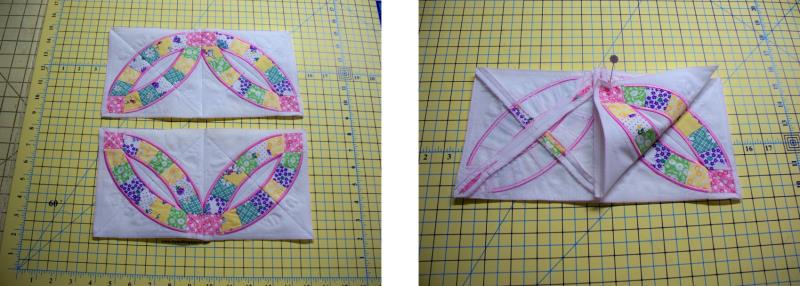
Step 17: | Now pin these two sections together, matching the center seams and all points along the seam line. Also, be sure the corner section seams match. This completes the upper left quadrant. |  (Click Image to Enlarge) |
Step 18: | Now repeat the other three quadrants in the same manner. Sew the upper quadrants together, matching all points, and then the bottom two quadrants. To complete the ring, sew the two halves together, again carefully matching all points. | 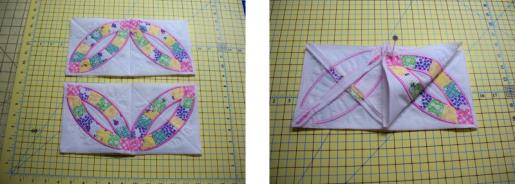 (Click Image to Enlarge) |
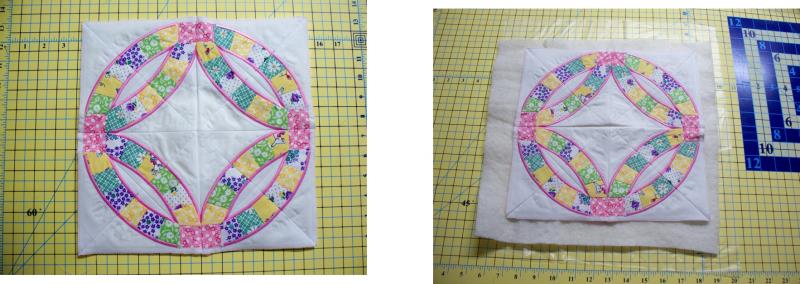
Step 19: | This completes the “ring” portion of the pillow top! What an easy way to do a practically perfect Wedding Ring Quilt Block! Cut a piece of batting larger than the pillow top, and also a piece of water-soluble stabilizer (or organza). Make a quilt sandwich using the temporary spray adhesive to hold the sections together. The water- soluble stabilizer (or organza) on the back of the batting prevents the hand-quilting thread from tangling in the batting while doing the hand stitching. | 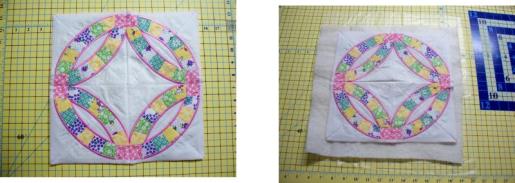 (Click Image to Enlarge) |
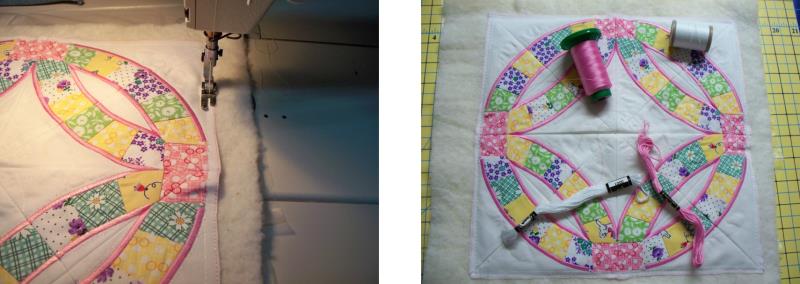
Step 20: | Baste all the layers together along the outer edge of the pillow top. Pull three strands of embroidery floss about 14” long, and thread the needle. |  (Click Image to Enlarge) |
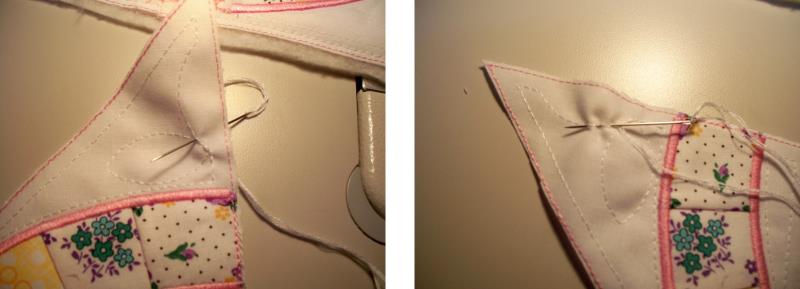
Step 21: | Take a couple of stitches in place on the back of the work in the batting. Bring the needle up from the back and through a stitch hole, and then back down again at the next needle penetration, creating one stitch. Skip the next water-soluble thread stitch, come back up in the next, back down, skip a stitch. Repeat this until all the hand quilting is done on the pillow top. If you feel comfortable, do like seasoned hand-quilters do, and place several stitches on the needle. |  (Click Image to Enlarge) |
Step 22: | Just be sure you are going in and out in those needle penetrations so you will have perfectly spaced hand quilting! |  (Click Image to Enlarge) |
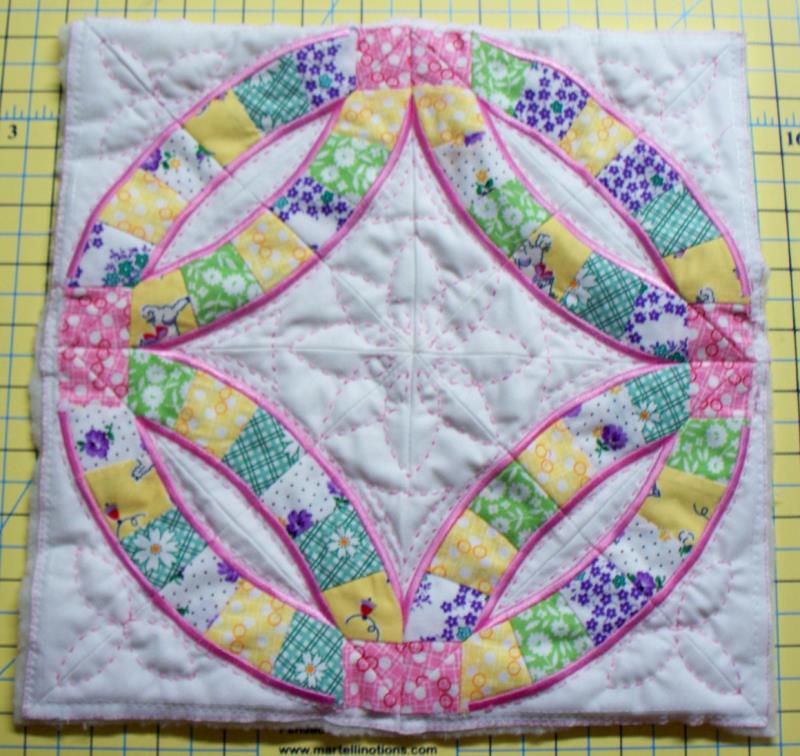
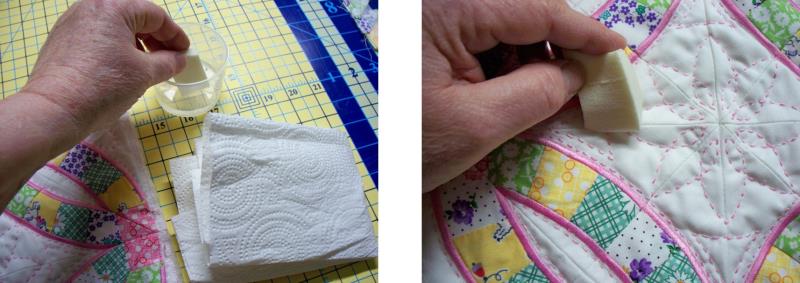
Step 23: | Now it is time to dissolve the water-soluble thread. Dip the cosmetic sponge in the water and dab it on a paper towel. Blot the sponge along the hand quilting to dissolve the water-soluble thread and all that remains are the hand-quilting stitches! Allow the pillow top to dry completely. | 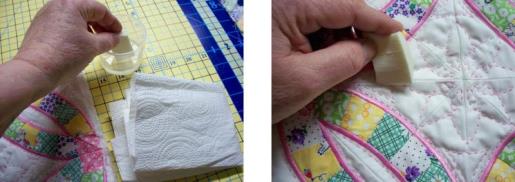 (Click Image to Enlarge) |
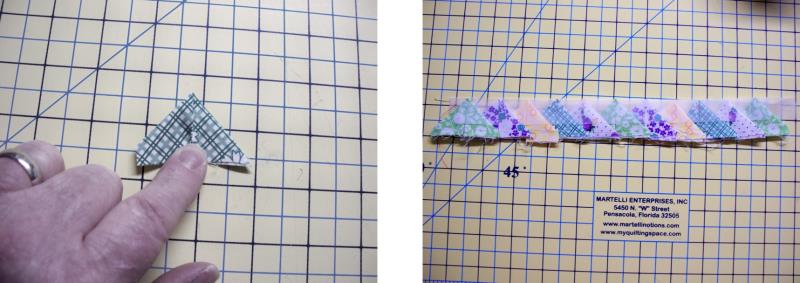
Step 24: | To finish the pillow, use the remaining 2 ½” fabric pieces to create prairie points to be sewn along the edges. Just cut the strips into 2 ½” square pieces, fold in half, and then bring the upper corners at the fold down to meet in the center of the bottom cut edge of the square. It takes a little finessing to get the pints spaced evenly all the way around, so just be patient and it will all come together. It is helpful to use clear tape to hold the points together in sections to be sewn onto the pillow. | 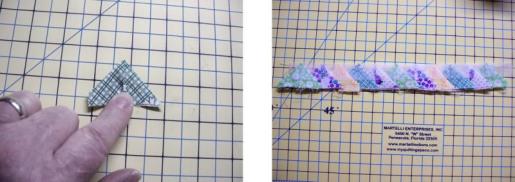 (Click Image to Enlarge) |
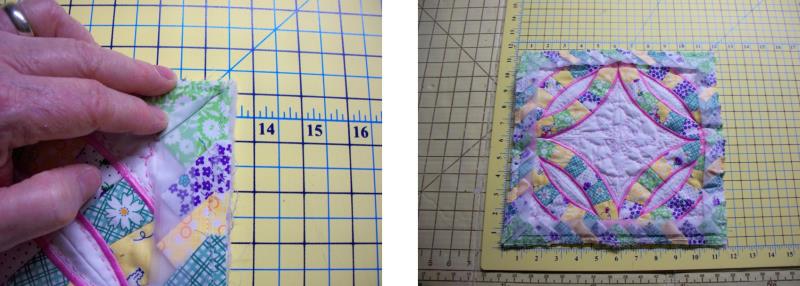
Step 25: | Pin and sew the prairie point borders onto the pillow top; make sure the prairie points meet in the corner seam lines on the pillow. Pin and baste the prairie points into place around all the edges of the pillow. |  (Click Image to Enlarge) |
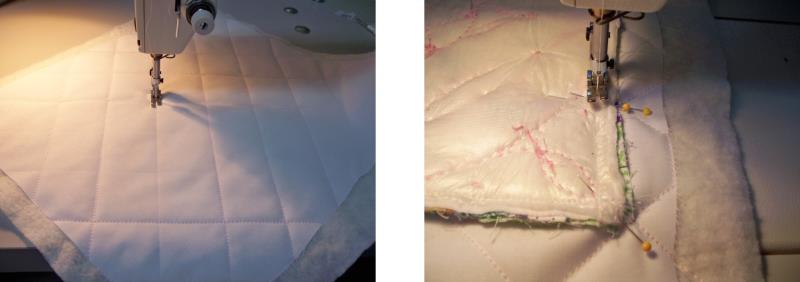
Step 26: | For the pillow back, layer the remaining 13” square of white fabric over the remaining square of batting and quilt as desired (this may be a good time to practice some free motions quilting). To finish the pillow, place the pillow top and back right sides together. Sew along all edges, leaving an opening for turning. Trim the excess batting and backing. | 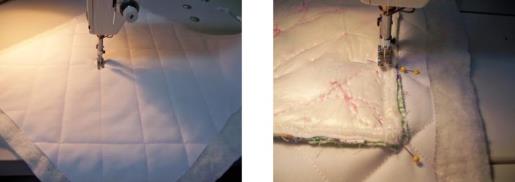 (Click Image to Enlarge) |
Step 27: | Turn the pillow to the right side through the opening, forming the corners well and press along the outer edges. | 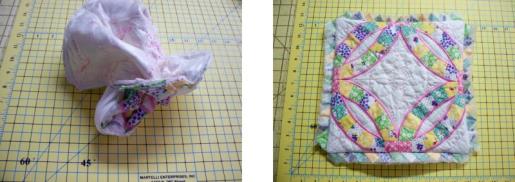 (Click Image to Enlarge) |
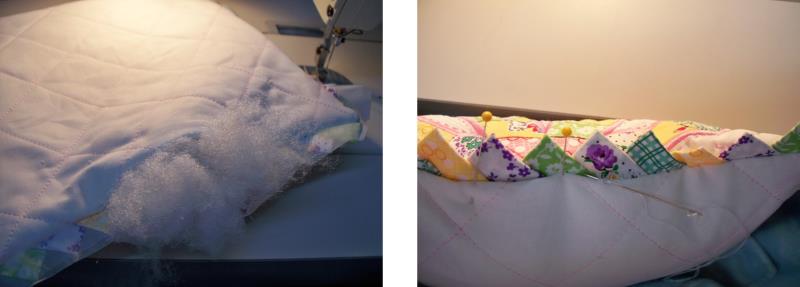
Step 28: | Insert the fiber-fil into the pillow in small amounts, begin by filling out the corners, then along the seam lines, and then the center portion of the pillow until it is gently stuffed. Turn in the seam allowance along the open edge and hand sew the opening closed using a ladder stitch. |  (Click Image to Enlarge) |
Step 29: | Here is the pillow all stitched and assembled, complete with practically perfect hand quilting. | 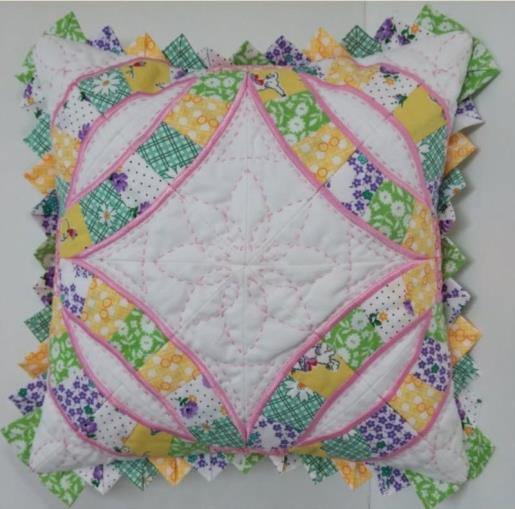 (Click Image to Enlarge) |
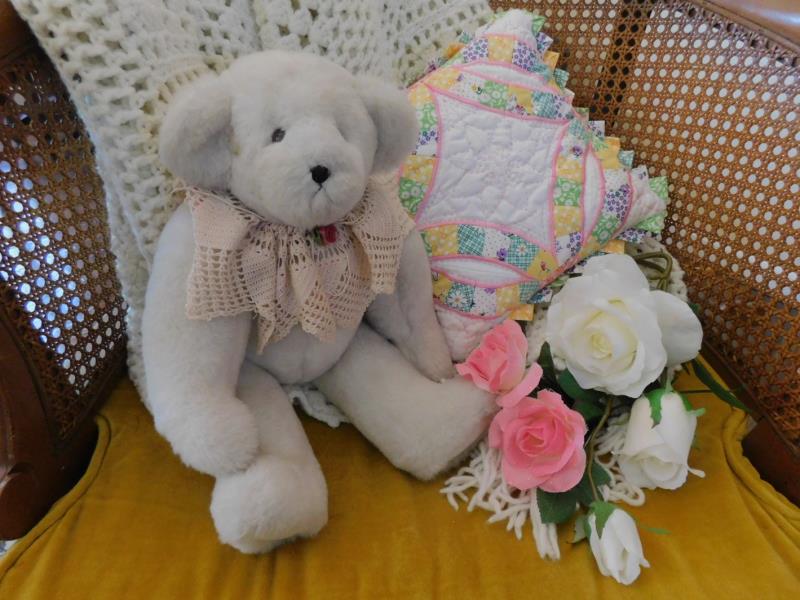
Step 30: | Congratulations on creating a beautiful ITH Wedding Ring Pillow! | 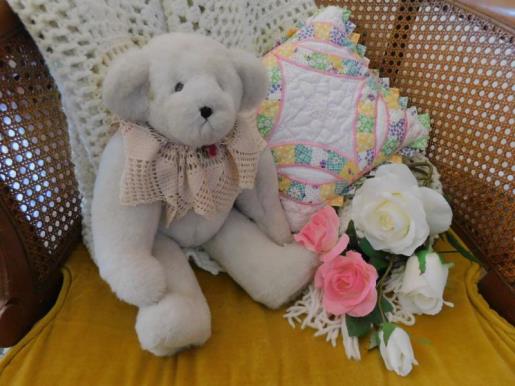 (Click Image to Enlarge) |
|