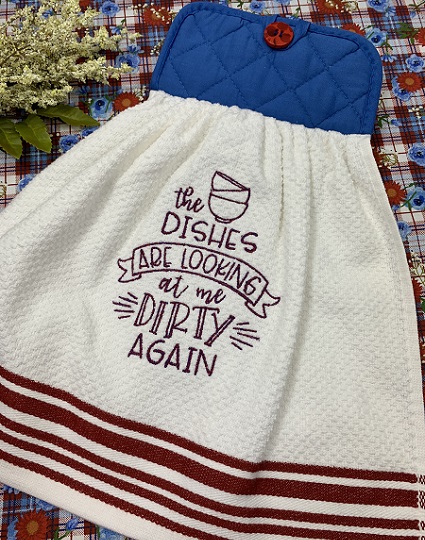
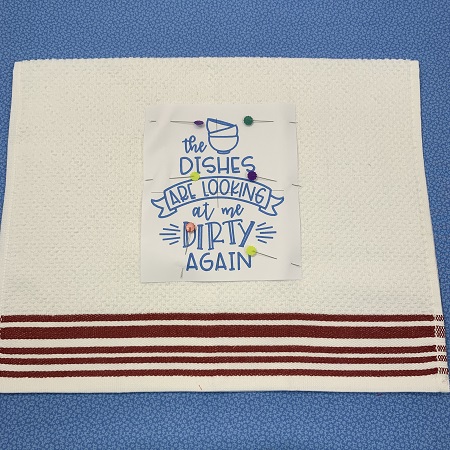
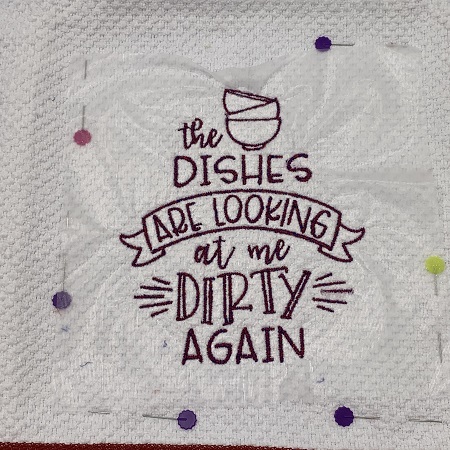
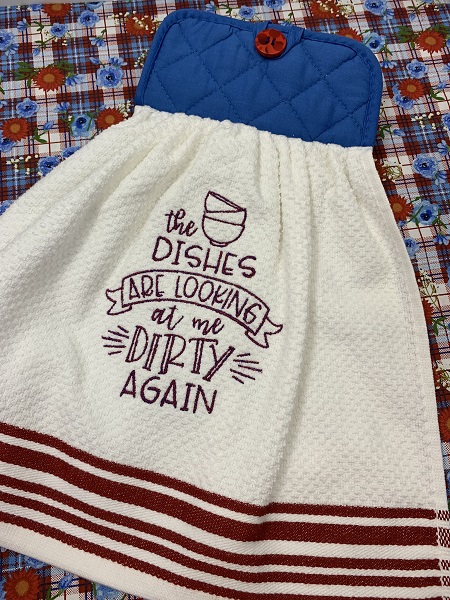
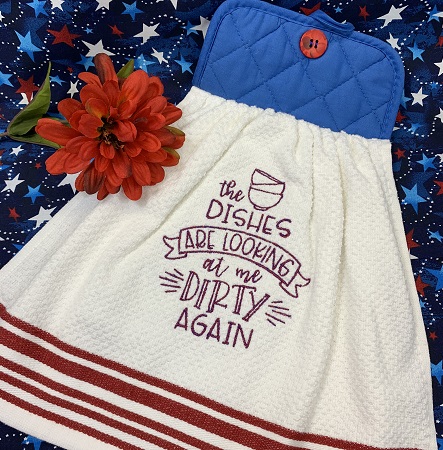
A hanging kitchen towel telling everyone that 'The DISHES are looking at me DIRTY again! Just the right note to nudge your kitchen helpers! The embroidery design is available in 4 sizes. The largest size (5"x6") was used for this project. Specialty thread works well with this design. Twister Tweed or Variegated threads from Robison Anton add dimension to the design. Twister Tweed thread has two strands twisted together giving a heather look in the stitches. Either thread type adds a new twist to a lettering design.
Step 1:
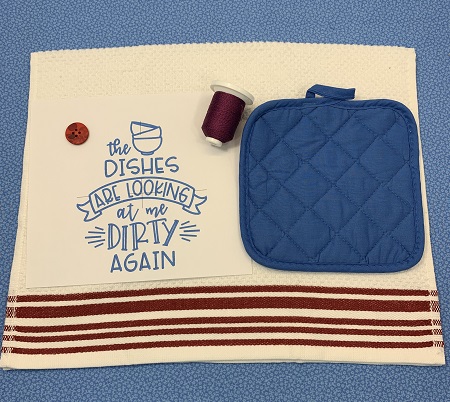
Read the directions carefully before beginning. Gather the supplies needed for the project. Print a copy of the design template. If you need a different size design template, a trial version of Embrilliance Essentials is available.
Step 2:
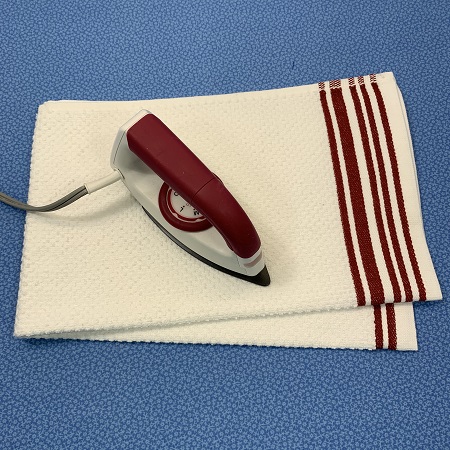
Fold the kitchen towel in half lengthwise. Press along the fold line with an iron. Fold the towel in half again. Press along the fold line with an iron. The creases will be used when placing the design on the towel.
Step 3:
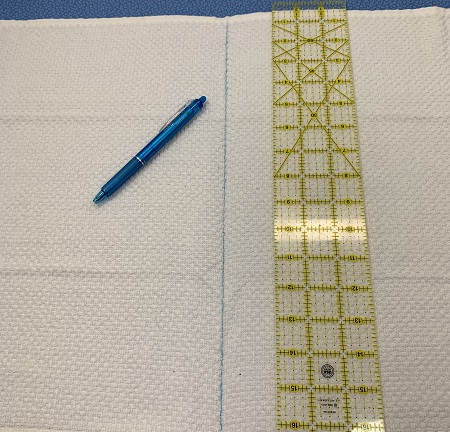
Placement: Lay the towel on a flat surface with the right side facing you. Draw a line on the center crease using a fabric marker. Fold the towel in half so that the line shows at the crease.
Step 4:
The design template is the actual size of the stitched design & makes an excellent placement guide. Decide design placement on the towel using the template. Match the crease line on the towel with the center axis line on the design template. Allow for a 1" margin at the top of the towel where you will attach the potholder topper.
Step 5:
Floating the towel: A floating technique will be used to make the kitchen towel. You will hoop only the stabilizer. Hoop one piece of No Show poly mesh stabilizer. Stabilizer must be taut in the hoop. Match the center point on the design template with the center of the hoop. Align the axis points on the hoop and the template. Lightly mist the stabilizer surface with 404 Repositionable Adhesive. Gently press the kitchen towel to the stabilizer. The surface of the towel must be smooth and wrinkle free.
Step 6:
Stitching the design: Load the design on your embroidery machine. Check the needle. Needle size is very important if using specialty thread. Check the bobbin area for debris. Attach the hoop. If using a specialty thread, reduce the speed on your machine to about 600 stitches per minute. A spool holder also helps keep the thread from tangling as much. If using regular 40 weight embroidery thread, a 75/11 needle works well. Place one piece of Water Soluble topping over the stitch field.
Stitch the design.
Step 7:
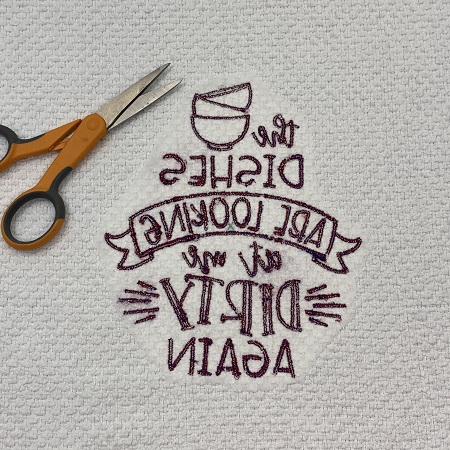
Remove the hoop from the machine. Remove the towel from the hoop. Tear away the Water Soluble topping from the design. Use the white honeycomb tip on a Fix-a-Seam seam ripper to remove the topping in small areas. Trim the excess stabilizer from the back of the design leaving about a 1/2" margin. Trim long threads if needed.
Step 8:
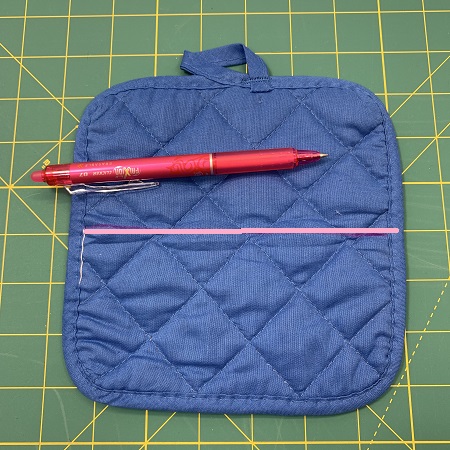
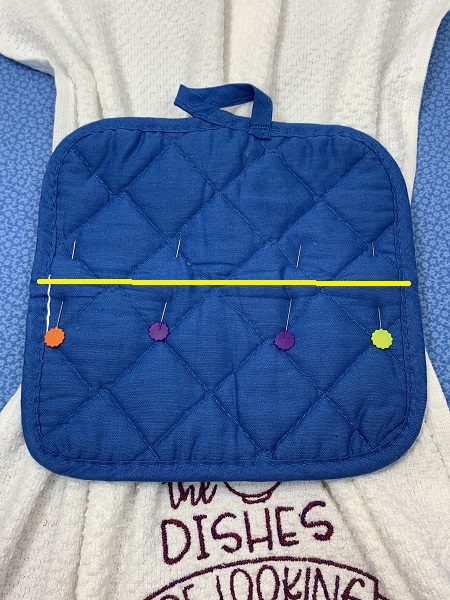
Potholder Topper: Fold the potholder in half. Draw a line on the center with a fabric pen. Measure the width of the potholder.
Step 9:
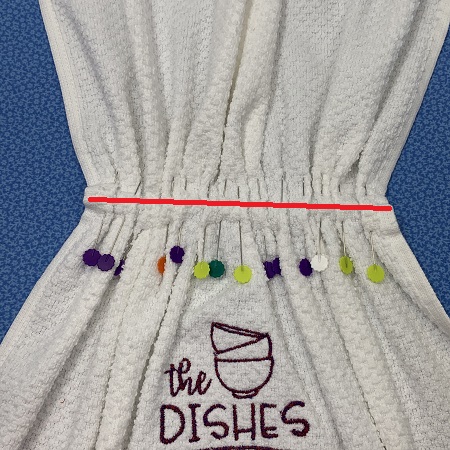
Lay the kitchen towel on a flat surface with the right side up. Gather in the center of the kitchen towel so that it matches the width of the potholder. I made small pleats starting from each side and working toward the center.
Step 10:
Lay the potholder on top of the towel with the wrong side facing you. Match the center lines on the towel and potholders. Make sure that the loop on the potholder is at the top. If the loop is in a corner, fold the potholder at a diagonal.
Attach the potholder to the towel. Sew a seam on the marked line on the potholder. Sew the seam again to reinforce the stitch line. Remember to reinforce the stitching at the beginning and end of each seam.
(Click Image to Enlarge)
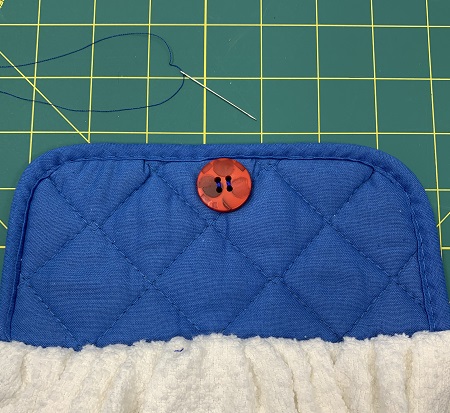
Step 11:
Find the center on the top edge of the potholder. Measure down approximately 1-1.5" for button placement. Mark the spot with a fabric pen. Sew the button on the potholder.
Marisa Littleton is a retired educator with a love for teaching and learning. Interests include machine embroidery, hand embroidery, quilting, cooking, and antiques.