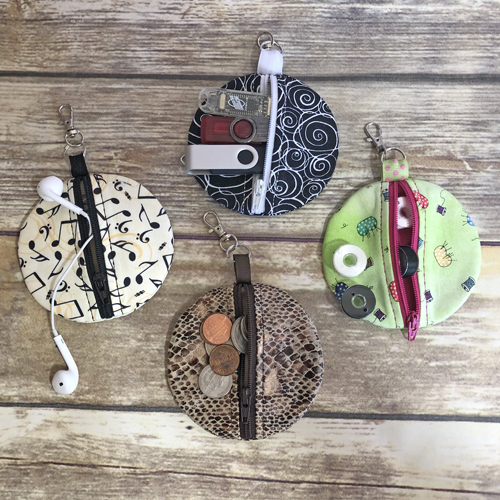
Make these wonderful little zippered pouches in only about 35 minutes each. They are the perfect size for carrying your earbuds, flash drives, bobbins or coins wherever you go. They are great stocking stuffers too!
Though there are 10 color changes in this embroidery file all of them can be stitched in the same color thread. The color stops are there so that you can perform the necessary steps to make the pouch. For each step you will need to remove the hoop and place it on a flat surface to perform the necessary step. Do not unhoop the project until you are instructed to do so. Use a size 12 needle if you are stitching this up in the faux suede fabrics.
Step 1:
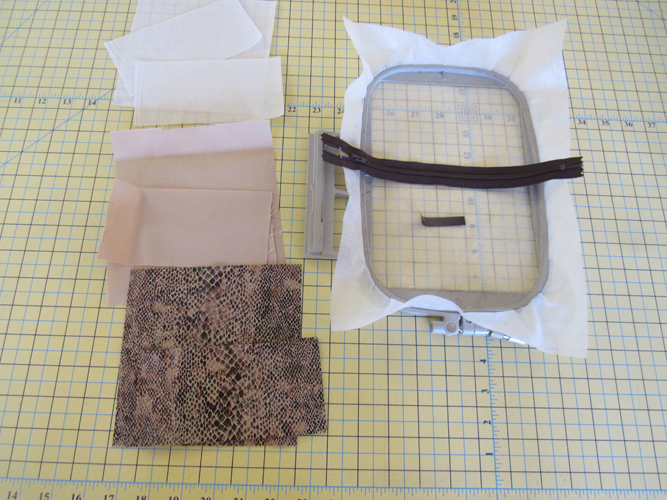
1. For each pouch cut:
a. 1 6” x 6” square each of outer fabric, interfacing, and lining b. 2 6” X 3” rectangles of the outer fabric, interfacing, and lining c. No-show stabilizer to fit your hoop
d. 2” or more of grosgrain ribbon or twill tape
(Click Image to Enlarge)
Step 2:
Following the manufacturer’s instructions fuse the interfacing to the wrong side of the outer fabrics.
(Click Image to Enlarge)
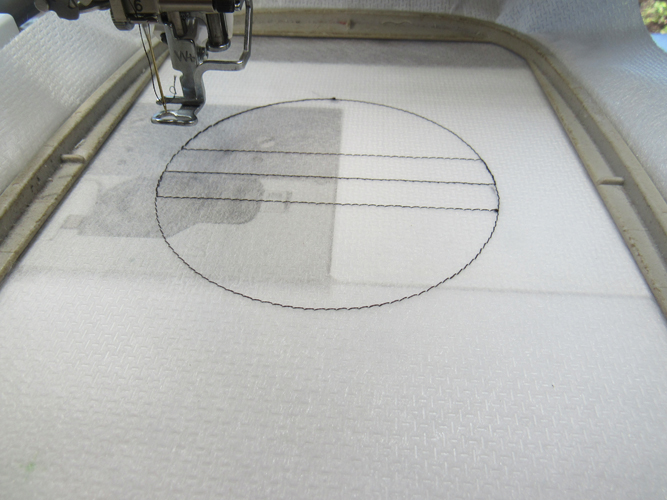
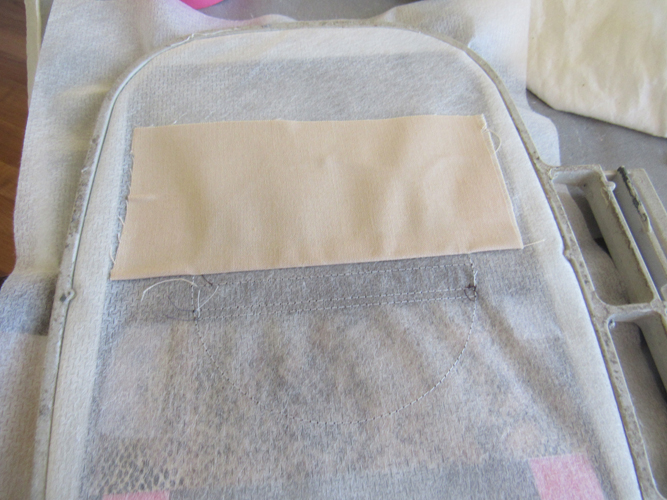
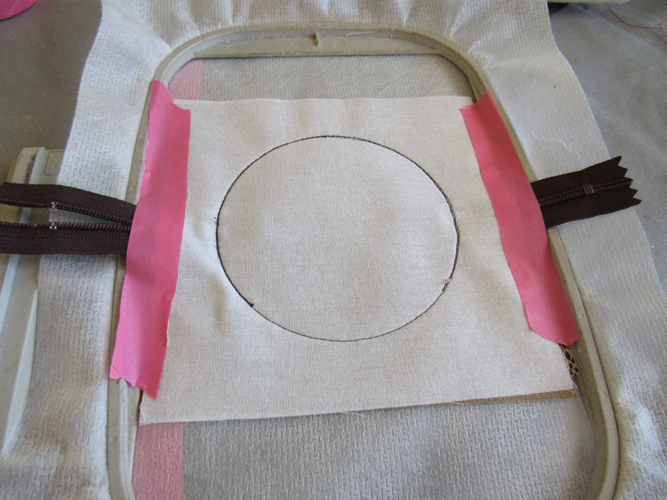
Step 3:
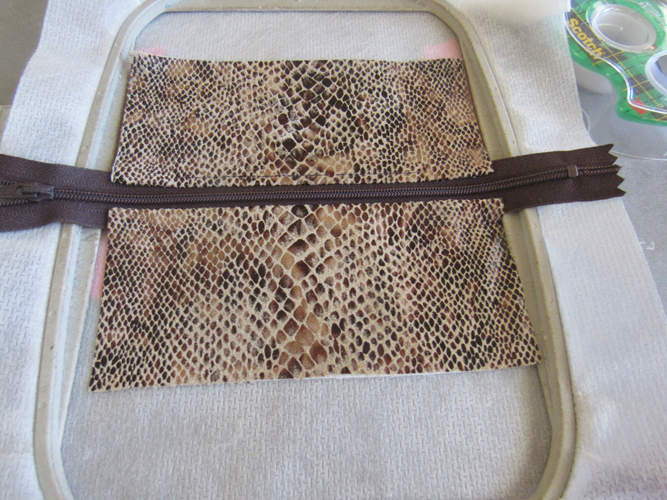
Tautly hoop the stabilizer and run color stop 1 (CS1) as a placement line for the zipper and fabrics.
(Click Image to Enlarge)
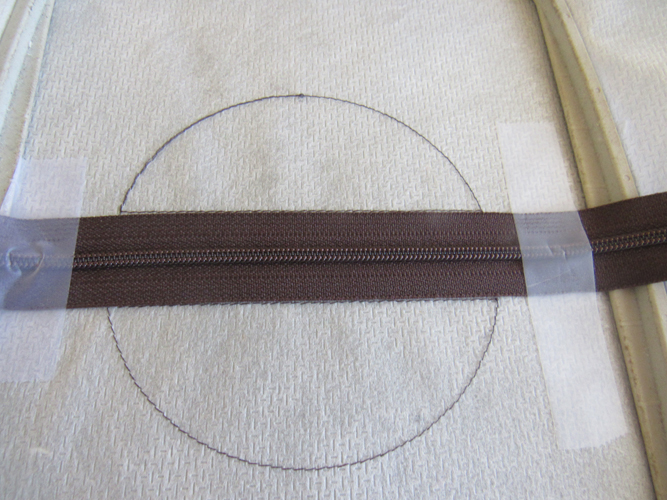
Step 4:
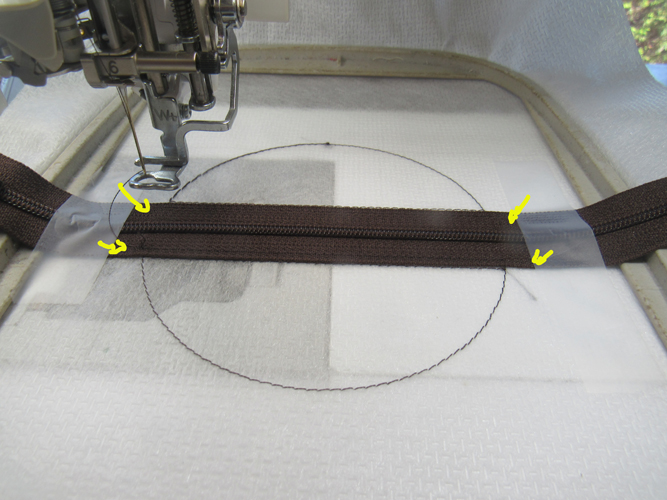
Remove the hoop from the machine and using cellophane tape, tape the zipper, right side up so that both ends of the zipper extend beyond the placement lines. The zipper teeth should be aligned along the center placement line.
(Click Image to Enlarge)
Step 5:
Run CS 2 to tack down the zipper.
(Click Image to Enlarge)
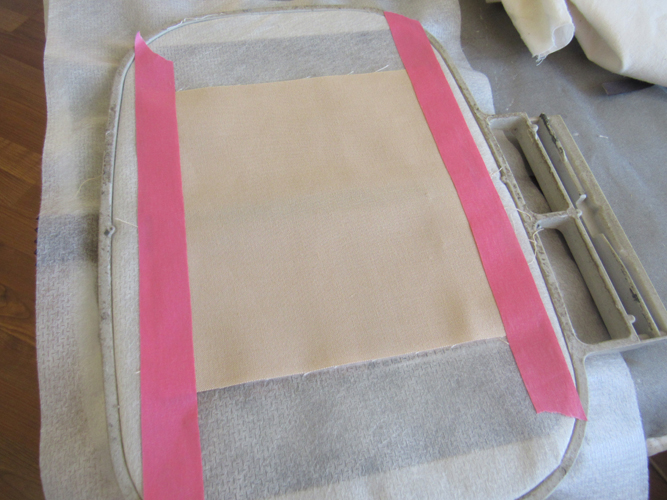
Step 6:
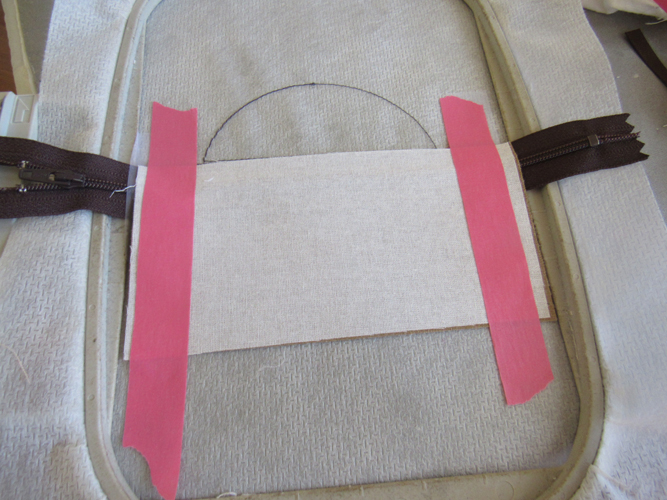
Place the 6” x 3” outer fabric face down aligning the top edge of the fabric with the top edge of the zipper. Tape the fabric down with embroidery tape.
(Click Image to Enlarge)
Step 7:
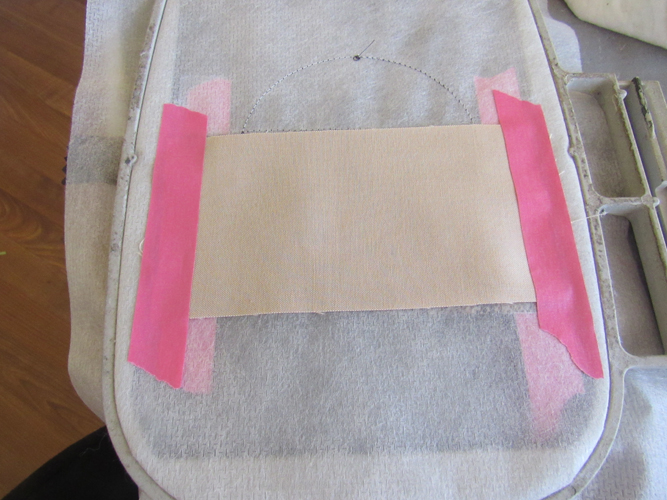
Turn the hoop over and position the top edge of a 6” x 3” lining fabric along the top edge of the zipper and tape down both sides with embroidery tape. If you are using a print fabric for the lining tape it right side down.
(Click Image to Enlarge)
Step 8:
Run CS 3 to seam the fabrics to the zipper.
(Click Image to Enlarge)
Step 9:
Remove the tape from the lining fabric, spray it with a little adhesive and fold it up towards the top of the hoop.
(Click Image to Enlarge)
Step 10:
Turn the hoop right side up, remove the tape, spray the back of the outer fabric with adhesive spray and push the fabric up towards the top of the hoop.
(Click Image to Enlarge)
Step 11:
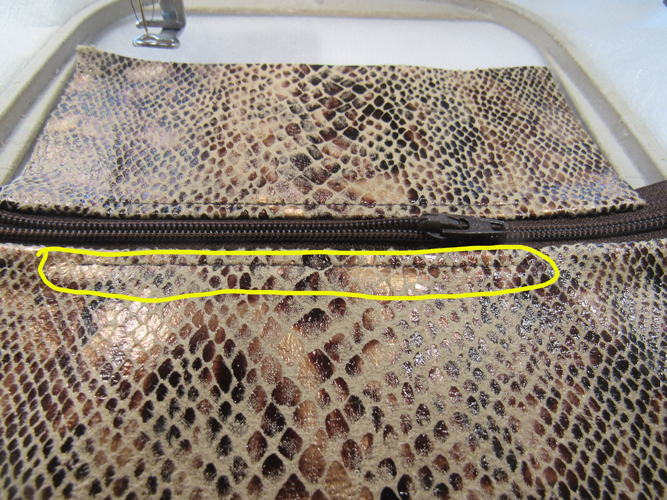
Run CS 4 to topstitch these fabrics.
(Click Image to Enlarge)
Step 12:
Align the top edge of the second 6” x 3” outer fabric, face down, with the bottom of the zipper and tape into place with the embroidery tape.
(Click Image to Enlarge)
Step 13:
Turn the hoop over and place the 2nd 6” x 3” lining fabric, aligning the top edge of the fabric with the bottom edge of the zipper, and tape into place.
(Click Image to Enlarge)
Step 14:
Run CS 5 to seam the fabrics.
(Click Image to Enlarge)
Step 15:
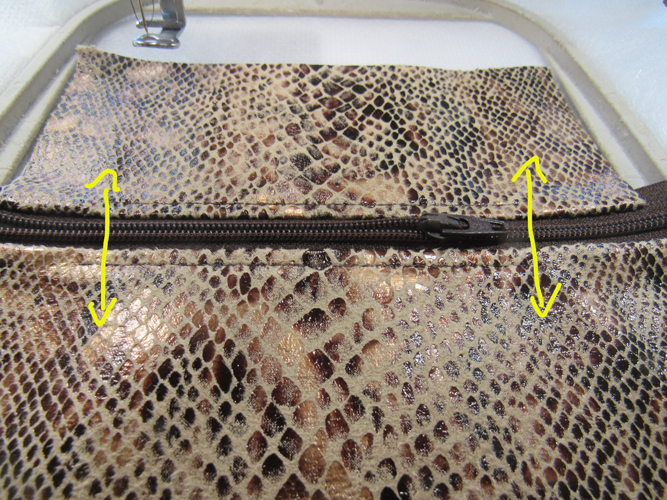
Remove the tape, spray adhesive on the back of the outer fabric and push it down over the stabilizer towards the bottom of the hoop. Repeat this with the lining fabric on the back of the hoop.
(Click Image to Enlarge)
Step 16:
Run CS 6 to topstitch through the fabrics.
(Click Image to Enlarge)
Step 17:
Open the zipper about three quarters of the way down between the top stitch lines. You want it far enough in from the right side edge so that the presser foot will not hit it as it comes around that curve on the final stitching, but open enough so that you will access to it when you want to turn the bag.
(Click Image to Enlarge)
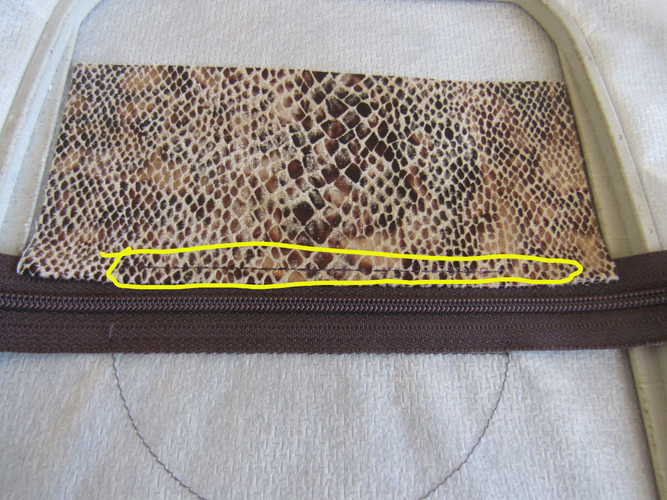
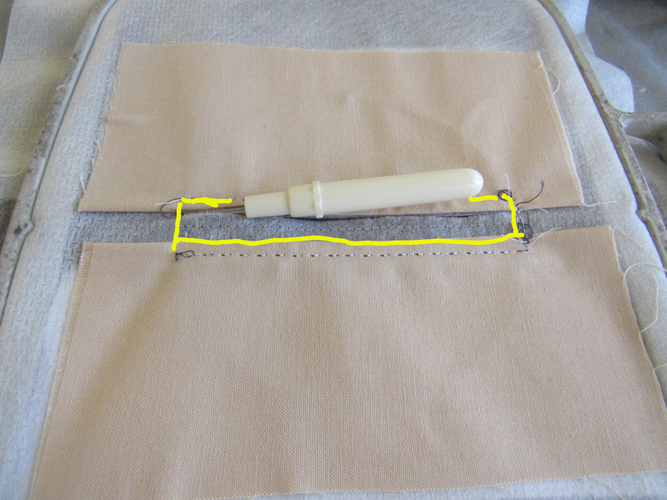
Step 18:
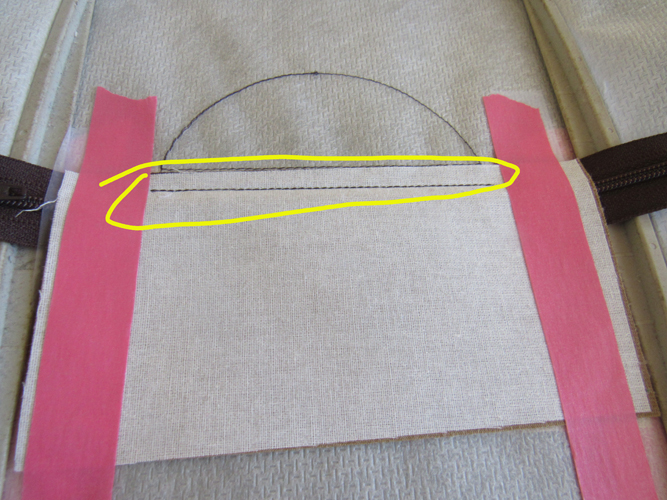
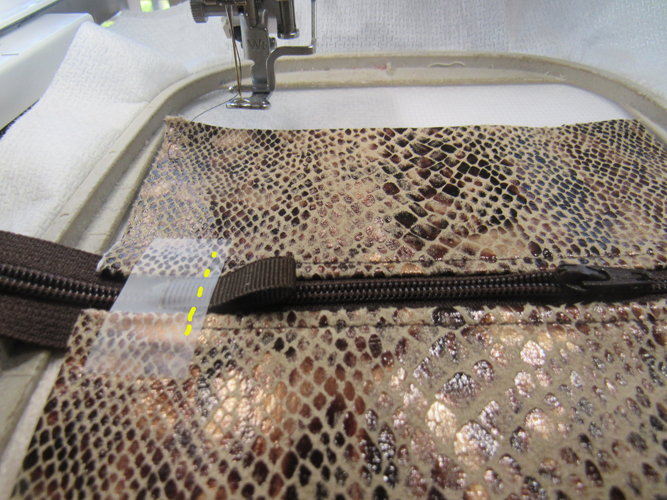
Run CS 7, as indicated by the yellow dashes. This is a placement line for the ribbon. Fold the ribbon in half to form a loop. Place the raw edges of the ribbon ¼” to the left of the placement line and tape down with cellophane tape. Run CS 8, also as indicated by the yellow dashes to tack the loop into place. Remove the cellophane tape.
(Click Image to Enlarge)
Step 19:
With a seam ripper or small scissors remove the stabilizer behind the zipper on the back of the hoop. Be sure to not cut your zipper, just cut the stabilizer.
(Click Image to Enlarge)
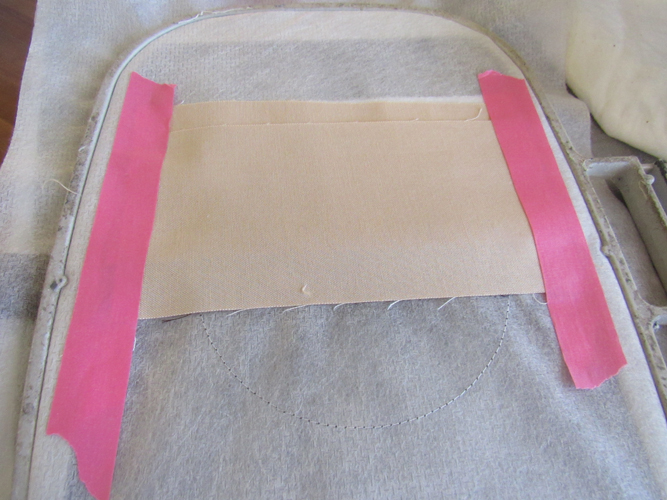
Step 20:
Place the 6” x 6” outer fabric face down over the pouch on the front of the hoop. Tape into place and run CS 9 to tack it down.
(Click Image to Enlarge)
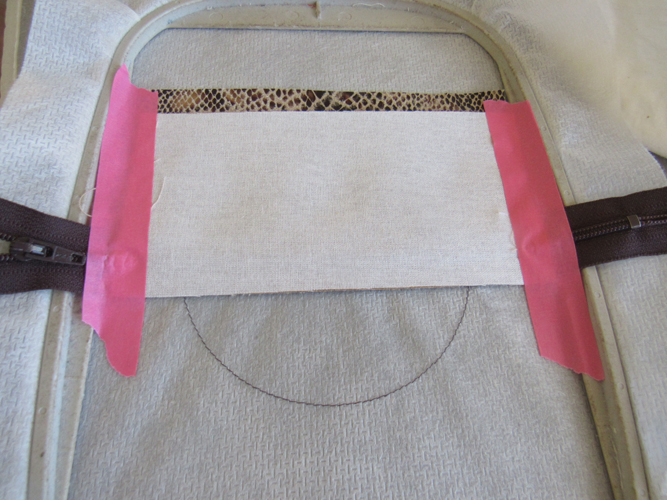
Step 21:
Turn the hoop over, tape the lining face down over the project on the back of the hoop.
(Click Image to Enlarge)
Step 22:
Run CS 10 to stitch the final seam.
(Click Image to Enlarge)
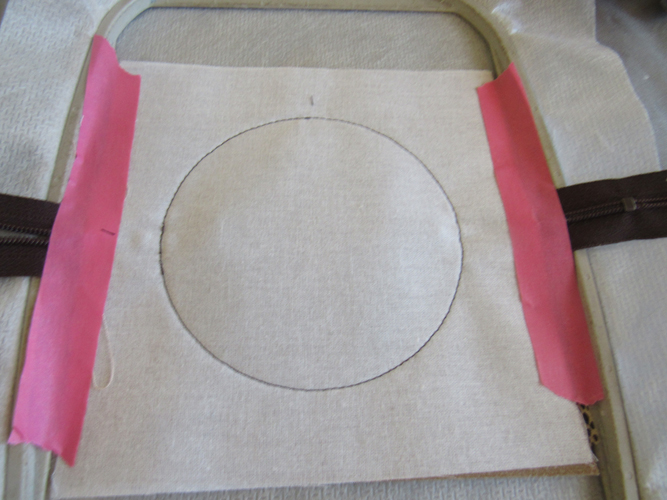
Step 23:
Remove the project from the hoop. Cut a ½” seam allowance across the opening left in the final seam and ¼” seam allowance around the rest of the circle.
(Click Image to Enlarge)
Step 24:
You only need the lining fabrics to be ½” seam allowance across the opening, so you can lift the two lining fabrics and trim the outer fabrics and stabilizer to ¼” behind the lining fabrics.
(Click Image to Enlarge)
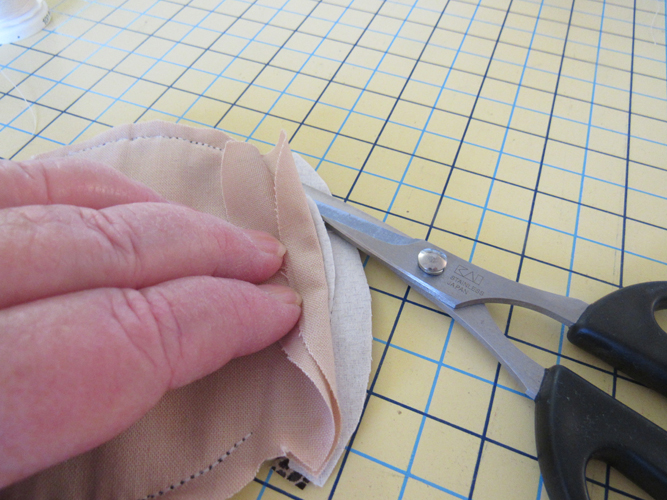
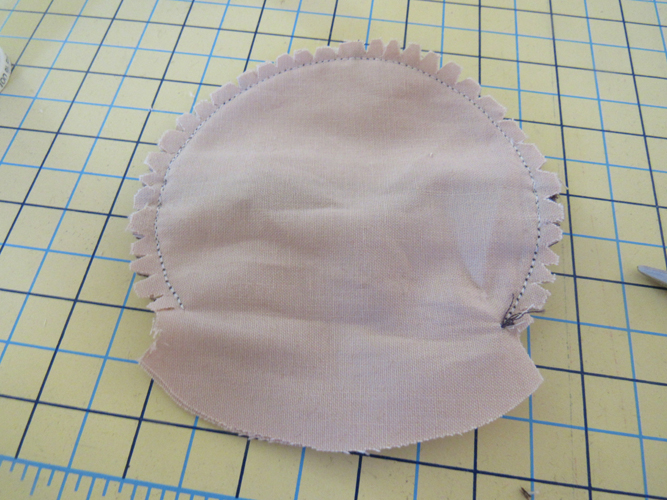
Step 25:
Cut notches around the circle so that the bag will turn nicely when it’s time to do so.
(Click Image to Enlarge)
Step 26:
Turn the bag through the opening so that the lining side is out.
(Click Image to Enlarge)
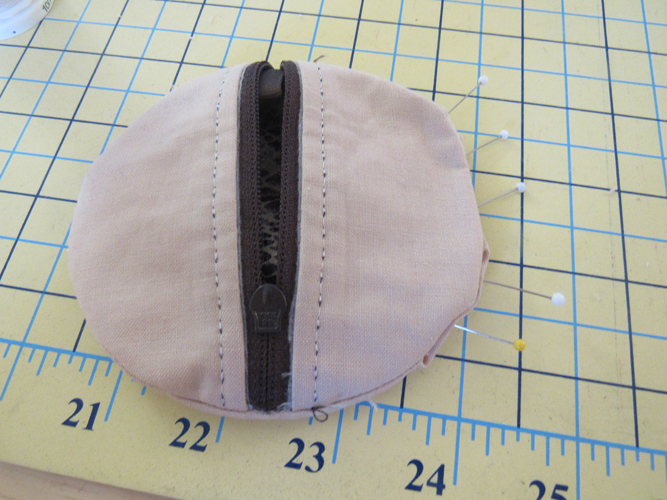
Step 27:
Turn under the lining seam allowances across the opening, pin and whip stitch the lining closed. These do not have to be beautiful stitches as they will not be seen again.
(Click Image to Enlarge)
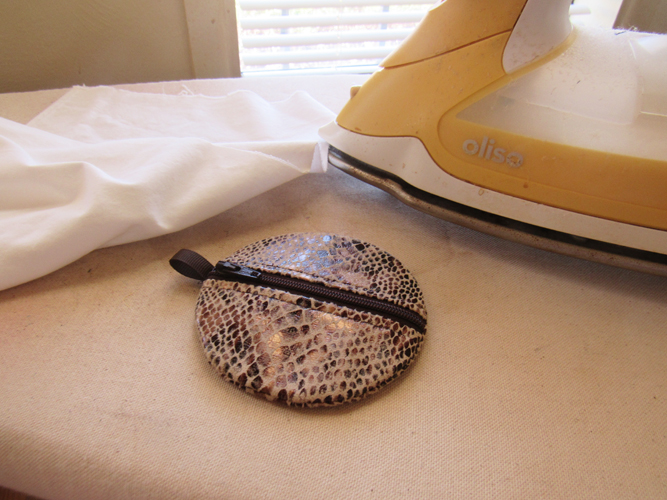
Step 28:
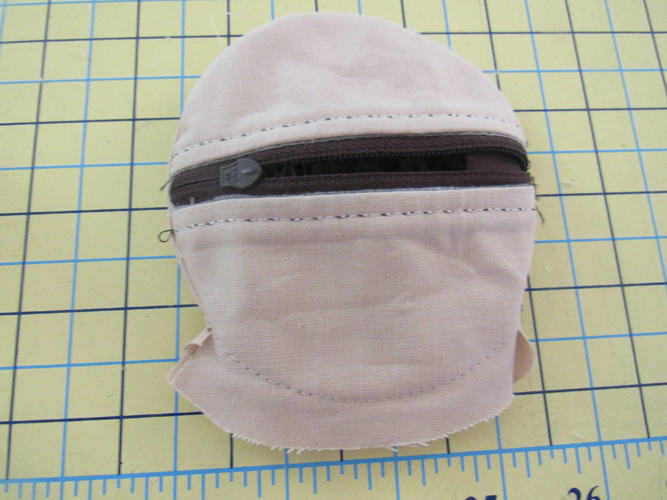
Turn the pouch right side out through the zipper. Press the pouch for a smooth finish. Use a pressing cloth if you used faux suede fabric.
(Click Image to Enlarge)
Step 29:
Attach a split ring and lobster clasp as desired. Make up several more to keep your essential items handy.
Award winning Digitizer, Embroidery Educator, Author and a Consultant to the Industry, Pat Williams has 30 years of experience in the embroidery industry. Pat has won multiple awards for her digitizing expertise including the 2007 Impressions Awards Grand Championship, Best of Show as well as the 1st and 2nd Place Awards. Pat’s love of digitizing has afforded her the opportunity to write numerous articles for Impressions magazine in the United States and Images Magazine in Europe. In 2001 Pat was named “Embroidery Educator of the Year.” For many years Pat taught digitizing seminars at the ISS Shows in Long Beach, CA and for Compucon software. She now resides in Tucson, AZ.