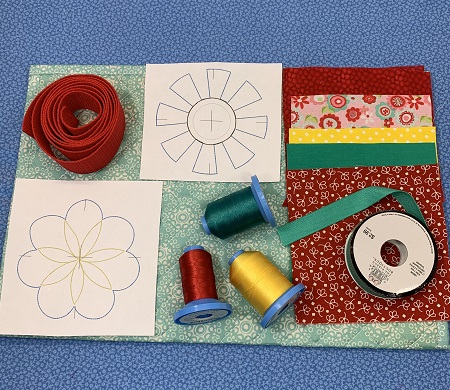
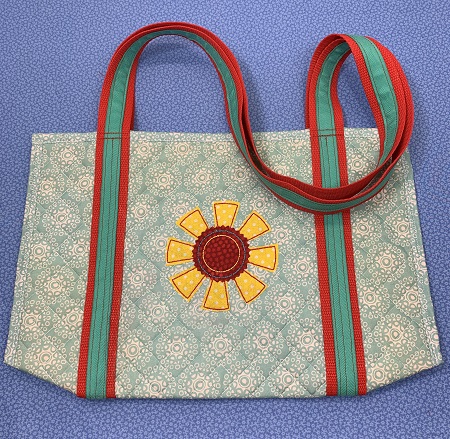
A handy carry-all for on-the-go days. Crafty cut raw edge flowers are appliqued on a placemat bag. The project combines machine embroidery with basic sewing skills. Craft pattern scissors or pinking shears are used on the raw edges of flower parts before they are appliqued. Design Technique: Crafty cut applique. Hoop Size: 4x4 or larger. Fabric: Quilted cotton commercial placemat. Stitch Count: 3,500 per design. Stabilizer: Tear away. Hooping Method: Floating. Embroidery Needle Size: 90/14. Thread: 40 wt. Robison-Anton Super Brite polyester.
Step 1:
Read the directions before beginning the project. Gather and prepare materials.
Select a quilted placemat that has two pieces of fabric with a layer of batting in between. Iron and lightly starch the fabric pieces. Print out two copies of each design templates. The paper design template is the actual size of the stitch out.
Step 2:
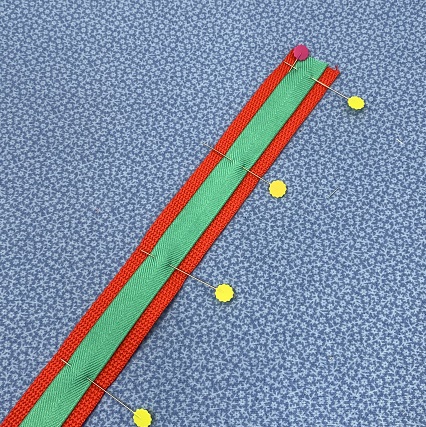
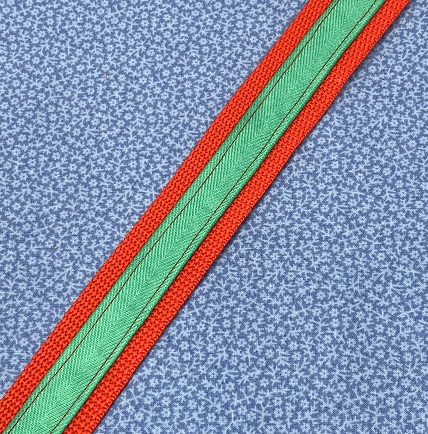
Making the handles. Place the grosgrain ribbon in the center of the webbing. Pin the ribbon in place on the webbing.
Step 3:
Stitch a 1/8" seam on each side of the ribbon using a sewing machine.
Step 4:
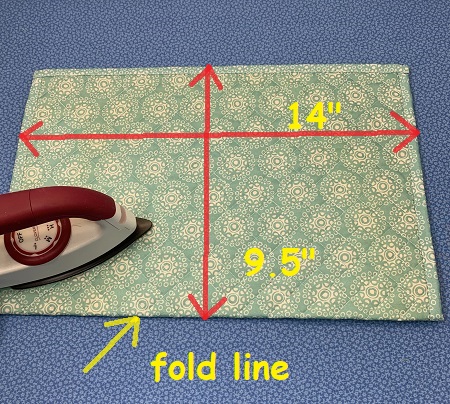
Fold the placement in half. Iron a light crease at the fold.
Step 5:
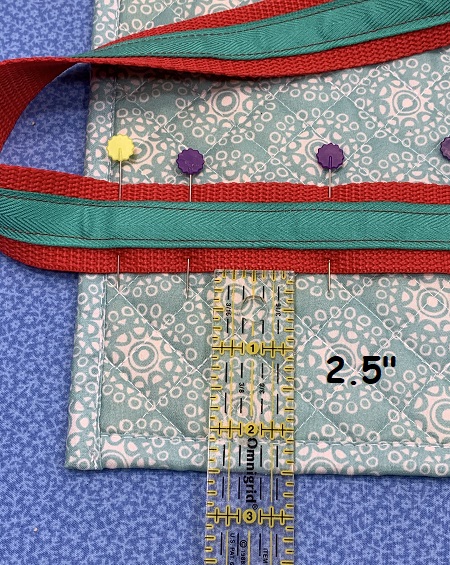
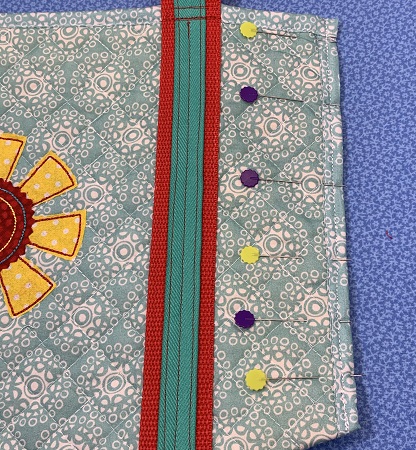
Pick a front and back side of the placemat for the bag. Lay the placemat on a flat surface with front side facing you. Measure 2.5" from the sides and mark with a fabric pen. Starting at the fold line, begin pinning the webbing to the placemat.
(Click Image to Enlarge)
Step 6:
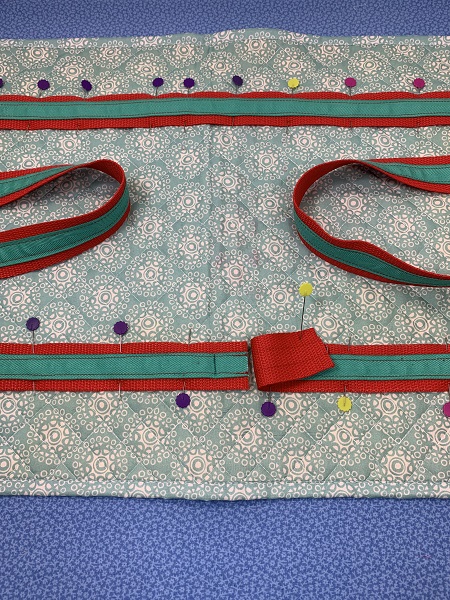
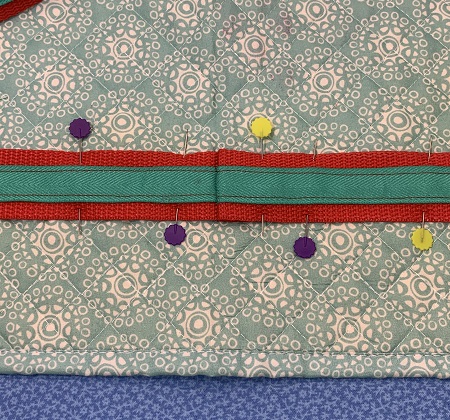
At the top edge of the placemat, watch the direction that the strap handles loop around when you are pinning them in place. Make sure the webbing is not twisted or turned wrong. Make sure that the loops are the same length on each end. Leave about a 1" overlap where the webbing meets on the placemat. Pin the straps in place.
(Click Image to Enlarge)
Step 7:
Turn the 1" raw edge webbing overlap under and pin in place.
Step 8:
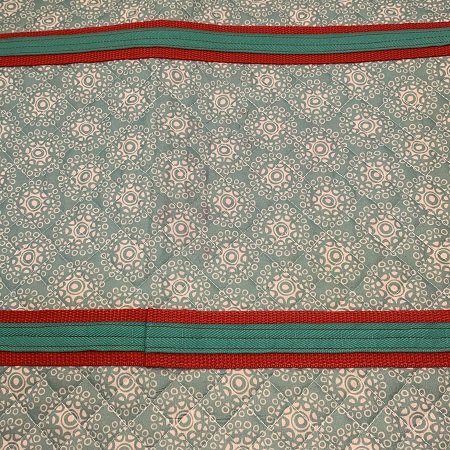
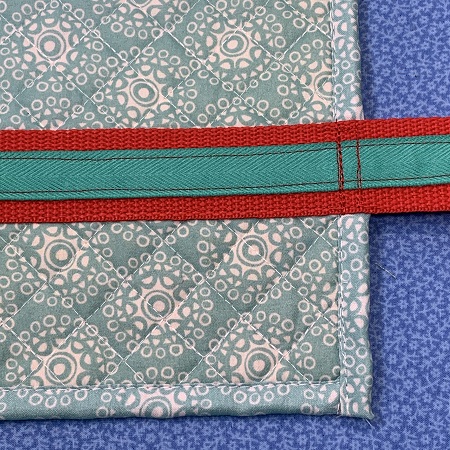
Using a sewing machine, sew a 1/8” to 1/4” seam along both edges of the strap. Reinforce the stitching at the beginning and ending of the seams.
Step 9:
Reinforce the stitching at the top of the bag 3-4 times to give extra support for the handles.
Step 10:
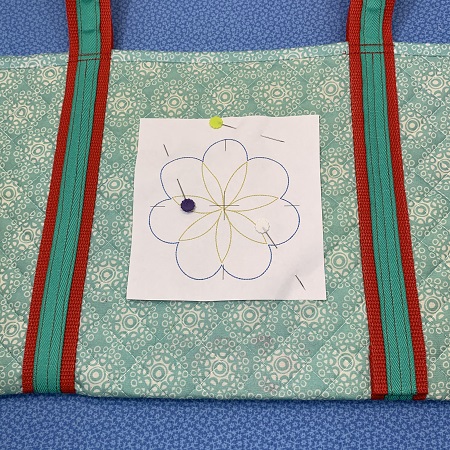
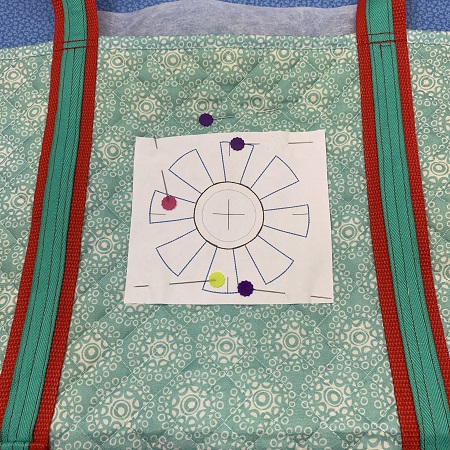
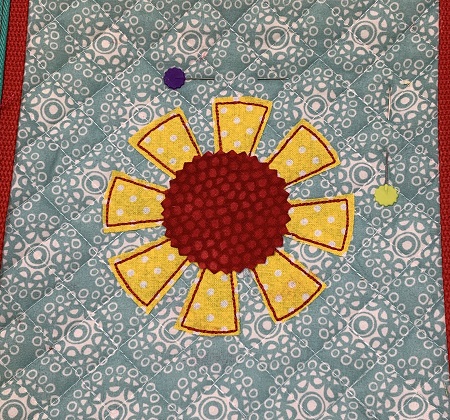
Design Placement: Fold the bag in half. Use the design template for flower 1 as a placement guide on the bag. Pin the template to the bag.
Step 11:
Use the design template for flower 2 as a placement guide on the other side of the bag. Pin the template to the bag.
Step 12:
(Click Image to Enlarge)
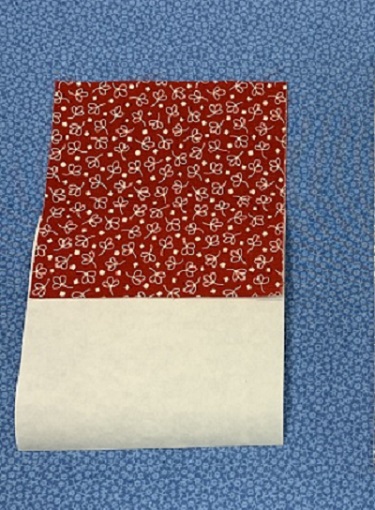
Follow package instructions to apply Heat n Bond ultra to the red and yellow fabric pieces. Heat n Bond ultra is recommended because of the raw edges of the appliqued flowers need more bonding.
Step 13:
Raw Edge Flower 1: Hoop one piece of medium weight tear away stabilizer. Spray a light mist of temporary adhesive on the stabilizer. Float the placemat on the stabilizer. Use grid points on the design template and the hoop to center the placemat on the stabilizer.
Step 14:
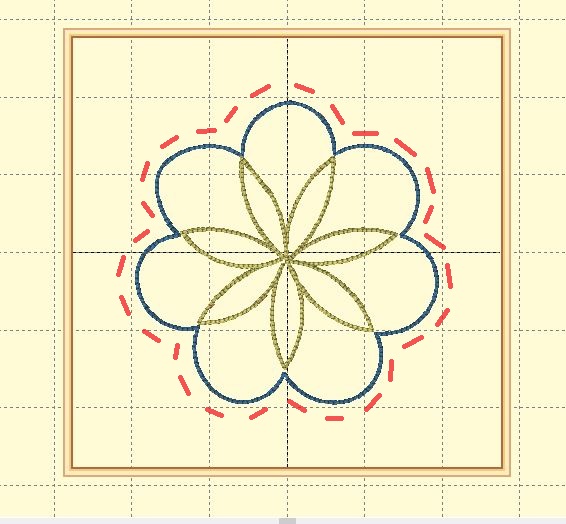
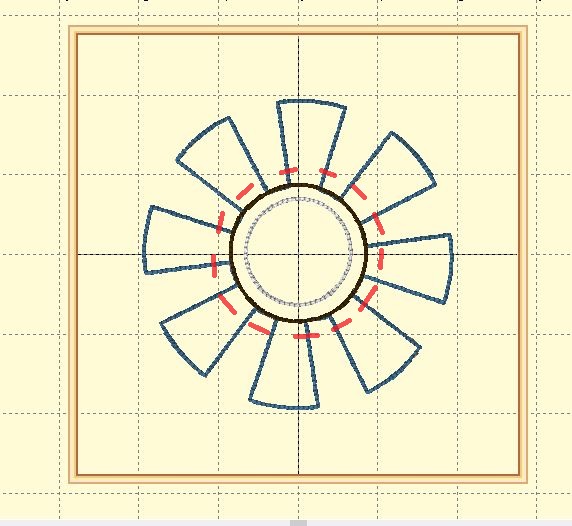
Load flower 1 on the machine. Check the needle, thread, and bobbin before embroidering. Attach the hoop. Stitch color stop 1. Color stop 1 is the placement stitch for the flower petals.
Step 15:
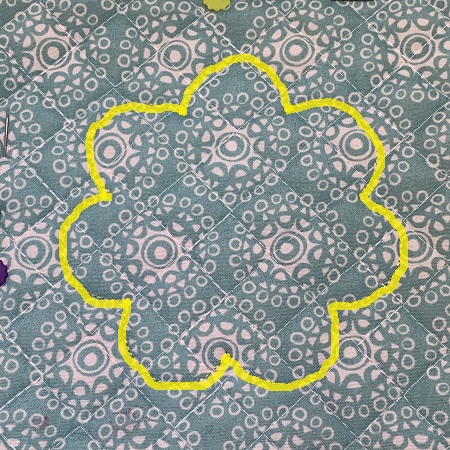
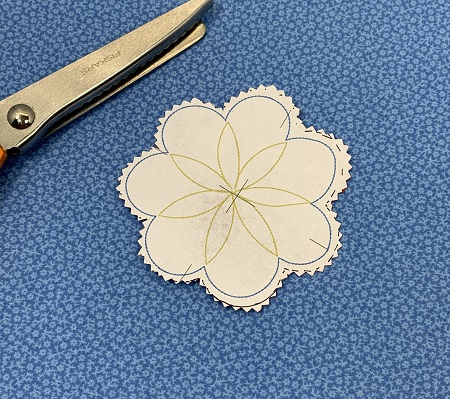
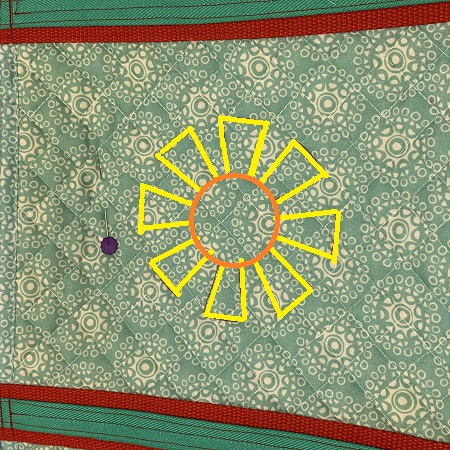
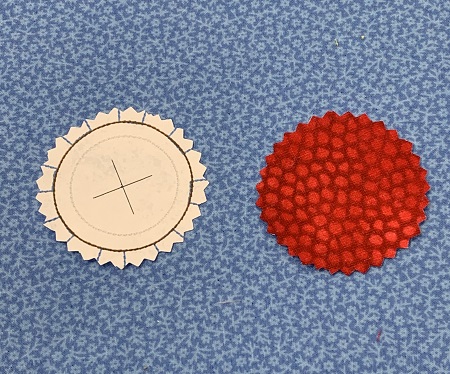
An additional 1/4" is needed when crafty cutting applique pieces. Using a design template for flower 1, add 1/4" around the petals.
(Click Image to Enlarge)
Step 16:
Cut out flower 1 in red fabric using the design template with craft pattern scissors.
Step 17:
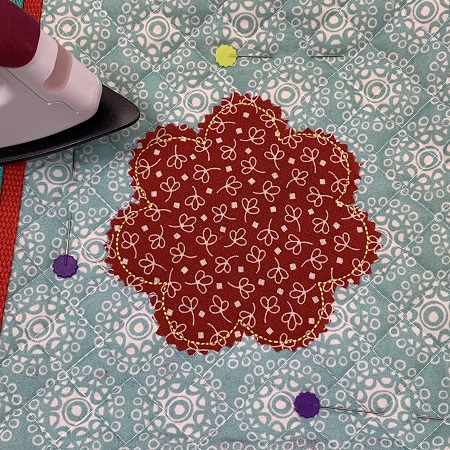
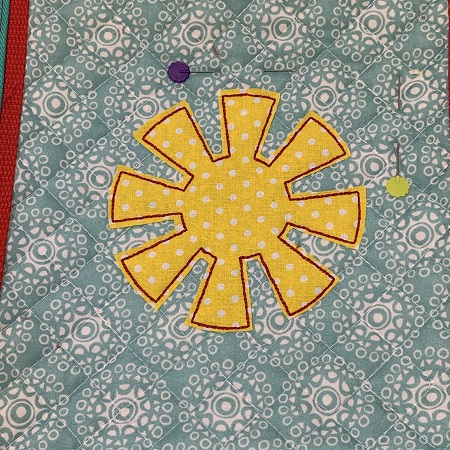
Place the flower shaped fabric on the placement stitches. Stitch color stop 2. Color stop 2 is the tack down stitches. Stitch color stop 3. Color stop 3 is the finishing stitches for the petal edges.
The flower uses a double applique step for the center. Bond the petals to the placemat using a small craft iron before adding the center appliqued piece.
Step 18:
Continue stitching the flower. Color stop 4 is the placement stitches. After color stop 4, place a piece of yellow fabric over the placement stitches. Stitch color stop 5. Color stop 5 is the tack down stitches.
Step 19:
Remove the hoop from the machine. Do not UNHOOP the project. Trim excess fabric from around the stitching. Be careful not to clip any stitches. Attach the hoop to the machine. Stitch color stop 6 which is the finishing stitches.
Step 20:
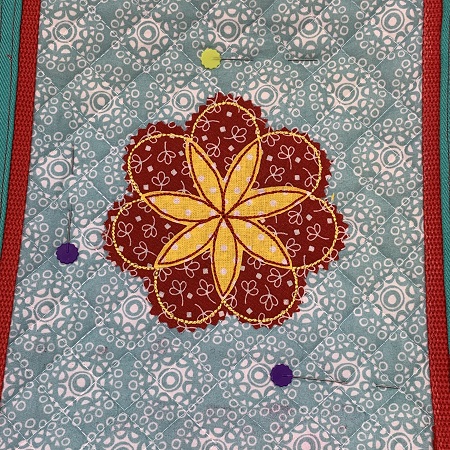
Remove the hoop from the machine. Remove the project from the hoop. Use a small craft iron to bond the yellow center to the red petals.
Tear away the stabilizer from the back. Clip any long threads as needed.
Step 21:
Raw Edge Flower 2: Hoop one piece of medium weight tear away stabilizer. Spray a light mist of temporary adhesive on the stabilizer. Float the placemat on the stabilizer. Use grid points on the design template and the hoop to center the placement on the stabilizer.
Step 22:
Load flower 2 on the machine. Check the needle, thread, and bobbin before embroidering. Attach the hoop. Stitch color stop 1. Color stop 1 is the placement stitch for the flower petals.
Step 23:
Place one piece of yellow fabric over the placement stitches. Stitch color stop 2 to tack down the fabric.
Remove the hoop from the machine. Do not UNHOOP the project. Use applique scissors or snippers to trim excess fabric from around the stitching. Be careful not to clip any stitches. Attach the hoop to the machine. Stitch color stop 3 which is the finishing stitches.
Step 24:
An additional 1/4" is needed when crafty cutting applique pieces. Using a design template for flower 2, add 1/4" around the center.
(Click Image to Enlarge)
Step 25:
Cut out the center for flower 2 in red fabric using the design template with craft pattern scissors.
Step 26:
Attach the hoop. Color stop 4 is the placement stitch for the center. Place the red center over the placement stitches. Color stop 5 will tack down the center. Color stops 6 & 7 are finishing stitches for the center.
Remove the hoop from the machine. Remove the project from the hoop. Use a small craft iron to bond the red center to the yellow petals. Tear away the stabilizer from the back. Clip any long threads as needed.
Step 27:
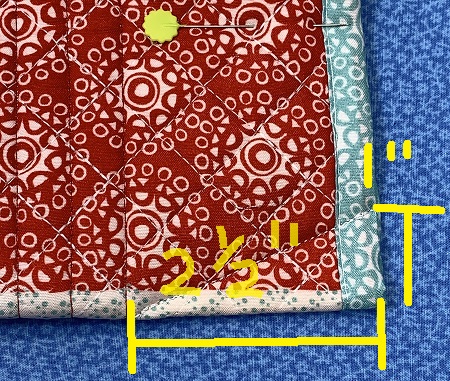
Turn the bag wrong side out. Make sure that the sides and top are even. Pin in place. Measure 1" up from the bottom of the bag on each corner. Next measure over 2.5". Draw a line with a fabric pen.
Using a sewing machine, sew a seam on the line for each corner. This seam will make a small dart at the bottom of the bag. Be sure to reinforce the stitching at the beginning and end of the seam.
Step 28:
Turn the bag right sides out. Pin the sides together. Make sure that the top and sides are even.
(Click Image to Enlarge)
Step 29:
Sew a seam along the sides. Reinforce the stitching at the beginning and end of the seams.
Step 30:
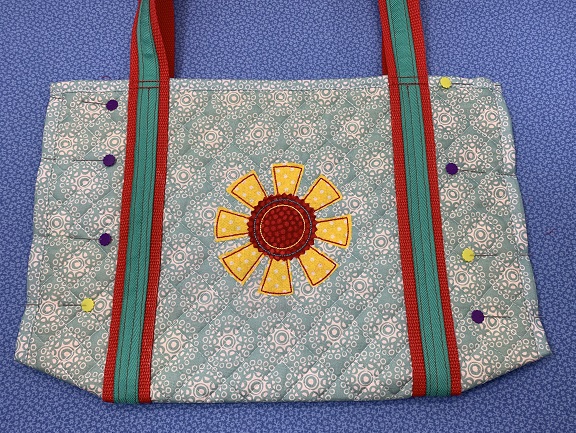
You have completed a Carry-All Bag using crafty cut and double applique techniques. Great job!
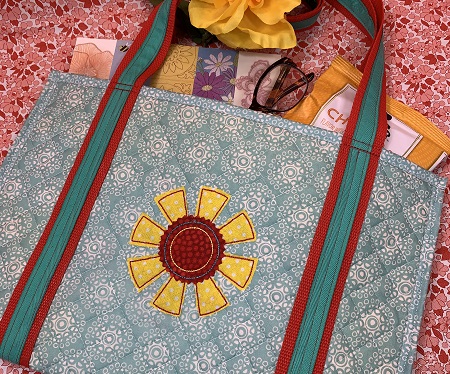
Step 31:
Now you have a handy, dandy Carry-All for those super busy days! Awesome!
Marisa Littleton is a retired educator with a love for teaching and learning. Interests include machine embroidery, hand embroidery, quilting, cooking, and antiques.