| Preface: | Though this project is very easy to do, it does take quite a bit of time to complete. Before beginning, read through the instructions entirely. Two nights of overnight drying are required for the blocking and sealing of the pieces; plan your time accordingly to complete the project. The project can be completed in a long-weekend, but you may wish to spread stitching and construction over several evenings. Also be sure to allow plenty of lead time for any items to arrive that you may need to order.
Assemble all the supplies needed for the project. Immediately read the instructions and assemble and test the LED fog mister to make sure it is working properly; test the tea lights for proper operation, too.
For each design, hoop two layers of fibrous water-soluble stabilizer. Depending on the hoops you have for your machine, you may be able to two or three several designs together in one hooping; just be sure to leave at least ½” between designs.
To stitch, load the appropriate design format for your machine. There are 12 design parts that need to be stitched; some require several repeats of stitching, and a few only one.
You will need to stitch:
15- RBCAU01A- Top
15- RBCAU01B- Bottom
2- RBCAU01C- Circle
5- RBCAU001D- Center Band
3- RBCAU01E- Top Rim A
1- RBCAU01F- Top Rim B
3- RBCAU01G- Top Band A
1- RBCAU01H- Top Band B
3- RBCAU01I- Log
1- RBCAU01J- Flame A
1- RBCAU01K- Flame B
1- RBCAU01L- Flame C
For the instructions the name (top, bottom, circle, log, etc.) will be used instead of the file number, because it is less confusing while reading the instructions. |
Step 1: | Read through the instructions thoroughly before beginning and assemble all the materials needed to complete the project. Everything listed in the project was tested to be sure it would work in the project. Please do not deviate from the materials list, as the results may not be the same. The log flames use a variegated thread—to create the exact colors in the flame, please use the recommended thread. Individual custard bowls are sold at Walmart, as is the clear bowl. The atomizer produces the right amount of mist to rinse out the stabilizer after the pieces is stitched and blocked. The flames purchased were sold on Amazon. The water feature was purchased on Amazon. | 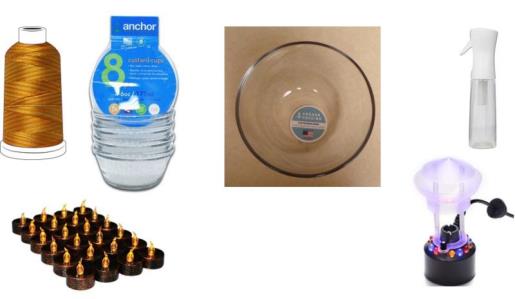 (Click Image to Enlarge) |
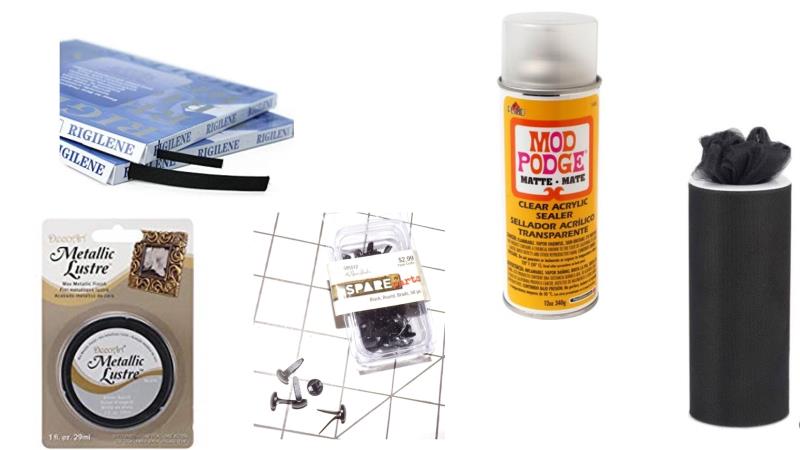
Step 2: | Rigilene boning was purchased in two sizes. Mod Podge spray is water resistant, please use that brand. If the spray is not water resistant, the cauldron may collapse from the mist of the water when the cauldron is used. Black brads hold the cauldron pieces together and the Metallic Luster gives a metal look to the bands. A roll of net was purchased, but bridal tulle could also be used as the backdrop. |  (Click Image to Enlarge) |
Step 3: | All the parts and pieces put together make this vignette. Create more logs if you wish. Add more metal polish if you wish. Be sure to use only battery-operated flameless candles in the logs. |  (Click Image to Enlarge) |
Step 4: | The atomizer turns different colors and adds a wonderful glow to the water and mist pouring out of the atomizer. |  (Click Image to Enlarge) |
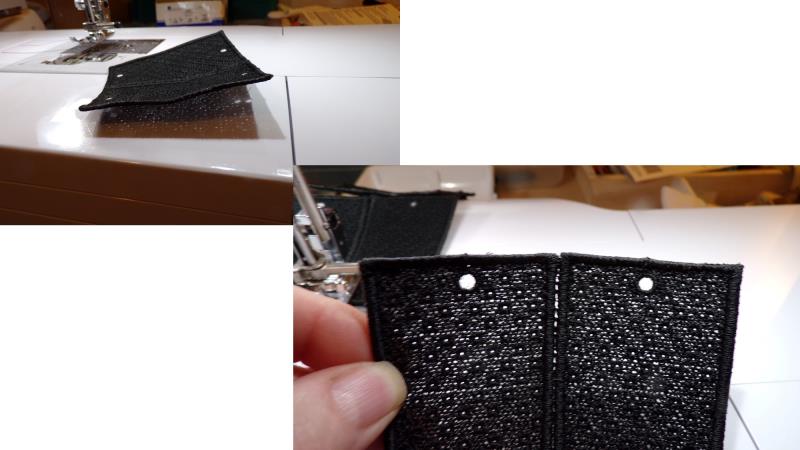
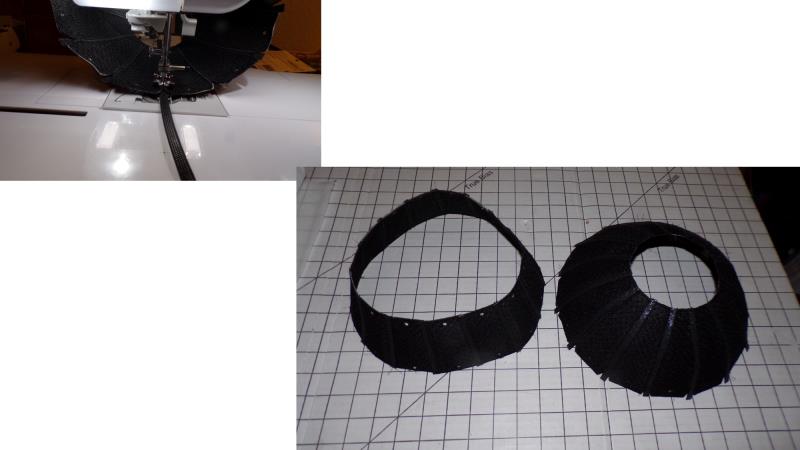
Step 5: | Begin stitching the black cauldron pieces. For each hooping, use two layers of fibrous water-soluble stabilizer. Load the designs on the machine. Load several bobbins with the black bobbin thread, and black thread on the machine for stitching all the black cauldron parts. It is possible to group two or three designs in a hoop—just leave at least ½” between each design. Follow the list in the preface to stitch all 12 designs in the quantities needed. | 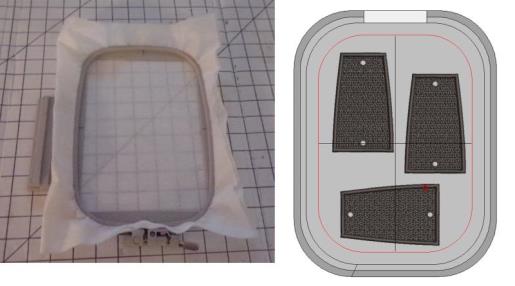 (Click Image to Enlarge) |
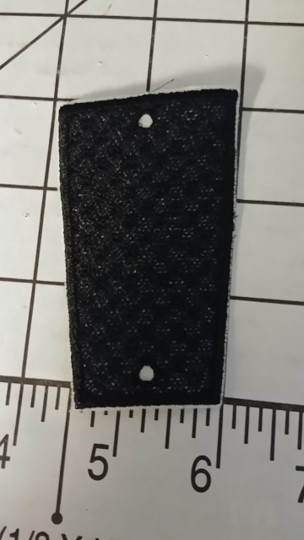
Step 6: |  (Click Image to Enlarge) After each part is stitched, very carefully trim the stabilizer away to within about 1/8” of the outer satin edge—be very careful not to cut into the stitching. The stabilizer is left in the pieces, the pieces blocked, and then the spray bottle used to dissolve the stabilizer. |
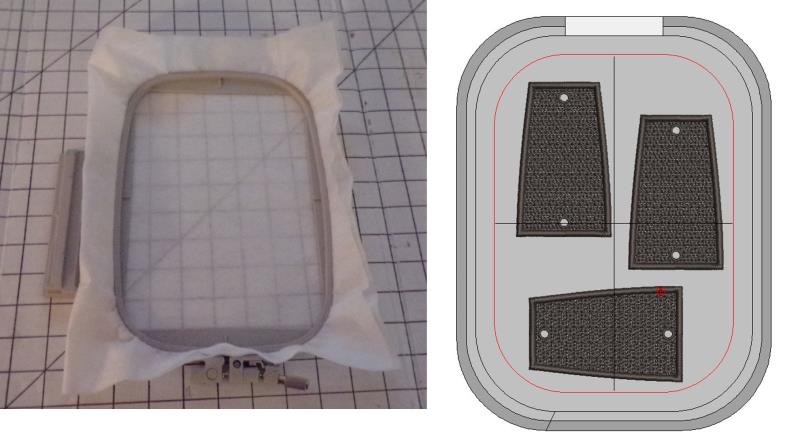
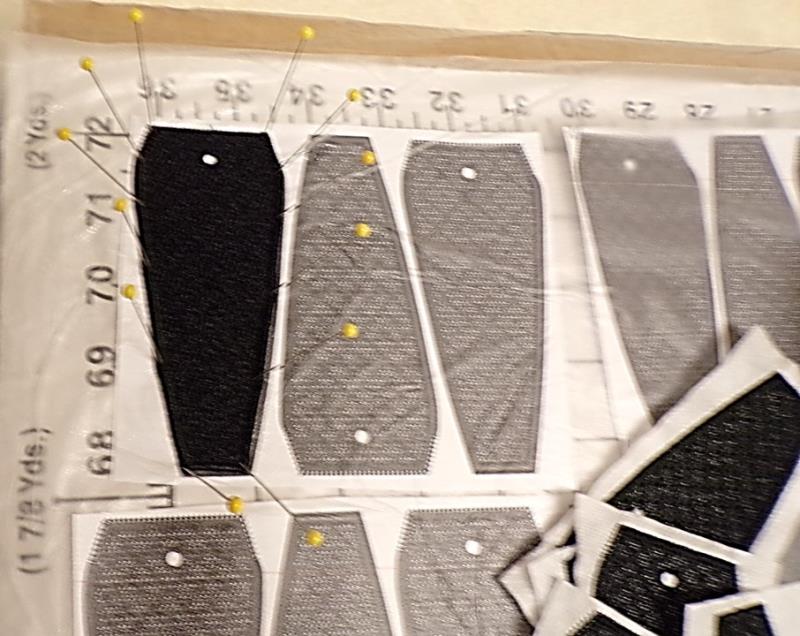
Step 7: | While the pieces are stitching, print out the pattern pieces at 100% or actual size—this is a critical step in the process. The pieces need to fit together for assembly, so the pieces are laid over the corresponding pattern pieces. To do this, print the same number of pattern pieces that correspond to the pieces being stitched. Lay them on an old cutting board. Cover the sheets with a layer of Press and Seal wrap. As the pieces come off the machine, trim away the stabilizer and then pin the piece to the corresponding printed pattern pieces, using the pins to secure. |  (Click Image to Enlarge) |
Step 8: | After all the pieces are blocked in place, fill the spray bottle and mist the pieces just until the stabilizer dissolves—do light sprays and do not soak the pieces. |  (Click Image to Enlarge) |
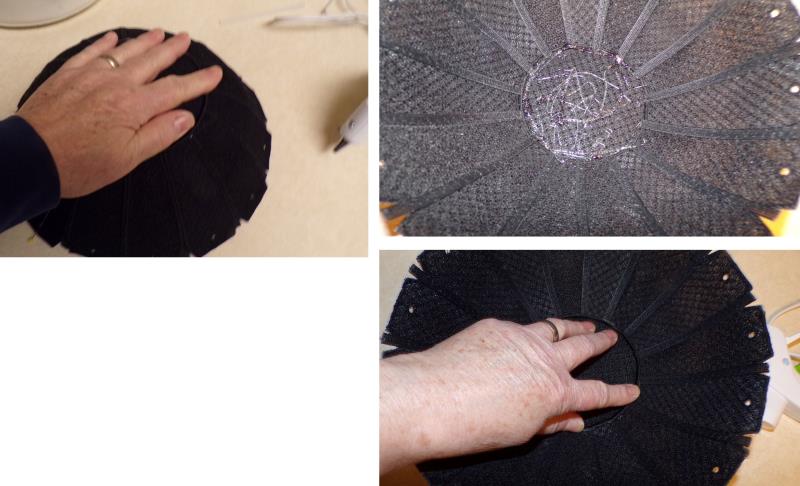
Step 9: | Let the pieces dry completely, preferably overnight. The pieces should be board stiff. | 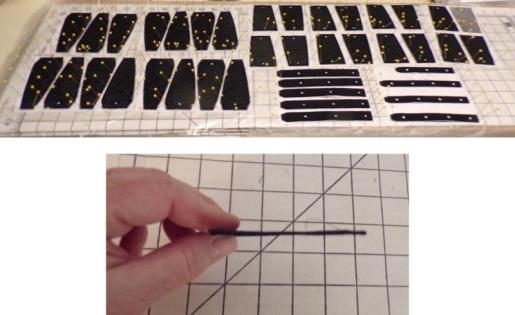 (Click Image to Enlarge) |
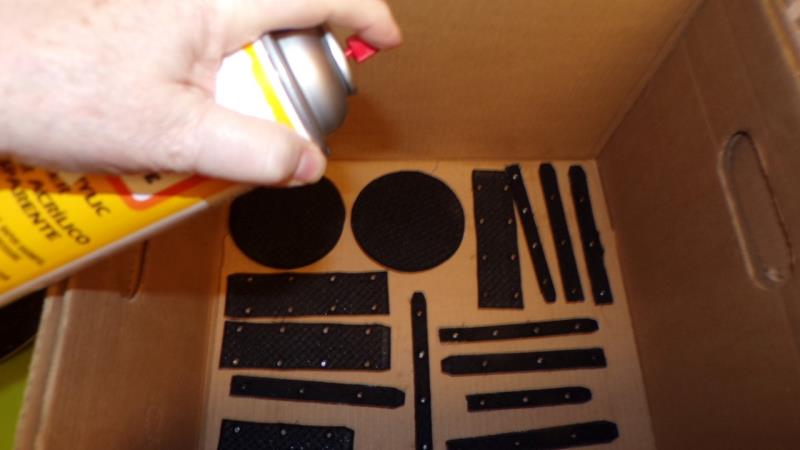
Step 10: | Place the dried pieces in an old box to catch the over spray. Read the directions on the Mod Podge and follow them. Begin with the pieces, right side up, and spray. Let dry. Flip the pieces over and spray again. Let dry. Repeat until the pieces have been sprayed on both sides four times. Let the pieces dry for at least an hour. | 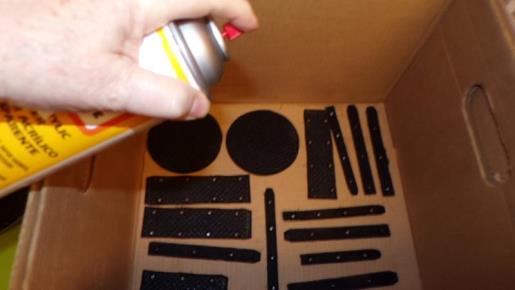 (Click Image to Enlarge) |
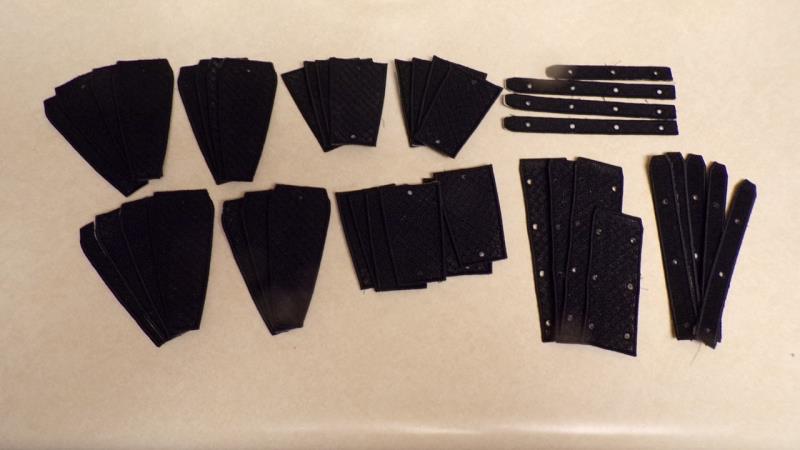
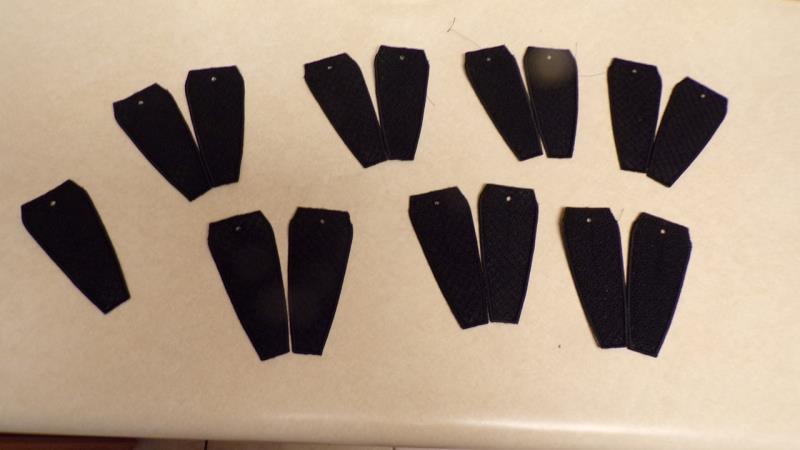
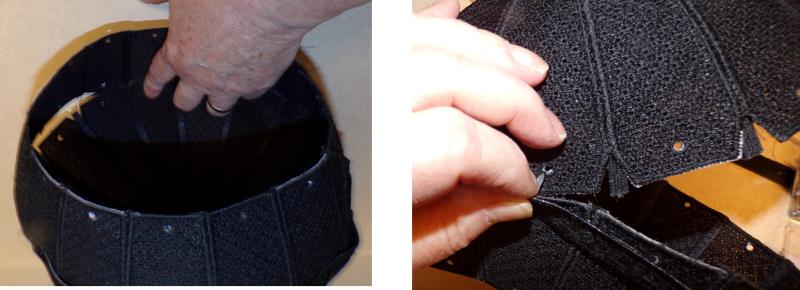
Step 11: | Next will come the assembly. Group all like-kind pieces together (label the piles if necessary so you are grabbing the right ones during the assembly process). | 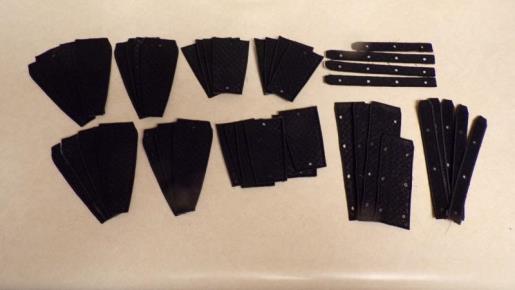 (Click Image to Enlarge) |
Step 12: | The Top and Bottom pieces will be assembled first in pairs, then in quarters, then all halves; boning will be added to the sections before completed top and bottom assembly. |  (Click Image to Enlarge) |
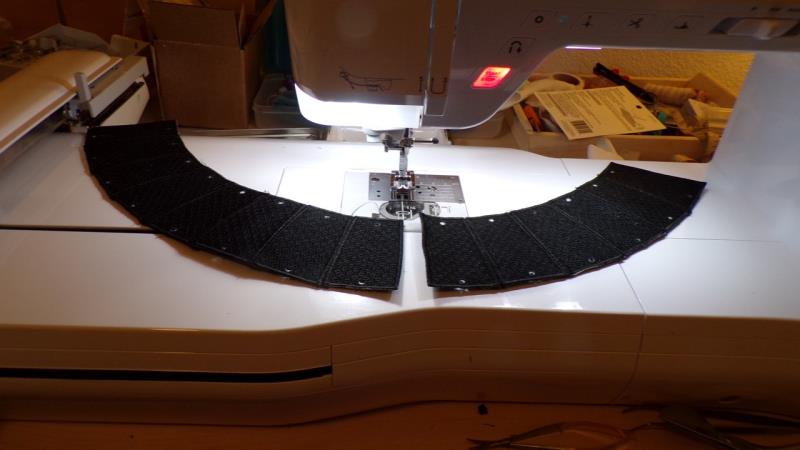
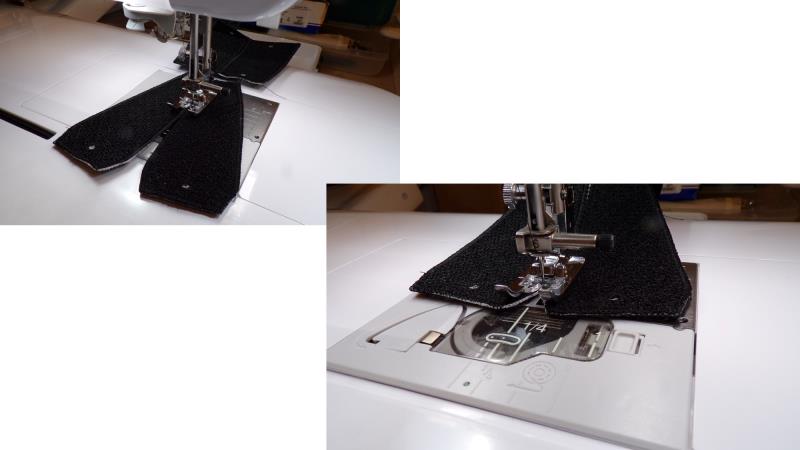
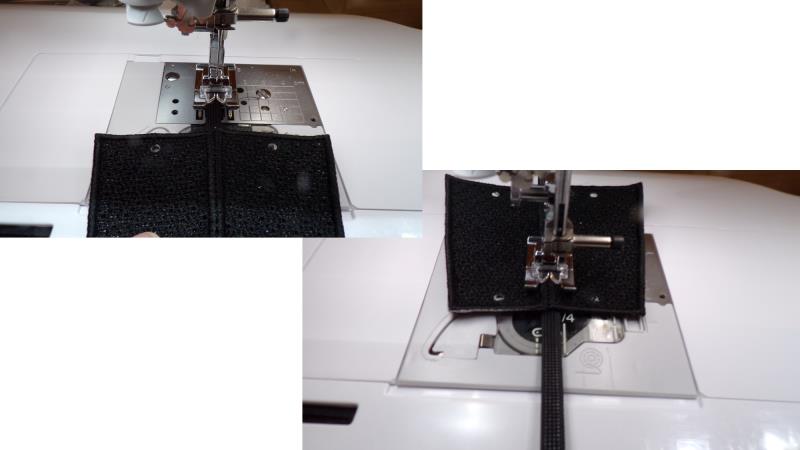
Step 13: | Begin with the Top pieces. Using the same top and bobbin thread, set the machine for a ladder stitch 6m wide and 2.5mm length, slow the machine down, and use a see-through satin foot for better visibility. Working with the pieces right side up, butt the bottom edges (wider end) of the two pieces together. Stitch from the bottom to the top all the while keeping the edges butted together tightly. | 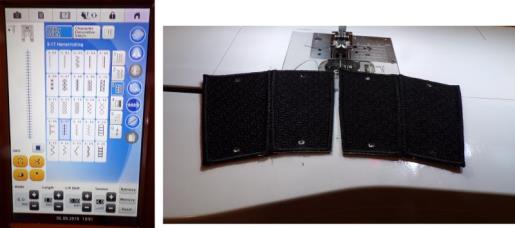 (Click Image to Enlarge) |
Step 14: | Do pairs for both the tops and bottoms. After boning is added then the pairs will be assembled into quarters, and quarters into halves. This photo is to show where you are headed in the stitching process. |  (Click Image to Enlarge) |
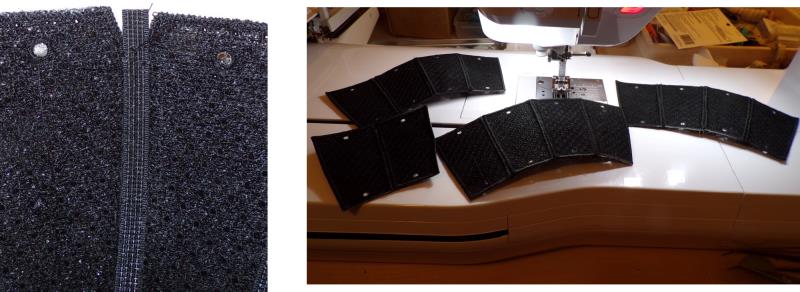
Step 15: | As you stitch, the bottom will start to lift up which actually is the shape of the top of the cauldron being formed. To expedite sewing, use the chaining method of sewing, butting the next two pieces under the presser foot right after the last two are sewn. Try and get the edges butted as close together if possible. If there is a little daylight between the pieces, just be sure all the edges are caught and keep the stitching consistent throughout the assembly so the pieces will fit together during final assembly. | 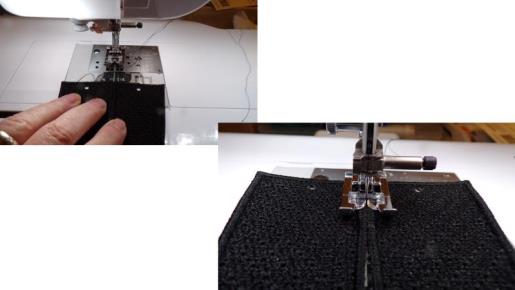 (Click Image to Enlarge) |
Step 16: | Now stitch the Bottom sections together in twos. Begin at the bottom (narrow end) and stitch up toward the top, ending at the bottom section of the V (aligns with the eyelet openings). | 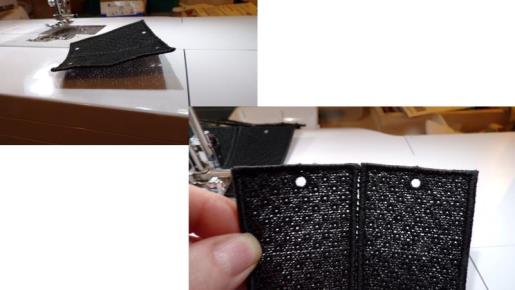 (Click Image to Enlarge) |
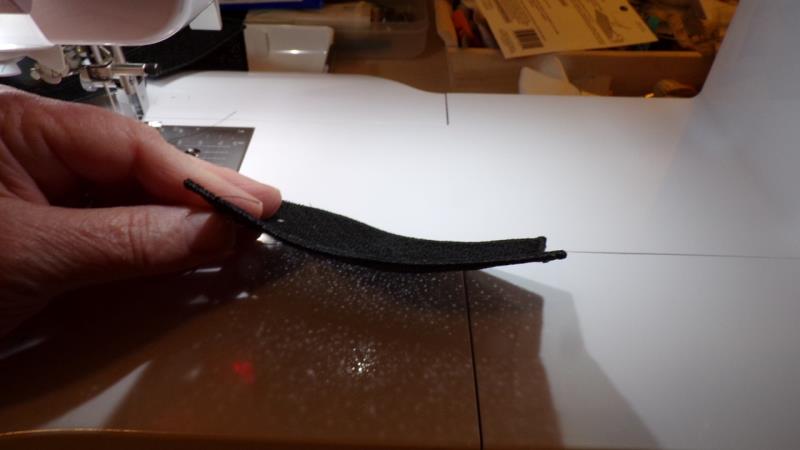
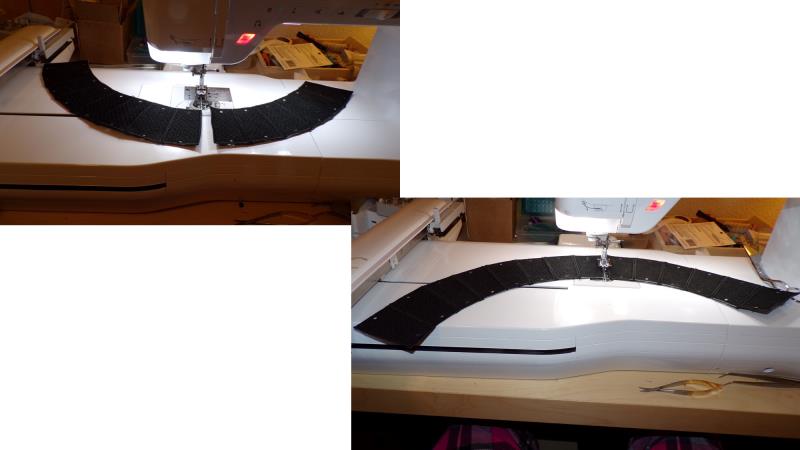
Step 17: | These pieces will develop a deeper curve when stitched together. | 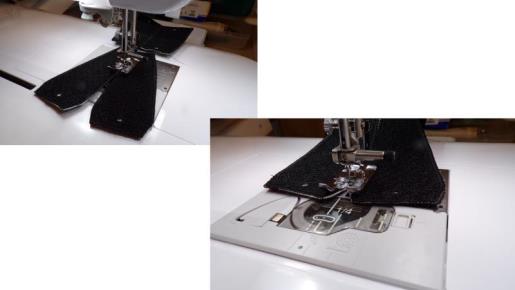 (Click Image to Enlarge) |
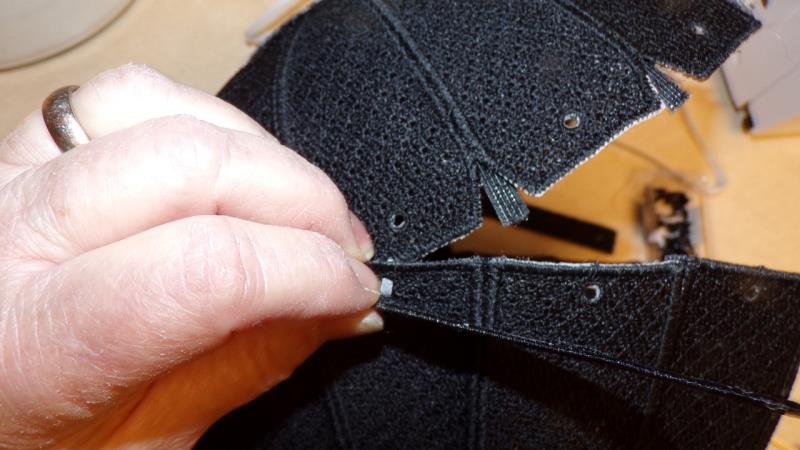
Step 18: | Cut all the chained pieces apart and prepare to add the 6mm boning to the back of the paired pieces—also using the chaining method. |  (Click Image to Enlarge) |
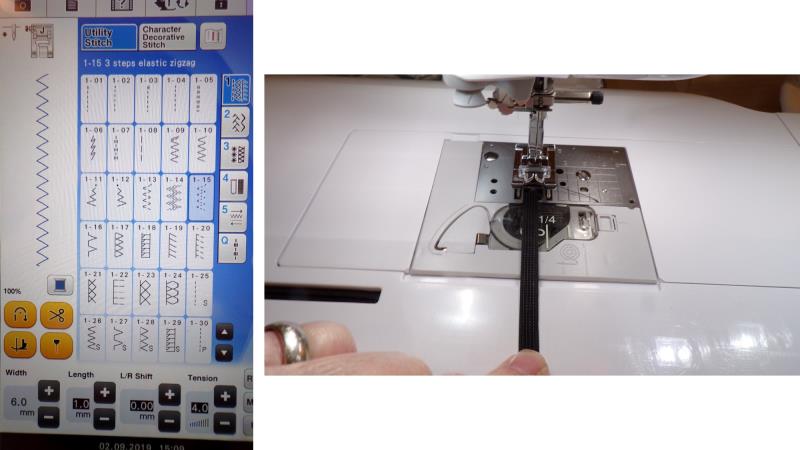
Step 19: | Set the machine up for a triple zig zag stitch, 6mm width, 1.0 mm length. Place the end of the boning under the presser foot and stitch a few stitches to anchor it. | 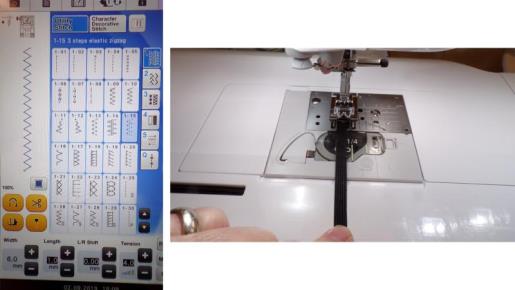 (Click Image to Enlarge) |
Step 20: | Raise the presser foot and working with the pieces right side up, center the seam just sewn over the boning. Stitch over the butted seam, centering and stitching the boning to the underside of all the Top and Bottom paired pieces using the chaining. | 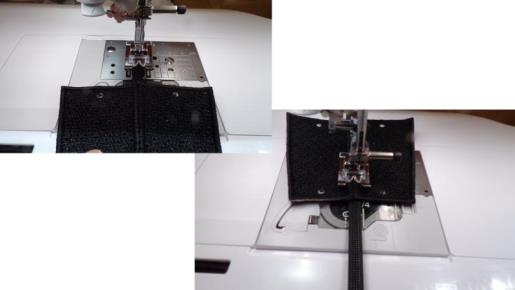 (Click Image to Enlarge) |
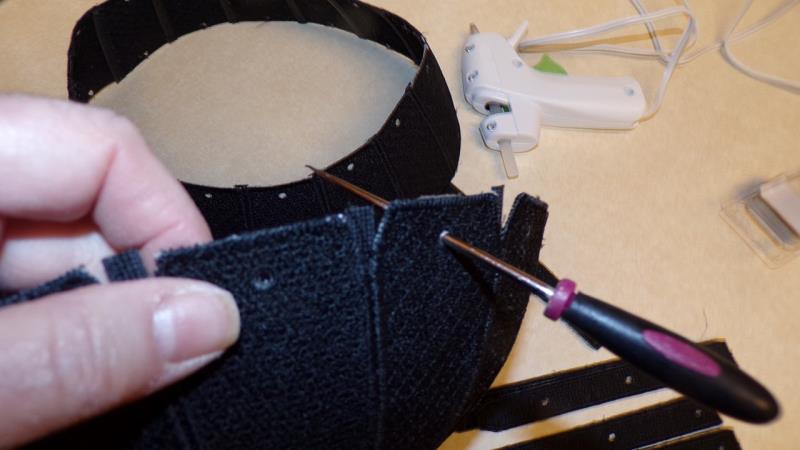
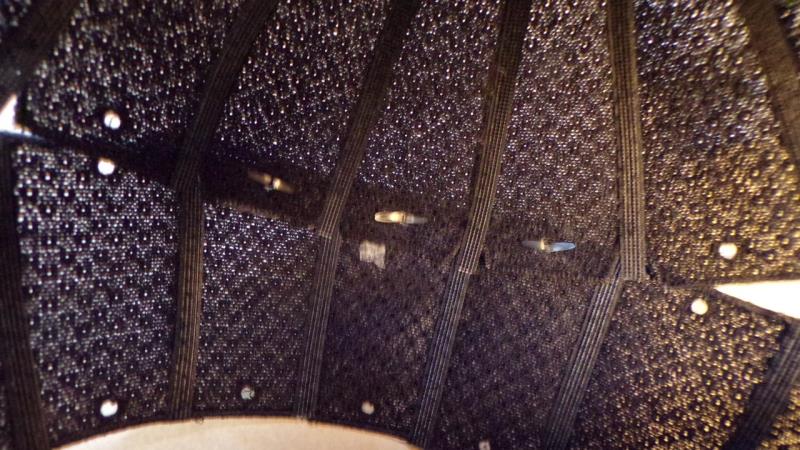
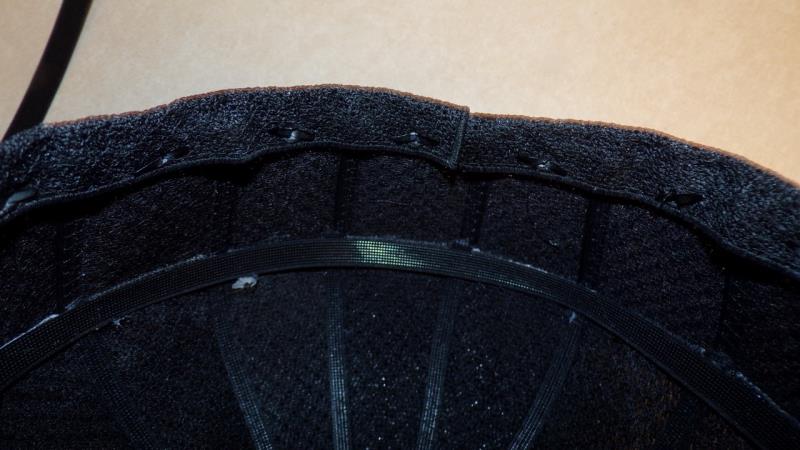
Step 21: | Cut apart all the sections from the boning, then trim the boning of the Top sections even with the top and bottom satin stitching, | 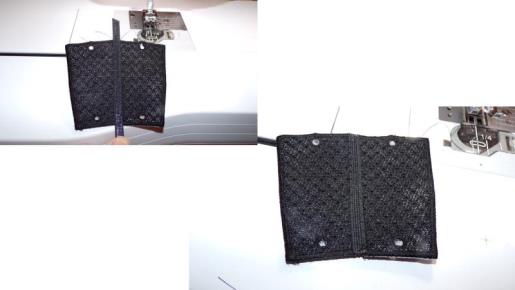 (Click Image to Enlarge) |
Step 22: | and the Bottom sections even with the satin stitching at the bottom and even with the top of the V. Now you’ll continue in the chaining method feeding pairs of Top pieces together to form fours, and then the paired Bottom pieces together to form fours by butting edges together and then adding the boning behind each new seam. Cut the pieces apart, trimming the boning pieces even with the top and bottom satin stitching. |  (Click Image to Enlarge) |
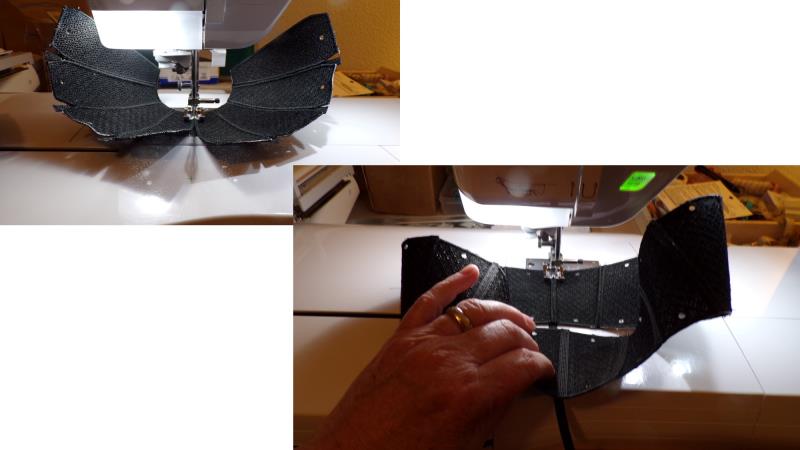
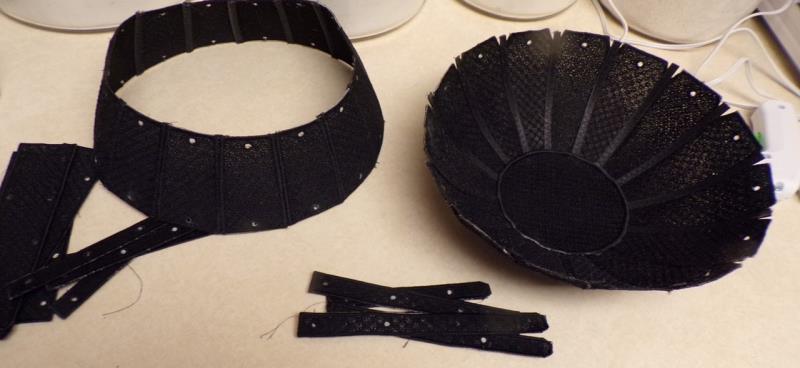
Step 23: | Continue stitching sections together and adding boning under the seam, until all but the two ends are sewn together. Now bring those together, sew, add boning, trim, and the top section of the cauldron is complete. |  (Click Image to Enlarge) |
Step 24: | For the last bottom sections, join the ends together and repeat the steps of sewing the edges together, but on the Bottom section, sew about ½” and then skip an inch to leave an opening in the seam to insert the atomizer cord through this opening. | 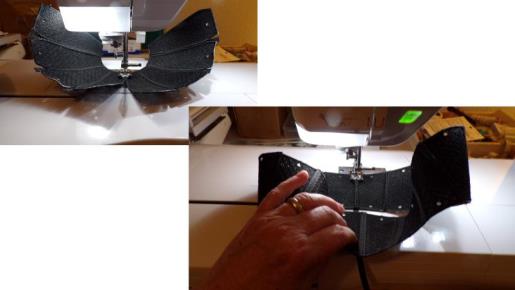 (Click Image to Enlarge) |
Step 25: | You should have a top bowl and a bottom bowl. Next will be to assemble the bowl sections together. |  (Click Image to Enlarge) |
Step 26: | Now the Cauldron will be put together. Begin with the bowl bottom. Place one of the circles, right side down on a flat surface. Place glue along the edge. Turn the bottom bowl upside down and center the glued circle over the opening at the bottom of the bowl. Now turn the bottom right side up (you’ll be looking inside the bottom part of the bowl) and place hot glue on the inside of the same circle. Place the wrong side of the remaining circle over the glue, centering the circle and firmly holding in place until the glue sets. |  (Click Image to Enlarge) |
Step 27: | Place the awl through all the eyelets to make sure they are not clogged from the spray sealer. | 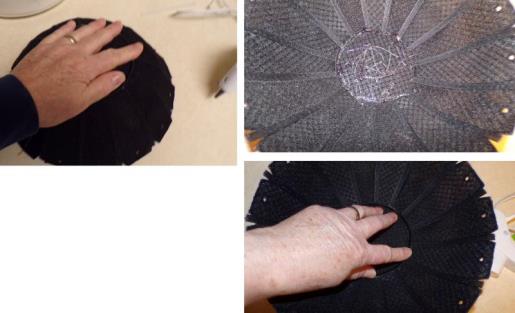 (Click Image to Enlarge) |
Step 28: | The awl will also be used to help align the eyelets for the cauldron assembly. Gather the remaining pieces. |  (Click Image to Enlarge) |
Step 29: | Align the cauldron top over the cauldron bottom bowl, aligning eyelets and having the “V” sections inside the top section of the bowl. |  (Click Image to Enlarge) |
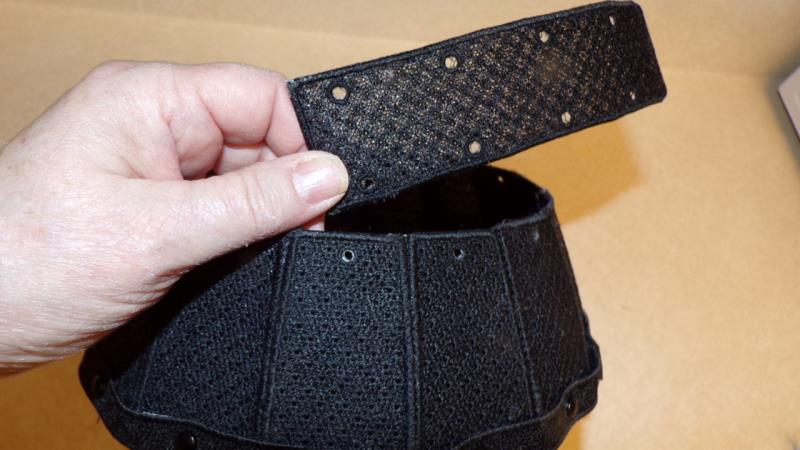
Step 30: | The Center Band pieces will be placed over this seam on the outside, with eyelets aligning and brads inserted to hold all the pieces together. Take one Center Band section and align the eyelets over the center seam of the bowl bottom. Place a brad through the first eyelet of the Center Band and then through the top eyelet and into the Bottom bowl eyelet. |  (Click Image to Enlarge) |
Step 31: | Hold the three sections firmly together and then spread the prongs apart on the back side, flattening them as much as possible. Work around the first band aligning holes and securing the brads. |  (Click Image to Enlarge) |
Step 32: | The prongs should be parallel to the bowl seam as shown. | 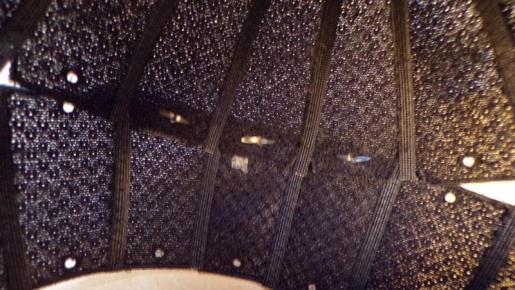 (Click Image to Enlarge) |
Step 33: | Continue aligning and repeating, placing the “tab” end of the center band pieces under the straight end of the next center band piece, ending with the Center Band B piece. | 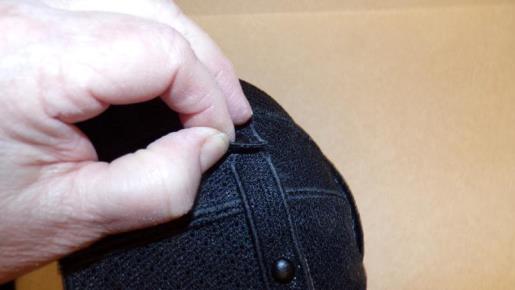 (Click Image to Enlarge) |
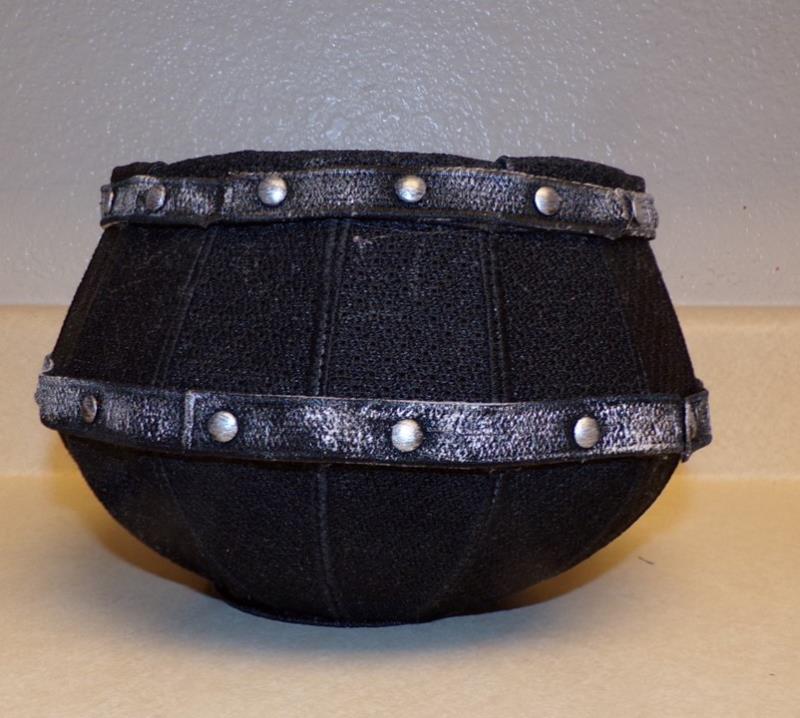
Step 34: | The Cauldron should look like this. | 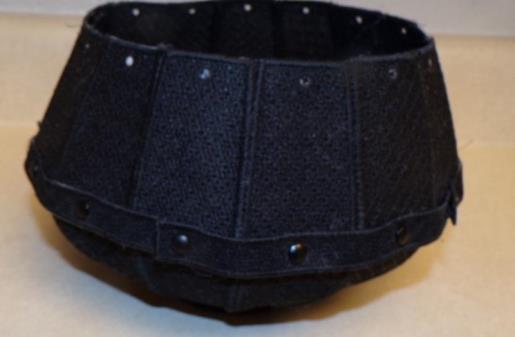 (Click Image to Enlarge) |
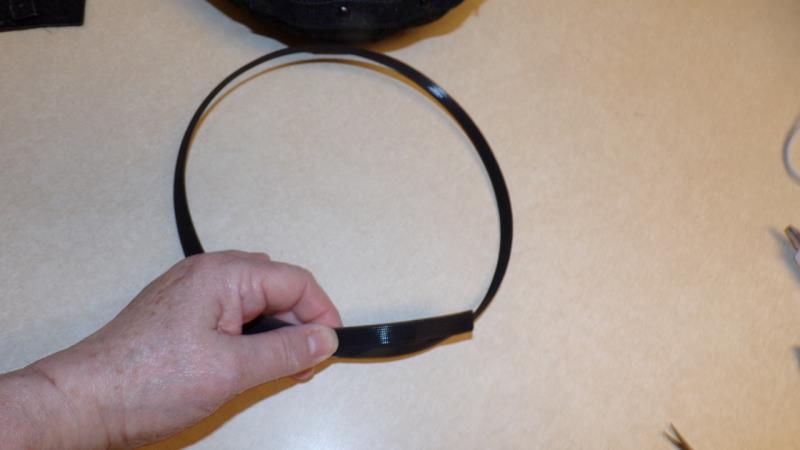
Step 35: | To strengthen the center of the cauldron and cover the backs of the brads, cut a length of 12mm Rigilene boning 33” long, wrap it into a circle, overlapping the ends. | 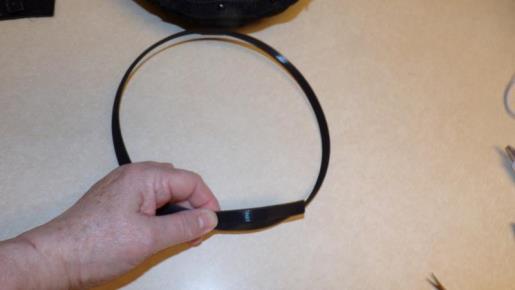 (Click Image to Enlarge) |
Step 36: | Working in sections, place dabs of glue on and in-between the prongs on the inside of the cauldron. Place the boning over the prongs so the edge of the boning is even with the inside edge of where the pieces join, overlapping and gluing the ends. |  (Click Image to Enlarge) |
Step 37: | The top is done in the same manner except that the Top Rim pieces are first aligned, folded over the top of the cauldron, and then the Top Band pieces affixed in place with the brads. | 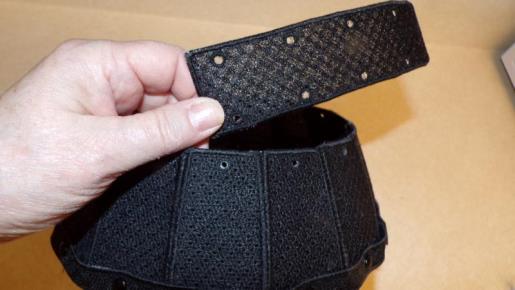 (Click Image to Enlarge) |
Step 38: | To do this, align the bottom part of one Top Rim A piece to the eyelet at the top of the cauldron—make sure the cauldron Top Rim piece is facing to the right side. Now gently fold the Top Rim A piece to the wrong side of the cauldron top, aligning all the eyelets. Take one Top Band A piece and align the second eyelet from the end to the end eyelet on the Top Rim A piece--this will offset the end pieces for a better look and better stability at the top of the cauldron. | 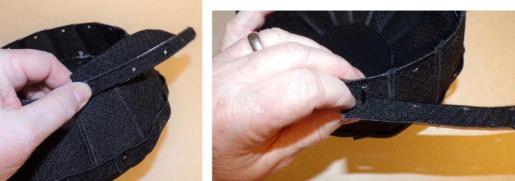 (Click Image to Enlarge) |
Step 39: | It is helpful to use the awl through all the eyelets to aid in alignment of the pieces. Place a brad through the Top Band A eyelet, into the front of the Top Rim A eyelet, through the Top cauldron eyelet and then into the folded over other Rim eyelet, splaying the prongs parallel to the top of the cauldron. The tab ends of all the Top Band pieces should be placed under the straight ends of all the Top Band A pieces and Top Band B piece like was done for the Center Bands. Be sure all the band pieces lie in a nice smooth line; if necessary, a small amount of hot glue can be applied to the tab end and then the next end overlaid and secured in place. | 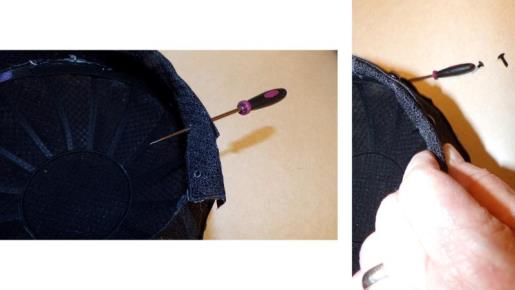 (Click Image to Enlarge) |
Step 40: | To further stabilize the cauldron, cut a 27” piece of 12mm Rigilene boning is added to the inside of the cauldron over the brads). Working in sections, place a small dab of hot glue over and in-between each brad and then align the boning over the brads, overlapping the ends about an inch or two. Allow the glue to cool completely. | 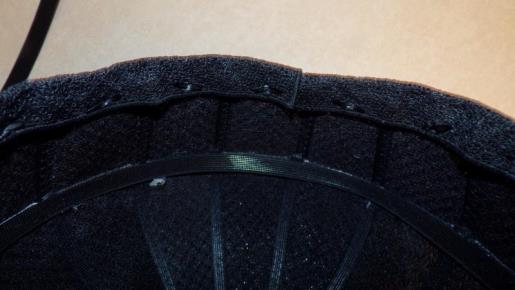 (Click Image to Enlarge) |
Step 41: | To finish the cauldron, load a small stiff brush with the paint wax and using a paper towel, work the paint into the brush removing excess until there is only enough paint left in the brush to dry bush it over the Top Bands, Center bands, and brads; this gives an old-world look of metal to the bands. Reload the brush as needed until all the sections have been dry brushed with paint. Begin with small amounts of dry-brushing adding more as desired to get the look you want. | 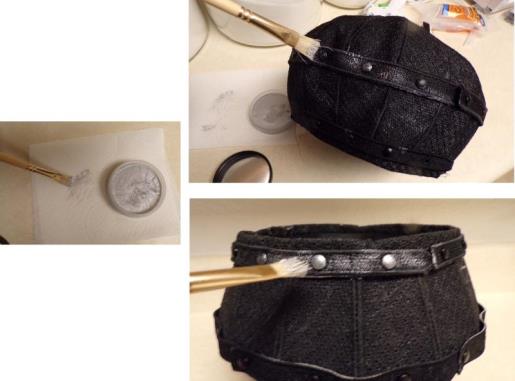 (Click Image to Enlarge) |
Step 42: | Allow the paint to dry and then use the sealer to spray two or three light coats all over the outside of the cauldron; allow the spray to dry thoroughly. |  (Click Image to Enlarge) |
Step 43: | Stitch the three logs and one of each flame designs, using two layers of fibrous water-soluble stabilizer and following the color sequence steps. After the designs stitch, block, spritz, and dry as was done for the cauldron pieces. | 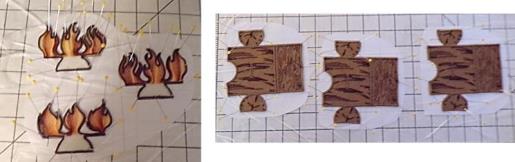 (Click Image to Enlarge) |
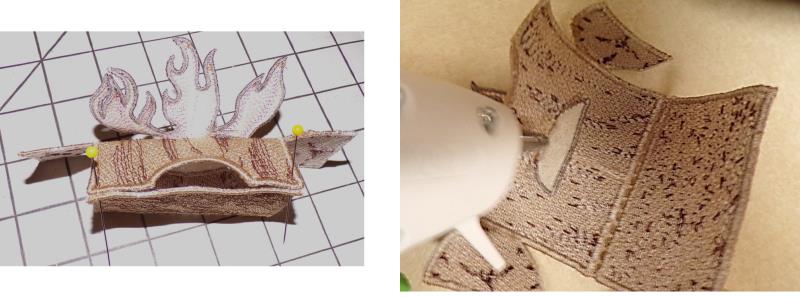
Step 44: | For the log and flames, the pieces will be assembled before they are sealed with acrylic spray. Be sure the buttonhole at the top of the log is open. Insert the bottom tab of the flame through the buttonhole and then open it up again inside the log. |  (Click Image to Enlarge) |
Step 45: | The back side of the flame should face the arched back side of the log. Place a small amount of hot glue around the inside of the buttonhole/tab to hold it in place. |  (Click Image to Enlarge) |
Step 46: | To assemble the log, fold the bottom along the little satin stitches so it meets at the other end, forming an arch in the log. | 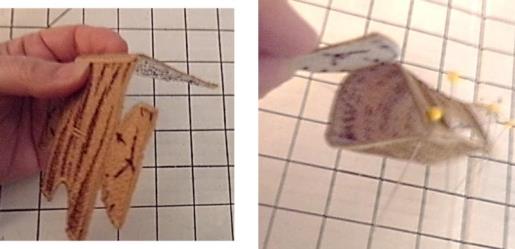 (Click Image to Enlarge) |
Step 47: | The log ends will fold down and be hand-stitched in place with the same embroidery thread from the top, around the arch to the bottom, repeating on the other side. Use a little hot glue on the bottom of the flame (along the outside back side at the buttonhole) to secure it to the log, slightly curving the flame; allow the glue to cool thoroughly and then spray the flame lightly with three coats of the Mod Podge sealer, drying between coats. | 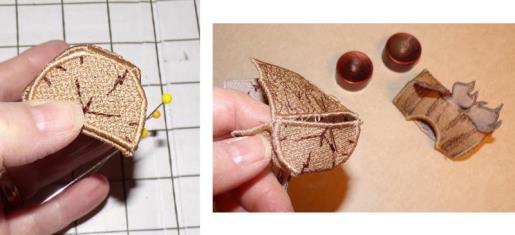 (Click Image to Enlarge) |
Step 48: | Turn on the tea light, insert it through the opening in the back, and it will look like the flames and log are glowing. Repeat for the remaining logs. | 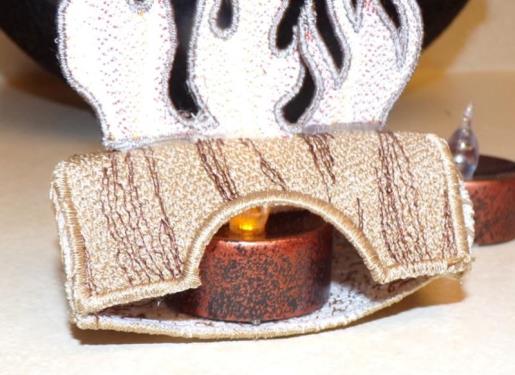 (Click Image to Enlarge) |
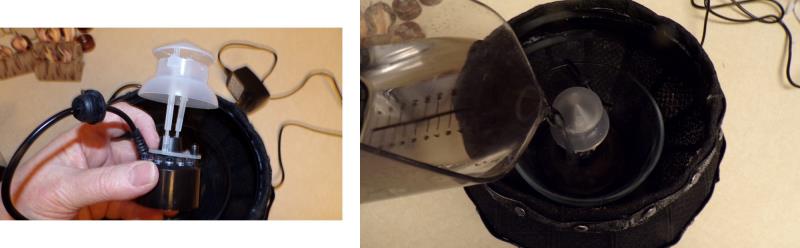
Step 49: | To assemble the cauldron parts, be sure all the paint and acrylic spray is dry. Follow the directions that come with the atomizer. Insert the atomizer cord male end from inside the cauldron through the opening left in the last Bottom seam and then attach it to the female electrical end. Place the small bowl upside down inside the cauldron and place a small amount of hot glue on the bowl bottom and center the bottom of the large bowl on top. | 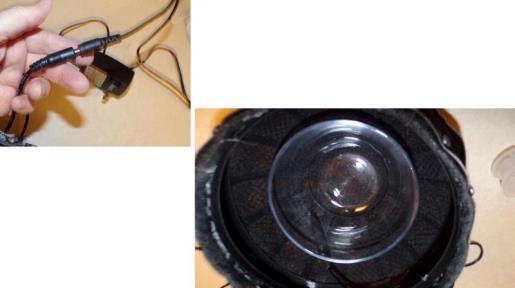 (Click Image to Enlarge) |
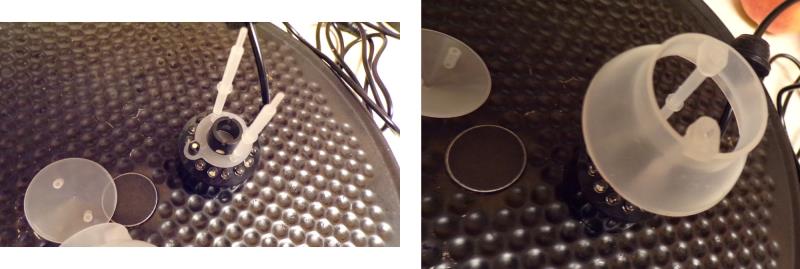
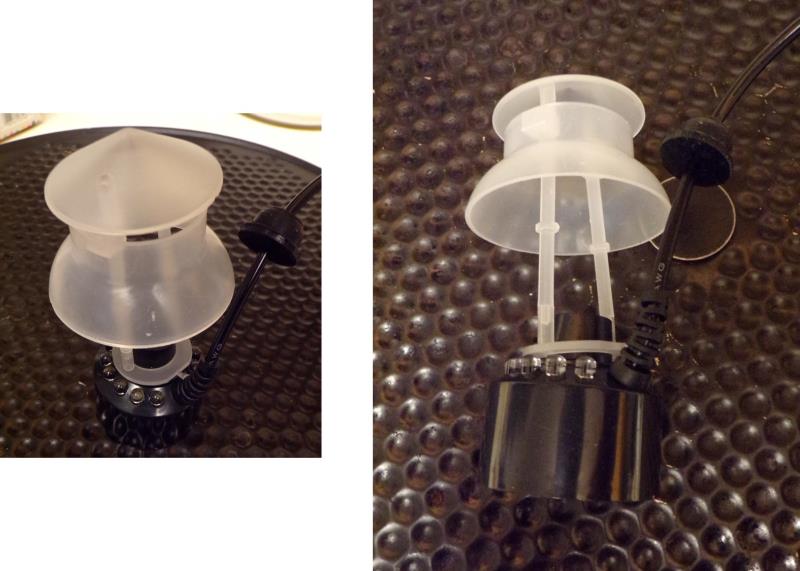
Step 50: | Assemble the atomizer shield according to the instructions that come with the atomizer. Place the bottom piece over the atomizer LED section, aligning the tab with the hole over the pin on the LED light section. Place the short end of the pins into the openings on the bottom section. |  (Click Image to Enlarge) |
Step 51: | Place the larger shield opening over the pins and then place the cap on, inserting the pins into the openings. | 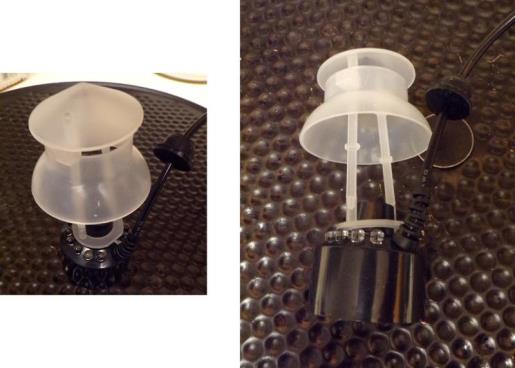 (Click Image to Enlarge) |
Step 52: | Place the atomizer into the bowl and pull the remainder of the cord through the opening. Fill the bowl with tap water about 3 mm over the top of the lights, according to the manufactures’’ instructions. | 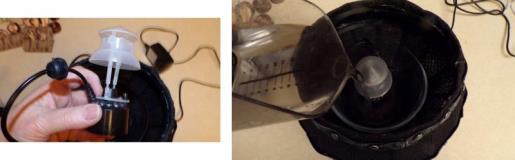 (Click Image to Enlarge) |
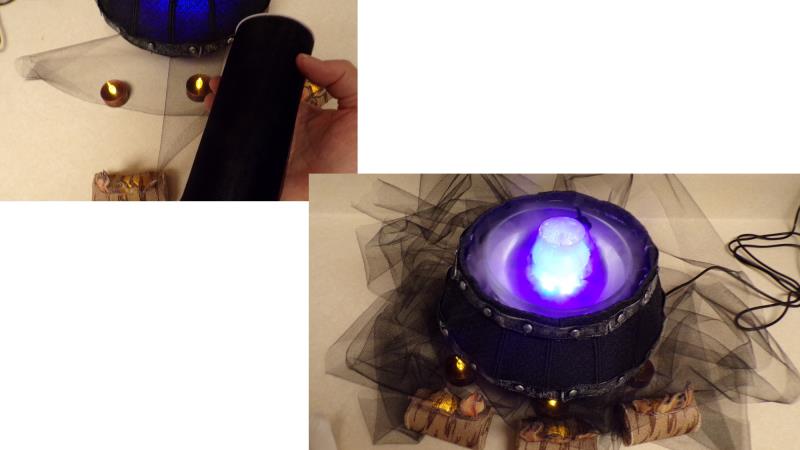
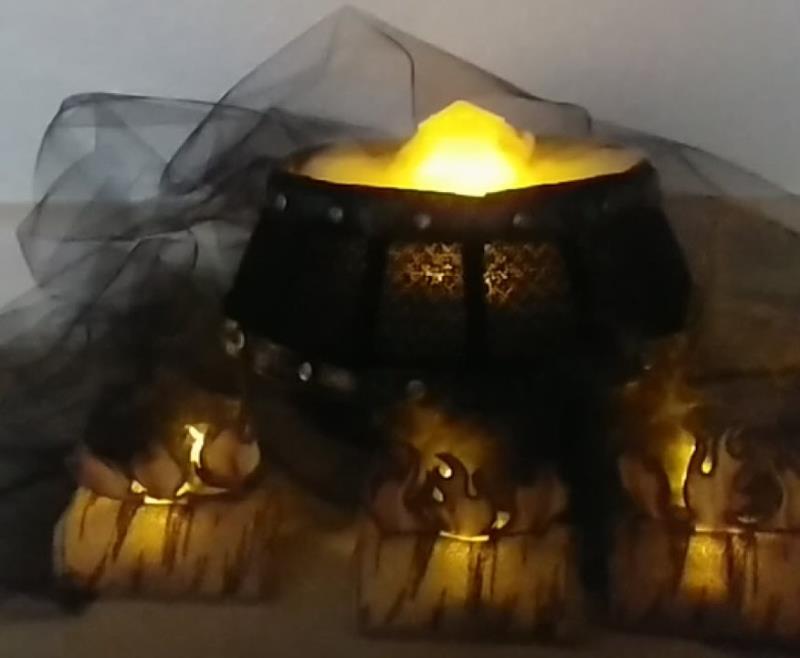
Step 53: | Place the remaining tea lights around and close to the cauldron; cut sections of net to place around the cauldron, covering the tea lights loosely so the lights glow under the net. Place the logs in front of the other lights and net. Plug in the atomizer. Turn out the room lights and watch the cauldron come to life with the fog trailing over the net, the lights glowing, creating a spooky and fun addition to your Halloween décor. | 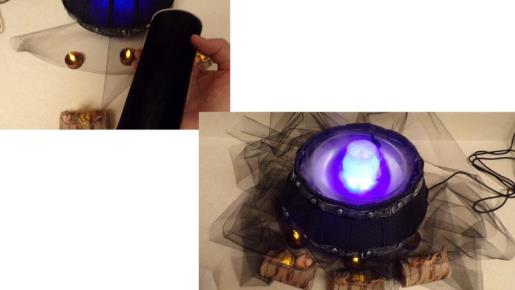 (Click Image to Enlarge) |
Step 54: | Congratulations on completing this advanced project. Children and adults alike with enjoy this 3D FSL Cauldron! When packing away after use, be sure to remove the batteries from the lights and store them separately. Fold up the net and make sure the FSL is absolutely dry. Pack peanuts or tissue paper inside the Cauldron to hold its shape during storage. Remove and store the glass bowls and atomizer separately. |  (Click Image to Enlarge) |
|