There are three parts to this project, the left and right end pieces which are stitched first, and the main wrapper portion which is stitched with a second hooping. All the parts are contained in one file, with stops programmed for color changes and assembly.
For each hooping, two pieces of fibrous water soluble-stabilizer are to be used. Also, if possible, turn the cutter off on the machine. At the beginning of each color change, pull the bobbin thread to the top and hold the thread tails until the first few stitches have tied on, and then cut the tails of both threads. This will keep the work clean and there won’t be any trimmed threads to the back of the work.
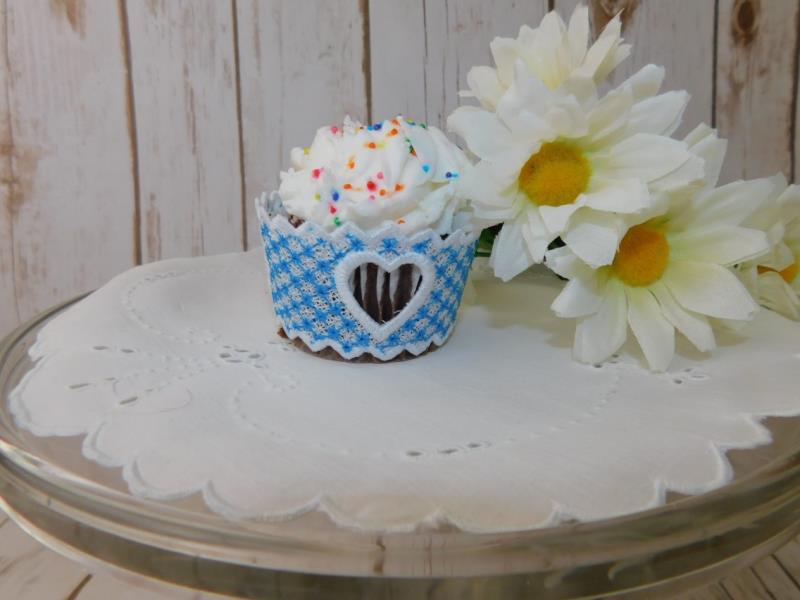
There are color stops programmed for each step and to do new hoopings. The project designs were stitched in two colors: white for the background, aqua-mint for the decorative fill, and white again for heart outlines, scallops, and assembly. The stops are programmed so if you wish, you could stitch with three colors: background in one color, decorative fill in a second color, and a third color for the scallops, hearts and assembly. All but the last step of the assembly is done in the hoop.
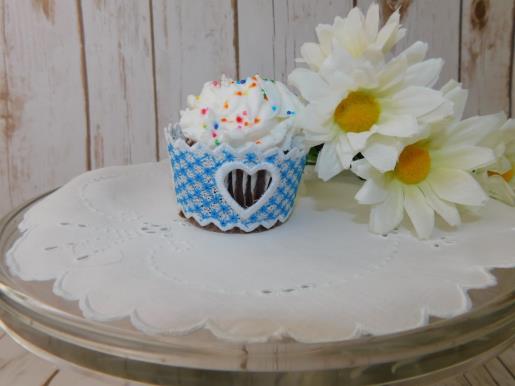
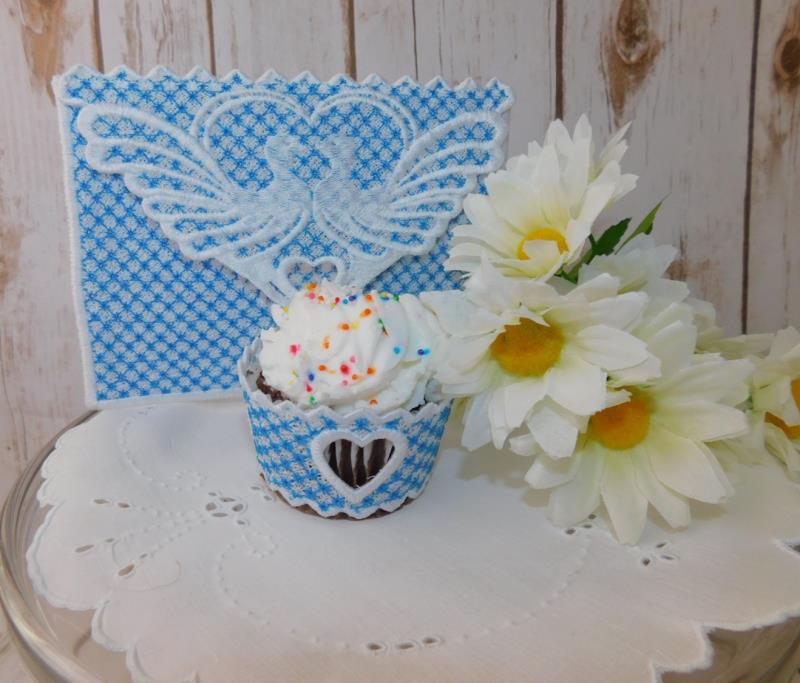
How could this sweet cupcake wrapper be used? There are many ways! Wrap a single cupcake in the wrapper as a birthday treat for a co-worker or elderly person. Why not a single cupcake as a thank-you for something special done for you. Make a spectacular presentation at a wedding or anniversary celebration with a tower of cupcakes, each with a FSL Cupcake Wrapper, stitched in the wedding colors as a special take-home treat for guests!
This Cupcake Wrapper coordinates with the FSL Love Doves Envelope.
Step 1:
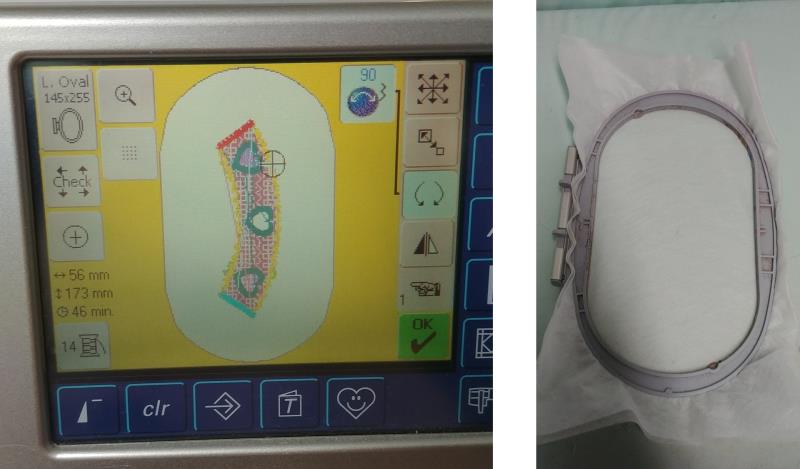
Read through the instructions thoroughly before beginning and assemble all the materials needed to complete the project. Load the FSL cupcake design on the machine. Hoop two layers of fibrous water-soluble stabilizer.
(Click Image to Enlarge)
Step 2:
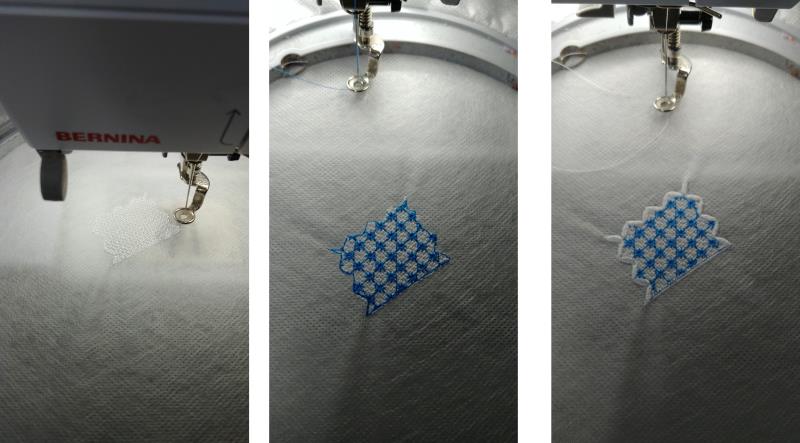
Place Color 1 on the machine (white). Press start and the base will stitch for the first edge. Color 2 stitches the decorative fill. Color 3 stitches the scallop edge. It will be tempting to color sort at the machine, but don’t—it may throw off the registration on the second side which stitches next.
(Click Image to Enlarge)
Step 3:
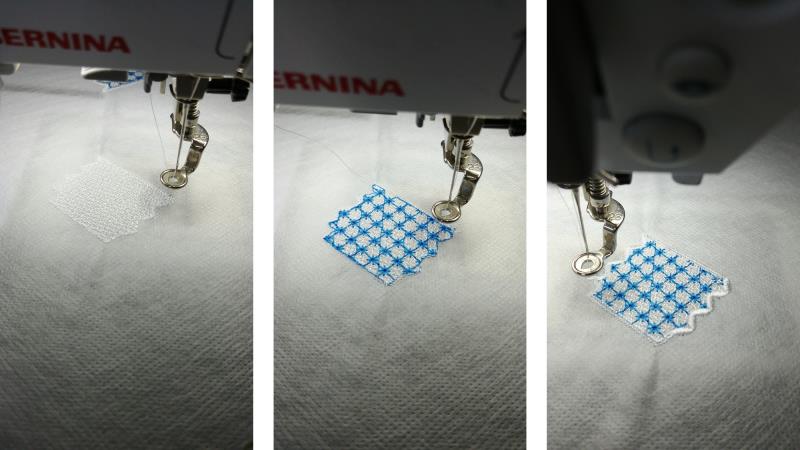
Place Color 4 on the machine (white). Press start and the base for the second side will stitch. Color 5 will stitch the decorative fill, and Color 6 is the scallop stitching.
(Click Image to Enlarge)
Step 4:
(Click Image to Enlarge)
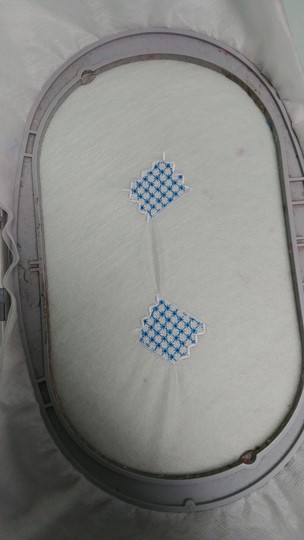
The side pieces are now finished. Remove them from the hoop and set them aside.
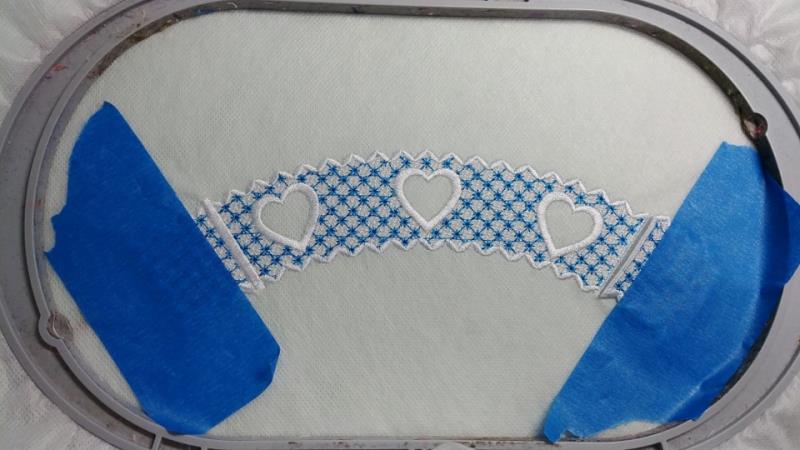
Step 5:
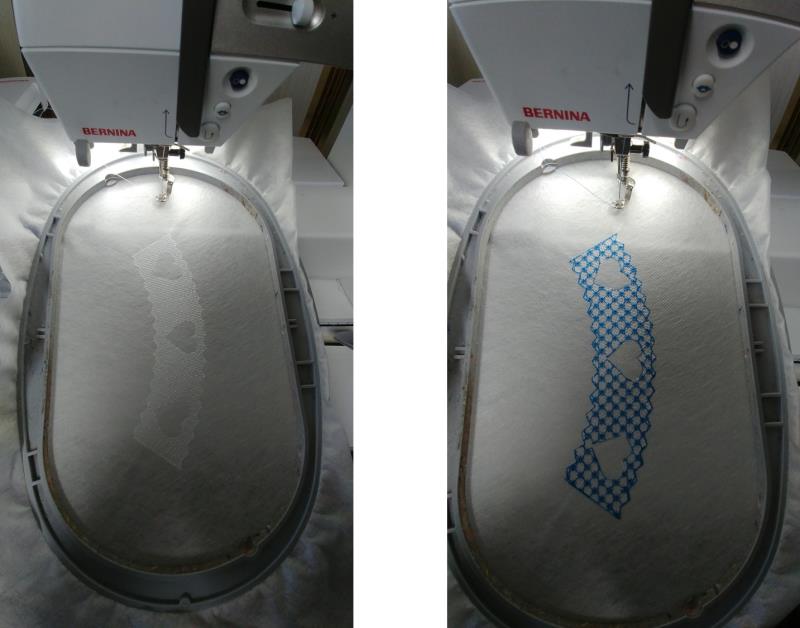
Now stitch the main portion of the FSL Cupcake Wrapper. Hoop two layers of fibrous water-soluble stabilizer. Color 7 will stitch the base (white), Color 8 the decorative fill, and color 9 the scallop border. Next will be to add the end pieces doing the assembly in the hoop!
(Click Image to Enlarge)
Step 6:
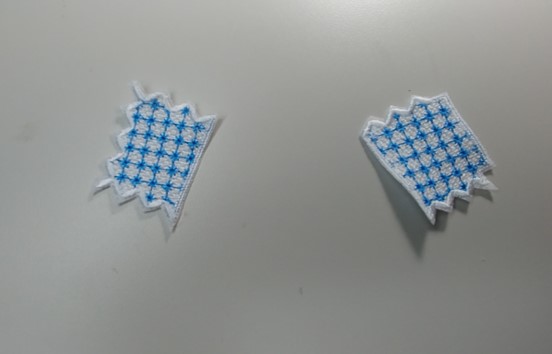
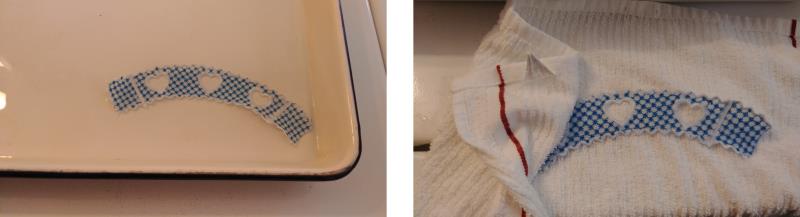
Trim the stabilizer from the end pieces, being careful not to cut any threads. Do not rinse out the stabilizer—that will be done after the entire wrapper is assembled.
(Click Image to Enlarge)
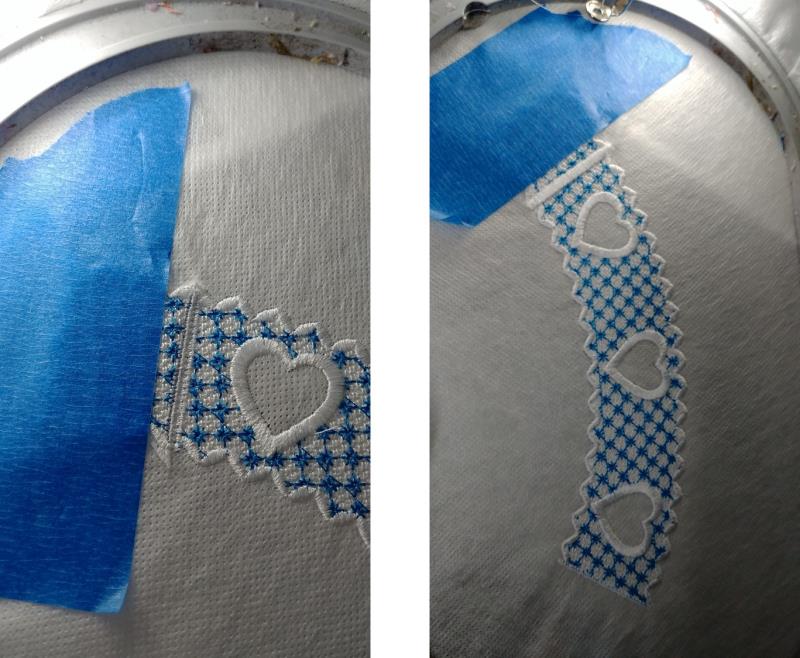
Step 7:
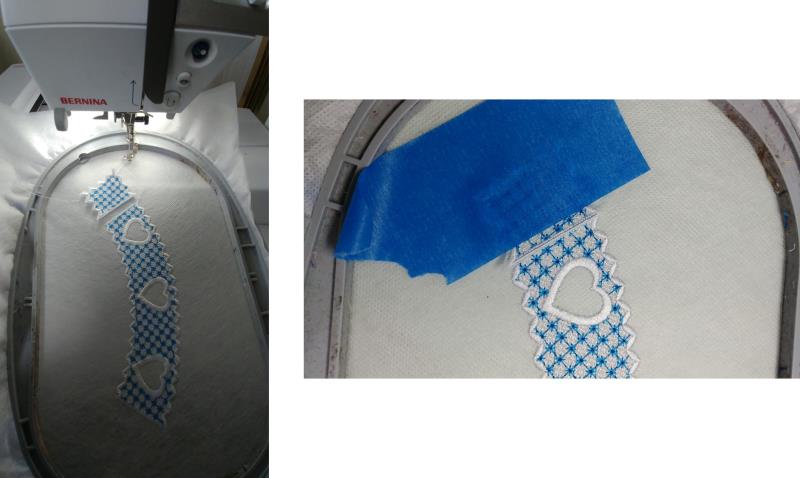
Lay the left end next to the main wrapper, with the scallops facing the top of the hoop and the unfinished end next to the left end of the main wrapper portion—but them right next to each other and secure with painters tape. Do be careful not to get the tape too close to the area to be stitched.
(Click Image to Enlarge)
Step 8:
Slow down the machine and stitch the next color which will satin stitch the ends together.
(Click Image to Enlarge)
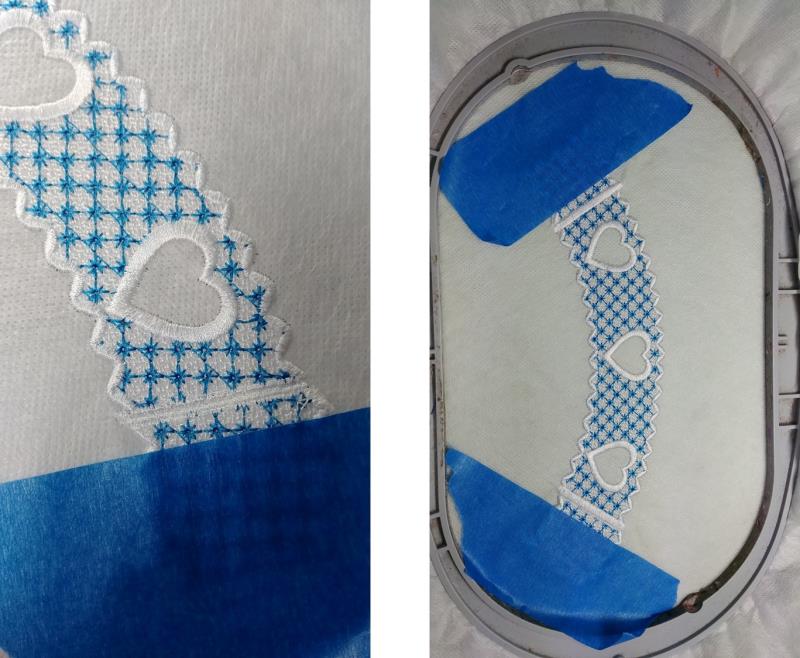
Step 9:
Repeat for the right side, butting the right edge to the right side of the wrapper end
(Click Image to Enlarge)
Step 10:
and stitch the last color which will satin stitch the ends together.
(Click Image to Enlarge)
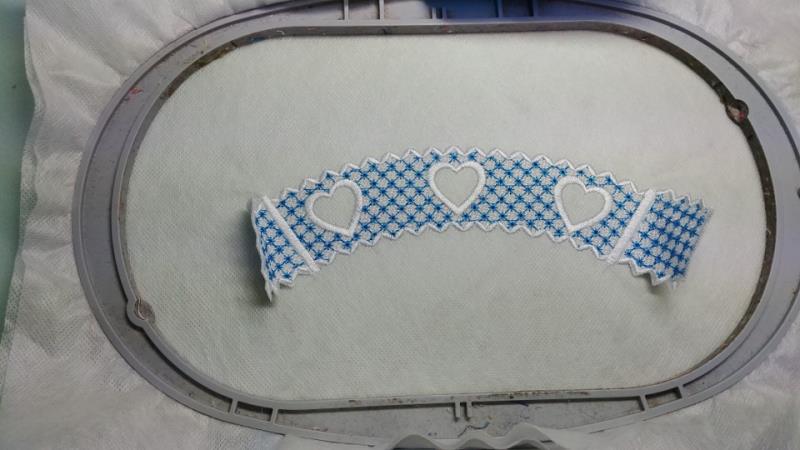
Step 11:
Remove the painters tape, and remove the piece from the hoop.
(Click Image to Enlarge)
Step 12:
Follow the manufacturers’ directions for dissolving the stabilizer. Place in water only long enough for the excess stabilizer to be removed—most of the stabilizer should be left in the piece so when it dries, it will be stiff. Blot out the excess water on a clean towel.
(Click Image to Enlarge)
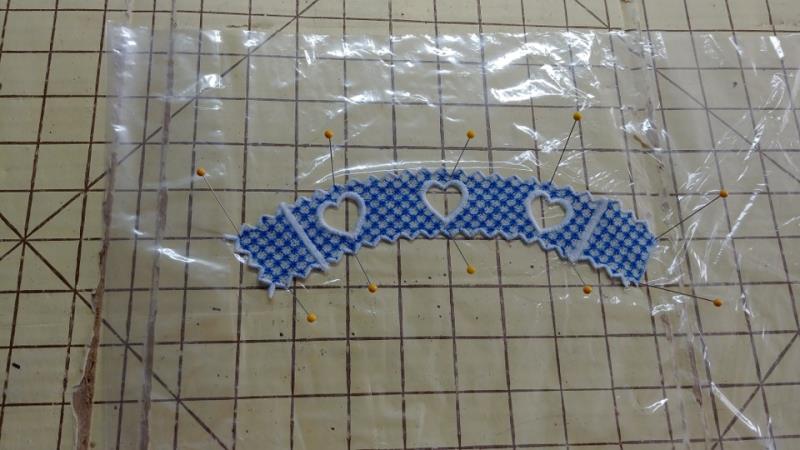
Step 13:
Place plastic wrap on an old piece of cutting board and then pin the piece to the board, using the grid lines as a guide to make sure the piece ends are on the same line so the piece is blocked and dries to form.
(Click Image to Enlarge)
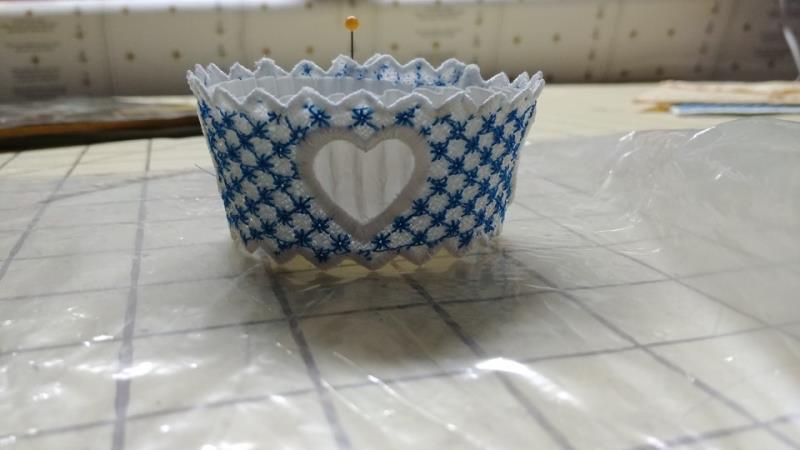
Step 14:
After the piece has dried, place a blank cupcake wrapper inside the form and overlap the ends and pin in place. Use hot glue to secure the ends in place (or stitch the ends together on the machine or by hand if preferred).
(Click Image to Enlarge)
Step 15:
Be sure to check out the FSL Love Doves Envelope that coordinates withe this FSL Cupcake Wrapper--a perfect set for an event like a wedding, shower, or anniversary celebration!
(Click Image to Enlarge)
Step 16:
Congratulations on creating a beautiful FSL Cupcake Wrapper holder ready to be admired by the recipient of the cupcake for a special occasion or just-because. These are fast and fun to do, so create several in different colors so they are ready when you need a quick treat-gift for any time of the year.
Ramona Baird has been in the embroidery industry for over 23 years. She and her husband owned a commercial and retail embroidery store in Arizona for many years. She is an experienced digitizer having been mentored by award-winners Pat Williams and Lindee Goodall. Ramona is a contributor to “Creative Machine Embroidery” magazine having 5 covers to her credit. Ramona has worked for Wilcom America and served many years as Education Director for the American Sewing Guild. With a degree in fashion design, she is able to design and execute patterns which Pat Williams says are “out of the box” in creativity and application. Ramona likes to challenge the boundaries of embroidery and bring new and exciting designs, ideas, and projects to EmbroideryDesigns.com. She wants embroiderers of all levels to increase their skills and enjoyment in using their embroidery machine for gift-making and personal pleasure.