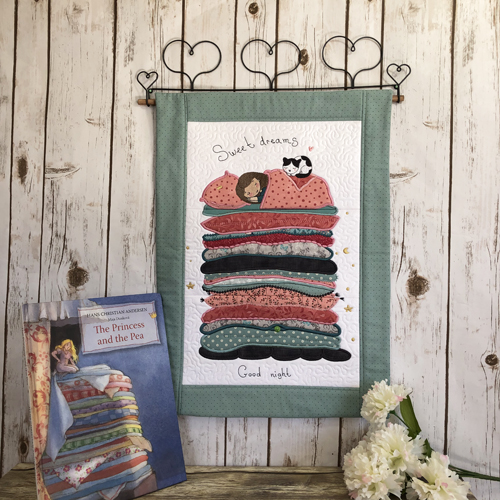
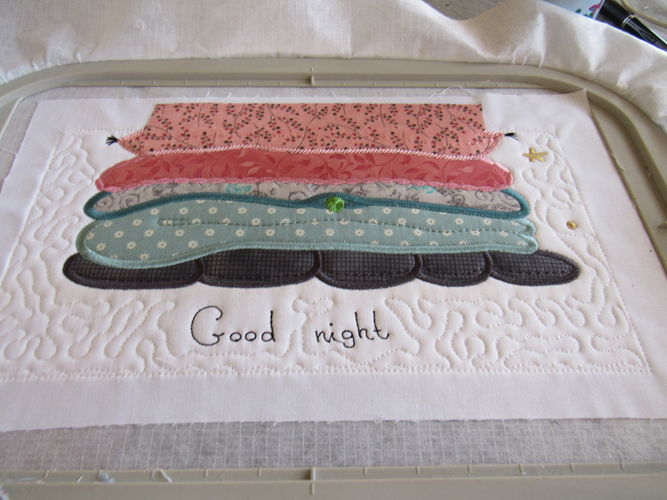
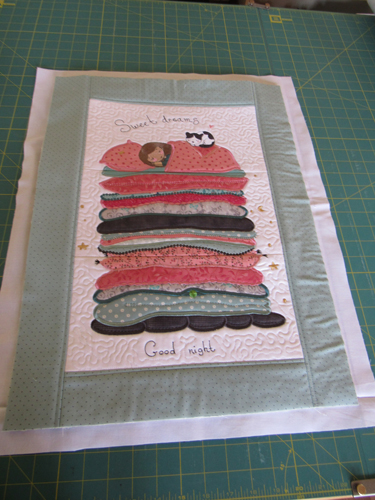
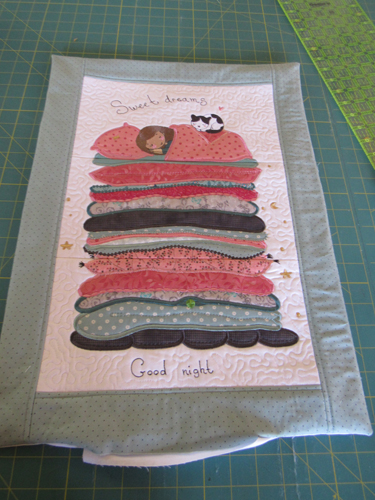
Based on a classic fairytale this lovely wall hanging is a priceless gift for any little girl’s room. Three blocks are appliqued and quilted in the hoop and assembled with borders at your sewing machine.
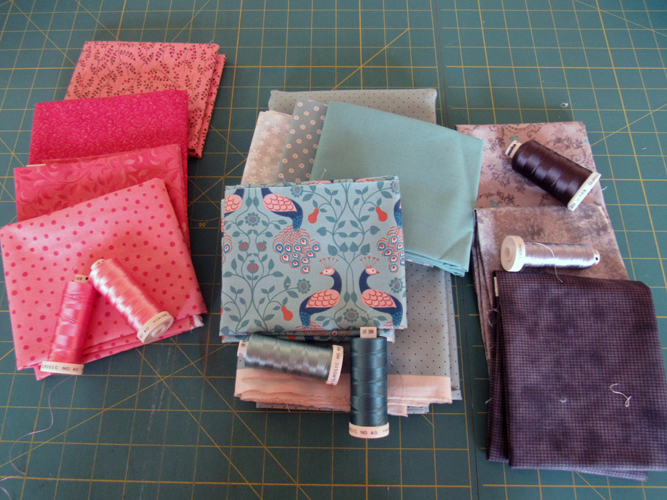
Pressing each fabric with Magic Sizing® or spray starch several times before beginning the project will make it easier to cut each applique and will help prevent fraying.
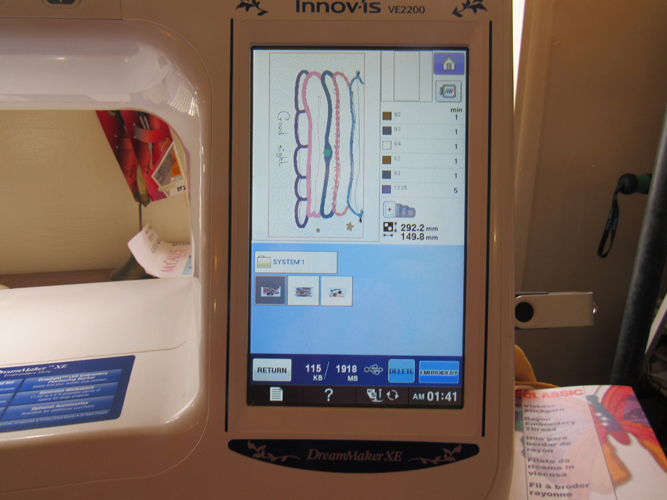
Step 1:
There are many colors of thread in the color charts for the three design files for this wall hanging, but for most of them you will want to use colors of thread that match or compliment your fabrics. Keep the Vegas Gold (1070) for the stars, black for the lettering, Loofah (1127) for the face and change the other colors as desired.
(Click Image to Enlarge)
Step 2:
(Click Image to Enlarge)
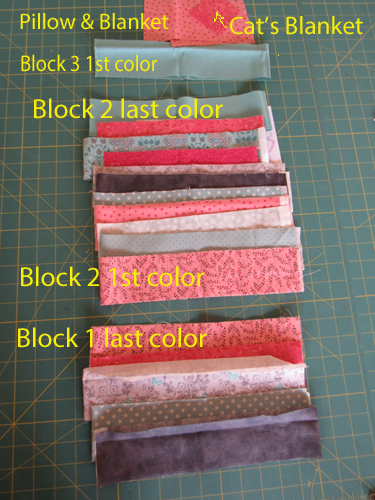
Lay out the color strips for the three blocks. The quilt is worked from the bottom up. Make the strips for the last strip of the 1st block the same color strip for the 1st strip of the second block. Make the last strip of the 2nd block the same color as the 1st strip of 3rd block.
Step 3:
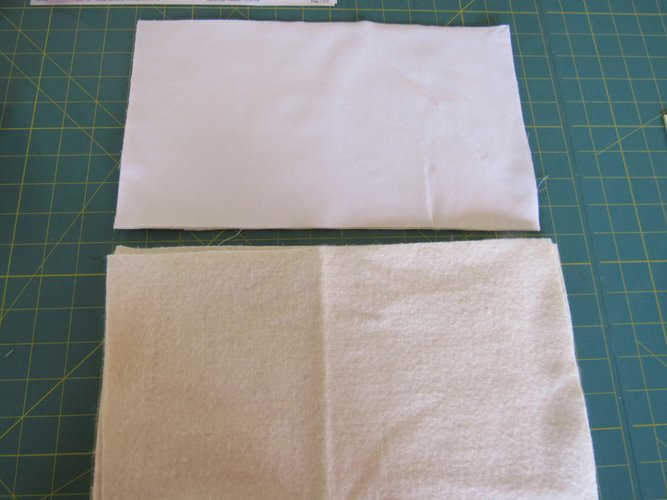
Cut 3 rectangles each of Battilizer® and white Kona® cloth 13 ½” x 8”.
(Click Image to Enlarge)
Step 4:
Depending on the machine and design format that you are using you may need to rotate the design right by 90 degrees. Some design formats will do this automatically. Load PREP01 into your machine, which is the bottom block of the wall hanging.
(Click Image to Enlarge)
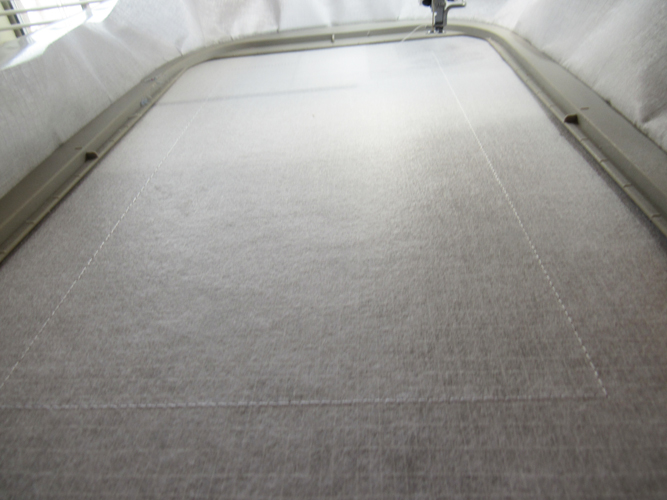
Step 5:
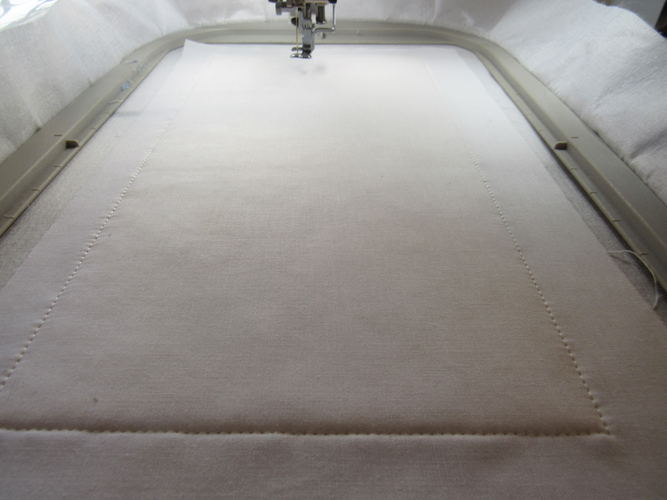
Tautly hoop the cut-away stabilizer in your hoop and run Color stop (CS) 1 in any color as a placement line for the Battilizer®.
(Click Image to Enlarge)
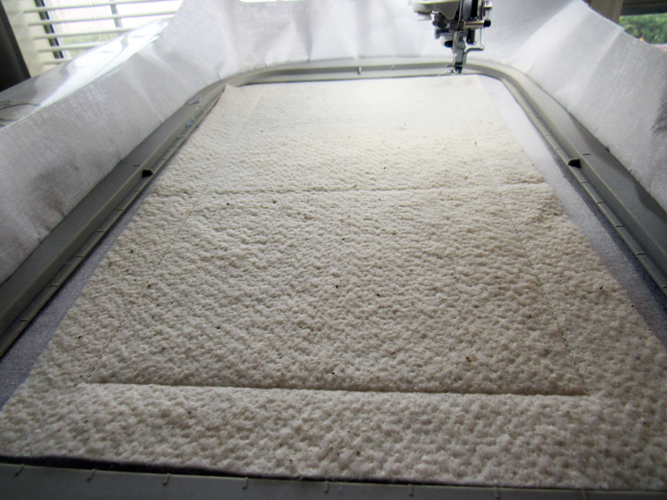
Step 6:
Spray adhesive on the Battilizer® and position it over the placement lines so that the Battilizer® exceeds the placement lines by ½” on all sides. Run CS 2 to tack down the Battilizer.
(Click Image to Enlarge)
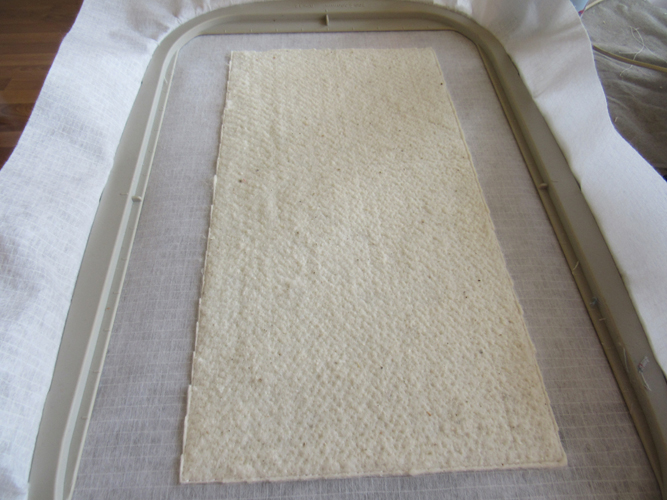
Step 7:
Remove the hoop from the machine, do not unhoop. Lay it on a flat surface and trim the excess stabilizer all around the tack down line.
(Click Image to Enlarge)
Step 8:
Return the hoop to the machine. Spray adhesive on a white Kona® cloth rectangle and position over the tack down lines so that the fabric exceeds the tack down lines and Battilizer by ½” on all sides. Run CS 3 in water-soluble thread to tack down the fabric. Do not trim the white fabric, leave the excess fabric intact.
(Click Image to Enlarge)
Step 9:
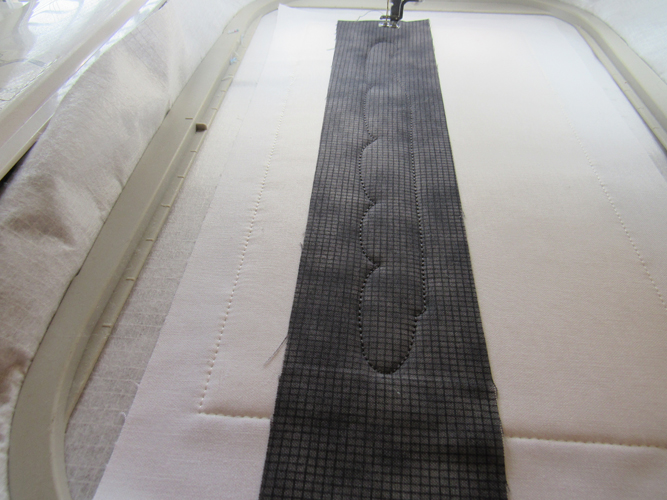
The tack down, placement line and borders of the individual quilt pieces can each be sewn in the same color. With the color of your choice run CS 4 as a placement line for the bottom quilt.
(Click Image to Enlarge)
Step 10:
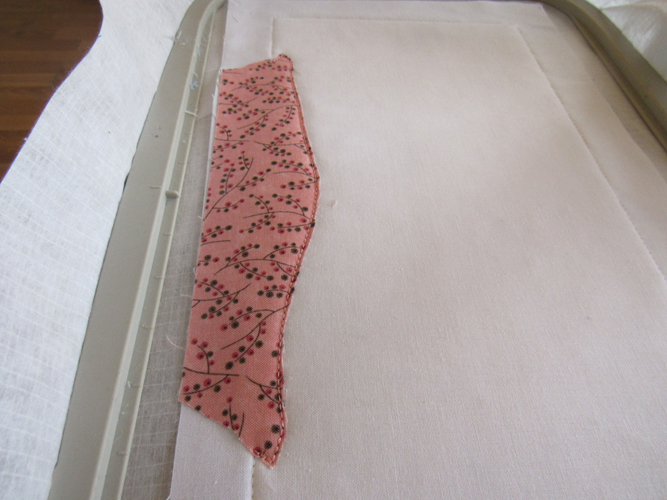
Spray adhesive on the back of your fabric strip and position over the placement lines. Run CS 5 to tack down the strip.
(Click Image to Enlarge)
Step 11:
Remove the hoop from the machine, do not unhoop. Trim the applique right up next to the tack down line. Run CS 6 to border the bottom of the quilt.
(Click Image to Enlarge)
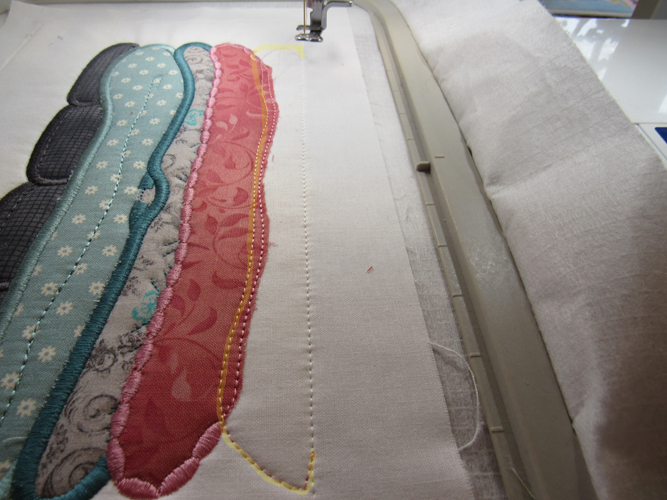
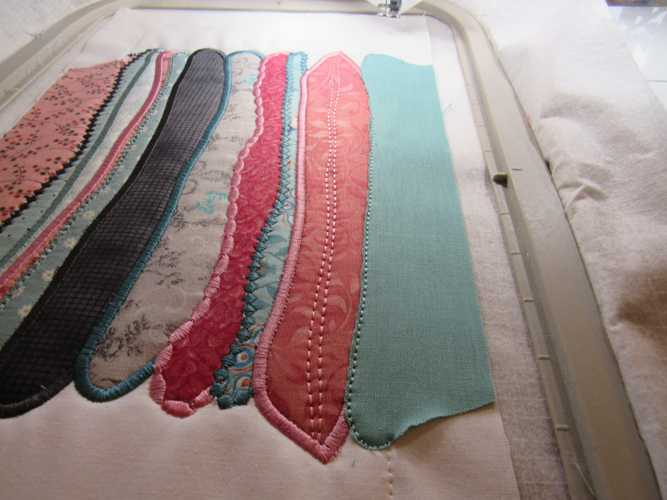
Step 12:
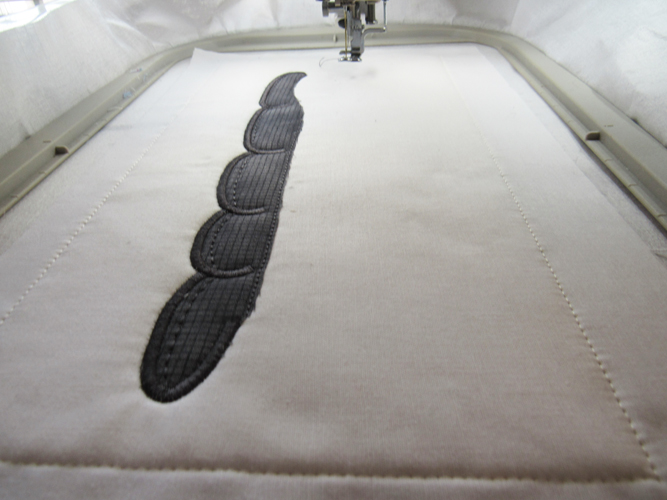
Repeat Steps 9 through 11 to add the next three quilts to the project. This will take you through CS 15.
(Click Image to Enlarge)
Step 13:
CS 16 is for the top quilt on the 1st block. Run CS 16 as the placement line. Note that this placement line is for the bottom edge of the quilt.
(Click Image to Enlarge)
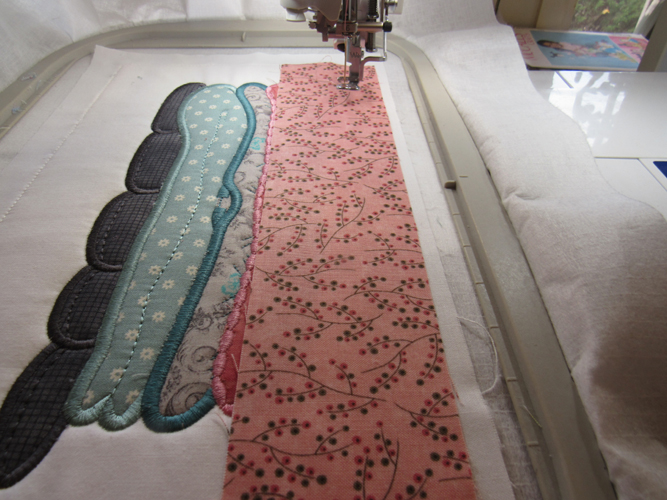
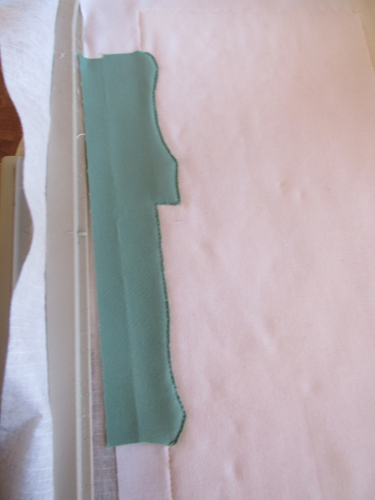
Step 14:
Spray adhesive and position your last quilt fabric so that the right hand (top edge) of the fabric exceeds the original tack down line by ½” and covers the inside placement line of the quilt. Tack down with CS 17.
(Click Image to Enlarge)
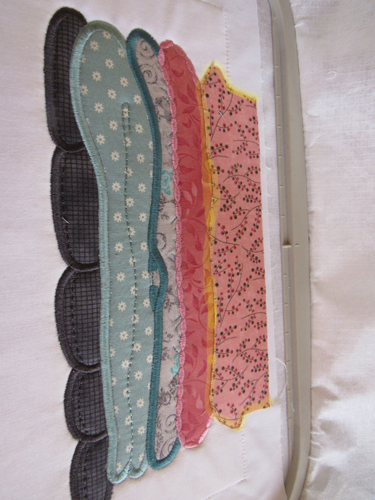
Step 15:
(Click Image to Enlarge)
Trim the strip right up to the tack down lines on the inside of the block. Leave the ½” or more excess fabric that is over the background fabric at the top of the block.
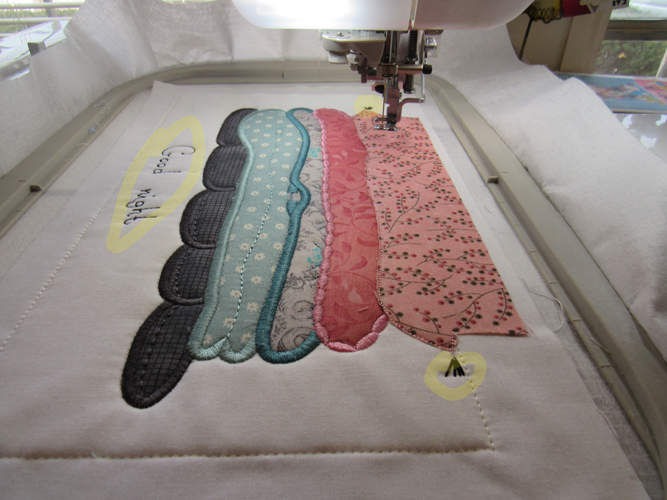
Step 16:
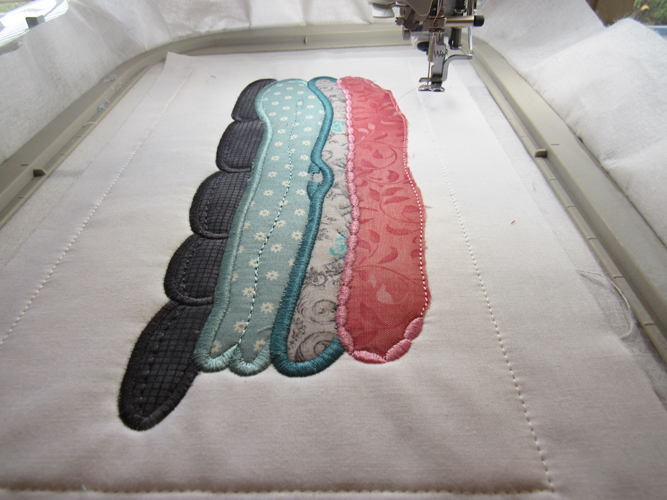
Switch to black thread for CS 18 to stitch the tassels on the last quilt and the lettering.
(Click Image to Enlarge)
Step 17:
Switch back to thread that matches your last quilt fabric to stitch the border on that quilt. Then follow the color chart to stitch the pea, the stars and to quilt the block.
(Click Image to Enlarge)
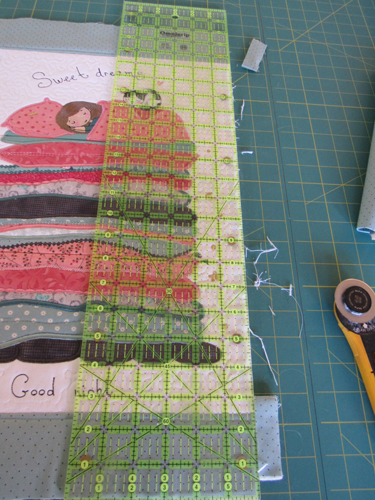
Step 18:
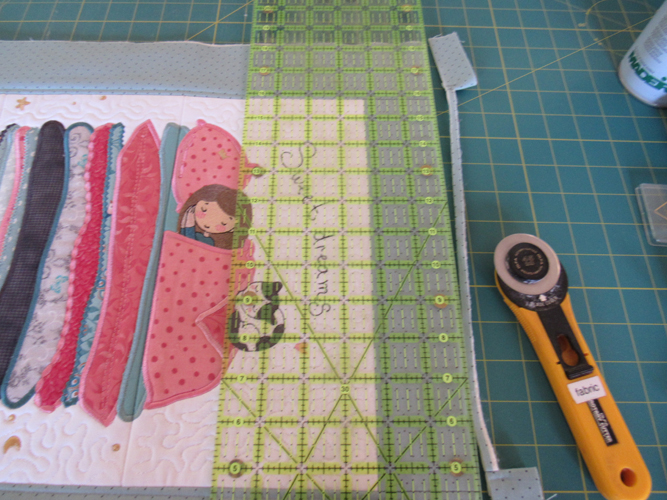
Remove the block from the hoop. Lay the ½” mark of a see-through ruler along the tack down lines and trim all edges of the block to ½”.
(Click Image to Enlarge)
Step 19:
Load design PRPE02 for the middle block. Repeat Steps 5 through 9. Note that the 1st placement line is only on the inside of the block. Position the fabric strip that matches the last fabric strip of the 1st block, in the same manner as you did in Step 14. Run CS 5 to tack it down. Trim just the inside edge of the quilt strip leaving the ½” extending into the seam allowance. Switch to black thread for CS 6 to stitch the tassels on the quilt, then switch back to the quilt thread color to border the quilt.
(Click Image to Enlarge)
Step 20:
Continue adding the quilts to the block as you did in the first block. When you reach the final quilt in the block use the same color strip of fabric that you will use as the first strip in the 3rd block. This color strip will make the sheets in the princess’s bed. Trim the final strip as you did in Step 15. Follow the color chart for CS 39 and 40 to complete the block. Trim the block to ½” seam allowances as in Step 18.
(Click Image to Enlarge)
Step 21:
(Click Image to Enlarge)
Load design PRPE02 into your machine. Follow Steps 5 through 9 to begin the block. Trim the fabrics just on the inside of the quilt leaving the ½” of fabric into the seam allowances. Border the edges of the quilt with CS 6.
Step 22:
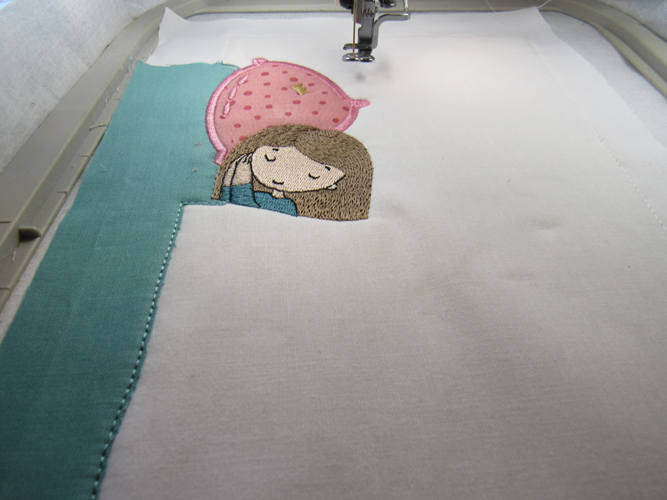
Applique the pillow with CS 7, 8 and 9. Then follow the color chart through CS 15 to embroider the princess.
(Click Image to Enlarge)
Step 23:
Use CS 16 through 21 as placement lines, tack downs and borders for the princess’s and cat’s blankets. Then follow the color chart to embroider the cat and complete the block. Trim the block to 1/2” seam allowances.
(Click Image to Enlarge)
Step 24:
(Click Image to Enlarge)
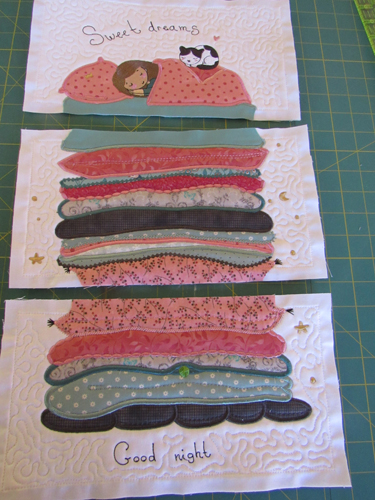
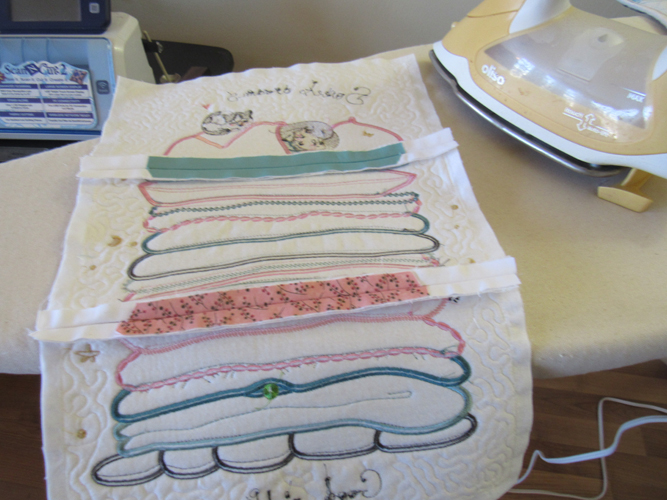
Lay out the blocks in the proper order.
Step 25:
Place the two bottom blocks right sides together. Push a pin vertically through the corner outline stitches of both blocks and then place a horizontal pin through the blocks to keep the corner perfectly aligned.
(Click Image to Enlarge)
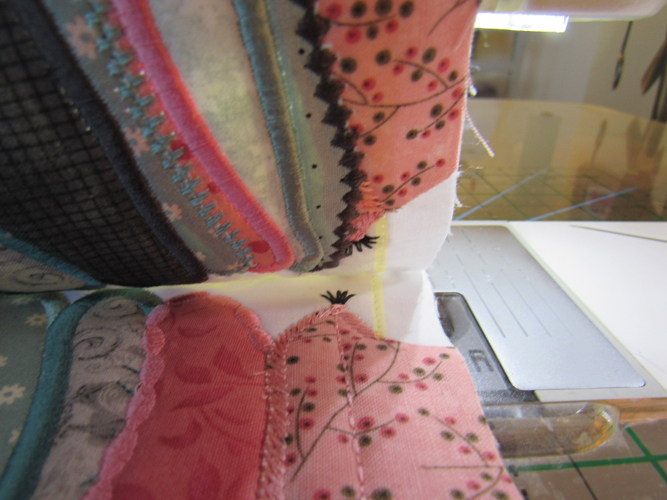
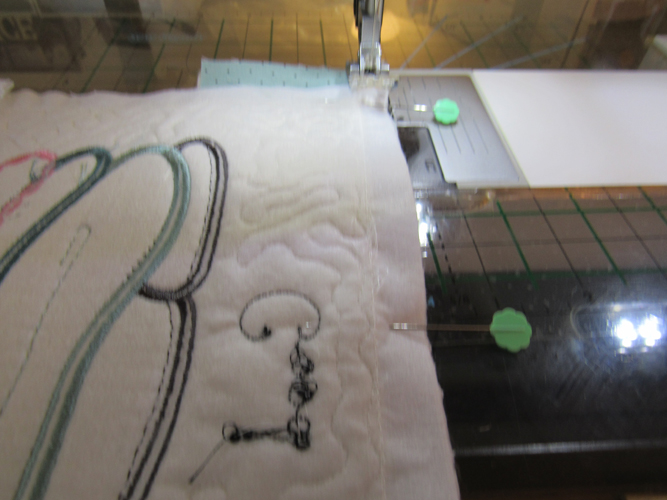
Step 26:
Stitch the two blocks together just a thread width inside the original placement lines. After you have the blocks underneath the presser foot lift the top block to see that the placement lines are aligned at the beginning and end of the blocks. Stitch the top block to the middle block in the same manner.
(Click Image to Enlarge)
Step 27:
Press the seams flat, then open and press them from the top of the quilted panel.
(Click Image to Enlarge)
Step 28:
Cut two strips of border fabric and Battilizer® 3” x 13 ½” spray the fabrics and align over the Battilizer® (pictured.) Cut two strips of border fabric and Battilizer® 3” x 24”, spray adhesive and align the fabrics on the Battilizer® (not pictured.)
(Click Image to Enlarge)
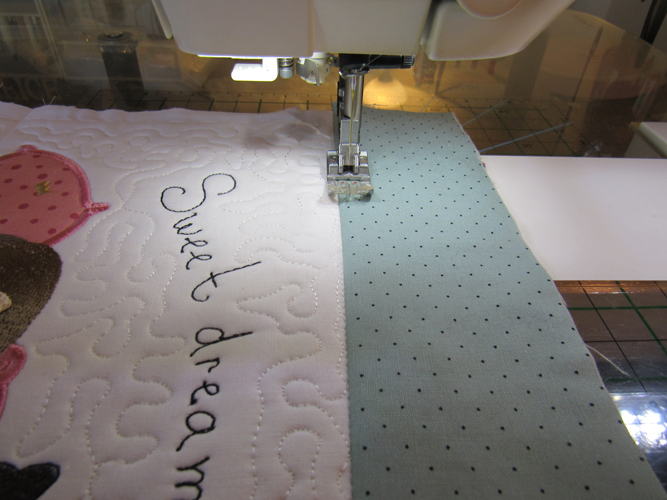
Step 29:
Place the shorter border strips to the quilt top and bottom, right sides together having the ends of the border strips about ½” beyond the sides of the quilt top. Stitch together with a ½” seam allowance. Press the seams flat, then open and then from the top of the quilt.
(Click Image to Enlarge)
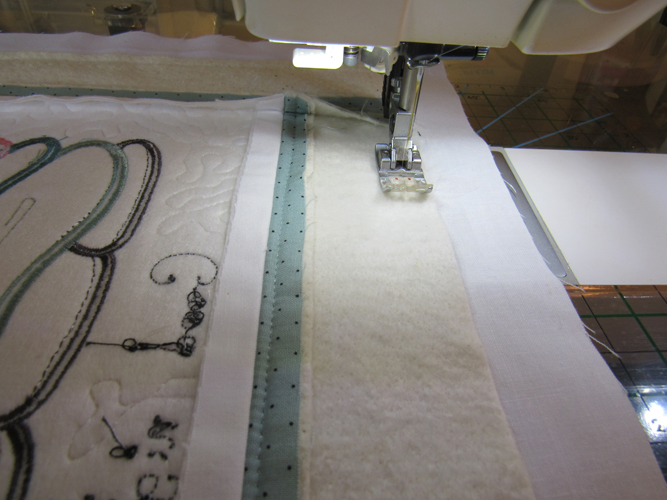
Step 30:
Top stitch across the border about ¼” from the seam.
(Click Image to Enlarge)
Step 31:
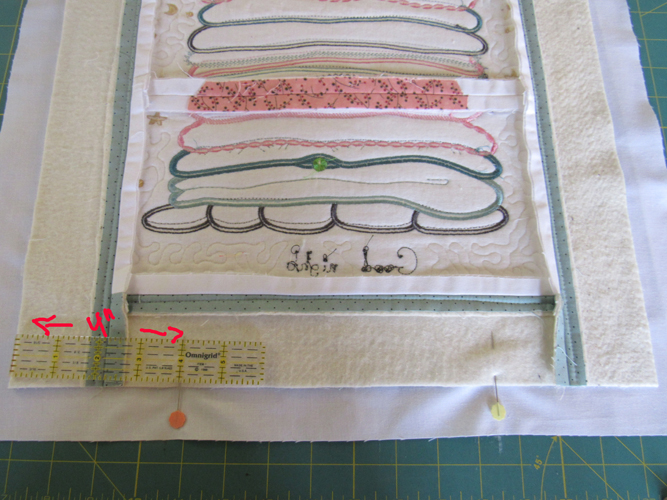
(Click Image to Enlarge)
Trim the excess top and bottom border even with the quilt.
Step 32:
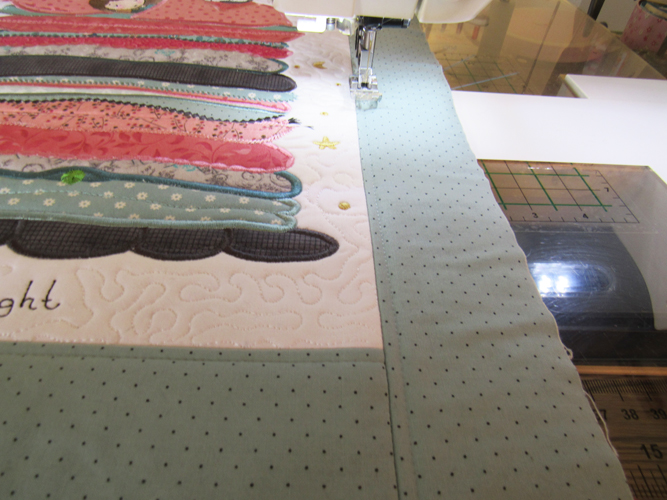
Repeat Steps 29 through 30 to add the side border strips.
(Click Image to Enlarge)
Step 33:
(Click Image to Enlarge)
Cut a piece of backing fabric 24” x 18”.
Step 34:
Place the wall hanging right sides together to the backing fabric. At the bottom of the quilt place pins in 4” from the outside edges of the quilt. You will leave the area between these pins open for the turning of the quilt. Pin the backing around the sides and top of the quilt.
(Click Image to Enlarge)
Step 35:
Aligning your presser foot with the edge of the quilt, starting at one of the bottom pins stitch around the quilt stopping when you reach the last pin that is 4” from the edge of the quilt leaving that bottom center unstitched.
(Click Image to Enlarge)
Step 36:
Trim the excess backing fabric around the quilt leaving about ½” extra fabric at the opening.
(Click Image to Enlarge)
Step 37:
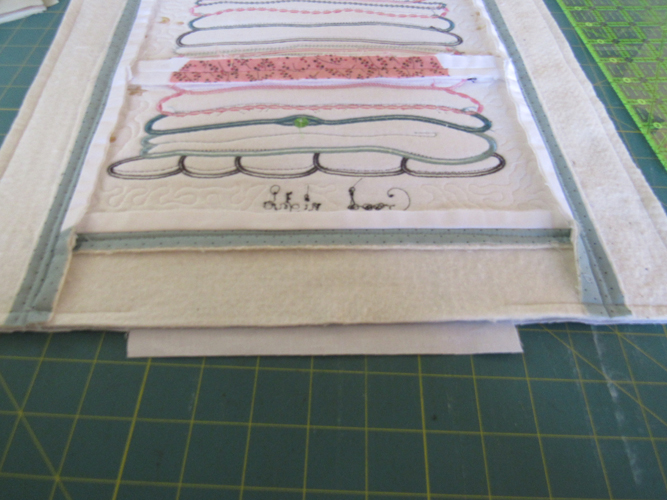
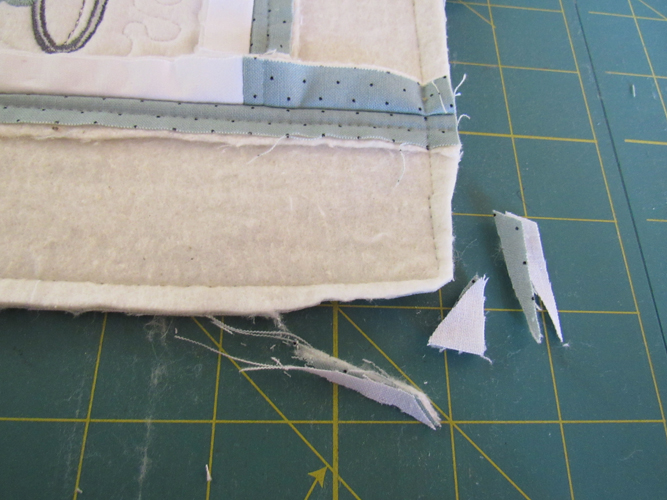
Trim and grade the corners.
(Click Image to Enlarge)
Step 38:
(Click Image to Enlarge)
Turn the wall hanging right side out and press. Turn in the seam allowances at the bottom of the quilt and stitch together by hand with a ladder stitch.
Step 39:
Add a hanging sleeve to the back of the quilt to hang it from the Ackfeld fabric holder. If you need help adding a hanging sleeve see the Attaching A Hanging Sleeve article. The hanging sleeve for this quilt was cut 3 ½” wide by the with of the quilt. Insert the rod through the hanging sleeve and your Sleeping Princess wall Hanging is complete!
Award winning Digitizer, Embroidery Educator, Author and a Consultant to the Industry, Pat Williams has 30 years of experience in the embroidery industry. Pat has won multiple awards for her digitizing expertise including the 2007 Impressions Awards Grand Championship, Best of Show as well as the 1st and 2nd Place Awards. Pat’s love of digitizing has afforded her the opportunity to write numerous articles for Impressions magazine in the United States and Images Magazine in Europe. In 2001 Pat was named “Embroidery Educator of the Year.” For many years Pat taught digitizing seminars at the ISS Shows in Long Beach, CA and for Compucon software. She now resides in Tucson, AZ.