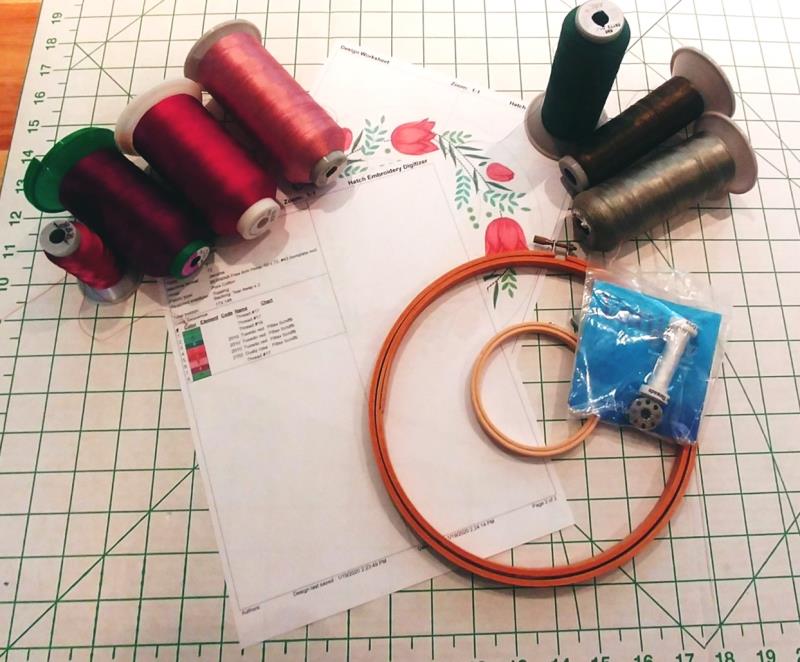
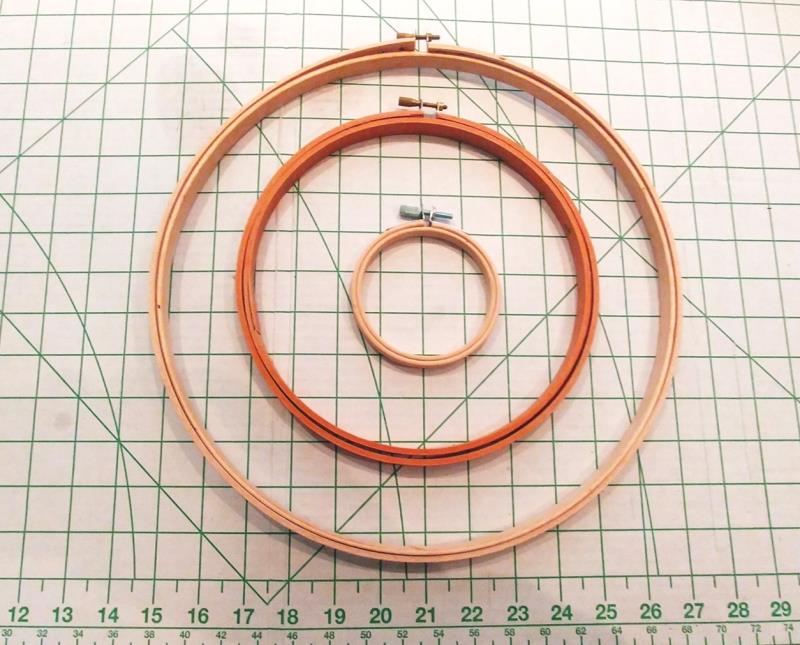
The design comes in three sizes, the largest size was used for this project. The design was resized and properties edited to allow the design to fill out the 8” hoop. For this project, the design was stitched in a 9.5” x 14” hoop. Adjust the materials and hoop sizes to allow stitching this project for the hoop size you have for your machine. The wooden embroidery hoops come in many sizes from 1.5” up. Measure the diameter of the inside and outside of the design you will be stitching and purchase the hoops accordingly.
Step 1:
Read through the instructions thoroughly before beginning and assemble all the materials needed to complete the project. Load a bobbin with the water-soluble thread to stitch the outer and inner circles which will be created in the software. Be sure to load a full bobbin for stitching the entire floral wreath design. Select the thread colors and determine the quantities of the remaining materials you will need for the size of wreath you will be creating.
(Click Image to Enlarge)
Step 2:
The design chosen was resized to fit an 8” hoop for the outer ring, and 3” hoop for the inner ring.
(Click Image to Enlarge)
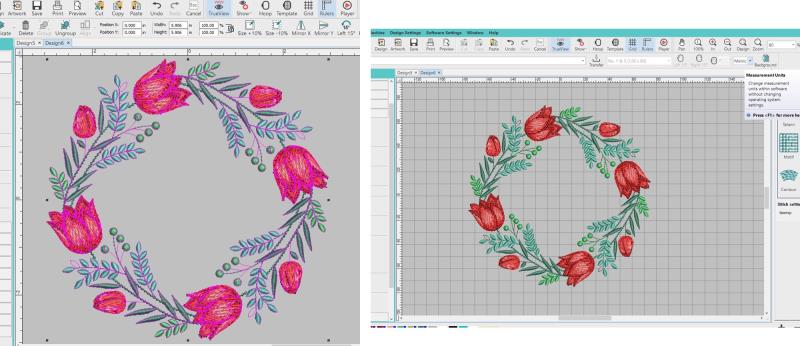
Step 3:
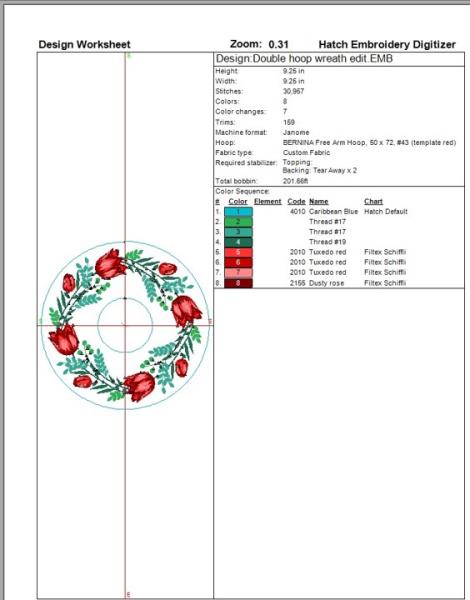
Open the software and open the design. For this project, Hatch Digitizing software (www.hatchbeginner.com) was used, though an embroidery editing software may also be used. Select the entire design and group. Set the measurement unit to US.
(Click Image to Enlarge)
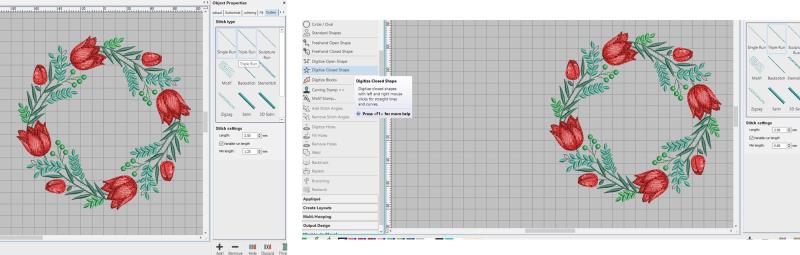
Step 4:
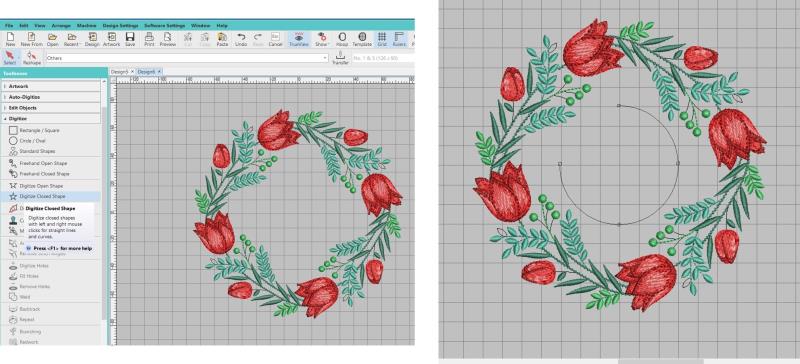
Open the Toolbox and open Digitize. Select the Circle/Oval tool. Create a circle at the inside of the design.
(Click Image to Enlarge)
Step 5:
Create the circle using a single run and 2.5mm stitch length.
(Click Image to Enlarge)
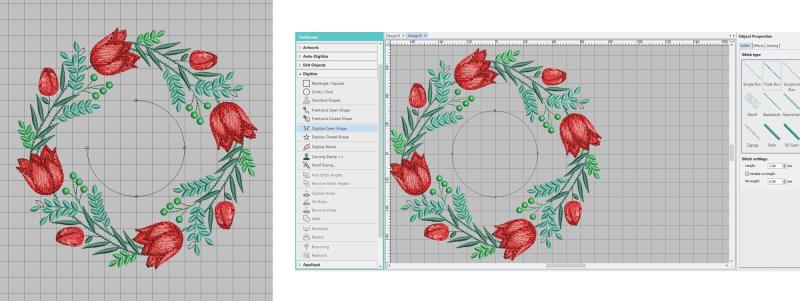
Step 6:
After the points are set, hit enter on the keyboard to complete the line of stitching. Size the circle to the inner wooden embroidery hoop size you will be using.
(Click Image to Enlarge)
Step 7:
The color can be changed so it is more visible. Now create a circle around the outer edge of the design, sizing it to 1” less than the size of the largest wooden embroidery hoop; change the color the color to the same color as the center circle. Select both circles and center align them.
(Click Image to Enlarge)
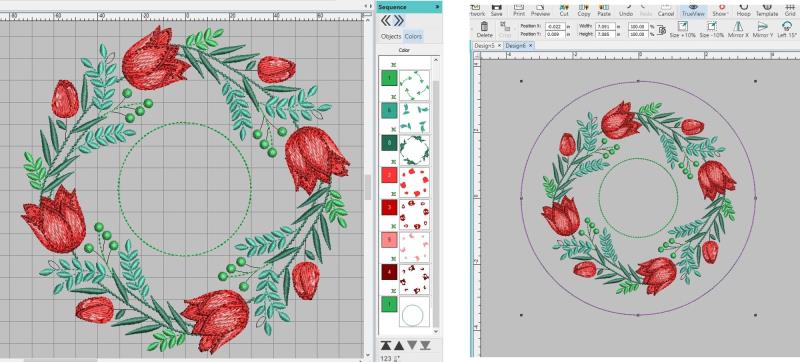
Step 8:
Using the sequence docker, select and drag the circles to the top of the sequence so they will stitch first.
(Click Image to Enlarge)
Step 9:
Resize the grouped floral design so that the outer most edges of the design touch the outside circle. Save the design. Normally designs can be sized up about 10%; however, any larger and properties need to be changed so that stitch lengths and fills are appropriate in each object of the design. Go through the design and check each object to be sure the stitching and underlay will be appropriate for the fabric.
(Click Image to Enlarge)
Step 10:
Print the color sequence sheet
(Click Image to Enlarge)
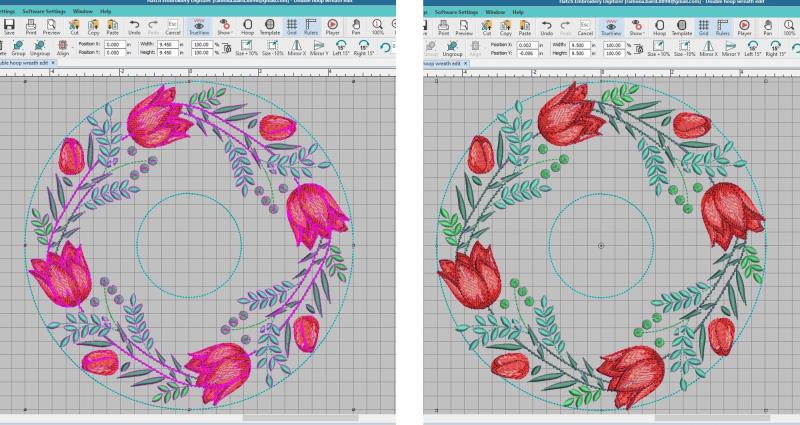
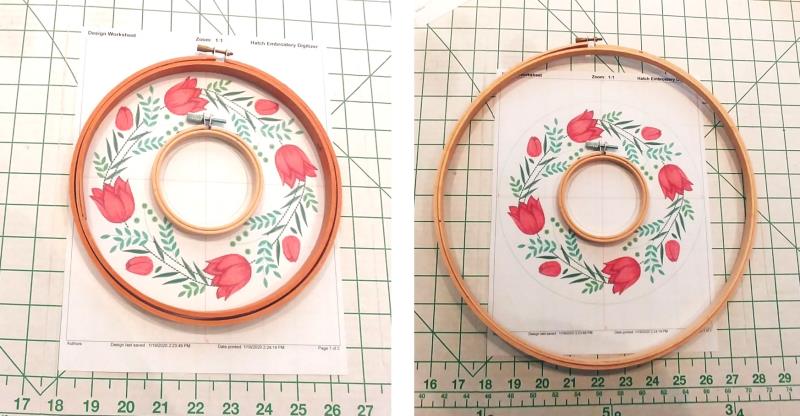
Step 11:
and double check the measurements. On the left, the design would need to be decreased. When the fabric is stitched and the hoops inserted, the hoop depth will take up some fabric—the design cannot fill up the hoop this much. On the right side, the hoop would be too big for the design.
(Click Image to Enlarge)
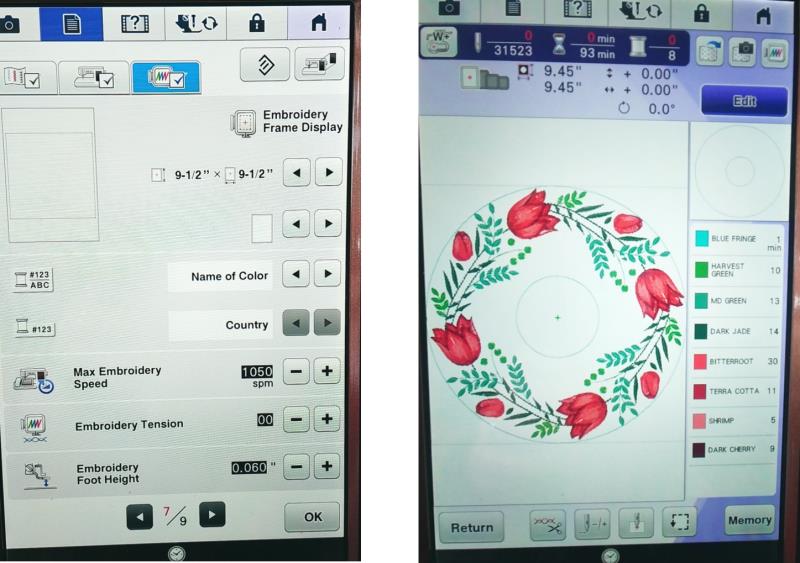
Step 12:
Start the machine and choose the hoop size for stitching. Load the design on the machine.
(Click Image to Enlarge)
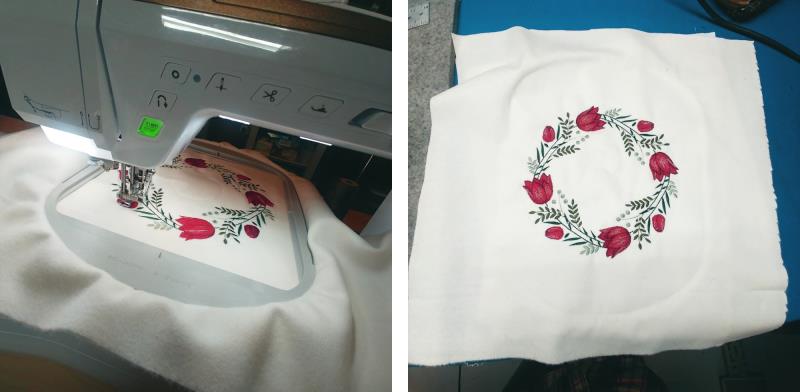
Step 13:
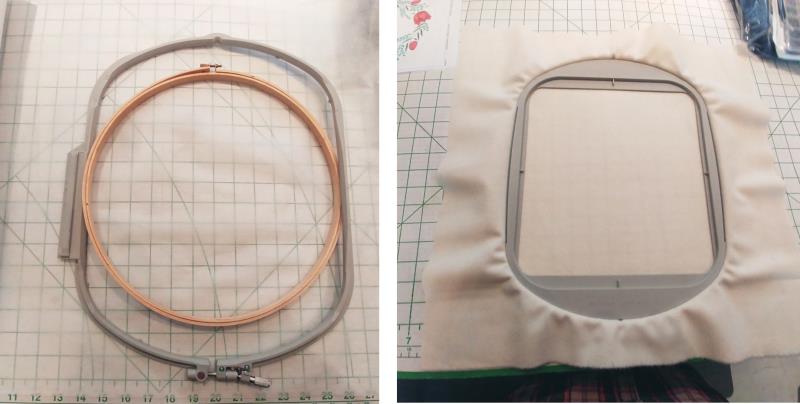
Be sure to choose the machine hoop large enough for the design and cut the fabric and stabilizer larger than needed. When assembling the hoop after stitching, it is easier to grasp the fabric if there is more fabric to grab onto. Hoop the white wool with two layers of poly mesh stabilizer.
(Click Image to Enlarge)
Step 14:
Place the water-soluble thread on the machine (bobbin and top). Place the hoop on the machine. Stitch color 1, the circles. Remove the water-soluble threads.
(Click Image to Enlarge)
Step 15:
Change to a full-bobbin of embroidery bobbin thread. Place the hoop back on the machine. Stitch the design following the color sequence.
(Click Image to Enlarge)
Step 16:
Continue stitching until the entire design has been stitched. Remove the fabric from the machine.
(Click Image to Enlarge)
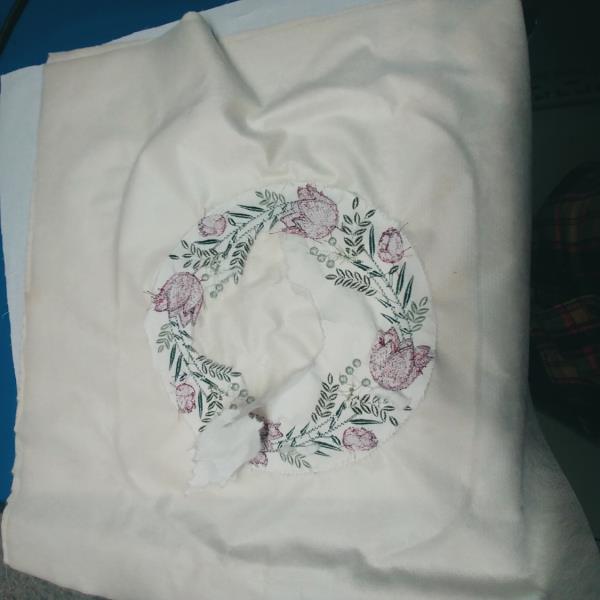
Step 17:
Cut away the stabilizer from the back of the design from both the inner and outer edges.
(Click Image to Enlarge)
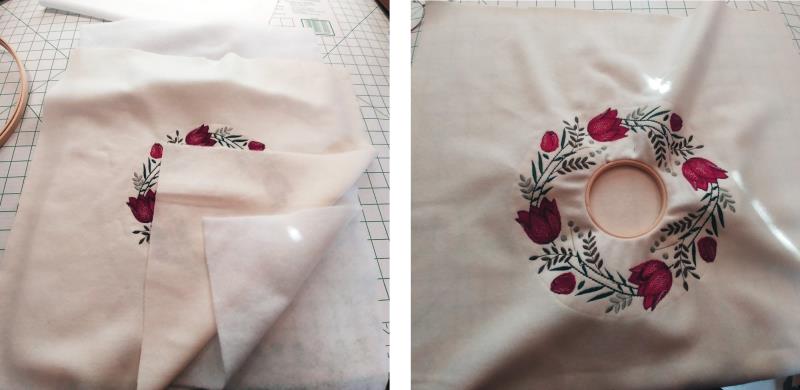
Step 18:
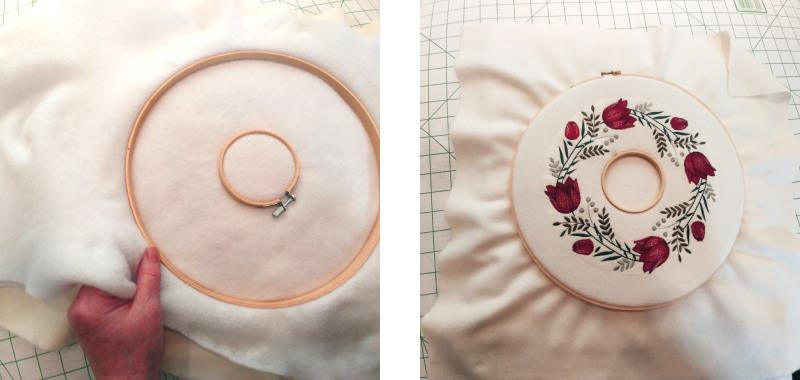
Cut two layers of cotton batting as large as the fabric. Begin with the smaller inner hoop. Unscrew the outer ring almost all the way. Align the inner ring to the inner stitched circle and press all three layers (fabric and two batting layers) into the outer ring and holding the inner hoop firmly, tighten the screw on the outer wring to snug it to the inner hoop. Be sure the circle remains aligned on the inner circle and the fabric inside the circle remains smooth.
(Click Image to Enlarge)
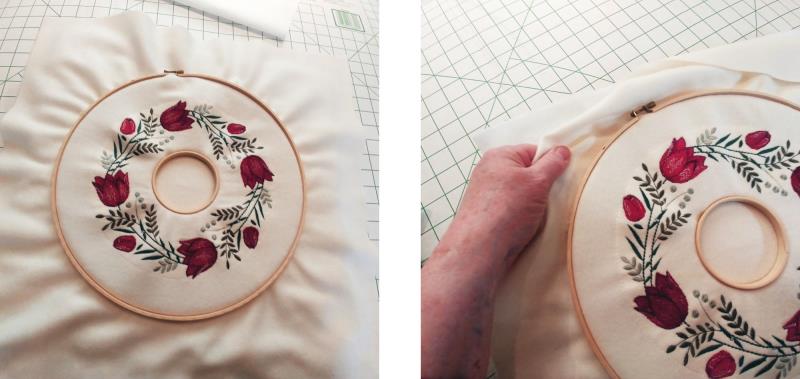
Step 19:
Repeat the steps but place the outer ring to the outside and make sure the screw is at the top of the design. Snug the screw up but not too tight at this point. Working around the hoop, gently pull on the fabric and batting to tease out all the wrinkles. Take your time and work carefully.
(Click Image to Enlarge)
Step 20:
Turn the project over, and continually check the back side, flipping back and forth working out all the wrinkles until the fabric is smooth. Tighten the screw firmly to hold the fabric in place.
(Click Image to Enlarge)
Step 21:
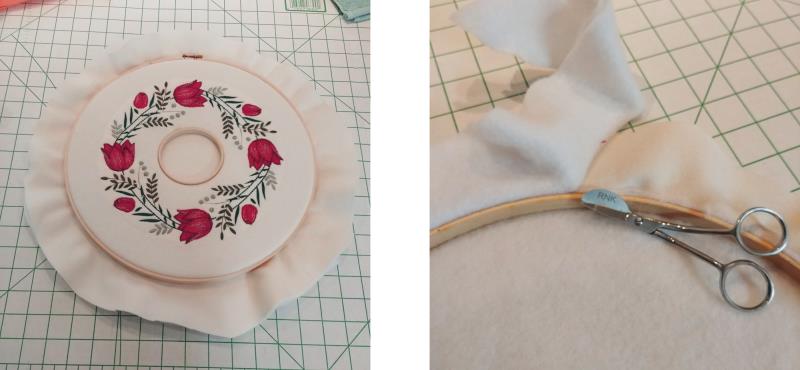
Trim the excess fabric leaving about two inches all the way around the outside. Flip the project over and on the back, use applique scissors to trim the batting right to the edge of the hoop.
(Click Image to Enlarge)
Step 22:
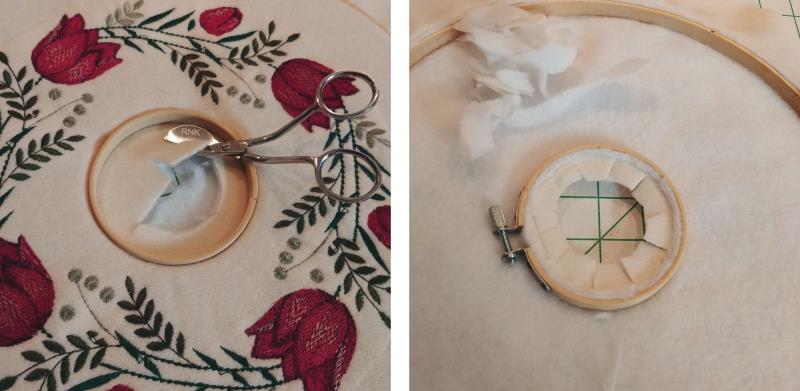
Next trim the fabric and batting from the center, leaving about ½” as shown. Now trim away the batting and clip the fabric.
(Click Image to Enlarge)
Step 23:
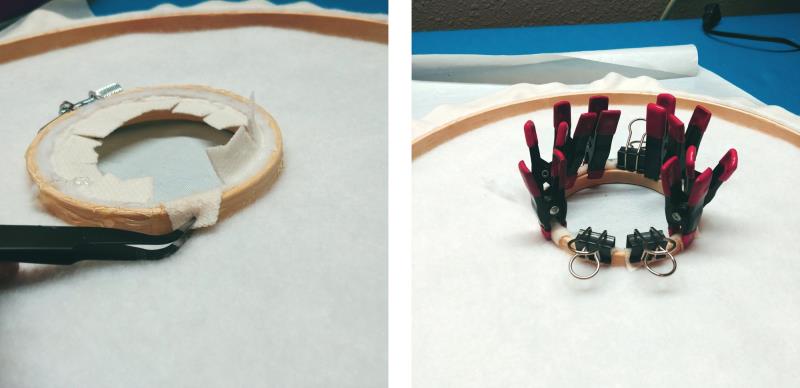
Trim the outer fabric to about ½-3/4” depending on the depth of the hoop. Beginning at the center hoop, place a line of glue around the hoop—read the directions on the glue and work in a well-ventilated area. If preferred, use hot glue and a glue gun.
(Click Image to Enlarge)
Step 24:
Smooth the clipped fabric over the hoop and to the back and use binder or gator clips to hold the fabric in place until dry.
(Click Image to Enlarge)
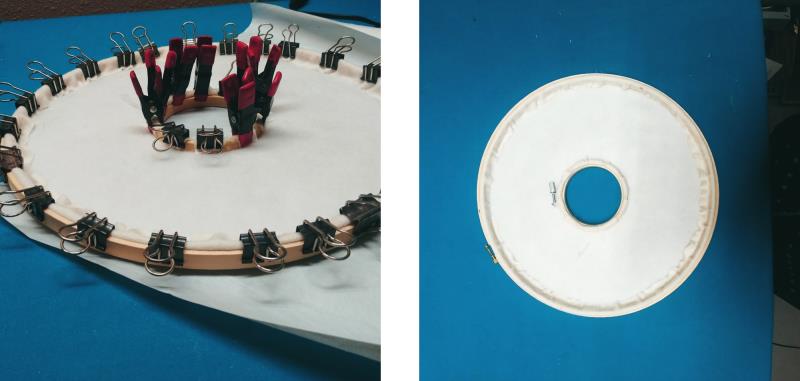
Step 25:
Working in small sections around the outer hoop, run a bead of glue on the back-inside of the hoop, smooth the fabric in place, and hold in place with clips. Let the piece dry overnight. Remove the clips when the glue is dry.
(Click Image to Enlarge)
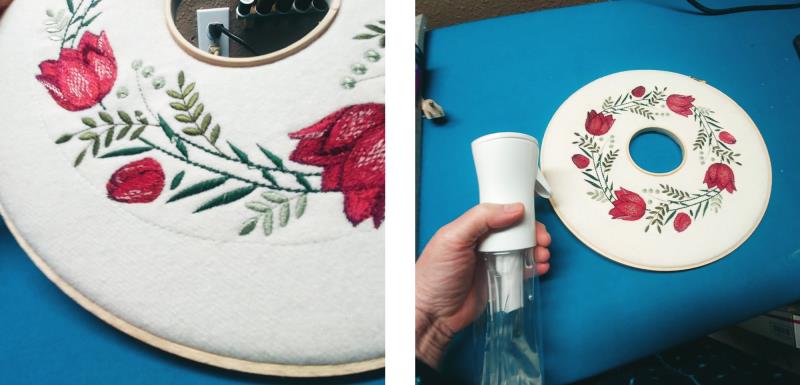
Step 26:
The water-soluble thread needs to be removed so just spritz the thread with a water misting bottle and let it air dry.
(Click Image to Enlarge)
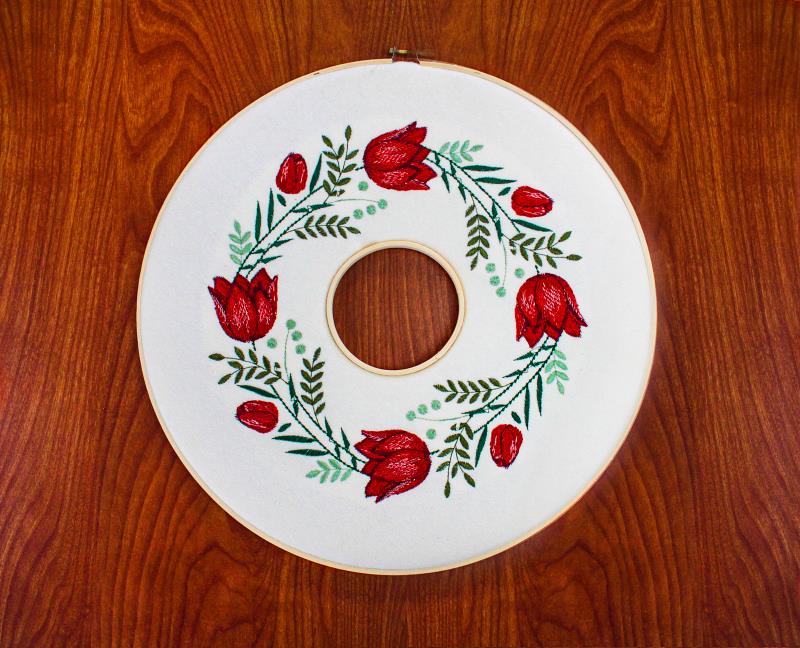
Step 27:
Congratulations on creating a beautiful wreath just in time for springtime decorating.
Ramona Baird has been in the embroidery industry for over 23 years. She and her husband owned a commercial and retail embroidery store in Arizona for many years. She is an experienced digitizer having been mentored by award-winners Pat Williams and Lindee Goodall. Ramona is a contributor to “Creative Machine Embroidery” magazine having 5 covers to her credit. Ramona has worked for Wilcom America and served many years as Education Director for the American Sewing Guild. With a degree in fashion design, she is able to design and execute patterns which Pat Williams says are “out of the box” in creativity and application. Ramona likes to challenge the boundaries of embroidery and bring new and exciting designs, ideas, and projects to EmbroideryDesigns.com. She wants embroiderers of all levels to increase their skills and enjoyment in using their embroidery machine for gift-making and personal pleasure.