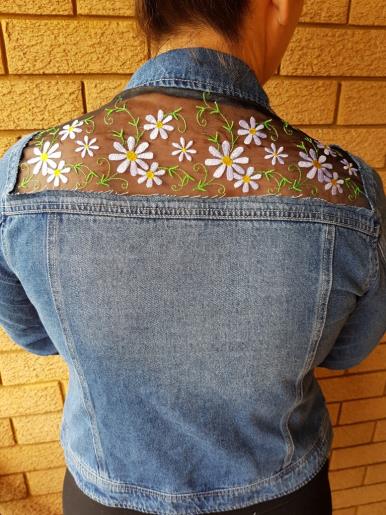
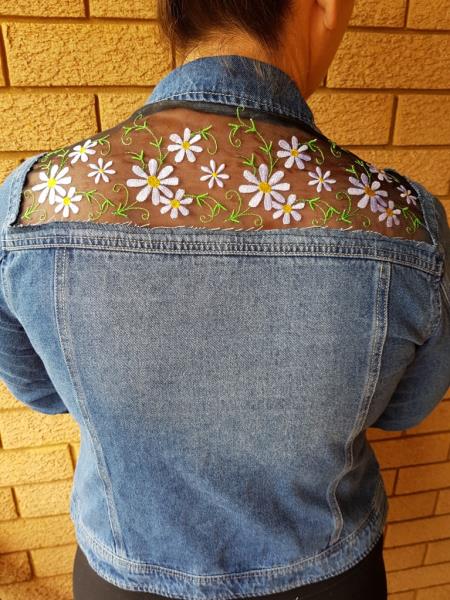
Around the cut out I have left the denim as raw edges. As you wash the garment, it will fray a little but will give a nice finish around the cut out
Step 1:
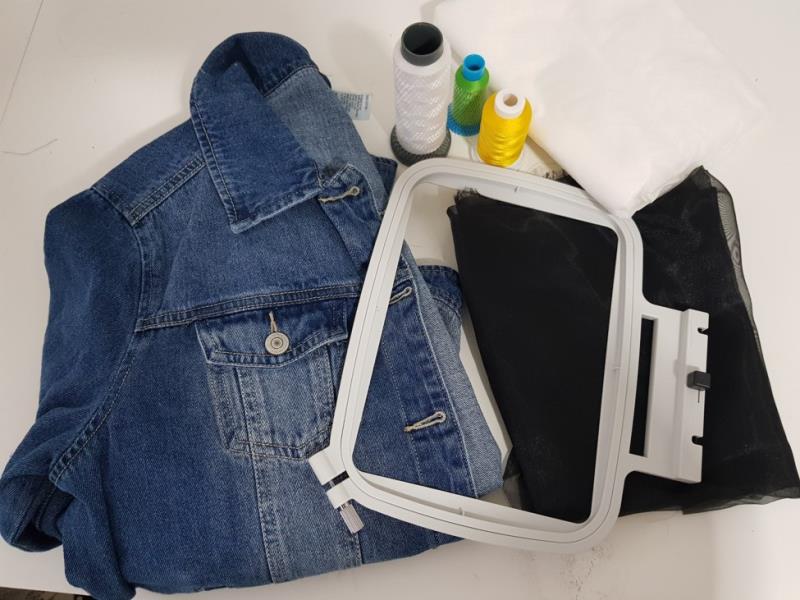
Gather your materials and have a read through the instructions before you begin. Have a copy of the color sequence on hand to refer to.
(Click Image to Enlarge)
Step 2:
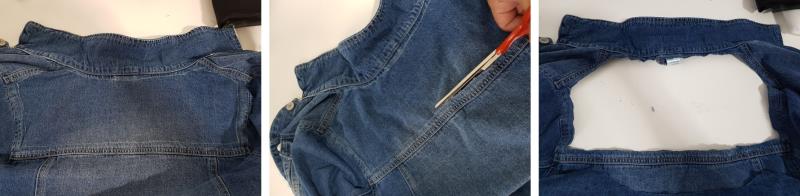
Lay your denim jacket down with the back facing up and mark the section to cut out ensuring you leave enough allowance to stitch the embroidered panel back on. Your panel size will vary with each jacket size, so ensure you take that into account. Once marked out, cut along that line. Take note of the width of your panel so you can size your embroidery to fit.
(Click Image to Enlarge)
Step 3:
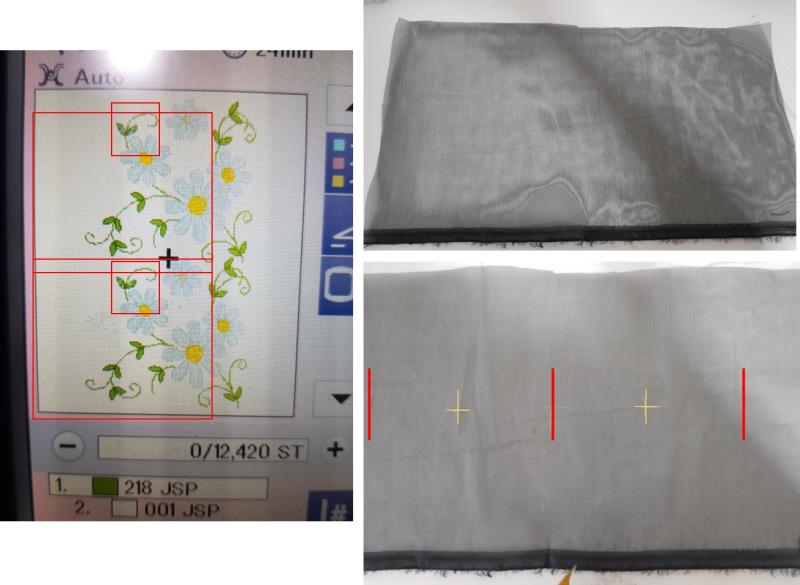
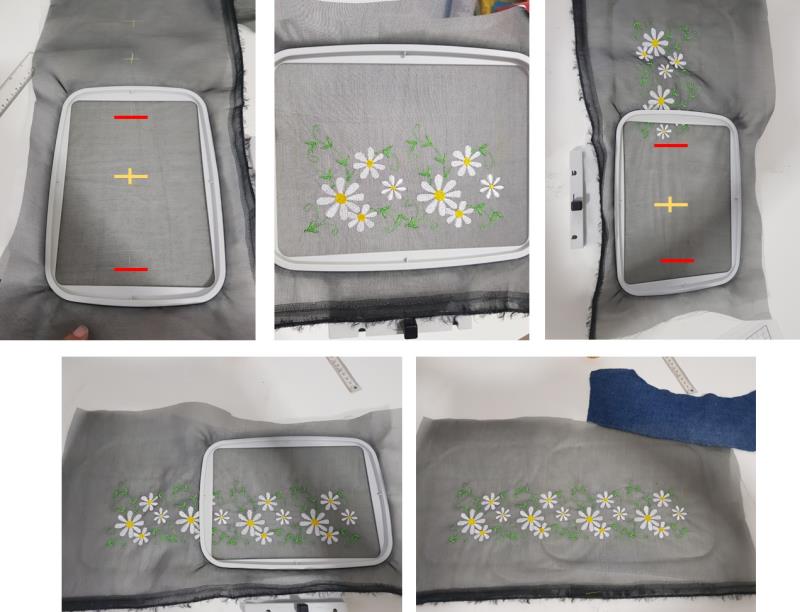
For this step, you can use an embroidery design software if you have it, otherwise just upload to your machine and move the designs as required. I have completed this embroidered panel in 2 hoopings as I needed the design to be 36cm long. So you will see in the first picture below, of my machine screen, that I have uploaded 2 of the Daisy Flowers (vine) design and 2 individual White Daisy’s (single flowers). I have positioned the single daisy flowers in the gaps of the vine design. So this will be 1 hooping. Press your organza panel so it is nice and flat. Then measure across the length of the panel and mark halfway (middle red line on below pic). My design measured 18cm long, so from the centre red line I marked to the left and right 18cm. between each red mark, mark the centre of those sections, this indicates the centre of each hooping design (yellow vertical markings). Then measure down the width of the fabric to find halfway and mark (yellow horizontal markings).
(Click Image to Enlarge)
Step 4:
Hoop your backing and organza together for the first hooping, ensuring your markings for the first section are centred in the hoop. Stitch out the design. Once complete, remove the hoop and re-hoop for the second stitch out, again ensuring you centre the panel according to your markings. Stitch out the design. Once complete, unhoop and your stitch outs are complete.
(Click Image to Enlarge)
Step 5:
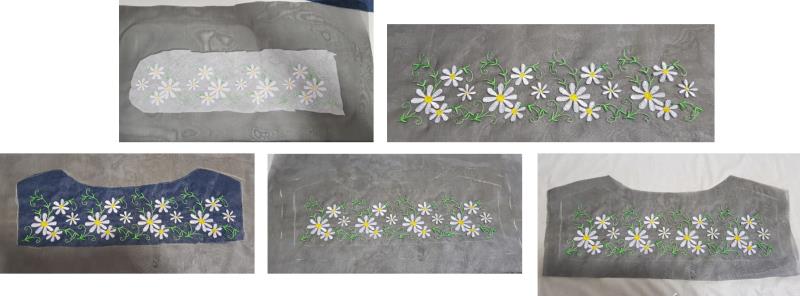
Cut away the backing, leaving some around the entire design. Following the manufacturers instructions, submerge the panel in water to dissolve the backing. Leave to dry and press flat. Now using the denim panel you cut out, lay it underneath the organza and centre your design over the top. Once you have it positioned, trace around the denim panel, then from that marking measure out 1” to indicate seam allowance. Now cut along that outside line.
(Click Image to Enlarge)
Step 6:
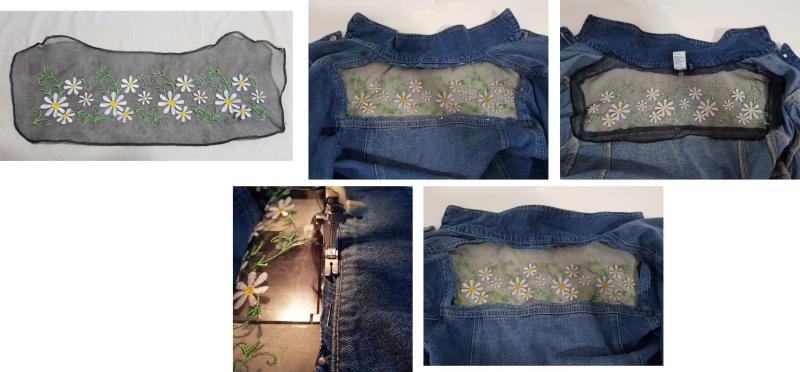
There are a few ways to finish the edge of your organza panel, I have decided to do a rolled hem, or you could serge it, but don’t leave it raw as it will fray. Now lay the panel underneath the denim jacket and pin it in place, the excess of the panel will be on the inside of the jacket. Now stitch the panel down in place.
(Click Image to Enlarge)
Step 7:
Enjoy your revamped denim jacket! Its eye catching and delicate