{{superHeaderAds.title}}
Live Chat
Embroidery Designs
Welcome, Embroiderer
Login
Cord Travel Case
{{mainImageAlt || (productInfo._source && productInfo._source.name) || ''}}

Cord Travel Case Embroidery Project

By   Kylie Burke   on   February 03, 2020

PROJECT DETAILS

SKILL LEVEL
Intermediate
TIME REQUIRED
01:30
Description

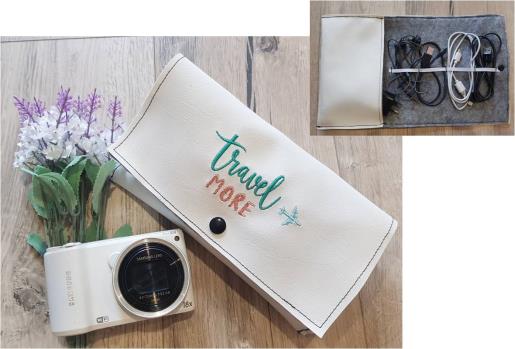
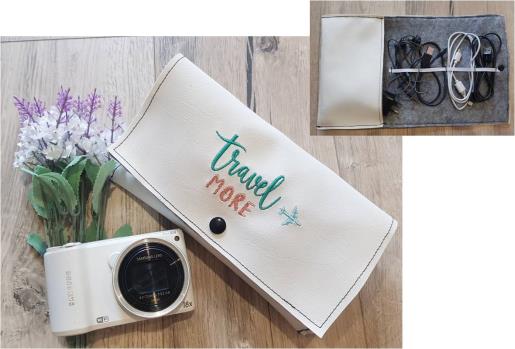
Are your cords always in a tangle when packing for a trip? Enjoy making this cord travel case to keep all your cords neat and in one place.

Project Preview Video

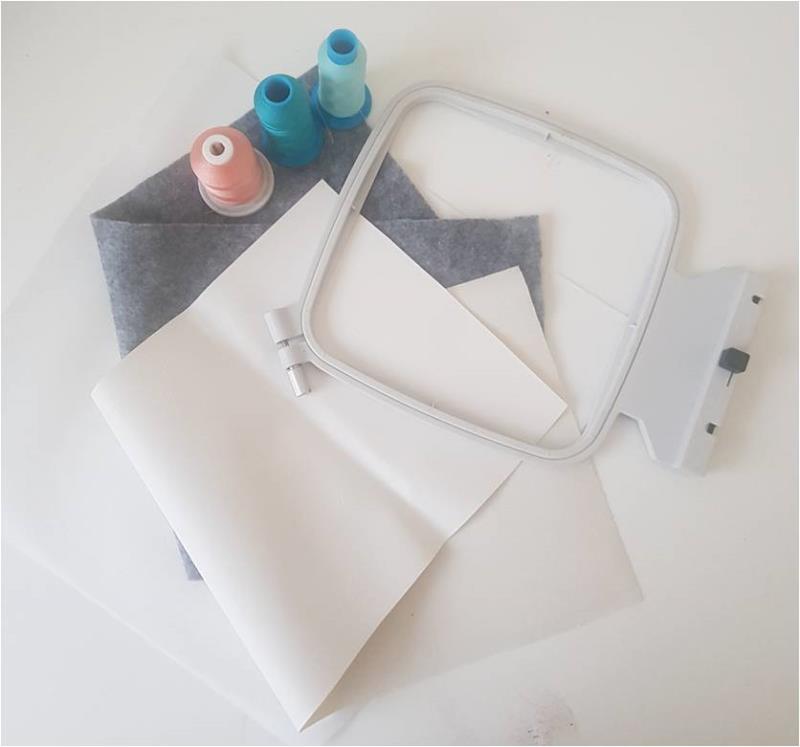
Materials
  • 8” x 18” piece of white vinyl
  • 8” x 18” piece of grey felt
  • 7 ¾” piece of 6mm elastic
  • Embroidery threads
  • Tearaway stabilizer
  • 4” embroidery hoop
  • Embroidery threads
  • Ballpoint needle

  • Designs used in this project

    Final Product: What You Will Create

    Preface:
    I always use a ballpoint needle when embroidering on vinyl and sewing, as it doesn’t pierce the vinyl like sharp needles do


    Step 1:
    Gather the materials and read through the instructions before beginning. Have a copy of the color sequence on hand to refer to.

    (Click Image to Enlarge)


    Step 2:
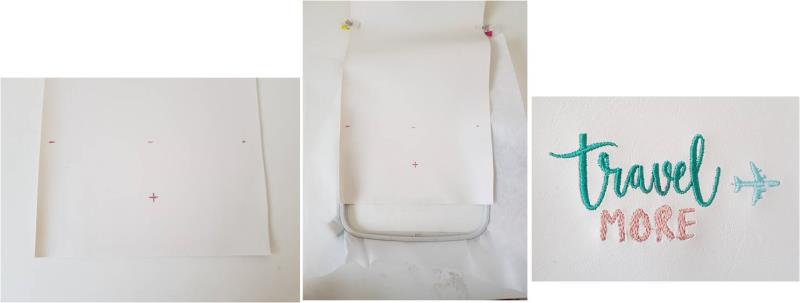
    Cut 1 piece of vinyl and 1 piece of felt into an 8” x 18” rectangles. At one end of the vinyl, mark up from the short edge 4”, this will be your front fold flap. Then find the centre of the front flap and mark with a wipeable marker. This indicates the centre of your embroidery design. Hoop the tearaway stabilizer and lay the vinyl onto, centering to the hoop and secure in place either with some spray adhesive or tape. Stitch out the design. Once complete, unhoop the design and tearaway the stabilizer 

    (Click Image to Enlarge)


    Step 3:
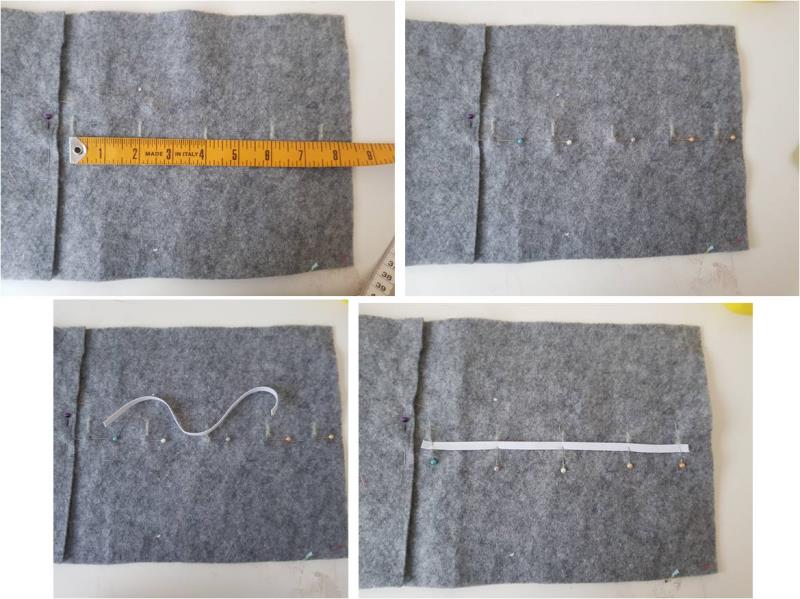
    On the felt piece only, measure in 8 ½” from the right hand side short edge. Mark at 0, 2”, 4”, 6” and 7 ½”. Then measure down from the top long edge and mark at 4”, this indicates the centre of the width of the felt. Lay your piece of elastic down, allowing it go a little past the 0 and 7 ½” marks and pin along the elastic at all your marks. The pin marks indicate where you will stitch down the elastic

    (Click Image to Enlarge)


    Step 4:
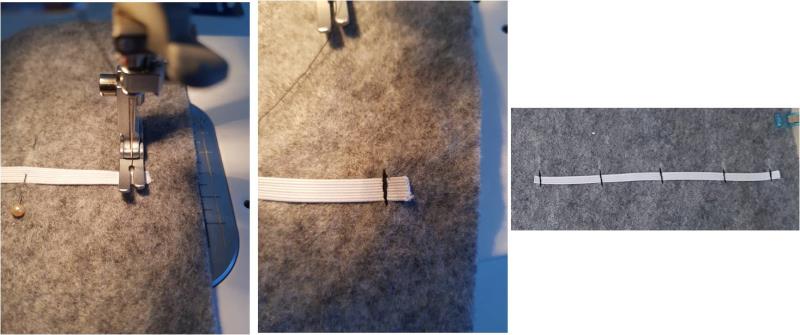
    Now stitch down across the elastic to hold it in place at each marking. This forms the sections for your cords. 

    (Click Image to Enlarge)


    Step 5:
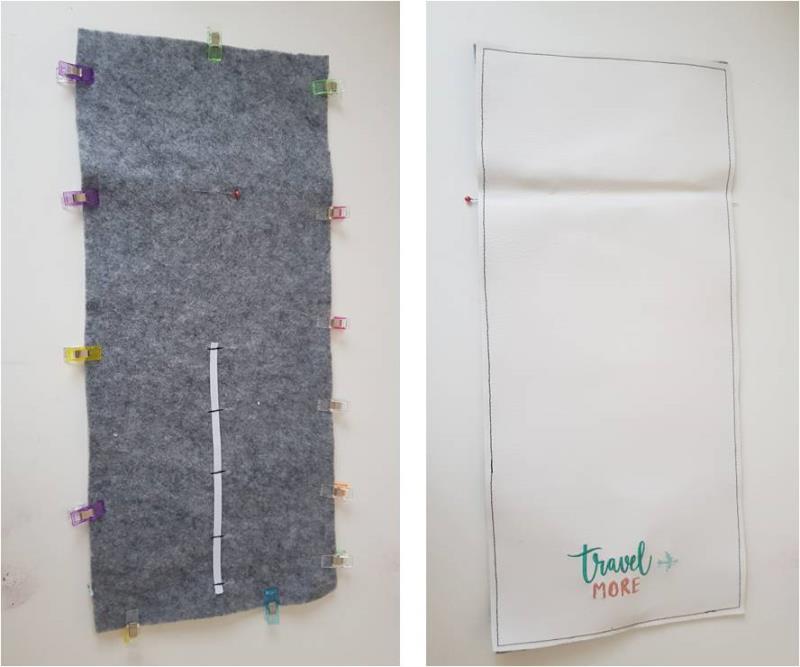
    Now lay your felt and vinyl together, wrong sides facing with all edges aligned and pin together. Stitch all the way around, sewing the 2 pieces together. I have used a contrast thread color for a design feature.  

    (Click Image to Enlarge)


    Step 6:
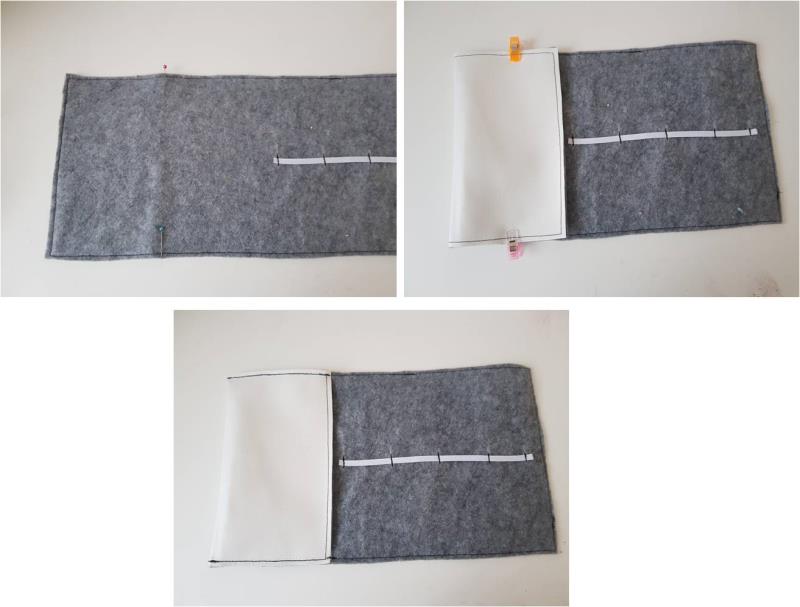
    Turn your project felt side up and from the left side short edge, mark in 4 ½”. This indicates the fold line for the internal pouch. Fold it up at that point and pin to hold. Now stitch down both sides along the existing stitch lines to secure the pouch. 

    (Click Image to Enlarge)


    Step 7:
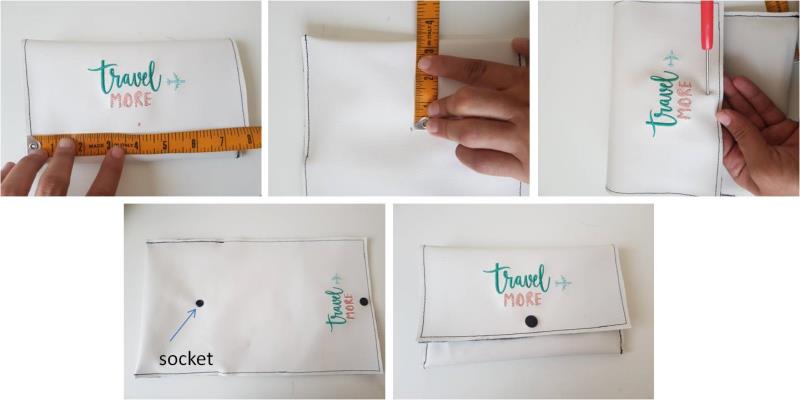
    I have used snaps for my closure. You will need 2 caps, 1 stud and 1 socket. On the front flap half way between the embroidery design and the edge of the vinyl, mark the centre for where your snap will go. Then on the back side of the pouch, measure up 3 ½”, ensuring it is also centered width wise, and mark. Attach your snaps. From the front you will see the cap, with the socket on the inside. On the back of the pouch, you will see the socket. This way when you fold up the case the front flap will secure down

    (Click Image to Enlarge)


    Step 8:
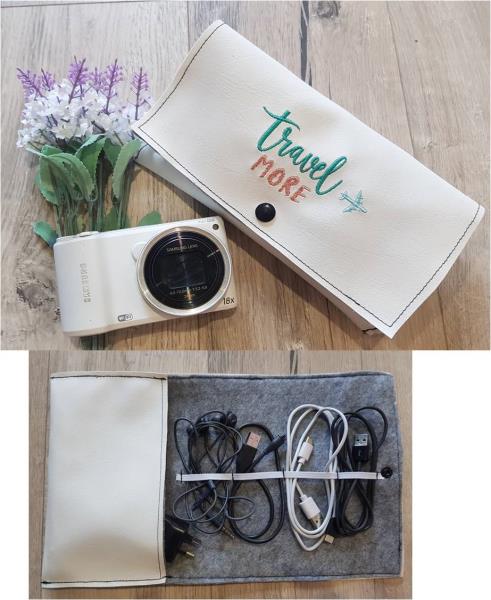
    Well done, your cord travel case is now complete. A wonderful project to keep all your chargers and accessories in one place while travelling. 

    (Click Image to Enlarge)

    Meet the Author: Kylie Burke
    Kylie Burke
    Kylie is based in Australia and loves creating and sharing her unique pieces.
    More From This Author
    Link is Broken, Please check the URL
    Exclusive Embroidery Offers!
    Copyright © {{ currentDate | date:'yyyy'}} - EmbroideryDesigns.com
    GET 50% OFF! ×