{{superHeaderAds.title}}
Live Chat
Embroidery Designs
Welcome, Embroiderer
Login
Simply Rustic Pocket Advent Calendar
{{mainImageAlt || (productInfo._source && productInfo._source.name) || ''}}

Simply Rustic Pocket Advent Calendar Embroidery Project

By   Linda Mills   on   November 26, 2019

PROJECT DETAILS

SKILL LEVEL
Intermediate
TIME REQUIRED
03:00
Description

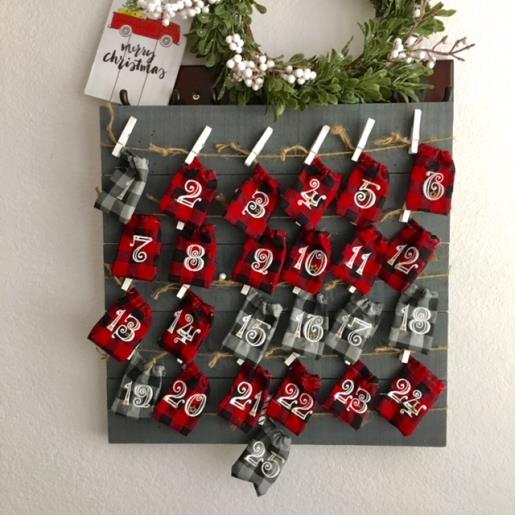
Make memories this holiday season and create this rustic themed pocket advent calendar to get into the Spirit of the Season.

Project Preview Video

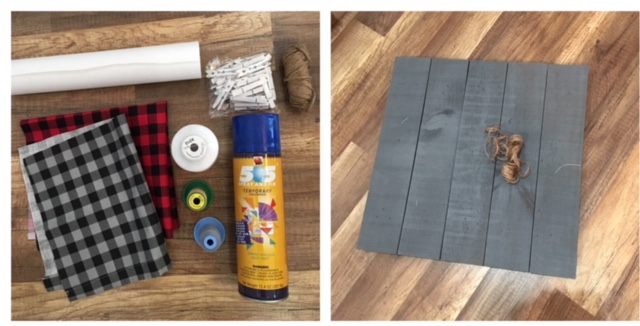
Materials
  • UNFINISHED OR FINISHED WOOD PLAQUE 16” X 16”
  • EMBROIDERY THREAD ( WHITE / GOLD)
  • SEWING THREAD
  • BUFFALO CHECK FABRIC ( RED AND GRAY) 1/4 YARD EACH
  • TEAR AWAY STABILIZER
  • TEMPORARY ADHESIVE SPRAY
  • CLOTHESPINS (25) ( 1 ½” – 2” IN LENGTH)
  • TWINE
  • LONG UPHOLSTERY NEEDLE ( LARGE EYE)( NOT PICTURED)
  • EMBROIDERY SOFTWARE PROGRAM ( OPT)
  • STAPLE GUN AND STAPLES (NOT PICTURED)

  • Designs used in this project
  • https://www.embroiderydesigns.com/productdetails/ct-company/supplies/1/tmpspray505
  • https://www.embroiderydesigns.com/productdetails/embroidery-patterns/stockdesign/1/bn01634_2
  • https://www.embroiderydesigns.com/productdetails/embroidery-patterns/stockdesign/1/bn01634_1
  • https://www.embroiderydesigns.com/productdetails/embroidery-patterns/stockdesign/1/bn01634_6
  • https://www.embroiderydesigns.com/productdetails/embroidery-patterns/stockdesign/1/bn01634_5
  • https://www.embroiderydesigns.com/productdetails/embroidery-patterns/stockdesign/1/bn01634_3
  • https://www.embroiderydesigns.com/productdetails/embroidery-patterns/stockdesign/1/bn01634_9
  • https://www.embroiderydesigns.com/productdetails/embroidery-patterns/stockdesign/1/bn01634_4
  • https://www.embroiderydesigns.com/productdetails/embroidery-patterns/stockdesign/1/bn01634_7
  • https://www.embroiderydesigns.com/productdetails/embroidery-patterns/stockdesign/1/bn01634_0
  • https://www.embroiderydesigns.com/productdetails/embroidery-patterns/stockdesign/1/bn01634_8
  • https://www.embroiderydesigns.com/productdetails/ct-company/supplies/1/ta15
  • https://www.embroiderydesigns.com/productdetails/emb-store/thread/5/ept5000


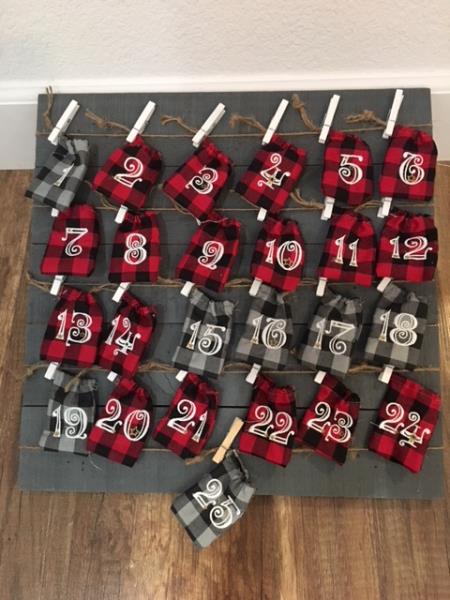
  • Final Product: What You Will Create

    Preface:
    A fun way to count down to Christmas right up to that Special Day. Pockets are individually embroidered using the small sized Starry Christmas Font. Side seams are then stitched to create a pocket with a casing for the twine. Fill the pockets that will bring enjoyment and delight when opened. 


    Step 1:
    Gather all your supplies and review instructions before beginning.( If using an unfinished board you can either paint or leave unfinished. Your preference for the look you'd like to achieve).

    (Click Image to Enlarge)


    Step 2:
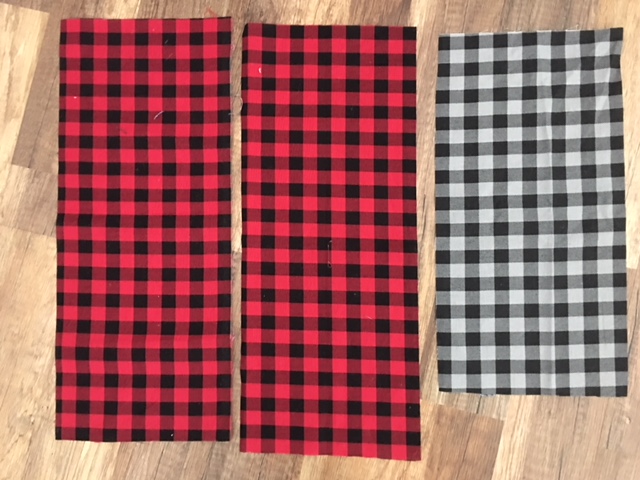
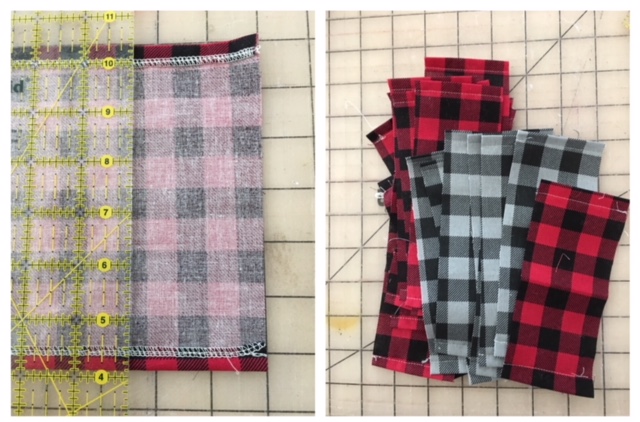
    Cut your fabric into 7 ½” width strips. (Allow for the stripes in the buffalo print as you cut. to size)  We will be making a total of 25 bags.

    (Click Image to Enlarge)


    Step 3:
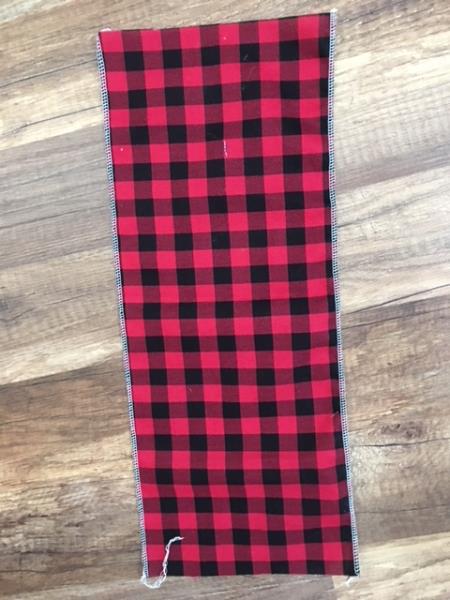
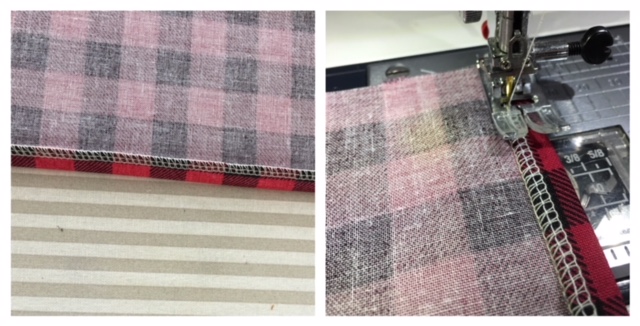
    Serge/zig zag long side edges of  cut strips

    (Click Image to Enlarge)


    Step 4:
    Fold down each side edge by ¼” and iron press. Stitch in place approx.. 1/8” seam allowance from serged/zig zagged edge. ( this will make a casing to insert the twine)

    (Click Image to Enlarge)


    Step 5:
    Cut 25 strips @ 2 ½” wide.  

    (Click Image to Enlarge)


    Step 6:
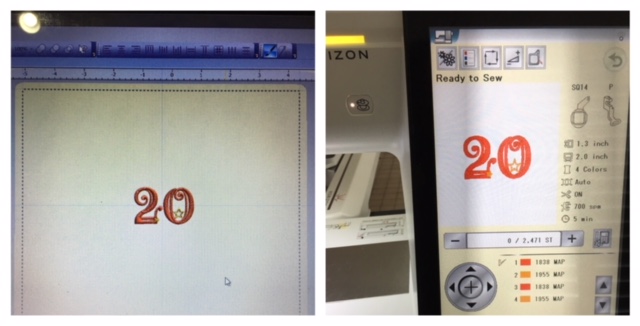
    EMBROIDER EACH BAG WITH A NUMBER #1 -#25.
    You can create the double digit numbers with your embroidery software program or load the numbers in your machine and create in edit mode per your machines instructions. 

    (Click Image to Enlarge)


    Step 7:
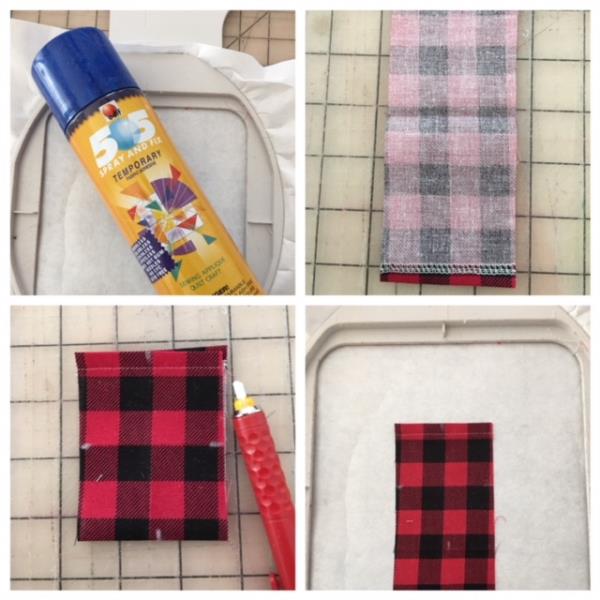
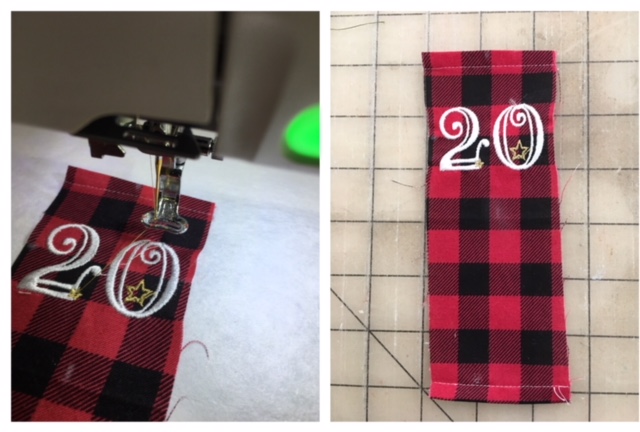
    Hoop a piece of tear away stabilizer. Lightly spray temporary adhesive spray onto stabilizer. Center a cut pocket strip onto stabilizer by folding the pocket in half. ( you will be emroidering on the top half of the strip as that will be the front of your pocket.) Mark side and top axis lines. Place onto stabilizer matching axis points to the hoop markings.  

    (Click Image to Enlarge)


    Step 8:
    Attach hoop to machine. Confirm center needle placement per your machine's instructions and begin the embroidering process. Embroidering complete. Remove hoop . Cut and trim all jump stitches and loose thread ends. Tear away stabilizer. Repeat steps for the remaining numbers. 

    (Click Image to Enlarge)


    Step 9:
    CREATING THE POCKET
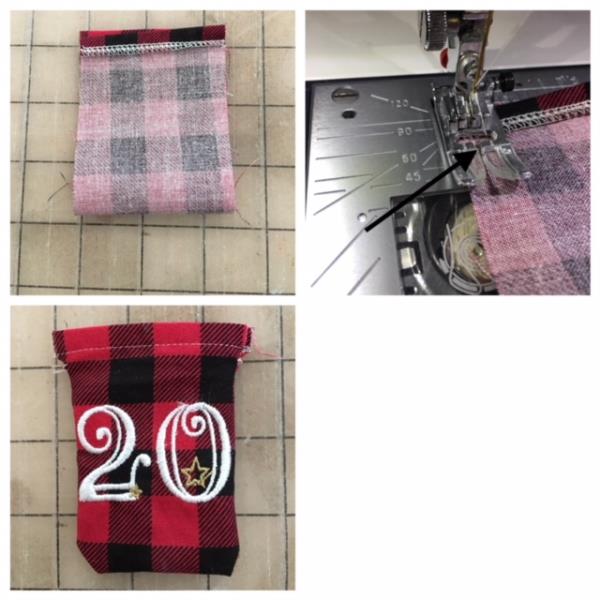
    Fold your embroidered strip in half right sides together matching top edges. Stitch side seams using ¼” seam allowance . Place your needle below the serged edge to begin stitching. ( casing) turn right side out. Complete step for the remaining embroidered strips. 

    (Click Image to Enlarge)


    Step 10:
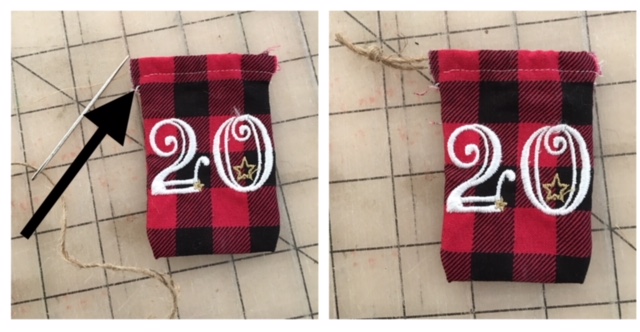
    Thread your long needle with the twine and feed through top front casing from left and into back casing. Slip knot ends. Repeat for the remaining stitched pockets.

    (Click Image to Enlarge)


    Step 11:
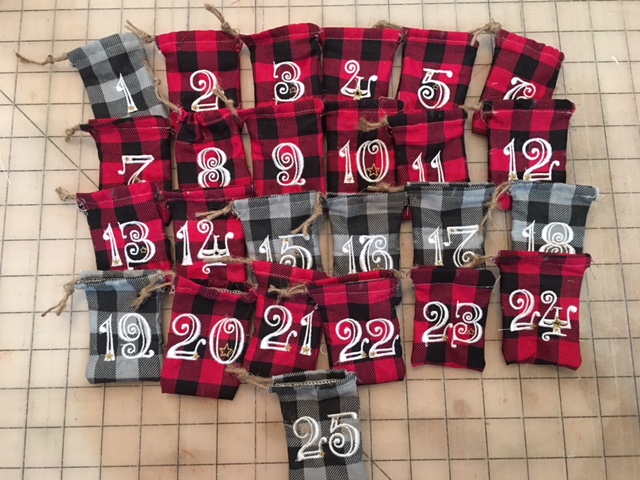
    Woohoo. Way to go. All 25 pockets are complete.

    (Click Image to Enlarge)


    Step 12:
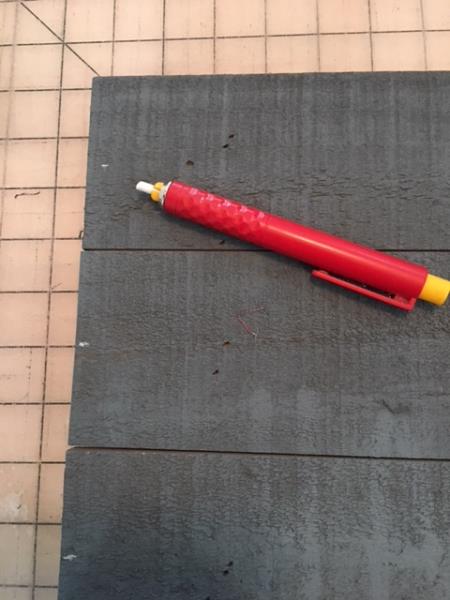
    Mark board on each side 1 ½” down from top and 3” in between markings for next 4 rows. Last row (5) marking should be approx 1 ½” from bottom of board.  ( Total: 5 rows)

    (Click Image to Enlarge)


    Step 13:
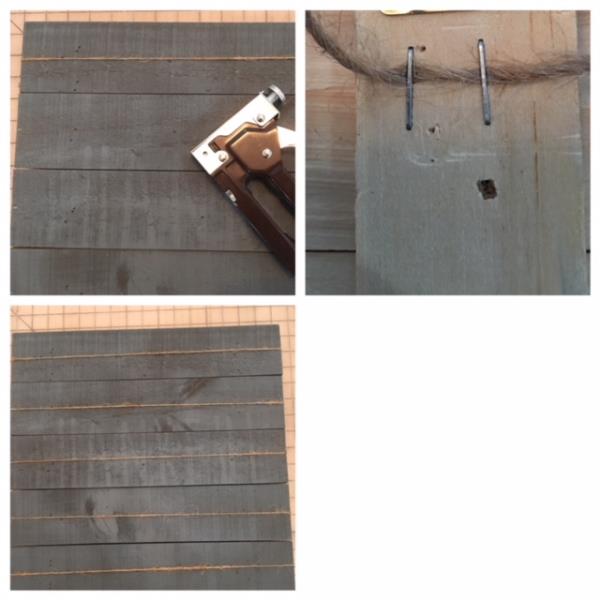
    Lay your twine across your board from side to side at markings. Secure using your staple gun by stapling on the back over the twine. Repeat for the next 4 rows.

    (Click Image to Enlarge)


    Step 14:
    Arrange your pockets with 6 pockets per the first 4 rows and #25 on the bottom row. Secure in place with your clothespins. Fill the pockets and your Simply Rustic Advent Calendar is complete and ready for the countdown to Christmas.    

    (Click Image to Enlarge)

    Meet the Author: Linda Mills
    Linda Mills
    Linda loves to create by sharing her different sewing and machine embroidery techniques so others can utilize their machines to the fullest
    More From This Author
    Link is Broken, Please check the URL
    Exclusive Embroidery Offers!
    Copyright © {{ currentDate | date:'yyyy'}} - EmbroideryDesigns.com
    GET 50% OFF! ×