{{superHeaderAds.title}}
Live Chat
Embroidery Designs
Welcome, Embroiderer
Login
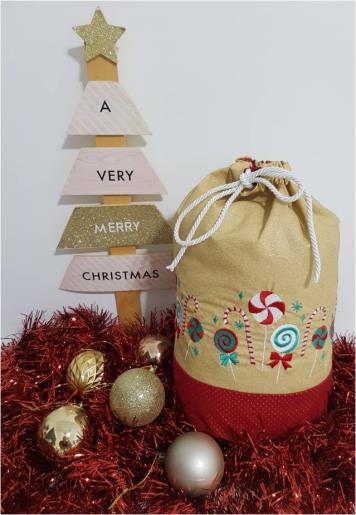
Holiday Candy Sack
{{mainImageAlt || (productInfo._source && productInfo._source.name) || ''}}

Holiday Candy Sack Embroidery Project

By   Kylie Burke   on   October 23, 2019

PROJECT DETAILS

SKILL LEVEL
Intermediate
TIME REQUIRED
02:40
Description

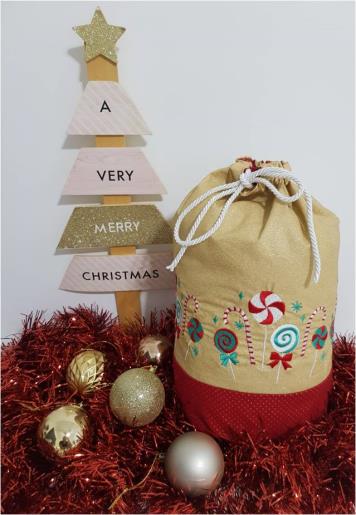
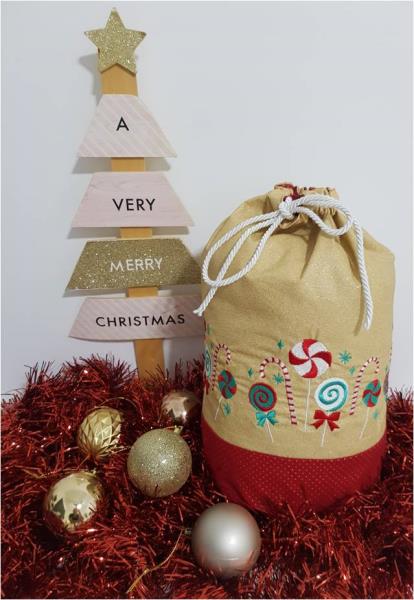
Christmas sacks are always a fun addition and this mini sack is a perfect gift or even gift holder!

Project Preview Video

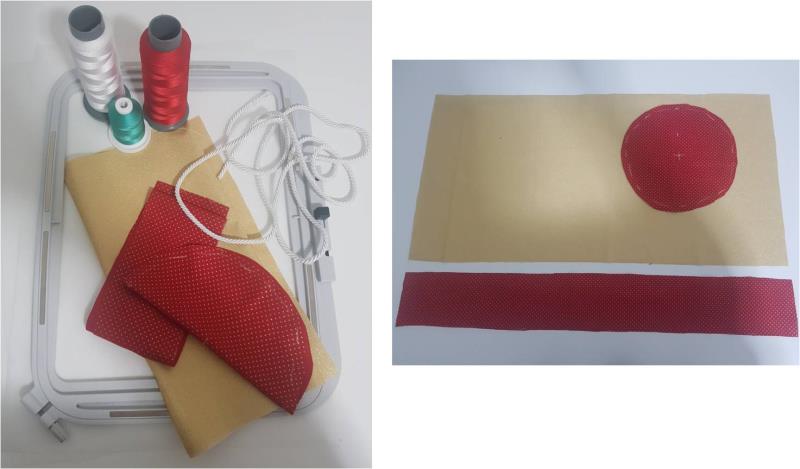
Materials
  • Gold glitter cotton fabric
  • Red with gold spots cotton fabric
  • White cord x 90cm
  • Green, white & red embroidery thread
  • Tearaway stabilizer
  • 5x7” hoop

  • Designs used in this project

    Final Product: What You Will Create

    Preface:
    For the candy cane design, I chose the largest size to best suit to sack size


    Step 1:
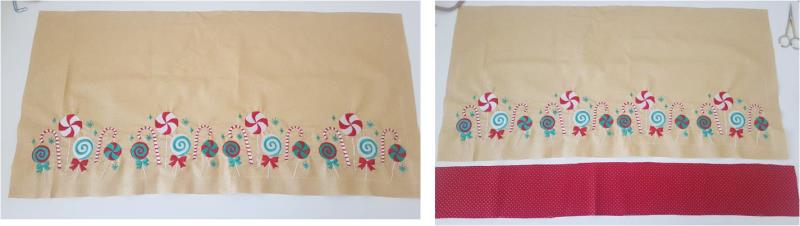
    Gather the materials and read through the instructions before beginning. Have a copy of the color sequence on hand to refer to. From the gold fabric cut a rectangle 27cm x 60cm. From the red spot fabric cut a rectangle 7cm high x 60cm long, 2 circles with a diameter of 22cm and 1 rectangle 36cm high x 60cm long. (2 circle and the larger rectangle of the red spot fabric is the lining)

    (Click Image to Enlarge)


    Step 2:
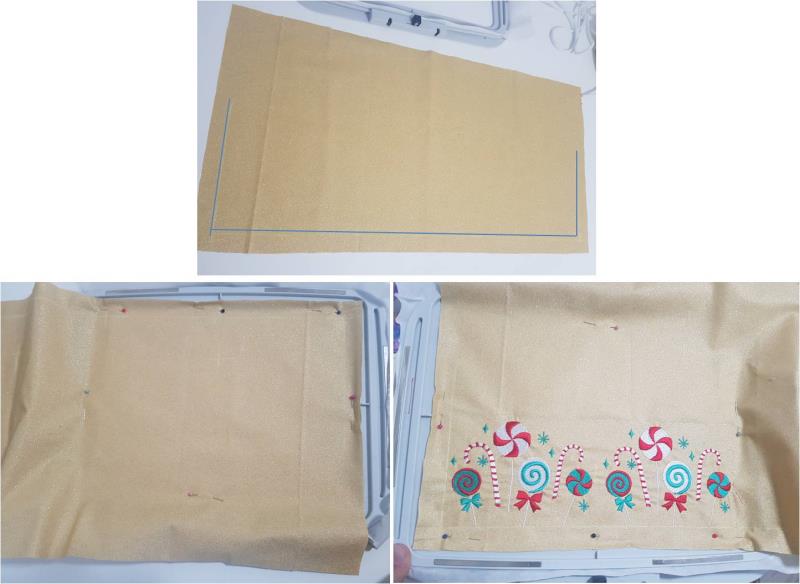
    On the gold rectangle, mark up from the bottom 2cm and in 2cm on each side. The indicates the outline of the design. For this sack, I have stitched the design out twice, with two hooping. For the first stitch out, hoop the tearaway stabilizer and secure fabric to your hoop, you may wish to hoop them together I just like using the tack down option. I have positioned my design at the bottom of the hoop top allow me to line up the fabric and design position. Stitch out the first repeat.

    (Click Image to Enlarge)


    Step 3:
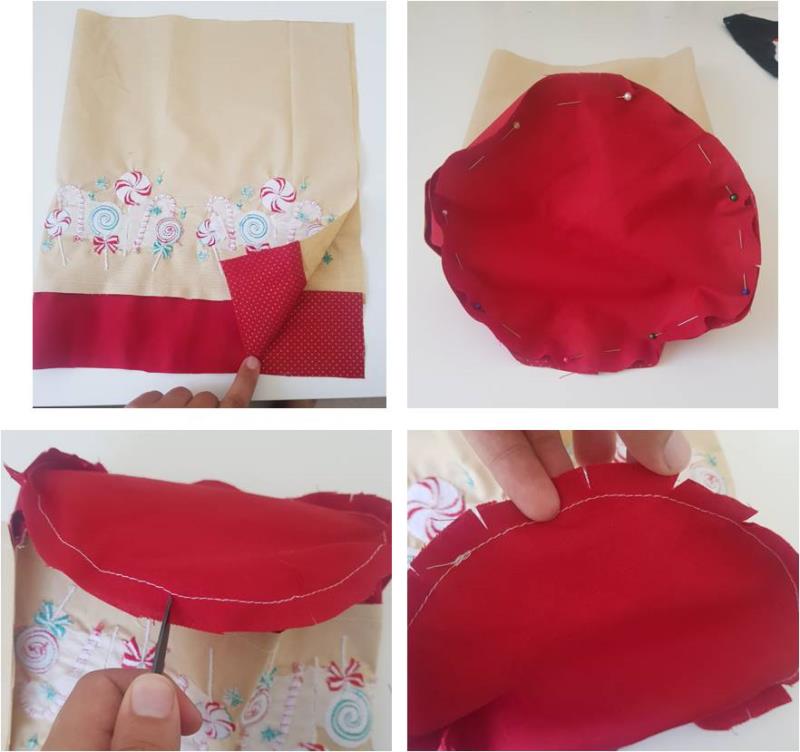
    Unhoop the fabric and stabilizer and rehoop for the next repeat, repeating the same steps for the first stitch out you completed. Your design should now cover the length of your fabric. Place the red rectangle onto the gold fabric, right sides facing and stitch along the long edge, using a 10mm seam. This will form the border base of the sack.

    (Click Image to Enlarge)


    Step 4:
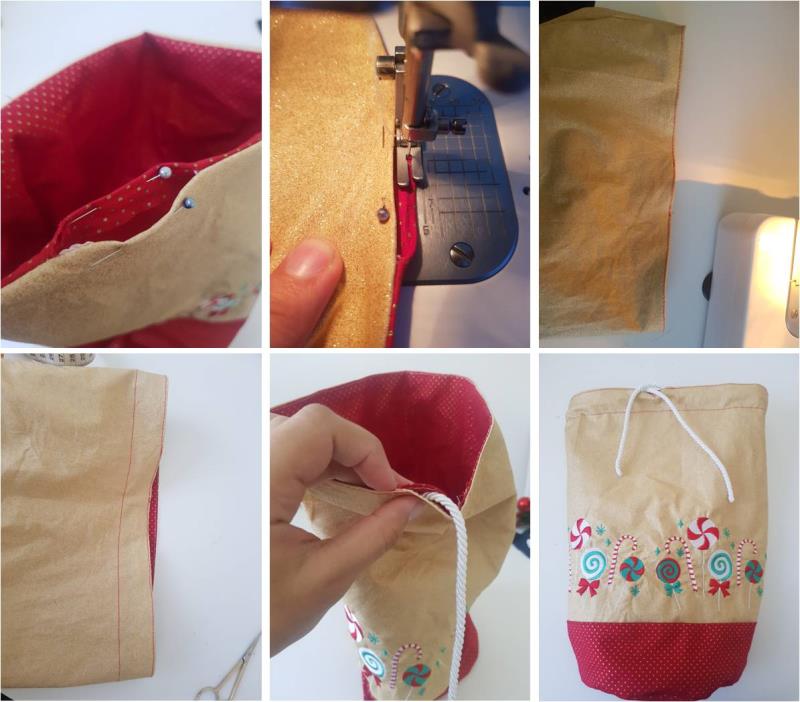
    Now fold that piece in half widthwise with right sides facing and stitch down the raw edges to form a tube, using a 10mm seam. Take 1 of the red circles and pin this to the base of the tube, stitch in place using a 10mm seam. Snip all around the circle, ensuring not to snip the stitching, to allow the sack to have a smooth curved edge.

    (Click Image to Enlarge)


    Step 5:
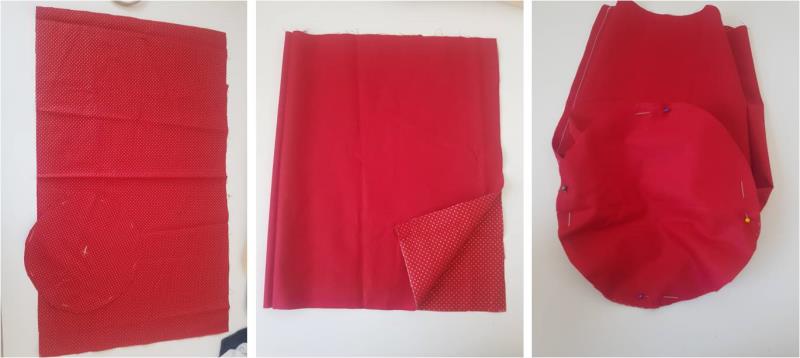
    Now repeat the steps with the lining fabric. Fold the rectangle piece in half widthwise, right sides facing, and stitch down the raw edge. Then attach the circle base.

    (Click Image to Enlarge)


    Step 6:
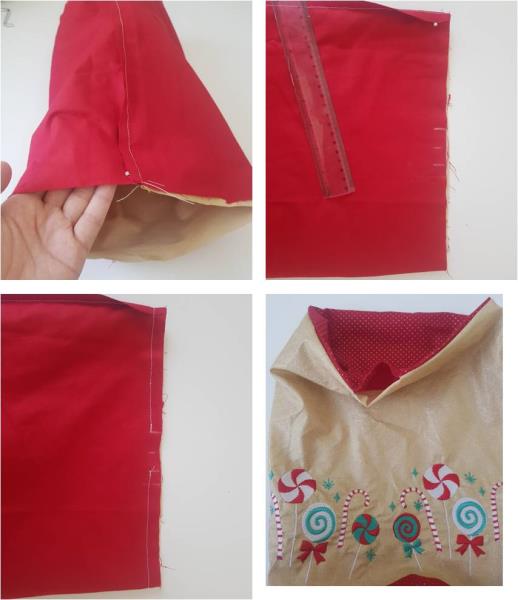
    Now insert the outer sack (embroidered piece) into the red lining with right sides facing and pin together at the side seam. Along the top opening, on the lining mark an opening of 6cm, then stitch all around the top edge leaving the marked section open. Turn your sack in the right way, pulling it through this opening. Press the top edge to ensure a flat seam.

    (Click Image to Enlarge)


    Step 7:
    On the opening, turn in the raw edges and pin down. Top stitch along each main and lining piece then top stitch around the remainder of the bag, through both layers. From the top edge, mark down 3cm and stitch all the way around the bag to form to cord casing. Then insert your cord through the casing.

    (Click Image to Enlarge)


    Step 8:
    Your candy sack is complete

    (Click Image to Enlarge)

    Meet the Author: Kylie Burke
    Kylie Burke
    Kylie is based in Australia and loves creating and sharing her unique pieces.
    More From This Author
    Link is Broken, Please check the URL
    Exclusive Embroidery Offers!
    Copyright © {{ currentDate | date:'yyyy'}} - EmbroideryDesigns.com
    GET 50% OFF! ×