{{superHeaderAds.title}}
Live Chat
Embroidery Designs
Welcome, Embroiderer
Login
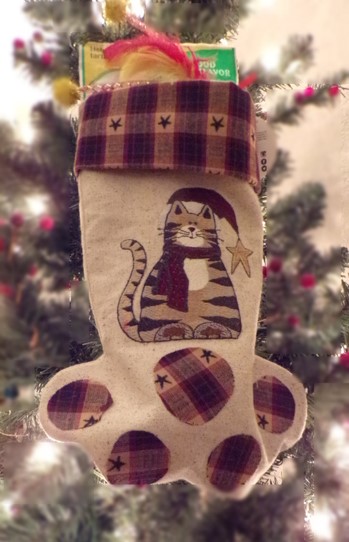
Meowy Christmas Stocking
{{mainImageAlt || (productInfo._source && productInfo._source.name) || ''}}

Meowy Christmas Stocking Embroidery Project

By   Ramona Baird   on   October 22, 2019

PROJECT DETAILS

SKILL LEVEL
Intermediate
TIME REQUIRED
03:30
Description

Let kitty participate in Christmas morning with their very own treat-filled stocking.

Project Preview Video

Materials
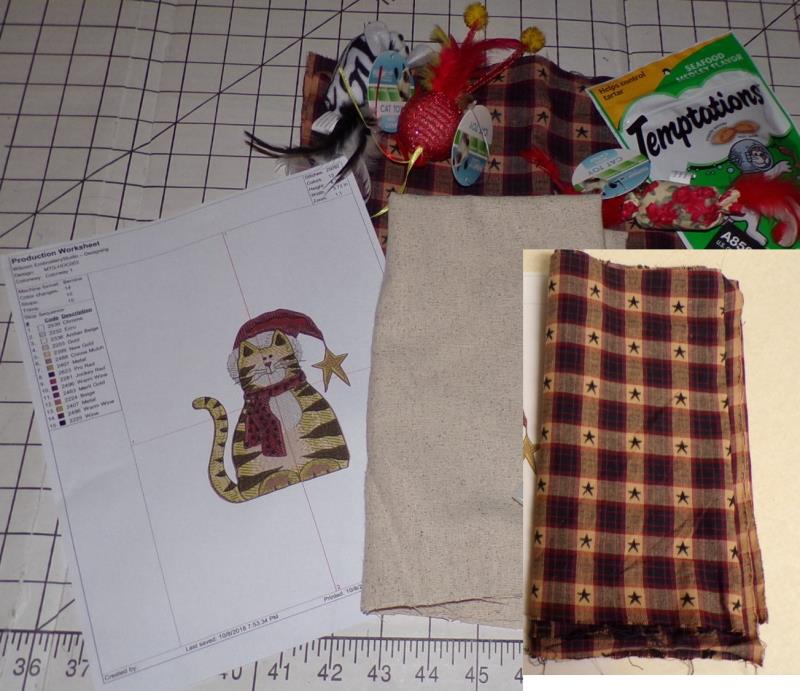
  • Paw-style cat stocking (search internet for downloadable pattern)
  • Fabrics yardage and notions as stated in stocking pattern
  • Embroidery thread as stated in color sequence and to coordinate with fabric colors
  • Embroidery stabilizer appropriate for fabric
  • Cat treats and toys

  • Designs used in this project

    Preface:
    Search the internet for a paw-style stocking pattern. There are many on the internet—some free for personal use (read usage/copyright license to be sure). There are also a few on Etsy that have downloadable PDF patterns.
    Chose a base fabric for the stocking and a contrasting patterned fabric for the cuff and paw prints—for this project, Osnaburg was used for the stocking and a “prim” homespun plaid fabric for the cuff and paws.
    Follow the pattern instructions for stocking assembly. You’ll see in the instructions given here, the stocking was lined, a small ribbon for hanging added, and the cuff sewn and flipped; your pattern instructions may differ.


    Step 1:
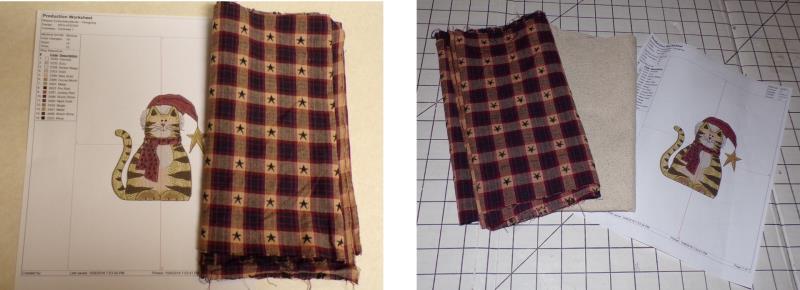
    Gather the materials and read through the instructions here and in the stocking pattern before beginning. Print out a paper template of the design.

    (Click Image to Enlarge)


    Step 2:
    Choose thread colors for the embroidery design that will coordinate with the fabric, yet keep the “prim” folk-art color style.

    (Click Image to Enlarge)


    Step 3:
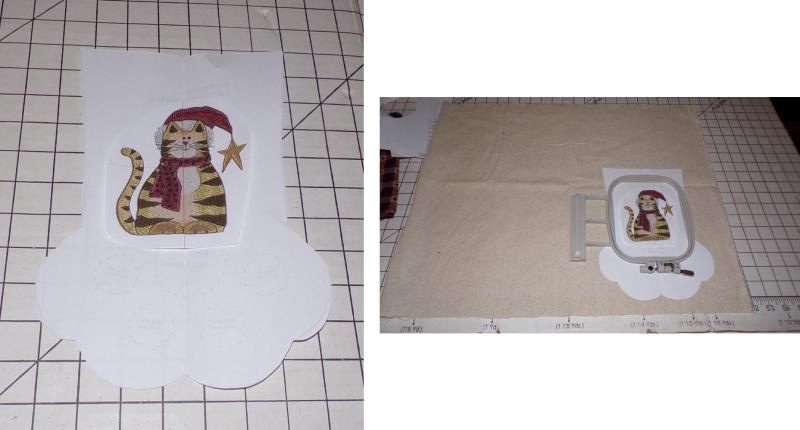
    Print or cut out the stocking pattern. Cut out the paper template of the design and determine where the design should be placed on the stocking. For this project, one fabric piece was cut to the stocking size and so that the entire piece of fabric would fit in the hoop (cut down after the design stitches).

    (Click Image to Enlarge)


    Step 4:
    Cut out the piece of fabric for the pattern and lining piece. Carefully remove the stocking pattern from under the design template—keep the design template centered where it needs to be on the fabric.

    (Click Image to Enlarge)


    Step 5:
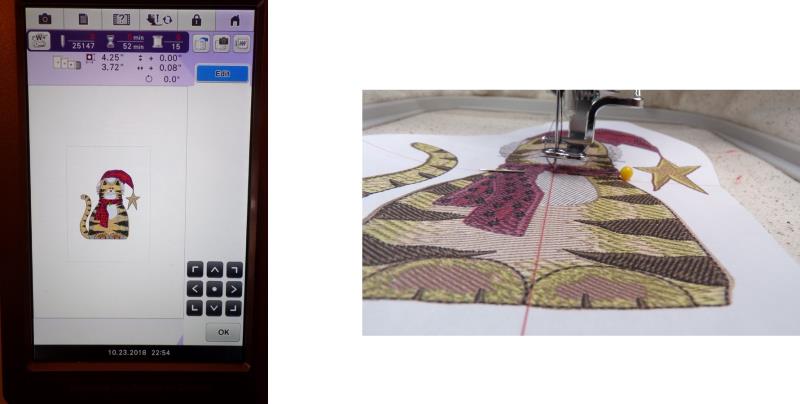
    Load the design on the machine. Hoop the fabric with the appropriate stabilizer. Place the hoop on the machine and align the needle to the center crosshair of the design.

    (Click Image to Enlarge)


    Step 6:
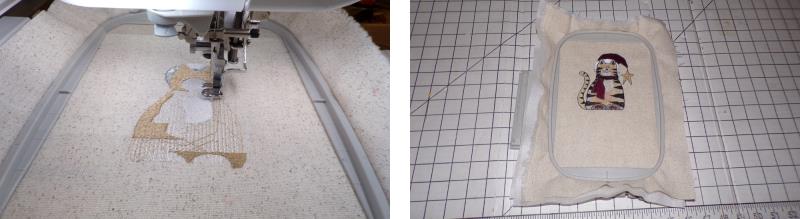
    Remove the paper template and stitch the design following the color sequence with your selected colors.

    (Click Image to Enlarge)


    Step 7:
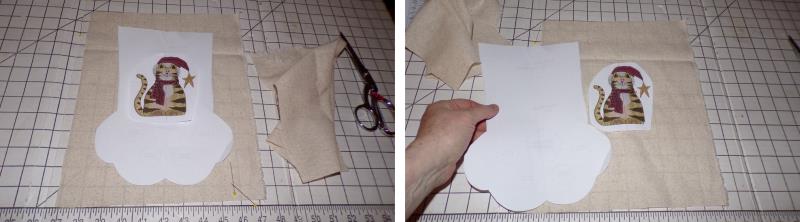
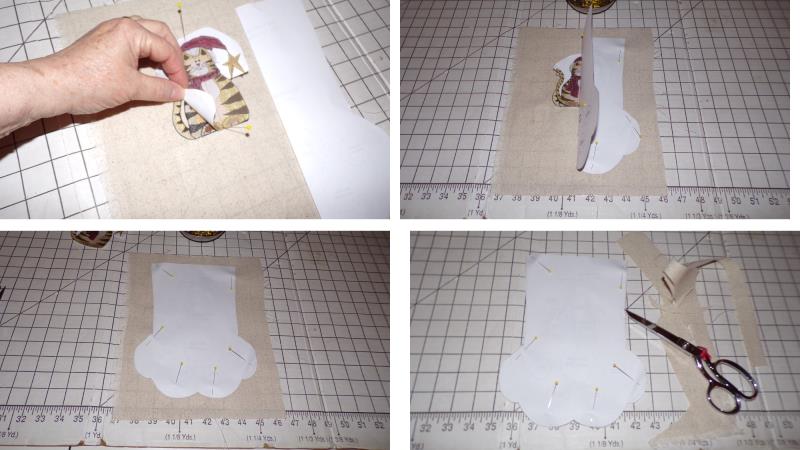
    Next will be to cut out the paw shape using the pattern. It seemed easiest to align the paper design template over the embroidery so the crosshairs could be used to make sure the design would be straight on the fabric. Fold the paw stocking pattern in half lengthwise and align the fold to the vertical line on the design template; pin that half of the stocking in place. Open up the stocking pattern so it is flat and then pin the other half in place. Cut out the stocking.

    (Click Image to Enlarge)


    Step 8:
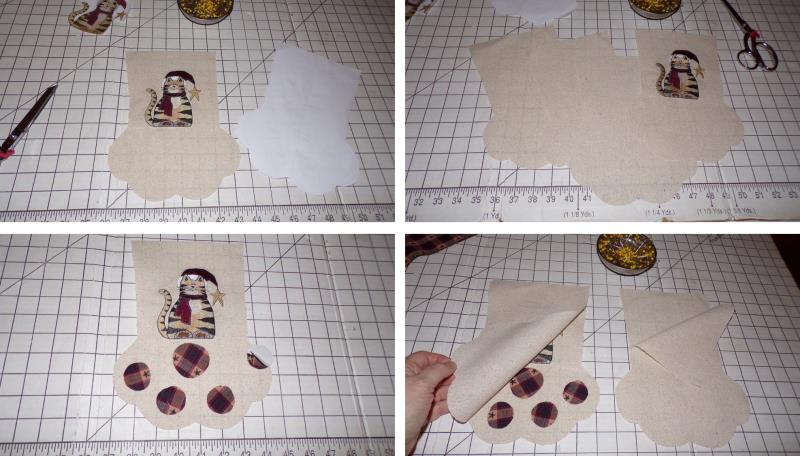
    Now cut out the back of the stocking (and lining pieces if you will line your stocking). Follow the pattern instructions for adding the paw print sections to the stocking. With right sides together, place the stocking back over the front and pin.

    (Click Image to Enlarge)


    Step 9:
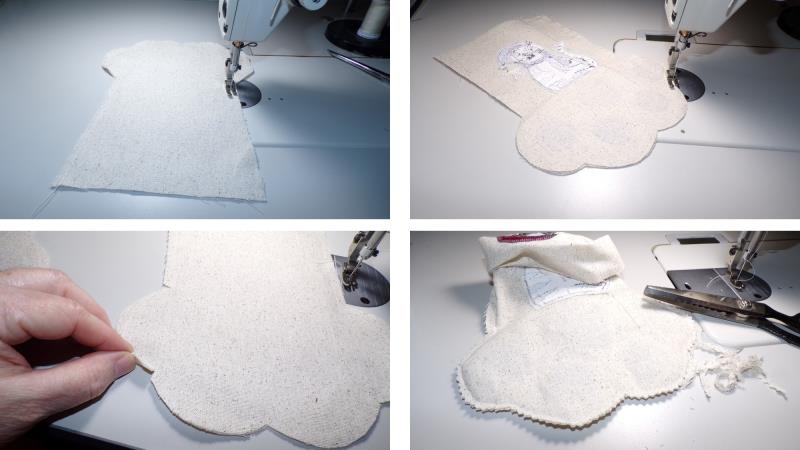
    Stitch the front and back together. Place right sides of the lining together, pin, and stitch them together. Clip the curves and use pinking shears to trim the seam allowances.

    (Click Image to Enlarge)


    Step 10:
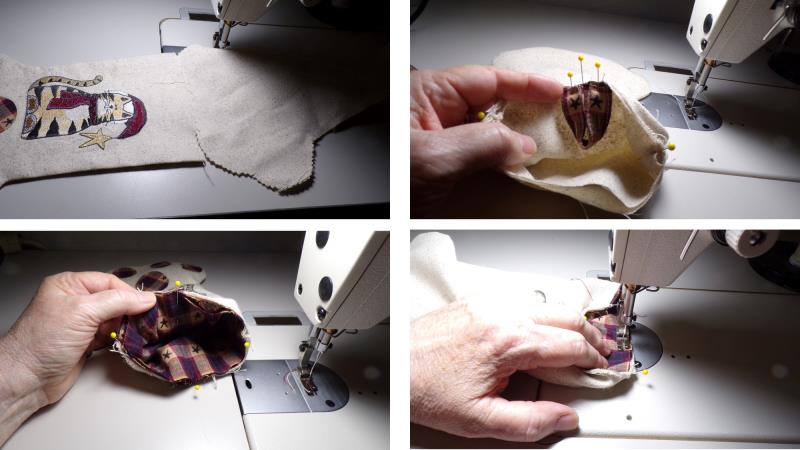
    Turn the stocking right side out. Insert the lining into the stocking (wrong sides will be together). Prepare and insert the hanger at the center back; pin and baste in place. Prepare the cuff, fold wrong sides together and place inside the stocking; pin in place and stitch.

    (Click Image to Enlarge)


    Step 11:
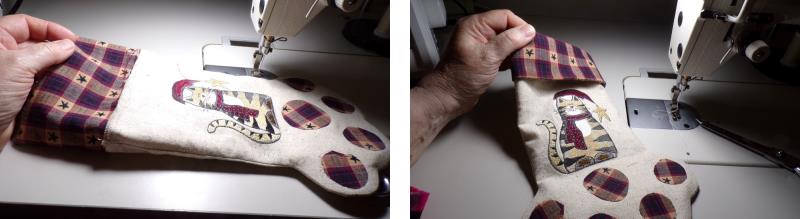
    Open out the cuff and fold it over as shown.

    (Click Image to Enlarge)


    Step 12:
    (Click Image to Enlarge)
    Fill the stocking with the desired treats and toys.


    Step 13:
    (Click Image to Enlarge)
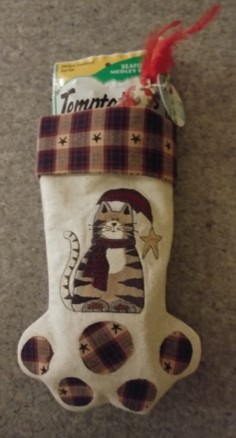
    Congratulations! Kitty will delight in all the toys and treats on Christmas morn.
    Meet the Author: Ramona Baird
    Ramona Baird
    Ramona Baird has been in the embroidery industry for over 23 years. She and her husband owned a commercial and retail embroidery store in Arizona for many years. She is an experienced digitizer having been mentored by award-winners Pat Williams and Lindee Goodall. Ramona is a contributor to “Creative Machine Embroidery” magazine having 5 covers to her credit. Ramona has worked for Wilcom America and served many years as Education Director for the American Sewing Guild. With a degree in fashion design, she is able to design and execute patterns which Pat Williams says are “out of the box” in creativity and application. Ramona likes to challenge the boundaries of embroidery and bring new and exciting designs, ideas, and projects to EmbroideryDesigns.com. She wants embroiderers of all levels to increase their skills and enjoyment in using their embroidery machine for gift-making and personal pleasure.
    More From This Author
    Link is Broken, Please check the URL
    Exclusive Embroidery Offers!
    Copyright © {{ currentDate | date:'yyyy'}} - EmbroideryDesigns.com
    GET 50% OFF! ×