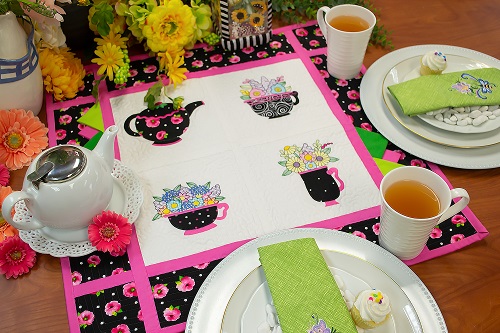
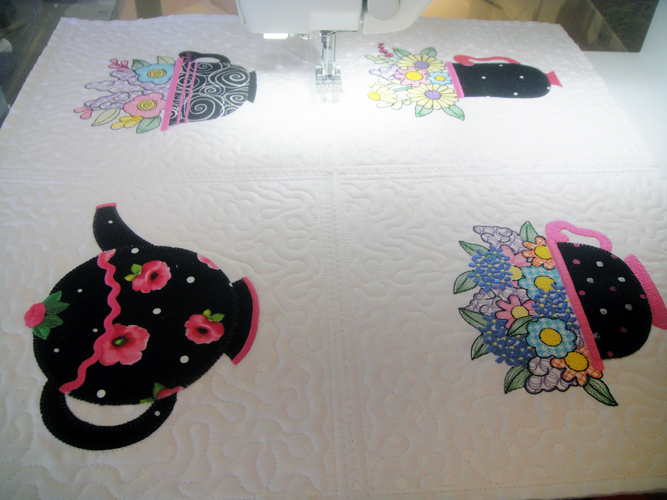
Pre-cut appliques and specialty threads give this table topper the look of hand stitched appliques. SVG, FCM and PDF files are available to pre-cut the appliques with your electronic cutter or by hand.
The initial inspiration for this project was a desire to make appliques on ITH quilt blocks that would look hand appliqued. Hand appliques are applied with almost invisible stitches. Eureka! Invisible thread works really well in embroidery machines and an E-stitch tack down is the lightest stitch to hold down a precut applique. We need placement lines in order to properly position our appliques, but sometimes they are visible underneath the E-stitch. The solution to that is to use water soluble thread to stitch the placement lines. If any of the placement line is visible when the project is completed we can get rid of them by either rubbing them with a wet cloth or simply throwing the whole project in the washer when it is completed. Precut appliques are a must for this project as there are no tack down stitches used for those who generally use the stitch and trim method. SVG, FCM and PDF files are available for downloading when you purchase the designs. If you use the Scan N Cut, as I do, download the FCM files as they will allow you to move different parts of the appliques around on the separate fabrics that you scan into the Scan N Cut®. When you download your designs you will see your default embroidery format first. Click on other formats to be able to download the FCM, SVG or PDF files. I love that these blocks came out with almost invisible borders. I hope you do too.
Step 1:
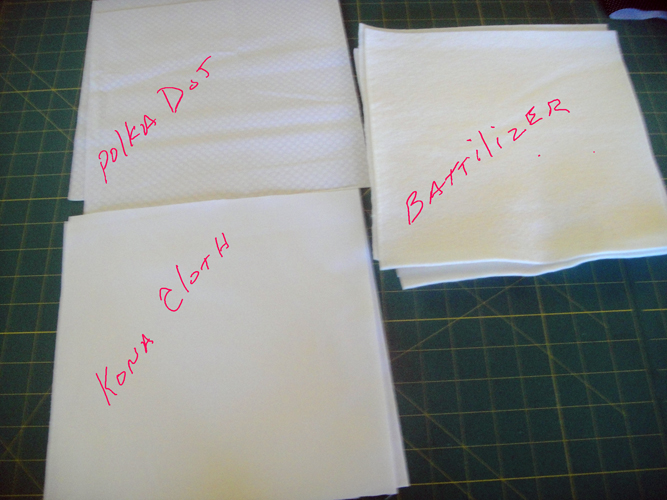
Cut 4 10” squares of your front fabric, the solid white for the back and the Battilizer® or low loft batting.
(Click Image to Enlarge)
Step 2:
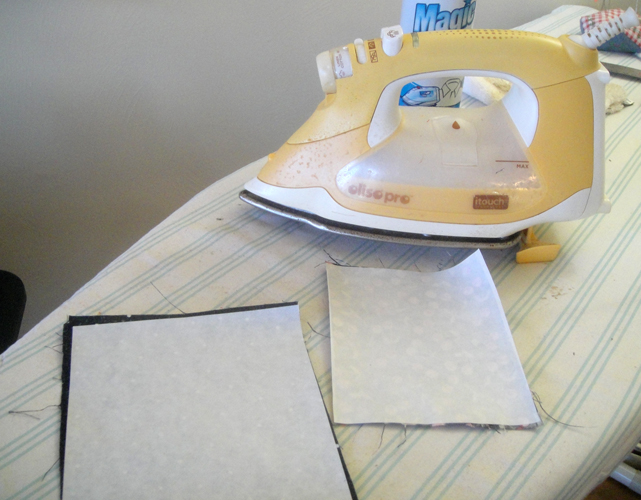
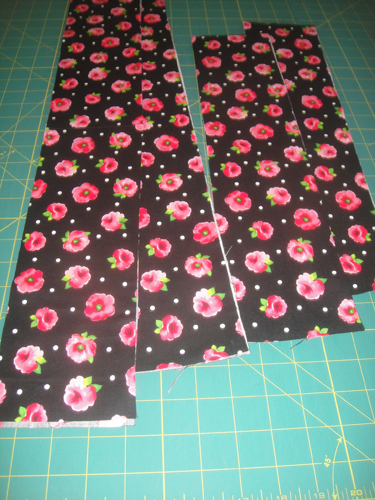
Cut a 6” square of Black Print for the teapot body and a 6” x 7” square of coordinating black print for the lid, handle, spout and base of the teapot for file TPTT01. Cut pieces of Heat N Bond Lite® to be applied to the applique fabrics. But before you adhere the Heat N Bond Lite® press your fabrics with Magic Sizing or spray starch about 4 times. You want the fabrics to be about as stiff as a piece of paper. This will help reduce fraying of the fabrics. Then adhere the Heat N Bond Lite® to the back of the fabrics.
(Click Image to Enlarge)
Step 3:
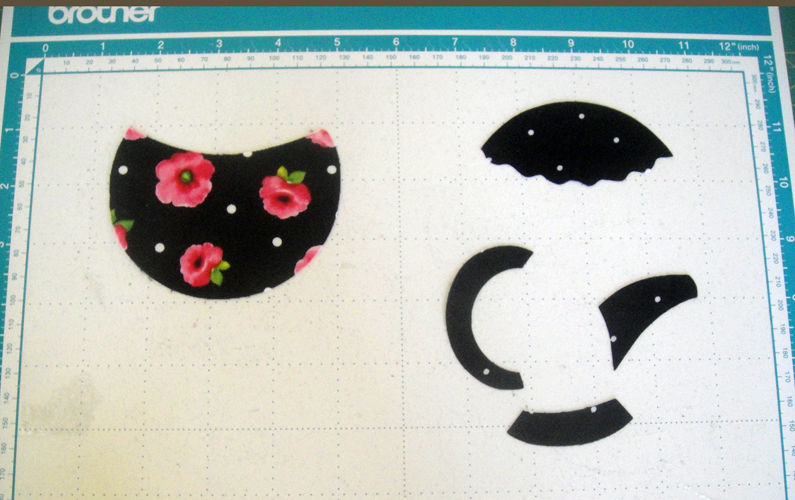
Cut the pieces with your electronic cutter. For the Scan N Cut users, peel the paper backing from the fabric and place the fabrics right side up on your mat. The cutting files have already been adjusted for size. Optionally print out the PDF files, spray them with adhesive and place over your prepared fabrics and cut by hand.
(Click Image to Enlarge)
Step 4:
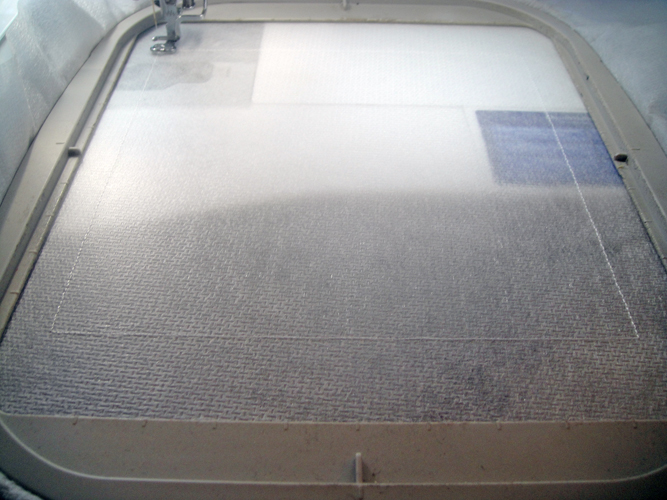
Tautly hoop no show stabilizer in your hoop. Run the 1st color stop (CS) in white thread as a placement line for the fabric.
(Click Image to Enlarge)
Step 5:
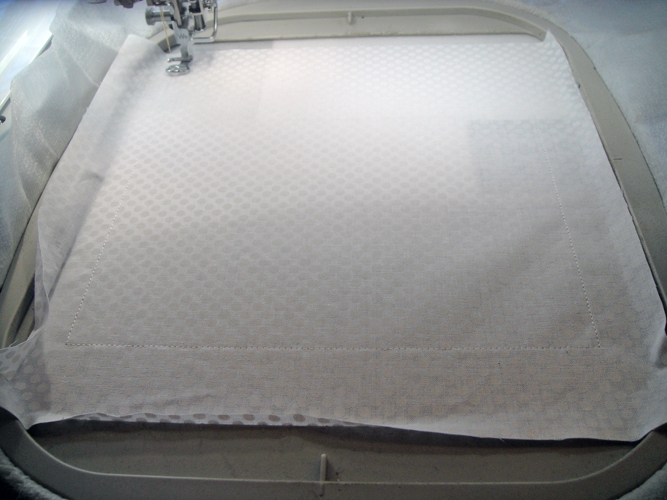
Spray adhesive on the back of your front fabric. Position the fabric over the placement lines so that the fabric exceeds the placement lines by ½” on all sides. Run CS 2 in water soluble thread to tack down the fabrics.
(Click Image to Enlarge)
Step 6:
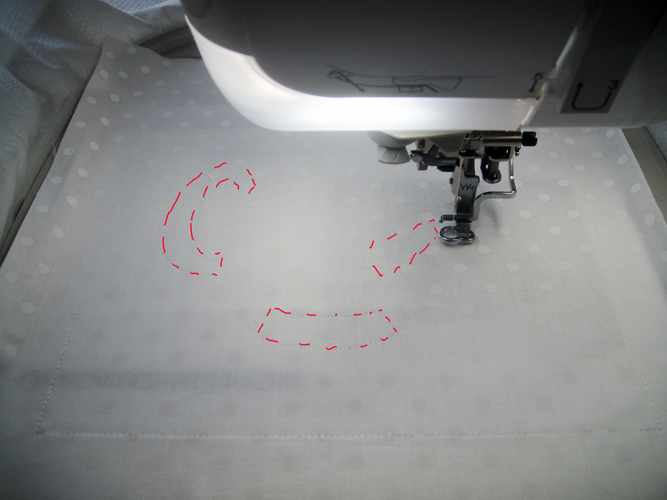
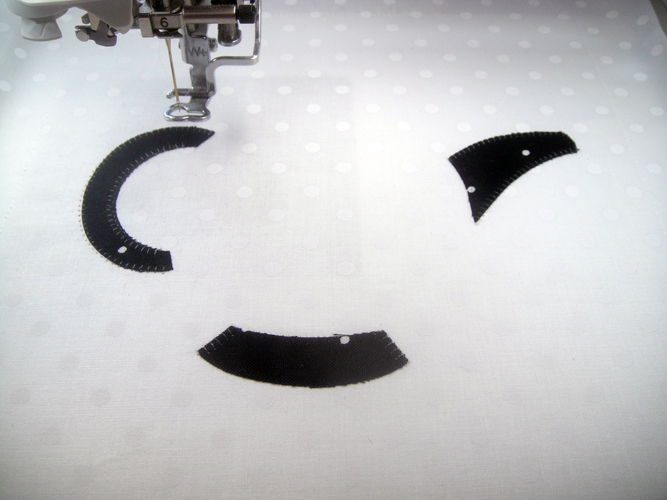
Run CS 3 in water soluble thread to create placement lines for the handle, spot and bottom of the teapot.
(Click Image to Enlarge)
Step 7:
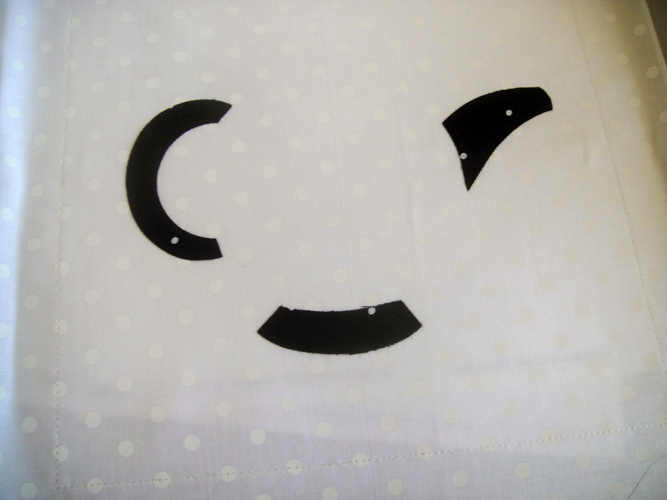
Remove the hoop from the machine, do not unhoop. Carefully position each of the applique pieces for the bottom of the pot, the spout and the handle and iron into place with an applique iron.
(Click Image to Enlarge)
Step 8:
Switch to invisible thread in the top of the embroidery machine and stitch down each of the appliques.
(Click Image to Enlarge)
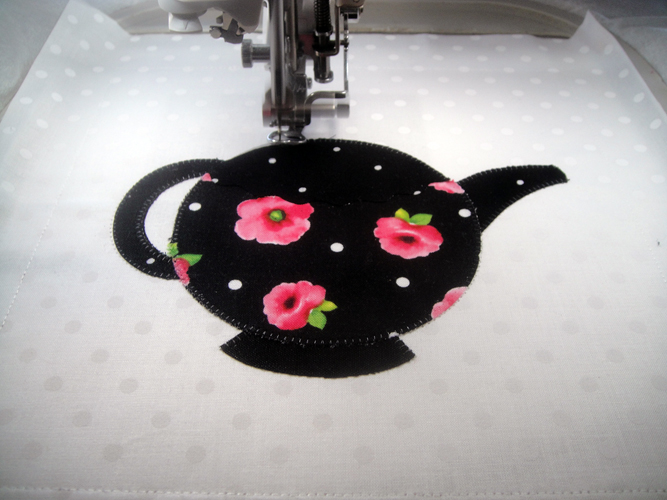
Step 9:
Run CS 5 in water soluble thread as a placement line for the main body of the pot and CS 6 in invisible thread to tack it down. Place and iron down the main body of the pot. Run CS 7 in water soluble thread as the placement line for the lid, position and iron it in place. Change to invisible thread for CS 8 to tack down the lid. All of the cup blocks for this project only have one applique for each cup. So you will only have to switch between the water soluble thread for the placement line and invisible thread for the tack down once for each of those appliques.
(Click Image to Enlarge)
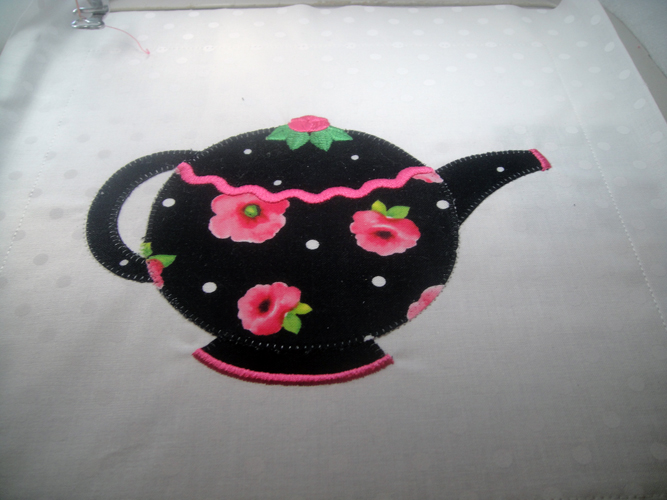
Step 10:
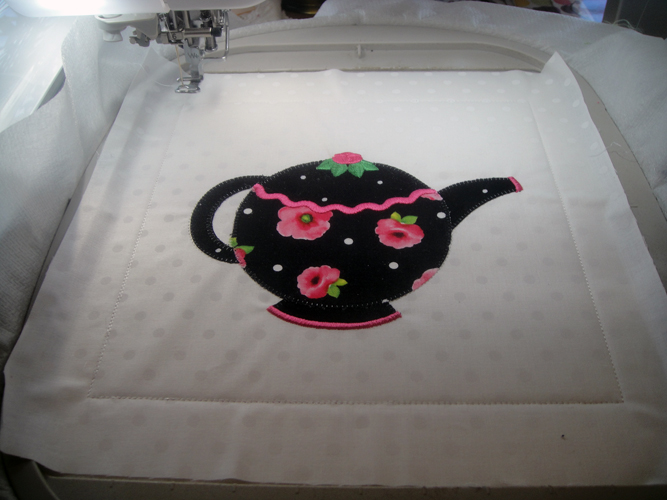
Follow the color chart through the next to last color stop to embroider the details on the pot. Stop and remove the hoop before the last two color stops are stitched. Do not unhoop.
(Click Image to Enlarge)
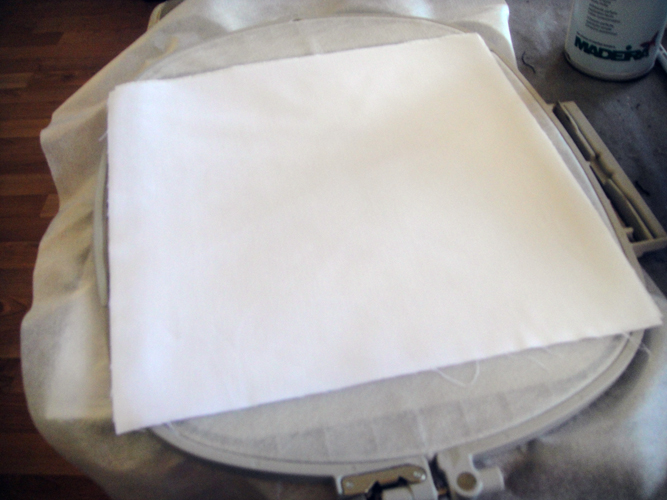
Step 11:
Place the hoop face down on flat surface. Spray the Battilizer® square with adhesive and position over the placement lines on the back of the hoop. Spray a square of your back fabric and align over the Battilizer®.
(Click Image to Enlarge)
Step 12:
Return the hoop to the machine and run the next to last color stop in water soluble thread to tack down all of the fabrics.
(Click Image to Enlarge)
Step 13:
Run the last CS in Super White to quilt the block.
(Click Image to Enlarge)
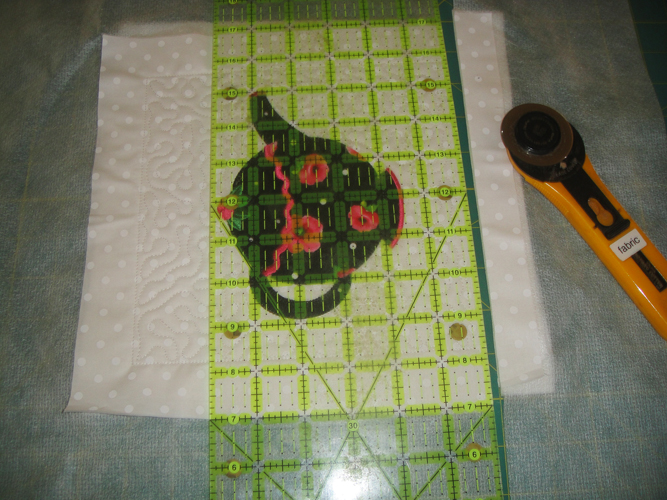
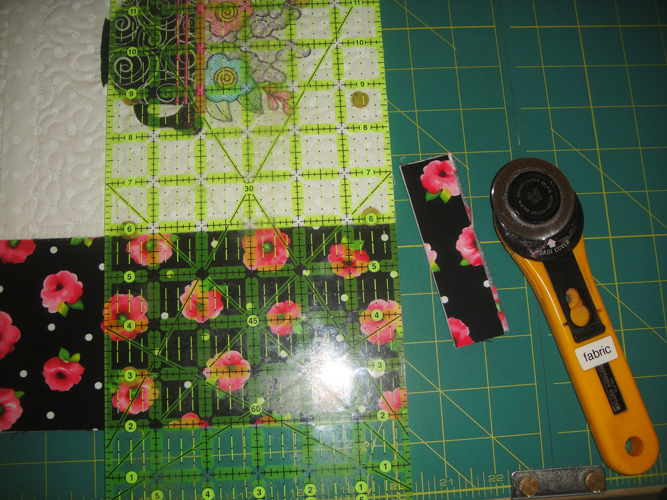
Step 14:
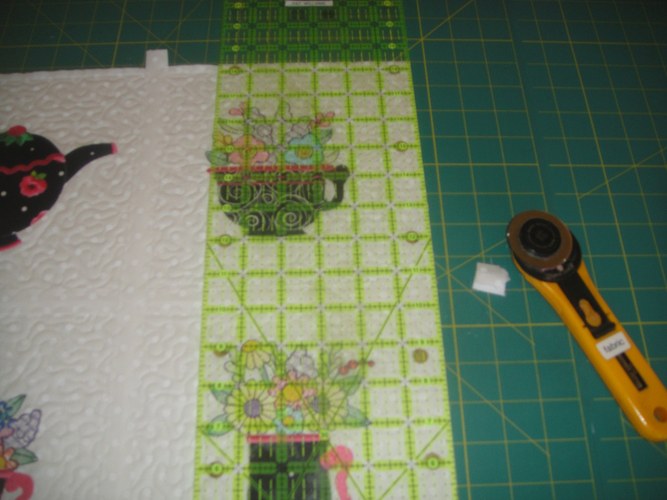
Remove the block from the hoop. Lay the ¼” marks of a clear ruler along the water soluble tack down stitches and trim each side with a ¼” seam allowance.
(Click Image to Enlarge)
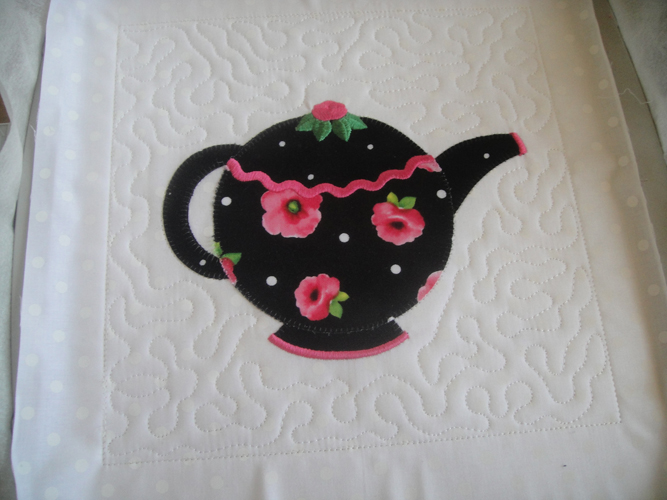
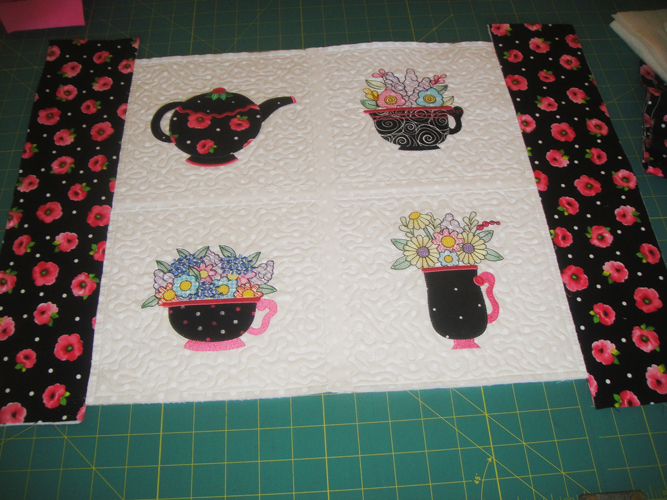
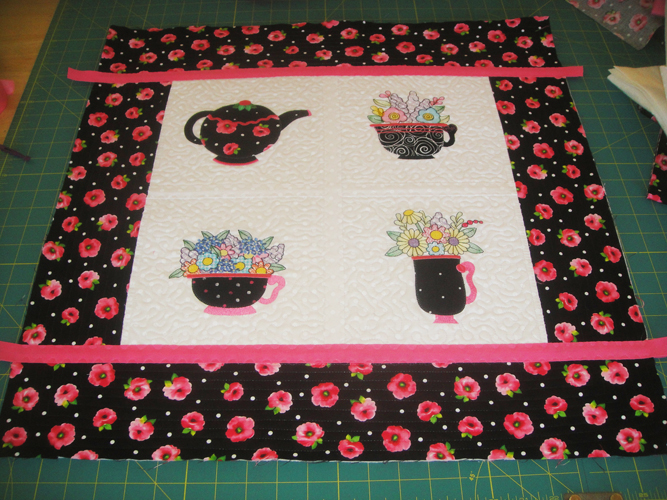
Step 15:
Your completed block will look like this. Repeat the above instructions to complete the other 3 blocks.
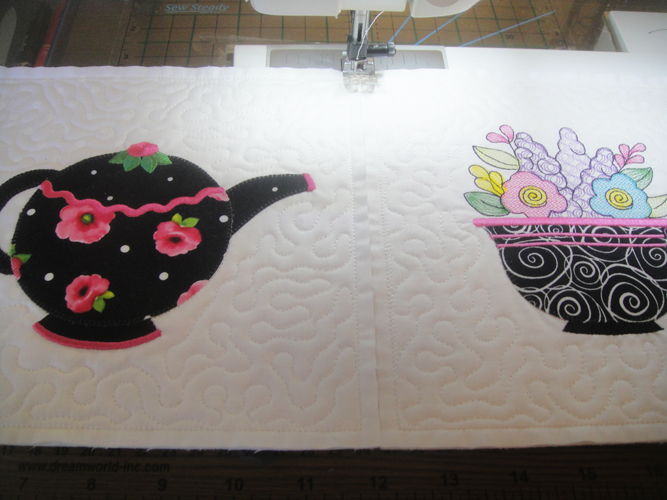
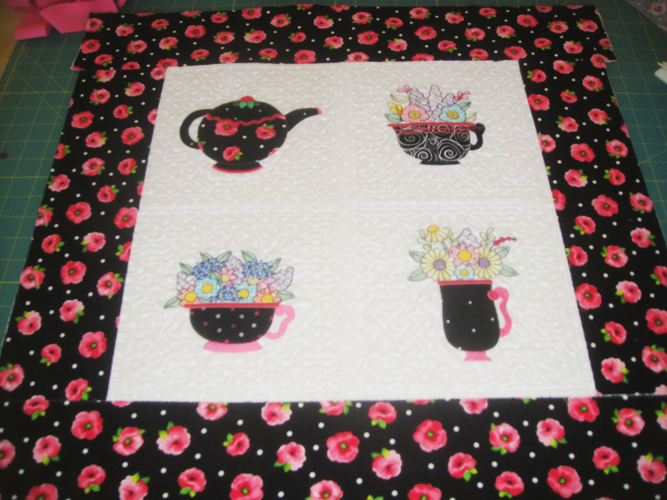
Step 16:
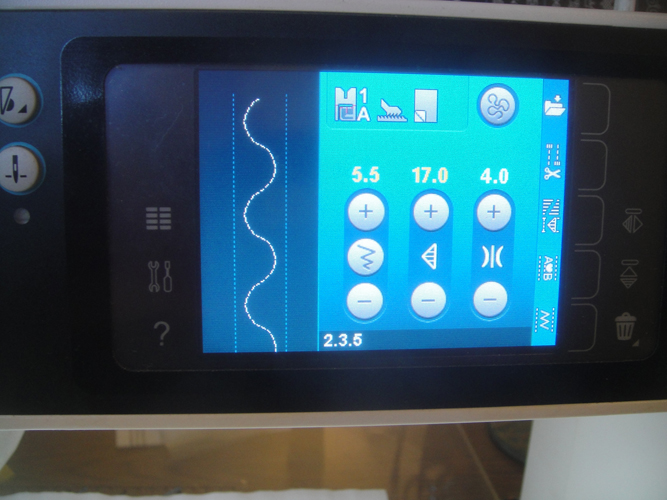
Arrange the 4 blocks in the order that you want them to be in the table topper. With invisible thread in the bobbin and top of your machine, butt the edges of the top two blocks together, without gaps or overlaps. With a wide zigzag stitch, about 5.5mm wide and spaced about 4mm apart, zigzag the two blocks together. Repeat for the two blocks of the second row.
(Click Image to Enlarge)
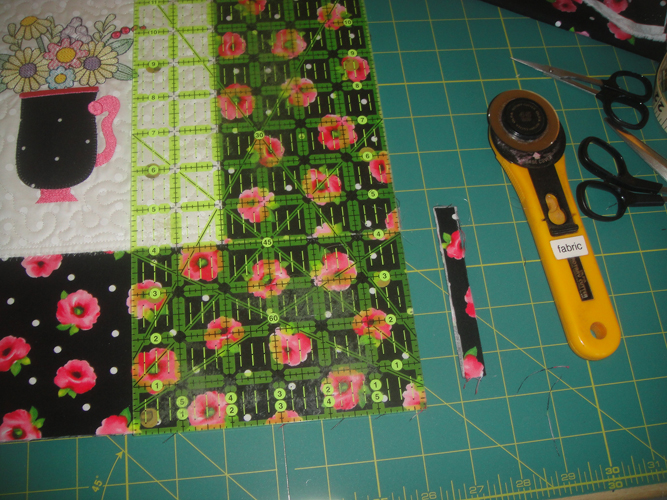
Step 17:
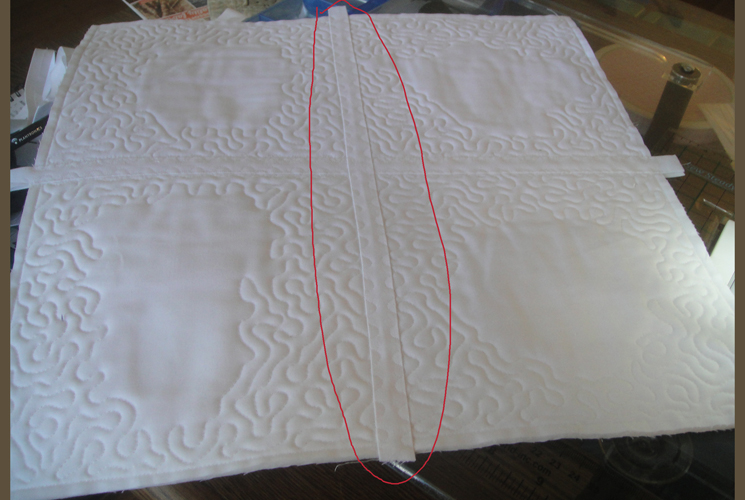
Trim the tops and bottoms of the two sets of blocks to make sure the blocks are even.
(Click Image to Enlarge)
Step 18:
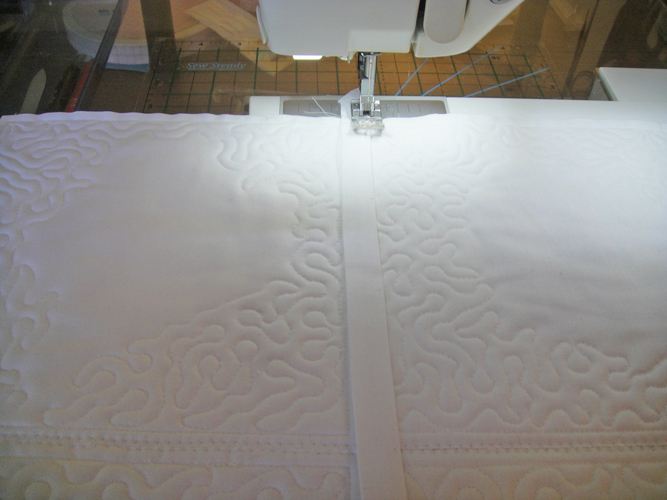
Butt the two sets of blocks together and zigzag then together.
(Click Image to Enlarge)
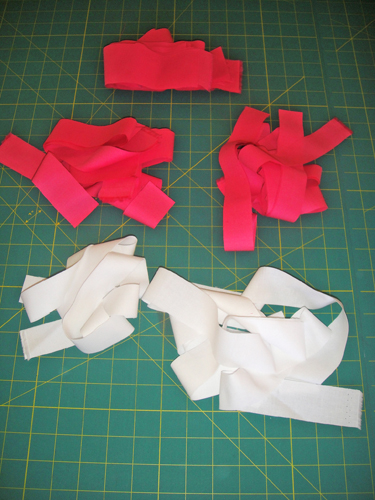
Step 19:
Cut 4 4” x 18” rectangles of your border fabric and Battilizer®. Cut 4 4” x 25” rectangles of your border fabric and Battilizer®.
Step 20:
(Click Image to Enlarge)
Make quilt sandwiches from the border pieces by spraying adhesive on one side of a strip of Battilizer® align a corresponding border fabric and smooth over the Battilizer®. Spray the other side of the Battilizer® with adhesive and smooth a corresponding piece of border fabric on that side. Do this for all the border strips. You will have two border sandwiches that are 4” x 18” and two that are 4” x 25”.
Step 21:
(Click Image to Enlarge)
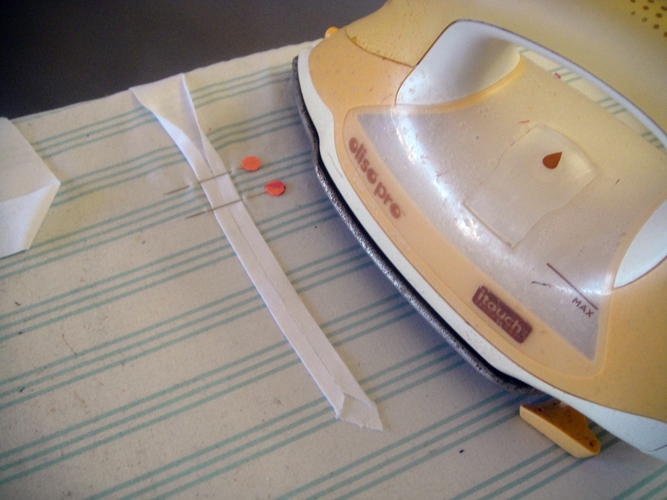
Cut your sashing and binding strips as follows: a. 1 1 ½” by the width of the fabric to match the front fabric b. 1 1 ¼” by the width of the fabric to match the back fabric c. 4 1 ½” by the width of the pink fabric d. 4 1 ¼” by the width of the pink fabric e. 3 2 ¼” by the width of the pink fabric for binding
Step 22:
For the sashing strips, i.e., the strips cut in a, b, c & d, above you will want to spray each of the strips with Magic Sizing. Fold the long sides to meet in the middle of the strips and press. Keep the narrower strips separate from the wider strips. The narrow strips will go on the back of the table topper, the wider strips will go on the front.
(Click Image to Enlarge)
Step 23:
Use a serpentine stitch and invisible thread in the top and bobbin of your machine if you have one available, as it blends in nicely with the stippling. If you do not have one a straight stitch can be used.
(Click Image to Enlarge)
Step 24:
Lay the sashing strip matching the back fabric across the horizontal joining of the blocks on the quilt back. Have the sashing strip extend over the side of the block by approximately ½”. Stitch down both sides of sashing strip with the serpentine stitch. Cut off the sashing end about ½” be on the quilt blocks at the end. Turn the quilt top over, apply the corresponding front fabric sashing strip over the horizontal seam on the front of the quilt in the same manner.
(Click Image to Enlarge)
Step 25:
Turn the quilt top face down. Apply the sashing over the vertical joining seams of the blocks in the same manner. Turn the quilt top face up and apply the matching front sashing strip over the front vertical seam.
(Click Image to Enlarge)
Step 26:
Trim the sashing strips even with the edges of the quilt blocks, squaring up the blocks if necessary. Make notes on the settings you used for the serpentine stitch as you will go back to zigzag stitches for the next step and then will want to able to set the serpentine stitches later.
(Click Image to Enlarge)
Step 27:
Attach the two 4” x 18” border strips to the sides of the quilt blocks. Butt the borders to the sides having the border extend above and below the top and bottom of the quilt blocks by approximately 1”. Zigzag the borders to the quilt blocks.
(Click Image to Enlarge)
Step 28:
Trim the borders even with the quilt blocks.
(Click Image to Enlarge)
Step 29:
Align and attach the top and bottom borders in the same manner.
(Click Image to Enlarge)
Step 30:
Trim the top and bottom borders even with the side borders.
(Click Image to Enlarge)
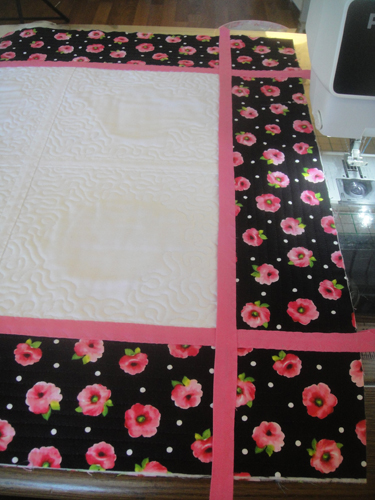
Step 31:
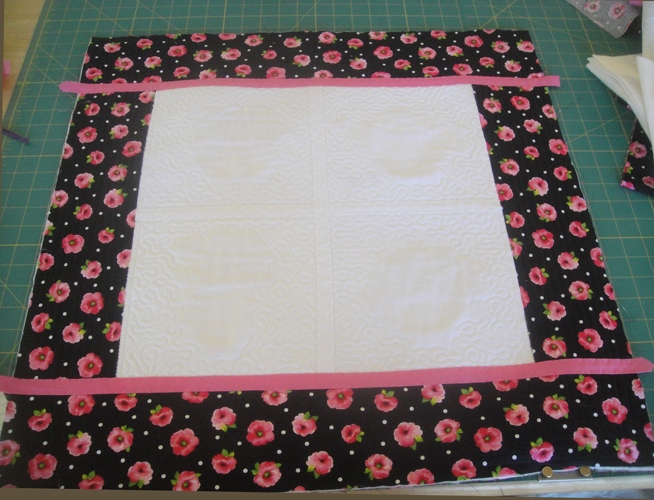
Switch back to the serpentine stitch parameters you used before. Stitch two narrower pink sashing strips across the horizontal seams where the top and bottom borders were added to the blocks.
(Click Image to Enlarge)
Step 32:
Turn the quilt top right side up. Attach two of the wider pink sashing strips over the horizontal seams where the top and bottom borders were joined. Be sure your sashing strips are straight.
(Click Image to Enlarge)
Step 33:
(Click Image to Enlarge)
Turn the quilt face down. Attach the two vertical sashing strips over the joining seams of the side borders. Place your sashing from the top to the bottom of the quilt even through the joining stitches don’t go through the top and bottom borders. Stitch in place.
Step 34:
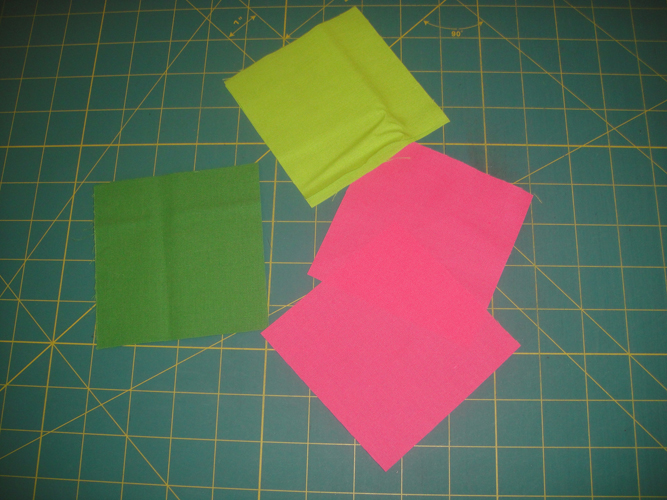
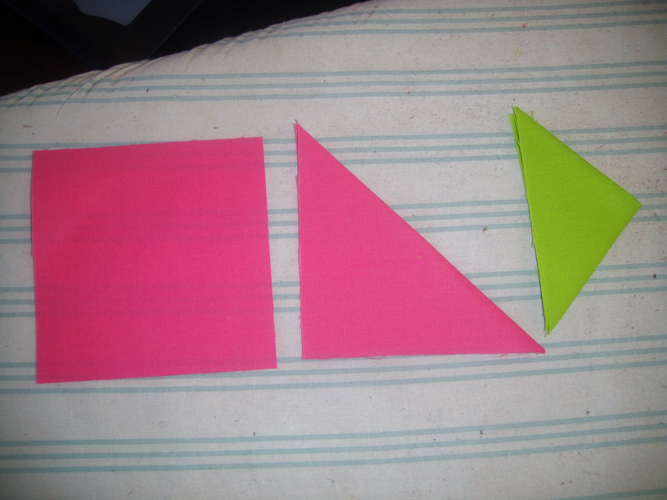
Cut 2 4” squares of pink and 2 4” squares of light green and darker green for the prairie points. These fabrics were chosen to match the leaves in the border print, use whatever colors you would like to match your fabrics.
(Click Image to Enlarge)
Step 35:
Mark prairie points by pressing the 4” squares flat, fold on the diagonal and press, fold on the diagonal again and press.
(Click Image to Enlarge)
Step 36:
(Click Image to Enlarge)
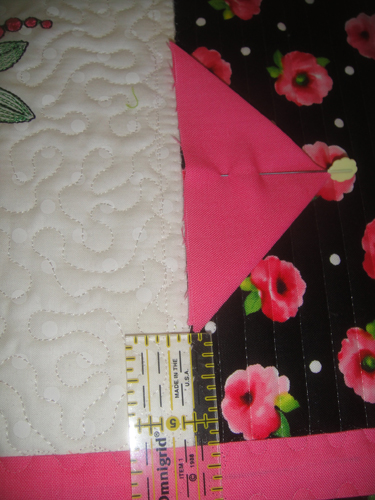
Turn the quilt to the front. Place the center prairie point about 1 ¼” from the horizontal sashing and pin in place along the border joining seam line.
Step 37:
(Click Image to Enlarge)
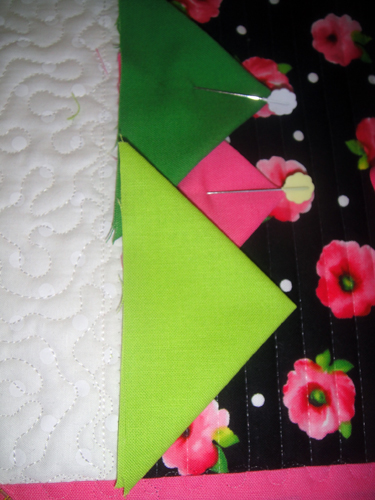
Arrange a light green and dark green prairie point to that they cross at the center point of the 1st prairie point. Use a zigzag stitch to tack then to the quilt. Repeat to place prairie points on the other border.
Step 38:
Stitch the wider sashing strips to the front of the quilt as you did the ones on the back. Trim the excess sashing and square up the table topper. Add the binding using your preferred method.
(Click Image to Enlarge)
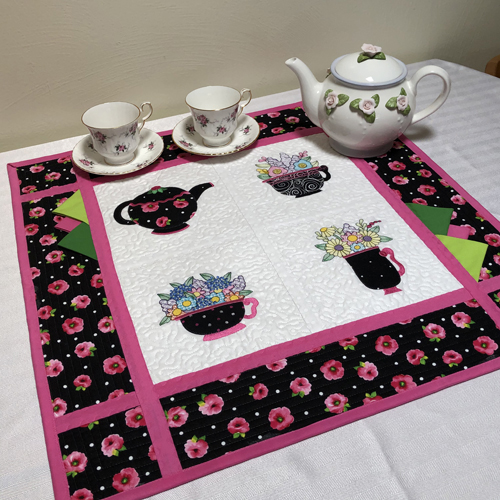
Step 39:
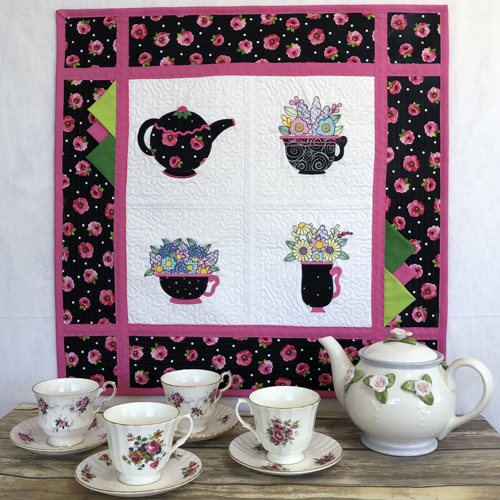
Congratulations your Teapot Table Topper is complete!
Award winning Digitizer, Embroidery Educator, Author and a Consultant to the Industry, Pat Williams has 30 years of experience in the embroidery industry. Pat has won multiple awards for her digitizing expertise including the 2007 Impressions Awards Grand Championship, Best of Show as well as the 1st and 2nd Place Awards. Pat’s love of digitizing has afforded her the opportunity to write numerous articles for Impressions magazine in the United States and Images Magazine in Europe. In 2001 Pat was named “Embroidery Educator of the Year.” For many years Pat taught digitizing seminars at the ISS Shows in Long Beach, CA and for Compucon software. She now resides in Tucson, AZ.